Tutorials on uploading and registering ML models of different frameworks into Wallaroo.
Wallaroo ML Model Upload and Registrations
Tutorials on uploading ML Models of various frameworks into a Wallaroo instance.
- 1: Model Registry Service with Wallaroo Tutorials
- 2: Wallaroo SDK Upload Tutorials: Arbitrary Python
- 2.1: Wallaroo SDK Upload Arbitrary Python Tutorial: Generate VGG16 Model
- 2.2: Wallaroo SDK Upload Arbitrary Python Tutorial: Deploy VGG16 Model
- 3: Wallaroo SDK Upload Tutorials: Hugging Face
- 3.1: Wallaroo API Upload Tutorial: Hugging Face Zero Shot Classification
- 3.2: Wallaroo SDK Upload Tutorial: Hugging Face Zero Shot Classification
- 4: Wallaroo SDK Upload Tutorials: Python Step Shape
- 5: Wallaroo SDK Upload Tutorials: Pytorch
- 5.1: Wallaroo SDK Upload Tutorial: Pytorch Single IO
- 5.2: Wallaroo SDK Upload Tutorial: Pytorch Multiple IO
- 6: Wallaroo SDK Upload Tutorials: SKLearn
- 6.1: Wallaroo SDK Upload Tutorial: SKLearn Clustering Kmeans
- 6.2: Wallaroo SDK Upload Tutorial: SKLearn Clustering SVM
- 6.3: Wallaroo SDK Upload Tutorial: SKLearn Linear Regression
- 6.4: Wallaroo SDK Upload Tutorial: SKLearn Logistic Regression
- 6.5: Wallaroo SDK Upload Tutorial: SKLearn SVM PCA
- 7: Wallaroo SDK Upload Tutorials: Tensorflow
- 8: Wallaroo SDK Upload Tutorials: Tensorflow Keras
- 9: Wallaroo SDK Upload Tutorials: XGBoost
- 9.1: Wallaroo SDK Upload Tutorial: RF Regressor Tutorial
- 9.2: Wallaroo SDK Upload Tutorial: XGBoost Classification
- 9.3: Wallaroo SDK Upload Tutorial: XGBoost Regressor
- 9.4: Wallaroo SDK Upload Tutorial: XGBoost RF Classification
- 10: Model Conversion Tutorials
1 - Model Registry Service with Wallaroo Tutorials
How to use a Model Registry Service to upload models to a Wallaroo instance.
The following tutorials demonstrate how to add ML Models from a model registry service into a Wallaroo instance.
Artifact Requirements
Models are uploaded to the Wallaroo instance as the specific artifact - the “file” or other data that represents the file itself. This must comply with the Wallaroo model requirements framework and version or it will not be deployed. Note that for models that fall outside of the supported model types, they can be registered to a Wallaroo workspace as MLFlow 1.30.0 containerized models.
Supported Models
The following frameworks are supported. Frameworks fall under either Native or Containerized runtimes in the Wallaroo engine. For more details, see the specific framework what runtime a specific model framework runs in.
IMPORTANT NOTE
Verify that the input types match the specified inputs, especially for Containerized Wallaroo Runtimes. For example, if the input is listed as apyarrow.float32(), submitting a pyarrow.float64() may cause an error.| Runtime Display | Model Runtime Space | Pipeline Configuration |
|---|---|---|
tensorflow | Native | Native Runtime Configuration Methods |
onnx | Native | Native Runtime Configuration Methods |
python | Native | Native Runtime Configuration Methods |
mlflow | Containerized | Containerized Runtime Deployment |
flight | Containerized | Containerized Runtime Deployment |
Please note the following.
IMPORTANT NOTICE: FRAMEWORK VERSIONS
The supported frameworks include the specific version of the model framework supported by Wallaroo. It is highly recommended to verify that models uploaded to Wallaroo meet the library and version requirements to ensure proper functioning.Wallaroo ONNX Requirements
Wallaroo natively supports Open Neural Network Exchange (ONNX) models into the Wallaroo engine.
| Parameter | Description |
|---|---|
| Web Site | https://onnx.ai/ |
| Supported Libraries | See table below. |
| Framework | Framework.ONNX aka onnx |
| Runtime | Native aka onnx |
The following ONNX versions models are supported:
| Wallaroo Version | ONNX Version | ONNX IR Version | ONNX OPset Version | ONNX ML Opset Version |
|---|---|---|---|---|
| 2023.4.0 (October 2023) | 1.12.1 | 8 | 17 | 3 |
| 2023.2.1 (July 2023) | 1.12.1 | 8 | 17 | 3 |
For the most recent release of Wallaroo 2023.4.0, the following native runtimes are supported:
- If converting another ML Model to ONNX (PyTorch, XGBoost, etc) using the onnxconverter-common library, the supported
DEFAULT_OPSET_NUMBERis 17.
Using different versions or settings outside of these specifications may result in inference issues and other unexpected behavior.
ONNX models always run in the Wallaroo Native Runtime space.
Data Schemas
ONNX models deployed to Wallaroo have the following data requirements.
- Equal rows constraint: The number of input rows and output rows must match.
- All inputs are tensors: The inputs are tensor arrays with the same shape.
- Data Type Consistency: Data types within each tensor are of the same type.
Equal Rows Constraint
Inference performed through ONNX models are assumed to be in batch format, where each input row corresponds to an output row. This is reflected in the in fields returned for an inference. In the following example, each input row for an inference is related directly to the inference output.
df = pd.read_json('./data/cc_data_1k.df.json')
display(df.head())
result = ccfraud_pipeline.infer(df.head())

display(result)
INPUT
| tensor | |
|---|---|
| 0 | [-1.0603297501, 2.3544967095000002, -3.5638788326, 5.1387348926, -1.2308457019, -0.7687824608, -3.5881228109, 1.8880837663, -3.2789674274, -3.9563254554, 4.0993439118, -5.6539176395, -0.8775733373, -9.131571192000001, -0.6093537873, -3.7480276773, -5.0309125017, -0.8748149526000001, 1.9870535692, 0.7005485718000001, 0.9204422758, -0.1041491809, 0.3229564351, -0.7418141657, 0.0384120159, 1.0993439146, 1.2603409756, -0.1466244739, -1.4463212439] |
| 1 | [-1.0603297501, 2.3544967095000002, -3.5638788326, 5.1387348926, -1.2308457019, -0.7687824608, -3.5881228109, 1.8880837663, -3.2789674274, -3.9563254554, 4.0993439118, -5.6539176395, -0.8775733373, -9.131571192000001, -0.6093537873, -3.7480276773, -5.0309125017, -0.8748149526000001, 1.9870535692, 0.7005485718000001, 0.9204422758, -0.1041491809, 0.3229564351, -0.7418141657, 0.0384120159, 1.0993439146, 1.2603409756, -0.1466244739, -1.4463212439] |
| 2 | [-1.0603297501, 2.3544967095000002, -3.5638788326, 5.1387348926, -1.2308457019, -0.7687824608, -3.5881228109, 1.8880837663, -3.2789674274, -3.9563254554, 4.0993439118, -5.6539176395, -0.8775733373, -9.131571192000001, -0.6093537873, -3.7480276773, -5.0309125017, -0.8748149526000001, 1.9870535692, 0.7005485718000001, 0.9204422758, -0.1041491809, 0.3229564351, -0.7418141657, 0.0384120159, 1.0993439146, 1.2603409756, -0.1466244739, -1.4463212439] |
| 3 | [-1.0603297501, 2.3544967095000002, -3.5638788326, 5.1387348926, -1.2308457019, -0.7687824608, -3.5881228109, 1.8880837663, -3.2789674274, -3.9563254554, 4.0993439118, -5.6539176395, -0.8775733373, -9.131571192000001, -0.6093537873, -3.7480276773, -5.0309125017, -0.8748149526000001, 1.9870535692, 0.7005485718000001, 0.9204422758, -0.1041491809, 0.3229564351, -0.7418141657, 0.0384120159, 1.0993439146, 1.2603409756, -0.1466244739, -1.4463212439] |
| 4 | [0.5817662108, 0.09788155100000001, 0.1546819424, 0.4754101949, -0.19788623060000002, -0.45043448540000003, 0.016654044700000002, -0.0256070551, 0.0920561602, -0.2783917153, 0.059329944100000004, -0.0196585416, -0.4225083157, -0.12175388770000001, 1.5473094894000001, 0.2391622864, 0.3553974881, -0.7685165301, -0.7000849355000001, -0.1190043285, -0.3450517133, -1.1065114108, 0.2523411195, 0.0209441826, 0.2199267436, 0.2540689265, -0.0450225094, 0.10867738980000001, 0.2547179311] |
OUTPUT
| time | in.tensor | out.dense_1 | check_failures | |
|---|---|---|---|---|
| 0 | 2023-11-17 20:34:17.005 | [-1.0603297501, 2.3544967095, -3.5638788326, 5.1387348926, -1.2308457019, -0.7687824608, -3.5881228109, 1.8880837663, -3.2789674274, -3.9563254554, 4.0993439118, -5.6539176395, -0.8775733373, -9.131571192, -0.6093537873, -3.7480276773, -5.0309125017, -0.8748149526, 1.9870535692, 0.7005485718, 0.9204422758, -0.1041491809, 0.3229564351, -0.7418141657, 0.0384120159, 1.0993439146, 1.2603409756, -0.1466244739, -1.4463212439] | [0.99300325] | 0 |
| 1 | 2023-11-17 20:34:17.005 | [-1.0603297501, 2.3544967095, -3.5638788326, 5.1387348926, -1.2308457019, -0.7687824608, -3.5881228109, 1.8880837663, -3.2789674274, -3.9563254554, 4.0993439118, -5.6539176395, -0.8775733373, -9.131571192, -0.6093537873, -3.7480276773, -5.0309125017, -0.8748149526, 1.9870535692, 0.7005485718, 0.9204422758, -0.1041491809, 0.3229564351, -0.7418141657, 0.0384120159, 1.0993439146, 1.2603409756, -0.1466244739, -1.4463212439] | [0.99300325] | 0 |
| 2 | 2023-11-17 20:34:17.005 | [-1.0603297501, 2.3544967095, -3.5638788326, 5.1387348926, -1.2308457019, -0.7687824608, -3.5881228109, 1.8880837663, -3.2789674274, -3.9563254554, 4.0993439118, -5.6539176395, -0.8775733373, -9.131571192, -0.6093537873, -3.7480276773, -5.0309125017, -0.8748149526, 1.9870535692, 0.7005485718, 0.9204422758, -0.1041491809, 0.3229564351, -0.7418141657, 0.0384120159, 1.0993439146, 1.2603409756, -0.1466244739, -1.4463212439] | [0.99300325] | 0 |
| 3 | 2023-11-17 20:34:17.005 | [-1.0603297501, 2.3544967095, -3.5638788326, 5.1387348926, -1.2308457019, -0.7687824608, -3.5881228109, 1.8880837663, -3.2789674274, -3.9563254554, 4.0993439118, -5.6539176395, -0.8775733373, -9.131571192, -0.6093537873, -3.7480276773, -5.0309125017, -0.8748149526, 1.9870535692, 0.7005485718, 0.9204422758, -0.1041491809, 0.3229564351, -0.7418141657, 0.0384120159, 1.0993439146, 1.2603409756, -0.1466244739, -1.4463212439] | [0.99300325] | 0 |
| 4 | 2023-11-17 20:34:17.005 | [0.5817662108, 0.097881551, 0.1546819424, 0.4754101949, -0.1978862306, -0.4504344854, 0.0166540447, -0.0256070551, 0.0920561602, -0.2783917153, 0.0593299441, -0.0196585416, -0.4225083157, -0.1217538877, 1.5473094894, 0.2391622864, 0.3553974881, -0.7685165301, -0.7000849355, -0.1190043285, -0.3450517133, -1.1065114108, 0.2523411195, 0.0209441826, 0.2199267436, 0.2540689265, -0.0450225094, 0.1086773898, 0.2547179311] | [0.0010916889] | 0 |
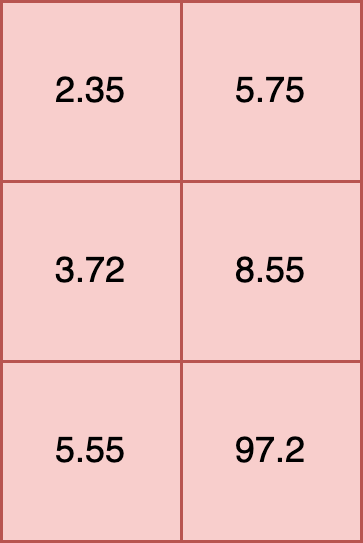
All Inputs Are Tensors
All inputs into an ONNX model must be tensors. This requires that the shape of each element is the same. For example, the following is a proper input:
t [
    [2.35, 5.75],
    [3.72, 8.55],
    [5.55, 97.2]
]
Another example is a 2,2,3 tensor, where the shape of each element is (3,), and each element has 2 rows.
t = [
        [2.35, 5.75, 19.2],
        [3.72, 8.55, 10.5]
    ],
    [
        [5.55, 7.2, 15.7],
        [9.6, 8.2, 2.3]
    ]
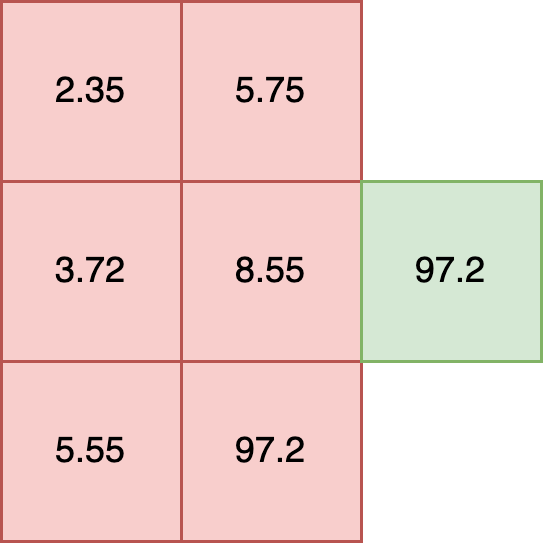
In this example each element has a shape of (2,). Tensors with elements of different shapes, known as ragged tensors, are not supported. For example:
t = [
    [2.35, 5.75],
    [3.72, 8.55, 10.5],
    [5.55, 97.2]
])

**INVALID SHAPE**
For models that require ragged tensor or other shapes, see other data formatting options such as Bring Your Own Predict models.
Data Type Consistency
All inputs into an ONNX model must have the same internal data type. For example, the following is valid because all of the data types within each element are float32.
t = [
    [2.35, 5.75],
    [3.72, 8.55],
    [5.55, 97.2]
]
The following is invalid, as it mixes floats and strings in each element:
t = [
    [2.35, "Bob"],
    [3.72, "Nancy"],
    [5.55, "Wani"]
]
The following inputs are valid, as each data type is consistent within the elements.
df = pd.DataFrame({
    "t": [
        [2.35, 5.75, 19.2],
        [5.55, 7.2, 15.7],
    ],
    "s": [
        ["Bob", "Nancy", "Wani"],
        ["Jason", "Rita", "Phoebe"]
    ]
})
df
| t | s | |
|---|---|---|
| 0 | [2.35, 5.75, 19.2] | [Bob, Nancy, Wani] |
| 1 | [5.55, 7.2, 15.7] | [Jason, Rita, Phoebe] |
| Parameter | Description |
|---|---|
| Web Site | https://www.tensorflow.org/ |
| Supported Libraries | tensorflow==2.9.3 |
| Framework | Framework.TENSORFLOW aka tensorflow |
| Runtime | Native aka tensorflow |
| Supported File Types | SavedModel format as .zip file |
IMPORTANT NOTE
These requirements are <strong>not</strong> for Tensorflow Keras models, only for non-Keras Tensorflow models in the SavedModel format. For Tensorflow Keras deployment in Wallaroo, see the Tensorflow Keras requirements.
TensorFlow File Format
TensorFlow models are .zip file of the SavedModel format. For example, the Aloha sample TensorFlow model is stored in the directory alohacnnlstm:
├── saved_model.pb
└── variables
    ├── variables.data-00000-of-00002
    ├── variables.data-00001-of-00002
    └── variables.index
This is compressed into the .zip file alohacnnlstm.zip with the following command:
zip -r alohacnnlstm.zip alohacnnlstm/
ML models that meet the Tensorflow and SavedModel format will run as Wallaroo Native runtimes by default.
See the SavedModel guide for full details.
| Parameter | Description |
|---|---|
| Web Site | https://www.python.org/ |
| Supported Libraries | python==3.8 |
| Framework | Framework.PYTHON aka python |
| Runtime | Native aka python |
Python models uploaded to Wallaroo are executed as a native runtime.
Note that Python models - aka “Python steps” - are standalone python scripts that use the python libraries natively supported by the Wallaroo platform. These are used for either simple model deployment (such as ARIMA Statsmodels), or data formatting such as the postprocessing steps. A Wallaroo Python model will be composed of one Python script that matches the Wallaroo requirements.
This is contrasted with Arbitrary Python models, also known as Bring Your Own Predict (BYOP) allow for custom model deployments with supporting scripts and artifacts. These are used with pre-trained models (PyTorch, Tensorflow, etc) along with whatever supporting artifacts they require. Supporting artifacts can include other Python modules, model files, etc. These are zipped with all scripts, artifacts, and a requirements.txt file that indicates what other Python models need to be imported that are outside of the typical Wallaroo platform.
Python Models Requirements
Python models uploaded to Wallaroo are Python scripts that must include the wallaroo_json method as the entry point for the Wallaroo engine to use it as a Pipeline step.
This method receives the results of the previous Pipeline step, and its return value will be used in the next Pipeline step.
If the Python model is the first step in the pipeline, then it will be receiving the inference request data (for example: a preprocessing step). If it is the last step in the pipeline, then it will be the data returned from the inference request.
In the example below, the Python model is used as a post processing step for another ML model. The Python model expects to receive data from a ML Model who’s output is a DataFrame with the column dense_2. It then extracts the values of that column as a list, selects the first element, and returns a DataFrame with that element as the value of the column output.
def wallaroo_json(data: pd.DataFrame):
    print(data)
    return [{"output": [data["dense_2"].to_list()[0][0]]}]
In line with other Wallaroo inference results, the outputs of a Python step that returns a pandas DataFrame or Arrow Table will be listed in the out. metadata, with all inference outputs listed as out.{variable 1}, out.{variable 2}, etc. In the example above, this results the output field as the out.output field in the Wallaroo inference result.
| time | in.tensor | out.output | check_failures | |
|---|---|---|---|---|
| 0 | 2023-06-20 20:23:28.395 | [0.6878518042, 0.1760734021, -0.869514083, 0.3.. | [12.886651039123535] | 0 |
| Parameter | Description |
|---|---|
| Web Site | https://huggingface.co/models |
| Supported Libraries |
|
| Frameworks | The following Hugging Face pipelines are supported by Wallaroo.
|
| Runtime | Containerized flight |
During the model upload process, the Wallaroo instance will attempt to convert the model to a Native Wallaroo Runtime. If unsuccessful based , it will create a Wallaroo Containerized Runtime for the model. See the model deployment section for details on how to configure pipeline resources based on the model’s runtime.
Hugging Face Schemas
Input and output schemas for each Hugging Face pipeline are defined below. Note that adding additional inputs not specified below will raise errors, except for the following:
Framework.HUGGING_FACE_IMAGE_TO_TEXTFramework.HUGGING_FACE_TEXT_CLASSIFICATIONFramework.HUGGING_FACE_SUMMARIZATIONFramework.HUGGING_FACE_TRANSLATION
Additional inputs added to these Hugging Face pipelines will be added as key/pair value arguments to the model’s generate method. If the argument is not required, then the model will default to the values coded in the original Hugging Face model’s source code.
See the Hugging Face Pipeline documentation for more details on each pipeline and framework.
| Wallaroo Framework | Reference |
|---|---|
Framework.HUGGING_FACE_FEATURE_EXTRACTION |
Schemas:
input_schema = pa.schema([
    pa.field('inputs', pa.string())
])
output_schema = pa.schema([
    pa.field('output', pa.list_(
        pa.list_(
            pa.float64(),
            list_size=128
        ),
    ))
])
| Wallaroo Framework | Reference |
|---|---|
Framework.HUGGING_FACE_IMAGE_CLASSIFICATION |
Schemas:
input_schema = pa.schema([
    pa.field('inputs', pa.list_(
        pa.list_(
            pa.list_(
                pa.int64(),
                list_size=3
            ),
            list_size=100
        ),
        list_size=100
    )),
    pa.field('top_k', pa.int64()),
])

output_schema = pa.schema([
    pa.field('score', pa.list_(pa.float64(), list_size=2)),
    pa.field('label', pa.list_(pa.string(), list_size=2)),
])
| Wallaroo Framework | Reference |
|---|---|
Framework.HUGGING_FACE_IMAGE_SEGMENTATION |
Schemas:
input_schema = pa.schema([
    pa.field('inputs',
        pa.list_(
            pa.list_(
                pa.list_(
                    pa.int64(),
                    list_size=3
                ),
                list_size=100
            ),
        list_size=100
    )),
    pa.field('threshold', pa.float64()),
    pa.field('mask_threshold', pa.float64()),
    pa.field('overlap_mask_area_threshold', pa.float64()),
])

output_schema = pa.schema([
    pa.field('score', pa.list_(pa.float64())),
    pa.field('label', pa.list_(pa.string())),
    pa.field('mask',
        pa.list_(
            pa.list_(
                pa.list_(
                    pa.int64(),
                    list_size=100
                ),
                list_size=100
            ),
    )),
])
| Wallaroo Framework | Reference |
|---|---|
Framework.HUGGING_FACE_IMAGE_TO_TEXT |
Any parameter that is not part of the required inputs list will be forwarded to the model as a key/pair value to the underlying models generate method. If the additional input is not supported by the model, an error will be returned.
Schemas:
input_schema = pa.schema([
    pa.field('inputs', pa.list_( #required
        pa.list_(
            pa.list_(
                pa.int64(),
                list_size=3
            ),
            list_size=100
        ),
        list_size=100
    )),
    # pa.field('max_new_tokens', pa.int64()),  # optional
])

output_schema = pa.schema([
    pa.field('generated_text', pa.list_(pa.string())),
])
| Wallaroo Framework | Reference |
|---|---|
Framework.HUGGING_FACE_OBJECT_DETECTION |
Schemas:
input_schema = pa.schema([
    pa.field('inputs',
        pa.list_(
            pa.list_(
                pa.list_(
                    pa.int64(),
                    list_size=3
                ),
                list_size=100
            ),
        list_size=100
    )),
    pa.field('threshold', pa.float64()),
])

output_schema = pa.schema([
    pa.field('score', pa.list_(pa.float64())),
    pa.field('label', pa.list_(pa.string())),
    pa.field('box',
        pa.list_( # dynamic output, i.e. dynamic number of boxes per input image, each sublist contains the 4 box coordinates
            pa.list_(
                    pa.int64(),
                    list_size=4
                ),
            ),
    ),
])
| Wallaroo Framework | Reference |
|---|---|
Framework.HUGGING_FACE_QUESTION_ANSWERING |
Schemas:
input_schema = pa.schema([
    pa.field('question', pa.string()),
    pa.field('context', pa.string()),
    pa.field('top_k', pa.int64()),
    pa.field('doc_stride', pa.int64()),
    pa.field('max_answer_len', pa.int64()),
    pa.field('max_seq_len', pa.int64()),
    pa.field('max_question_len', pa.int64()),
    pa.field('handle_impossible_answer', pa.bool_()),
    pa.field('align_to_words', pa.bool_()),
])

output_schema = pa.schema([
    pa.field('score', pa.float64()),
    pa.field('start', pa.int64()),
    pa.field('end', pa.int64()),
    pa.field('answer', pa.string()),
])
| Wallaroo Framework | Reference |
|---|---|
Framework.HUGGING_FACE_STABLE_DIFFUSION_TEXT_2_IMG |
Schemas:
input_schema = pa.schema([
    pa.field('prompt', pa.string()),
    pa.field('height', pa.int64()),
    pa.field('width', pa.int64()),
    pa.field('num_inference_steps', pa.int64()), # optional
    pa.field('guidance_scale', pa.float64()), # optional
    pa.field('negative_prompt', pa.string()), # optional
    pa.field('num_images_per_prompt', pa.string()), # optional
    pa.field('eta', pa.float64()) # optional
])

output_schema = pa.schema([
    pa.field('images', pa.list_(
        pa.list_(
            pa.list_(
                pa.int64(),
                list_size=3
            ),
            list_size=128
        ),
        list_size=128
    )),
])
| Wallaroo Framework | Reference |
|---|---|
Framework.HUGGING_FACE_SUMMARIZATION |
Any parameter that is not part of the required inputs list will be forwarded to the model as a key/pair value to the underlying models generate method. If the additional input is not supported by the model, an error will be returned.
Schemas:
input_schema = pa.schema([
    pa.field('inputs', pa.string()),
    pa.field('return_text', pa.bool_()),
    pa.field('return_tensors', pa.bool_()),
    pa.field('clean_up_tokenization_spaces', pa.bool_()),
    # pa.field('extra_field', pa.int64()), # every extra field you specify will be forwarded as a key/value pair
])

output_schema = pa.schema([
    pa.field('summary_text', pa.string()),
])
| Wallaroo Framework | Reference |
|---|---|
Framework.HUGGING_FACE_TEXT_CLASSIFICATION |
Schemas
input_schema = pa.schema([
    pa.field('inputs', pa.string()), # required
    pa.field('top_k', pa.int64()), # optional
    pa.field('function_to_apply', pa.string()), # optional
])

output_schema = pa.schema([
    pa.field('label', pa.list_(pa.string(), list_size=2)), # list with a number of items same as top_k, list_size can be skipped but may lead in worse performance
    pa.field('score', pa.list_(pa.float64(), list_size=2)), # list with a number of items same as top_k, list_size can be skipped but may lead in worse performance
])
| Wallaroo Framework | Reference |
|---|---|
Framework.HUGGING_FACE_TRANSLATION |
Any parameter that is not part of the required inputs list will be forwarded to the model as a key/pair value to the underlying models generate method. If the additional input is not supported by the model, an error will be returned.
Schemas:
input_schema = pa.schema([
    pa.field('inputs', pa.string()), # required
    pa.field('return_tensors', pa.bool_()), # optional
    pa.field('return_text', pa.bool_()), # optional
    pa.field('clean_up_tokenization_spaces', pa.bool_()), # optional
    pa.field('src_lang', pa.string()), # optional
    pa.field('tgt_lang', pa.string()), # optional
    # pa.field('extra_field', pa.int64()), # every extra field you specify will be forwarded as a key/value pair
])

output_schema = pa.schema([
    pa.field('translation_text', pa.string()),
])
| Wallaroo Framework | Reference |
|---|---|
Framework.HUGGING_FACE_ZERO_SHOT_CLASSIFICATION |
Schemas:
input_schema = pa.schema([
    pa.field('inputs', pa.string()), # required
    pa.field('candidate_labels', pa.list_(pa.string(), list_size=2)), # required
    pa.field('hypothesis_template', pa.string()), # optional
    pa.field('multi_label', pa.bool_()), # optional
])

output_schema = pa.schema([
    pa.field('sequence', pa.string()),
    pa.field('scores', pa.list_(pa.float64(), list_size=2)), # same as number of candidate labels, list_size can be skipped by may result in slightly worse performance
    pa.field('labels', pa.list_(pa.string(), list_size=2)), # same as number of candidate labels, list_size can be skipped by may result in slightly worse performance
])
| Wallaroo Framework | Reference |
|---|---|
Framework.HUGGING_FACE_ZERO_SHOT_IMAGE_CLASSIFICATION |
Schemas:
input_schema = pa.schema([
    pa.field('inputs', # required
        pa.list_(
            pa.list_(
                pa.list_(
                    pa.int64(),
                    list_size=3
                ),
                list_size=100
            ),
        list_size=100
    )),
    pa.field('candidate_labels', pa.list_(pa.string(), list_size=2)), # required
    pa.field('hypothesis_template', pa.string()), # optional
])

output_schema = pa.schema([
    pa.field('score', pa.list_(pa.float64(), list_size=2)), # same as number of candidate labels
    pa.field('label', pa.list_(pa.string(), list_size=2)), # same as number of candidate labels
])
| Wallaroo Framework | Reference |
|---|---|
Framework.HUGGING_FACE_ZERO_SHOT_OBJECT_DETECTION |
Schemas:
input_schema = pa.schema([
    pa.field('images',
        pa.list_(
            pa.list_(
                pa.list_(
                    pa.int64(),
                    list_size=3
                ),
                list_size=640
            ),
        list_size=480
    )),
    pa.field('candidate_labels', pa.list_(pa.string(), list_size=3)),
    pa.field('threshold', pa.float64()),
    # pa.field('top_k', pa.int64()), # we want the model to return exactly the number of predictions, we shouldn't specify this
])

output_schema = pa.schema([
    pa.field('score', pa.list_(pa.float64())), # variable output, depending on detected objects
    pa.field('label', pa.list_(pa.string())), # variable output, depending on detected objects
    pa.field('box',
        pa.list_( # dynamic output, i.e. dynamic number of boxes per input image, each sublist contains the 4 box coordinates
            pa.list_(
                    pa.int64(),
                    list_size=4
                ),
            ),
    ),
])
| Wallaroo Framework | Reference |
|---|---|
Framework.HUGGING_FACE_SENTIMENT_ANALYSIS | Hugging Face Sentiment Analysis |
| Wallaroo Framework | Reference |
|---|---|
Framework.HUGGING_FACE_TEXT_GENERATION |
Any parameter that is not part of the required inputs list will be forwarded to the model as a key/pair value to the underlying models generate method. If the additional input is not supported by the model, an error will be returned.
input_schema = pa.schema([
    pa.field('inputs', pa.string()),
    pa.field('return_tensors', pa.bool_()), # optional
    pa.field('return_text', pa.bool_()), # optional
    pa.field('return_full_text', pa.bool_()), # optional
    pa.field('clean_up_tokenization_spaces', pa.bool_()), # optional
    pa.field('prefix', pa.string()), # optional
    pa.field('handle_long_generation', pa.string()), # optional
    # pa.field('extra_field', pa.int64()), # every extra field you specify will be forwarded as a key/value pair
])

output_schema = pa.schema([
    pa.field('generated_text', pa.list_(pa.string(), list_size=1))
])
| Wallaroo Framework | Reference |
|---|---|
Framework.HUGGING_FACE_AUTOMATIC_SPEECH_RECOGNITION |
Sample input and output schema.
input_schema = pa.schema([
    pa.field('inputs', pa.list_(pa.float32())), # required: the audio stored in numpy arrays of shape (num_samples,) and data type `float32`
    pa.field('return_timestamps', pa.string()) # optional: return start & end times for each predicted chunk
])

output_schema = pa.schema([
    pa.field('text', pa.string()), # required: the output text corresponding to the audio input
    pa.field('chunks', pa.list_(pa.struct([('text', pa.string()), ('timestamp', pa.list_(pa.float32()))]))), # required (if `return_timestamps` is set), start & end times for each predicted chunk
])
| Parameter | Description |
|---|---|
| Web Site | https://pytorch.org/ |
| Supported Libraries |
|
| Framework | Framework.PYTORCH aka pytorch |
| Supported File Types | pt ot pth in TorchScript format |
| Runtime | onnx/flight |
- IMPORTANT NOTE: The PyTorch model must be in TorchScript format. scripting (i.e.
torch.jit.script()is always recommended over tracing (i.e.torch.jit.trace()). From the PyTorch documentation: “Scripting preserves dynamic control flow and is valid for inputs of different sizes.” For more details, see TorchScript-based ONNX Exporter: Tracing vs Scripting.
During the model upload process, the Wallaroo instance will attempt to convert the model to a Native Wallaroo Runtime. If unsuccessful based , it will create a Wallaroo Containerized Runtime for the model. See the model deployment section for details on how to configure pipeline resources based on the model’s runtime.
- IMPORTANT CONFIGURATION NOTE: For PyTorch input schemas, the floats must be
pyarrow.float32()for the PyTorch model to be converted to the Native Wallaroo Runtime during the upload process.
Sci-kit Learn aka SKLearn.
| Parameter | Description |
|---|---|
| Web Site | https://scikit-learn.org/stable/index.html |
| Supported Libraries |
|
| Framework | Framework.SKLEARN aka sklearn |
| Runtime | onnx / flight |
During the model upload process, the Wallaroo instance will attempt to convert the model to a Native Wallaroo Runtime. If unsuccessful based , it will create a Wallaroo Containerized Runtime for the model. See the model deployment section for details on how to configure pipeline resources based on the model’s runtime.
SKLearn Schema Inputs
SKLearn schema follows a different format than other models. To prevent inputs from being out of order, the inputs should be submitted in a single row in the order the model is trained to accept, with all of the data types being the same. For example, the following DataFrame has 4 columns, each column a float.
| sepal length (cm) | sepal width (cm) | petal length (cm) | petal width (cm) | |
|---|---|---|---|---|
| 0 | 5.1 | 3.5 | 1.4 | 0.2 |
| 1 | 4.9 | 3.0 | 1.4 | 0.2 |
For submission to an SKLearn model, the data input schema will be a single array with 4 float values.
input_schema = pa.schema([
    pa.field('inputs', pa.list_(pa.float64(), list_size=4))
])
When submitting as an inference, the DataFrame is converted to rows with the column data expressed as a single array. The data must be in the same order as the model expects, which is why the data is submitted as a single array rather than JSON labeled columns: this insures that the data is submitted in the exact order as the model is trained to accept.
Original DataFrame:
| sepal length (cm) | sepal width (cm) | petal length (cm) | petal width (cm) | |
|---|---|---|---|---|
| 0 | 5.1 | 3.5 | 1.4 | 0.2 |
| 1 | 4.9 | 3.0 | 1.4 | 0.2 |
Converted DataFrame:
| inputs | |
|---|---|
| 0 | [5.1, 3.5, 1.4, 0.2] |
| 1 | [4.9, 3.0, 1.4, 0.2] |
SKLearn Schema Outputs
Outputs for SKLearn that are meant to be predictions or probabilities when output by the model are labeled in the output schema for the model when uploaded to Wallaroo. For example, a model that outputs either 1 or 0 as its output would have the output schema as follows:
output_schema = pa.schema([
    pa.field('predictions', pa.int32())
])
When used in Wallaroo, the inference result is contained in the out metadata as out.predictions.
pipeline.infer(dataframe)
| time | in.inputs | out.predictions | check_failures | |
|---|---|---|---|---|
| 0 | 2023-07-05 15:11:29.776 | [5.1, 3.5, 1.4, 0.2] | 0 | 0 |
| 1 | 2023-07-05 15:11:29.776 | [4.9, 3.0, 1.4, 0.2] | 0 | 0 |
| Parameter | Description |
|---|---|
| Web Site | https://www.tensorflow.org/api_docs/python/tf/keras/Model |
| Supported Libraries |
|
| Framework | Framework.KERAS aka keras |
| Supported File Types | SavedModel format as .zip file and HDF5 format |
| Runtime | onnx/flight |
During the model upload process, the Wallaroo instance will attempt to convert the model to a Native Wallaroo Runtime. If unsuccessful based , it will create a Wallaroo Containerized Runtime for the model. See the model deployment section for details on how to configure pipeline resources based on the model’s runtime.
TensorFlow Keras SavedModel Format
TensorFlow Keras SavedModel models are .zip file of the SavedModel format. For example, the Aloha sample TensorFlow model is stored in the directory alohacnnlstm:
├── saved_model.pb
└── variables
    ├── variables.data-00000-of-00002
    ├── variables.data-00001-of-00002
    └── variables.index
This is compressed into the .zip file alohacnnlstm.zip with the following command:
zip -r alohacnnlstm.zip alohacnnlstm/
See the SavedModel guide for full details.
TensorFlow Keras H5 Format
Wallaroo supports the H5 for Tensorflow Keras models.
| Parameter | Description |
|---|---|
| Web Site | https://xgboost.ai/ |
| Supported Libraries |
|
| Framework | Framework.XGBOOST aka xgboost |
| Supported File Types | pickle (XGB files are not supported.) |
| Runtime | onnx / flight |
During the model upload process, the Wallaroo instance will attempt to convert the model to a Native Wallaroo Runtime. If unsuccessful based , it will create a Wallaroo Containerized Runtime for the model. See the model deployment section for details on how to configure pipeline resources based on the model’s runtime.
XGBoost Schema Inputs
XGBoost schema follows a different format than other models. To prevent inputs from being out of order, the inputs should be submitted in a single row in the order the model is trained to accept, with all of the data types being the same. If a model is originally trained to accept inputs of different data types, it will need to be retrained to only accept one data type for each column - typically pa.float64() is a good choice.
For example, the following DataFrame has 4 columns, each column a float.
| sepal length (cm) | sepal width (cm) | petal length (cm) | petal width (cm) | |
|---|---|---|---|---|
| 0 | 5.1 | 3.5 | 1.4 | 0.2 |
| 1 | 4.9 | 3.0 | 1.4 | 0.2 |
For submission to an XGBoost model, the data input schema will be a single array with 4 float values.
input_schema = pa.schema([
    pa.field('inputs', pa.list_(pa.float64(), list_size=4))
])
When submitting as an inference, the DataFrame is converted to rows with the column data expressed as a single array. The data must be in the same order as the model expects, which is why the data is submitted as a single array rather than JSON labeled columns: this insures that the data is submitted in the exact order as the model is trained to accept.
Original DataFrame:
| sepal length (cm) | sepal width (cm) | petal length (cm) | petal width (cm) | |
|---|---|---|---|---|
| 0 | 5.1 | 3.5 | 1.4 | 0.2 |
| 1 | 4.9 | 3.0 | 1.4 | 0.2 |
Converted DataFrame:
| inputs | |
|---|---|
| 0 | [5.1, 3.5, 1.4, 0.2] |
| 1 | [4.9, 3.0, 1.4, 0.2] |
XGBoost Schema Outputs
Outputs for XGBoost are labeled based on the trained model outputs. For this example, the output is simply a single output listed as output. In the Wallaroo inference result, it is grouped with the metadata out as out.output.
output_schema = pa.schema([
    pa.field('output', pa.int32())
])
pipeline.infer(dataframe)
| time | in.inputs | out.output | check_failures | |
|---|---|---|---|---|
| 0 | 2023-07-05 15:11:29.776 | [5.1, 3.5, 1.4, 0.2] | 0 | 0 |
| 1 | 2023-07-05 15:11:29.776 | [4.9, 3.0, 1.4, 0.2] | 0 | 0 |
| Parameter | Description |
|---|---|
| Web Site | https://www.python.org/ |
| Supported Libraries | python==3.8 |
| Framework | Framework.CUSTOM aka custom |
| Runtime | Containerized aka flight |
Arbitrary Python models, also known as Bring Your Own Predict (BYOP) allow for custom model deployments with supporting scripts and artifacts. These are used with pre-trained models (PyTorch, Tensorflow, etc) along with whatever supporting artifacts they require. Supporting artifacts can include other Python modules, model files, etc. These are zipped with all scripts, artifacts, and a requirements.txt file that indicates what other Python models need to be imported that are outside of the typical Wallaroo platform.
Contrast this with Wallaroo Python models - aka “Python steps”. These are standalone python scripts that use the python libraries natively supported by the Wallaroo platform. These are used for either simple model deployment (such as ARIMA Statsmodels), or data formatting such as the postprocessing steps. A Wallaroo Python model will be composed of one Python script that matches the Wallaroo requirements.
Arbitrary Python File Requirements
Arbitrary Python (BYOP) models are uploaded to Wallaroo via a ZIP file with the following components:
| Artifact | Type | Description |
|---|---|---|
Python scripts aka .py files with classes that extend mac.inference.Inference and mac.inference.creation.InferenceBuilder | Python Script | Extend the classes mac.inference.Inference and mac.inference.creation.InferenceBuilder. These are included with the Wallaroo SDK. Further details are in Arbitrary Python Script Requirements. Note that there is no specified naming requirements for the classes that extend mac.inference.Inference and mac.inference.creation.InferenceBuilder - any qualified class name is sufficient as long as these two classes are extended as defined below. |
requirements.txt | Python requirements file | This sets the Python libraries used for the arbitrary python model. These libraries should be targeted for Python 3.8 compliance. These requirements and the versions of libraries should be exactly the same between creating the model and deploying it in Wallaroo. This insures that the script and methods will function exactly the same as during the model creation process. |
| Other artifacts | Files | Other models, files, and other artifacts used in support of this model. |
For example, the if the arbitrary python model will be known as vgg_clustering, the contents may be in the following structure, with vgg_clustering as the storage directory:
vgg_clustering\
    feature_extractor.h5
    kmeans.pkl
    custom_inference.py
    requirements.txt
Note the inclusion of the custom_inference.py file. This file name is not required - any Python script or scripts that extend the classes listed above are sufficient. This Python script could have been named vgg_custom_model.py or any other name as long as it includes the extension of the classes listed above.
The sample arbitrary python model file is created with the command zip -r vgg_clustering.zip vgg_clustering/.
Wallaroo Arbitrary Python uses the Wallaroo SDK mac module, included in the Wallaroo SDK 2023.2.1 and above. See the Wallaroo SDK Install Guides for instructions on installing the Wallaroo SDK.
Arbitrary Python Script Requirements
The entry point of the arbitrary python model is any python script that extends the following classes. These are included with the Wallaroo SDK. The required methods that must be overridden are specified in each section below.
mac.inference.Inferenceinterface serves model inferences based on submitted input some input. Its purpose is to serve inferences for any supported arbitrary model framework (e.g.scikit,kerasetc.).classDiagram class Inference { <<Abstract>> +model Optional[Any] +expected_model_types()* Set +predict(input_data: InferenceData)* InferenceData -raise_error_if_model_is_not_assigned() None -raise_error_if_model_is_wrong_type() None }mac.inference.creation.InferenceBuilderbuilds a concreteInference, i.e. instantiates anInferenceobject, loads the appropriate model and assigns the model to to the Inference object.classDiagram class InferenceBuilder { +create(config InferenceConfig) * Inference -inference()* Any }
mac.inference.Inference
mac.inference.Inference Objects
| Object | Type | Description |
|---|---|---|
model (Required) | [Any] | One or more objects that match the expected_model_types. This can be a ML Model (for inference use), a string (for data conversion), etc. See Arbitrary Python Examples for examples. |
mac.inference.Inference Methods
| Method | Returns | Description |
|---|---|---|
expected_model_types (Required) | Set | Returns a Set of models expected for the inference as defined by the developer. Typically this is a set of one. Wallaroo checks the expected model types to verify that the model submitted through the InferenceBuilder method matches what this Inference class expects. |
_predict (input_data: mac.types.InferenceData) (Required) | mac.types.InferenceData | The entry point for the Wallaroo inference with the following input and output parameters that are defined when the model is updated.
InferenceDataValidationError exception is raised when the input data does not match mac.types.InferenceData. |
raise_error_if_model_is_not_assigned | N/A | Error when a model is not set to Inference. |
raise_error_if_model_is_wrong_type | N/A | Error when the model does not match the expected_model_types. |
IMPORTANT NOTE
Verify that the inputs and outputs match the InferenceData input and output types: a Dictionary of numpy arrays defined by the input_schema and output_schema parameters when uploading the model to the Wallaroo instance. The following code is an example of a Dictionary of numpy arrays.
preds = self.model.predict(data)
preds = preds.numpy()
rows, _ = preds.shape
preds = preds.reshape((rows,))
return {"prediction": preds} # a Dictionary of numpy arrays.
The example, the expected_model_types can be defined for the KMeans model.
from sklearn.cluster import KMeans
class SampleClass(mac.inference.Inference):
@property
def expected_model_types(self) -> Set[Any]:
return {KMeans}
mac.inference.creation.InferenceBuilder
InferenceBuilder builds a concrete Inference, i.e. instantiates an Inference object, loads the appropriate model and assigns the model to the Inference.
classDiagram
    class InferenceBuilder {
        +create(config InferenceConfig) * Inference
        -inference()* Any
}Each model that is included requires its own InferenceBuilder. InferenceBuilder loads one model, then submits it to the Inference class when created. The Inference class checks this class against its expected_model_types() Set.
mac.inference.creation.InferenceBuilder Methods
| Method | Returns | Description |
|---|---|---|
create(config mac.config.inference.CustomInferenceConfig) (Required) | The custom Inference instance. | Creates an Inference subclass, then assigns a model and attributes. The CustomInferenceConfig is used to retrieve the config.model_path, which is a pathlib.Path object pointing to the folder where the model artifacts are saved. Every artifact loaded must be relative to config.model_path. This is set when the arbitrary python .zip file is uploaded and the environment for running it in Wallaroo is set. For example: loading the artifact vgg_clustering\feature_extractor.h5 would be set with config.model_path \ feature_extractor.h5. The model loaded must match an existing module. For our example, this is from sklearn.cluster import KMeans, and this must match the Inference expected_model_types. |
inference | custom Inference instance. | Returns the instantiated custom Inference object created from the create method. |
Arbitrary Python Runtime
Arbitrary Python always run in the containerized model runtime.
| Parameter | Description |
|---|---|
| Web Site | https://mlflow.org |
| Supported Libraries | mlflow==1.3.0 |
| Runtime | Containerized aka mlflow |
For models that do not fall under the supported model frameworks, organizations can use containerized MLFlow ML Models.
This guide details how to add ML Models from a model registry service into Wallaroo.
Wallaroo supports both public and private containerized model registries. See the Wallaroo Private Containerized Model Container Registry Guide for details on how to configure a Wallaroo instance with a private model registry.
Wallaroo users can register their trained MLFlow ML Models from a containerized model container registry into their Wallaroo instance and perform inferences with it through a Wallaroo pipeline.
As of this time, Wallaroo only supports MLFlow 1.30.0 containerized models. For information on how to containerize an MLFlow model, see the MLFlow Documentation.
Wallaroo supports both public and private containerized model registries. See the Wallaroo Private Containerized Model Container Registry Guide for details on how to configure a Wallaroo instance with a private model registry.
List Wallaroo Frameworks
Wallaroo frameworks are listed from the Wallaroo.Framework class. The following demonstrates listing all available supported frameworks.
from wallaroo.framework import Framework
[e.value for e in Framework]
['onnx',
'tensorflow',
'python',
'keras',
'sklearn',
'pytorch',
'xgboost',
'hugging-face-feature-extraction',
'hugging-face-image-classification',
'hugging-face-image-segmentation',
'hugging-face-image-to-text',
'hugging-face-object-detection',
'hugging-face-question-answering',
'hugging-face-stable-diffusion-text-2-img',
'hugging-face-summarization',
'hugging-face-text-classification',
'hugging-face-translation',
'hugging-face-zero-shot-classification',
'hugging-face-zero-shot-image-classification',
'hugging-face-zero-shot-object-detection',
'hugging-face-sentiment-analysis',
'hugging-face-text-generation']
1.1 - Model Registry Service with Wallaroo SDK Demonstration
How to use the Wallaroo SDK with Model Registry Services
This tutorial can be downloaded as part of the Wallaroo Tutorials repository.
MLFLow Registry Model Upload Demonstration
Wallaroo users can register their trained machine learning models from a model registry into their Wallaroo instance and perform inferences with it through a Wallaroo pipeline.
This guide details how to add ML Models from a model registry service into a Wallaroo instance.
Artifact Requirements
Models are uploaded to the Wallaroo instance as the specific artifact - the “file” or other data that represents the file itself. This must comply with the Wallaroo model requirements framework and version or it will not be deployed.
This tutorial will:
- Create a Wallaroo workspace and pipeline.
- Show how to connect a Wallaroo Registry that connects to a Model Registry Service.
- Use the registry connection details to upload a sample model to Wallaroo.
- Perform a sample inference.
Prerequisites
- A Wallaroo version 2023.2.1 or above instance.
- A Model (aka Artifact) Registry Service
References
Tutorial Steps
Import Libraries
We’ll start with importing the libraries we need for the tutorial.
import os
import wallaroo
Connect to the Wallaroo Instance through the User Interface
The next step is to connect to Wallaroo through the Wallaroo client. The Python library is included in the Wallaroo install and available through the Jupyter Hub interface provided with your Wallaroo environment.
This is accomplished using the wallaroo.Client() command, which provides a URL to grant the SDK permission to your specific Wallaroo environment. When displayed, enter the URL into a browser and confirm permissions. Store the connection into a variable that can be referenced later.
If logging into the Wallaroo instance through the internal JupyterHub service, use wl = wallaroo.Client(). For more information on Wallaroo Client settings, see the Client Connection guide.
wl=wallaroo.Client()
Connect to Model Registry
The Wallaroo Registry stores the URL and authentication token to the Model Registry service, with the assigned name. Note that in this demonstration all URLs and token are examples.
registry = wl.create_model_registry(name="JeffRegistry45",
token="dapi67c8c0b04606f730e78b7ae5e3221015-3",
url="https://sample.registry.service.azuredatabricks.net")
registry
| Field | Value |
|---|---|
| Name | JeffRegistry45 |
| URL | https://sample.registry.service.azuredatabricks.net |
| Workspaces | john.hummel@wallaroo.ai - Default Workspace |
| Created At | 2023-17-Jul 19:54:49 |
| Updated At | 2023-17-Jul 19:54:49 |
List Model Registries
Registries associated with a workspace are listed with the Wallaroo.Client.list_model_registries() method.
# List all registries in this workspace
registries = wl.list_model_registries()
registries
| name | registry url | created at | updated at |
|---|---|---|---|
| JeffRegistry45 | https://sample.registry.service.azuredatabricks.net | 2023-17-Jul 17:56:52 | 2023-17-Jul 17:56:52 |
| JeffRegistry45 | https://sample.registry.service.azuredatabricks.net | 2023-17-Jul 19:54:49 | 2023-17-Jul 19:54:49 |
Create Workspace
For this demonstration, we will create a random Wallaroo workspace, then attach our registry to the workspace so it is accessible by other workspace users.
Add Registry to Workspace
Registries are assigned to a Wallaroo workspace with the Wallaroo.registry.add_registry_to_workspace method. This allows members of the workspace to access the registry connection. A registry can be associated with one or more workspaces.
Add Registry to Workspace Parameters
| Parameter | Type | Description |
|---|---|---|
name | string (Required) | The numerical identifier of the workspace. |
# Make a random new workspace
import math
import random
num = math.floor(random.random()* 1000)
workspace_id = wl.create_workspace(f"test{num}").id()
registry.add_registry_to_workspace(workspace_id=workspace_id)
| Field | Value |
|---|---|
| Name | JeffRegistry45 |
| URL | https://sample.registry.service.azuredatabricks.net |
| Workspaces | test68, john.hummel@wallaroo.ai - Default Workspace |
| Created At | 2023-17-Jul 19:54:49 |
| Updated At | 2023-17-Jul 19:54:49 |
Remove Registry from Workspace
Registries are removed from a Wallaroo workspace with the Registry remove_registry_from_workspace method.
Remove Registry from Workspace Parameters
| Parameter | Type | Description |
|---|---|---|
workspace_id | Integer (Required) | The numerical identifier of the workspace. |
registry.remove_registry_from_workspace(workspace_id=workspace_id)
| Field | Value |
|---|---|
| Name | JeffRegistry45 |
| URL | https://sample.registry.service.azuredatabricks.net |
| Workspaces | john.hummel@wallaroo.ai - Default Workspace |
| Created At | 2023-17-Jul 19:54:49 |
| Updated At | 2023-17-Jul 19:54:49 |
List Models in a Registry
A List of models available to the Wallaroo instance through the MLFlow Registry is performed with the Wallaroo.Registry.list_models() method.
registry_models = registry.list_models()
registry_models
| Name | Registry User | Versions | Created At | Updated At |
| logreg1 | gib.bhojraj@wallaroo.ai | 1 | 2023-06-Jul 14:36:54 | 2023-06-Jul 14:36:56 |
| sidekick-test | gib.bhojraj@wallaroo.ai | 1 | 2023-11-Jul 14:42:14 | 2023-11-Jul 14:42:14 |
| testmodel | gib.bhojraj@wallaroo.ai | 1 | 2023-16-Jun 12:38:42 | 2023-06-Jul 15:03:41 |
| testmodel2 | gib.bhojraj@wallaroo.ai | 1 | 2023-16-Jun 12:41:04 | 2023-29-Jun 18:08:33 |
| verified-working | gib.bhojraj@wallaroo.ai | 1 | 2023-11-Jul 16:18:03 | 2023-11-Jul 16:57:54 |
| wine_quality | gib.bhojraj@wallaroo.ai | 2 | 2023-16-Jun 13:05:53 | 2023-16-Jun 13:09:57 |
Select Model from Registry
Registry models are selected from the Wallaroo.Registry.list_models() method, then specifying the model to use.
single_registry_model = registry_models[4]
single_registry_model
| Name | verified-working |
| Registry User | gib.bhojraj@wallaroo.ai |
| Versions | 1 |
| Created At | 2023-11-Jul 16:18:03 |
| Updated At | 2023-11-Jul 16:57:54 |
List Model Versions
The Registry Model attribute versions shows the complete list of versions for the particular model.
single_registry_model.versions()
| Name | Version | Description |
| verified-working | 3 | None |
List Model Version Artifacts
Artifacts belonging to a MLFlow registry model are listed with the Model Version list_artifacts() method. This returns all artifacts for the model.
single_registry_model.versions()[1].list_artifacts()
| File Name | File Size | Full Path |
|---|---|---|
| MLmodel | 559B | https://sample.registry.service.azuredatabricks.net/api/2.0/dbfs/read?path=/databricks/mlflow-registry/9168792a16cb40a88de6959ef31e42a2/models/√erified-working/MLmodel |
| conda.yaml | 182B | https://sample.registry.service.azuredatabricks.net/api/2.0/dbfs/read?path=/databricks/mlflow-registry/9168792a16cb40a88de6959ef31e42a2/models/√erified-working/conda.yaml |
| model.pkl | 829B | https://sample.registry.service.azuredatabricks.net/api/2.0/dbfs/read?path=/databricks/mlflow-registry/9168792a16cb40a88de6959ef31e42a2/models/√erified-working/model.pkl |
| python_env.yaml | 122B | https://sample.registry.service.azuredatabricks.net/api/2.0/dbfs/read?path=/databricks/mlflow-registry/9168792a16cb40a88de6959ef31e42a2/models/√erified-working/python_env.yaml |
| requirements.txt | 73B | https://sample.registry.service.azuredatabricks.net/api/2.0/dbfs/read?path=/databricks/mlflow-registry/9168792a16cb40a88de6959ef31e42a2/models/√erified-working/requirements.txt |
Configure Data Schemas
To upload a ML Model to Wallaroo, the input and output schemas must be defined in pyarrow.lib.Schema format.
from wallaroo.framework import Framework
import pyarrow as pa
input_schema = pa.schema([
pa.field('inputs', pa.list_(pa.float64(), list_size=4))
])
output_schema = pa.schema([
pa.field('predictions', pa.int32()),
pa.field('probabilities', pa.list_(pa.float64(), list_size=3))
])
Upload a Model from a Registry
Models uploaded to the Wallaroo workspace are uploaded from a MLFlow Registry with the Wallaroo.Registry.upload method.
Upload a Model from a Registry Parameters
| Parameter | Type | Description |
|---|---|---|
name | string (Required) | The name to assign the model once uploaded. Model names are unique within a workspace. Models assigned the same name as an existing model will be uploaded as a new model version. |
path | string (Required) | The full path to the model artifact in the registry. |
framework | string (Required) | The Wallaroo model Framework. See Model Uploads and Registrations Supported Frameworks |
input_schema | pyarrow.lib.Schema (Required for non-native runtimes) | The input schema in Apache Arrow schema format. |
output_schema | pyarrow.lib.Schema (Required for non-native runtimes) | The output schema in Apache Arrow schema format. |
model = registry.upload_model(
name="verified-working",
path="https://sample.registry.service.azuredatabricks.net/api/2.0/dbfs/read?path=/databricks/mlflow-registry/9168792a16cb40a88de6959ef31e42a2/models/√erified-working/model.pkl",
framework=Framework.SKLEARN,
input_schema=input_schema,
output_schema=output_schema)
model
| Name | verified-working |
| Version | cf194b65-65b2-4d42-a4e2-6ca6fa5bfc42 |
| File Name | model.pkl |
| SHA | 5f4c25b0b564ab9fe0ea437424323501a460aa74463e81645a6419be67933ca4 |
| Status | pending_conversion |
| Image Path | None |
| Updated At | 2023-17-Jul 17:57:23 |
Verify the Model Status
Once uploaded, the model will undergo conversion. The following will loop through the model status until it is ready. Once ready, it is available for deployment.
import time
while model.status() != "ready" and model.status() != "error":
print(model.status())
time.sleep(3)
print(model.status())
pending_conversion
pending_conversion
pending_conversion
pending_conversion
pending_conversion
pending_conversion
pending_conversion
pending_conversion
pending_conversion
pending_conversion
converting
converting
converting
converting
converting
converting
converting
converting
converting
converting
converting
converting
converting
converting
converting
ready
Model Runtime
Once uploaded and converted, the model runtime is derived. This determines whether to allocate resources to pipeline’s native runtime environment or containerized runtime environment. For more details, see the Wallaroo SDK Essentials Guide: Pipeline Deployment Configuration guide.
model.config().runtime()
'mlflow'
Deploy Pipeline
The model is uploaded and ready for use. We’ll add it as a step in our pipeline, then deploy the pipeline. For this example we’re allocated 0.5 cpu to the runtime environment and 1 CPU to the containerized runtime environment.
import os, json
from wallaroo.deployment_config import DeploymentConfigBuilder
deployment_config = DeploymentConfigBuilder().cpus(0.5).sidekick_cpus(model, 1).build()
pipeline = wl.build_pipeline("jefftest1")
pipeline = pipeline.add_model_step(model)
deployment = pipeline.deploy(deployment_config=deployment_config)
pipeline.status()
{'status': 'Running',
'details': [],
'engines': [{'ip': '10.244.3.148',
'name': 'engine-86c7fc5c95-8kwh5',
'status': 'Running',
'reason': None,
'details': [],
'pipeline_statuses': {'pipelines': [{'id': 'jefftest1',
'status': 'Running'}]},
'model_statuses': {'models': [{'name': 'verified-working',
'version': 'cf194b65-65b2-4d42-a4e2-6ca6fa5bfc42',
'sha': '5f4c25b0b564ab9fe0ea437424323501a460aa74463e81645a6419be67933ca4',
'status': 'Running'}]}}],
'engine_lbs': [{'ip': '10.244.4.203',
'name': 'engine-lb-584f54c899-tpv5b',
'status': 'Running',
'reason': None,
'details': []}],
'sidekicks': [{'ip': '10.244.0.225',
'name': 'engine-sidekick-verified-working-43-74f957566d-9zdfh',
'status': 'Running',
'reason': None,
'details': [],
'statuses': '\n'}]}
Run Inference
A sample inference will be run. First the pandas DataFrame used for the inference is created, then the inference run through the pipeline’s infer method.
import pandas as pd
from sklearn.datasets import load_iris
data = load_iris(as_frame=True)
X = data['data'].values
dataframe = pd.DataFrame({"inputs": data['data'][:2].values.tolist()})
dataframe
| inputs | |
|---|---|
| 0 | [5.1, 3.5, 1.4, 0.2] |
| 1 | [4.9, 3.0, 1.4, 0.2] |
deployment.infer(dataframe)
| time | in.inputs | out.predictions | out.probabilities | check_failures | |
|---|---|---|---|---|---|
| 0 | 2023-07-17 17:59:18.840 | [5.1, 3.5, 1.4, 0.2] | 0 | [0.981814913291491, 0.018185072312411506, 1.43... | 0 |
| 1 | 2023-07-17 17:59:18.840 | [4.9, 3.0, 1.4, 0.2] | 0 | [0.9717552971628304, 0.02824467272952288, 3.01... | 0 |
Undeploy Pipelines
With the tutorial complete, the pipeline is undeployed to return the resources back to the cluster.
pipeline.undeploy()
| name | jefftest1 |
|---|---|
| created | 2023-07-17 17:59:05.922172+00:00 |
| last_updated | 2023-07-17 17:59:06.684060+00:00 |
| deployed | False |
| tags | |
| versions | c2cca319-fcad-47b2-9de0-ad5b2852d1a2, f1e6d1b5-96ee-46a1-bfdf-174310ff4270 |
| steps | verified-working |
2 - Wallaroo SDK Upload Tutorials: Arbitrary Python
How to upload different Arbitrary Python models to Wallaroo.
The following tutorials cover how to upload sample arbitrary python models into a Wallaroo instance.
| Parameter | Description |
|---|---|
| Web Site | https://www.python.org/ |
| Supported Libraries | python==3.8 |
| Framework | Framework.CUSTOM aka custom |
| Runtime | Containerized aka flight |
Arbitrary Python models, also known as Bring Your Own Predict (BYOP) allow for custom model deployments with supporting scripts and artifacts. These are used with pre-trained models (PyTorch, Tensorflow, etc) along with whatever supporting artifacts they require. Supporting artifacts can include other Python modules, model files, etc. These are zipped with all scripts, artifacts, and a requirements.txt file that indicates what other Python models need to be imported that are outside of the typical Wallaroo platform.
Contrast this with Wallaroo Python models - aka “Python steps”. These are standalone python scripts that use the python libraries natively supported by the Wallaroo platform. These are used for either simple model deployment (such as ARIMA Statsmodels), or data formatting such as the postprocessing steps. A Wallaroo Python model will be composed of one Python script that matches the Wallaroo requirements.
Arbitrary Python File Requirements
Arbitrary Python (BYOP) models are uploaded to Wallaroo via a ZIP file with the following components:
| Artifact | Type | Description |
|---|---|---|
Python scripts aka .py files with classes that extend mac.inference.Inference and mac.inference.creation.InferenceBuilder | Python Script | Extend the classes mac.inference.Inference and mac.inference.creation.InferenceBuilder. These are included with the Wallaroo SDK. Further details are in Arbitrary Python Script Requirements. Note that there is no specified naming requirements for the classes that extend mac.inference.Inference and mac.inference.creation.InferenceBuilder - any qualified class name is sufficient as long as these two classes are extended as defined below. |
requirements.txt | Python requirements file | This sets the Python libraries used for the arbitrary python model. These libraries should be targeted for Python 3.8 compliance. These requirements and the versions of libraries should be exactly the same between creating the model and deploying it in Wallaroo. This insures that the script and methods will function exactly the same as during the model creation process. |
| Other artifacts | Files | Other models, files, and other artifacts used in support of this model. |
For example, the if the arbitrary python model will be known as vgg_clustering, the contents may be in the following structure, with vgg_clustering as the storage directory:
vgg_clustering\
feature_extractor.h5
kmeans.pkl
custom_inference.py
requirements.txt
Note the inclusion of the custom_inference.py file. This file name is not required - any Python script or scripts that extend the classes listed above are sufficient. This Python script could have been named vgg_custom_model.py or any other name as long as it includes the extension of the classes listed above.
The sample arbitrary python model file is created with the command zip -r vgg_clustering.zip vgg_clustering/.
Wallaroo Arbitrary Python uses the Wallaroo SDK mac module, included in the Wallaroo SDK 2023.2.1 and above. See the Wallaroo SDK Install Guides for instructions on installing the Wallaroo SDK.
Arbitrary Python Script Requirements
The entry point of the arbitrary python model is any python script that extends the following classes. These are included with the Wallaroo SDK. The required methods that must be overridden are specified in each section below.
mac.inference.Inferenceinterface serves model inferences based on submitted input some input. Its purpose is to serve inferences for any supported arbitrary model framework (e.g.scikit,kerasetc.).classDiagram class Inference { <<Abstract>> +model Optional[Any] +expected_model_types()* Set +predict(input_data: InferenceData)* InferenceData -raise_error_if_model_is_not_assigned() None -raise_error_if_model_is_wrong_type() None }mac.inference.creation.InferenceBuilderbuilds a concreteInference, i.e. instantiates anInferenceobject, loads the appropriate model and assigns the model to to the Inference object.classDiagram class InferenceBuilder { +create(config InferenceConfig) * Inference -inference()* Any }
mac.inference.Inference
mac.inference.Inference Objects
| Object | Type | Description |
|---|---|---|
model (Required) | [Any] | One or more objects that match the expected_model_types. This can be a ML Model (for inference use), a string (for data conversion), etc. See Arbitrary Python Examples for examples. |
mac.inference.Inference Methods
| Method | Returns | Description |
|---|---|---|
expected_model_types (Required) | Set | Returns a Set of models expected for the inference as defined by the developer. Typically this is a set of one. Wallaroo checks the expected model types to verify that the model submitted through the InferenceBuilder method matches what this Inference class expects. |
_predict (input_data: mac.types.InferenceData) (Required) | mac.types.InferenceData | The entry point for the Wallaroo inference with the following input and output parameters that are defined when the model is updated.
InferenceDataValidationError exception is raised when the input data does not match mac.types.InferenceData. |
raise_error_if_model_is_not_assigned | N/A | Error when a model is not set to Inference. |
raise_error_if_model_is_wrong_type | N/A | Error when the model does not match the expected_model_types. |
IMPORTANT NOTE
Verify that the inputs and outputs match the InferenceData input and output types: a Dictionary of numpy arrays defined by the input_schema and output_schema parameters when uploading the model to the Wallaroo instance. The following code is an example of a Dictionary of numpy arrays.
preds = self.model.predict(data)
preds = preds.numpy()
rows, _ = preds.shape
preds = preds.reshape((rows,))

return {"prediction": preds} # a Dictionary of numpy arrays.
The example, the expected_model_types can be defined for the KMeans model.
from sklearn.cluster import KMeans

class SampleClass(mac.inference.Inference):
    @property
    def expected_model_types(self) -> Set[Any]:
        return {KMeans}
mac.inference.creation.InferenceBuilder
InferenceBuilder builds a concrete Inference, i.e. instantiates an Inference object, loads the appropriate model and assigns the model to the Inference.
classDiagram
    class InferenceBuilder {
        +create(config InferenceConfig) * Inference
        -inference()* Any
    }
Each model that is included requires its own InferenceBuilder. InferenceBuilder loads one model, then submits it to the Inference class when created. The Inference class checks this class against its expected_model_types() Set.
mac.inference.creation.InferenceBuilder Methods
| Method | Returns | Description |
|---|---|---|
create(config mac.config.inference.CustomInferenceConfig) (Required) | The custom Inference instance. | Creates an Inference subclass, then assigns a model and attributes. The CustomInferenceConfig is used to retrieve the config.model_path, which is a pathlib.Path object pointing to the folder where the model artifacts are saved. Every artifact loaded must be relative to config.model_path. This is set when the arbitrary python .zip file is uploaded and the environment for running it in Wallaroo is set. For example: loading the artifact vgg_clustering\feature_extractor.h5 would be set with config.model_path \ feature_extractor.h5. The model loaded must match an existing module. For our example, this is from sklearn.cluster import KMeans, and this must match the Inference expected_model_types. |
inference | custom Inference instance. | Returns the instantiated custom Inference object created from the create method. |
Arbitrary Python Runtime
Arbitrary Python always run in the containerized model runtime.
2.1 - Wallaroo SDK Upload Arbitrary Python Tutorial: Generate VGG16 Model
How to generate a VGG166 model for arbitrary python model deployment in Wallaroo.
This tutorial can be downloaded as part of the Wallaroo Tutorials repository.
Wallaroo SDK Upload Arbitrary Python Tutorial: Generate Model
This tutorial demonstrates how to use arbitrary python as a ML Model in Wallaroo. Arbitrary Python allows organizations to use Python scripts that require specific libraries and artifacts as models in the Wallaroo engine. This allows for highly flexible use of ML models with supporting scripts.
Tutorial Goals
This tutorial is split into two parts:
- Wallaroo SDK Upload Arbitrary Python Tutorial: Generate Model: Train a dummy
KMeansmodel for clustering images using a pre-trainedVGG16model oncifar10as a feature extractor. The Python entry points used for Wallaroo deployment will be added and described.- A copy of the arbitrary Python model
models/model-auto-conversion-BYOP-vgg16-clustering.zipis included in this tutorial, so this step can be skipped.
- A copy of the arbitrary Python model
- Arbitrary Python Tutorial Deploy Model in Wallaroo Upload and Deploy: Deploys the
KMeansmodel in an arbitrary Python package in Wallaroo, and perform sample inferences. The filemodels/model-auto-conversion-BYOP-vgg16-clustering.zipis provided so users can go right to testing deployment.
Arbitrary Python Script Requirements
The entry point of the arbitrary python model is any python script that must include the following.
class ImageClustering(Inference): The default inference class. This is used to perform the actual inferences. Wallaroo uses the_predictmethod to receive the inference data and call the appropriate functions for the inference.def __init__: Used to initialize this class and load in any other classes or other required settings.def expected_model_types: Used by Wallaroo to anticipate what model types are used by the script.def model(self, model): Defines the model used for the inference. Accepts the model instance used in the inference.self._raise_error_if_model_is_wrong_type(model): Returns the error if the wrong model type is used. This verifies that only the anticipated model type is used for the inference.self._model = model: Sets the submitted model as the model for this class, provided_raise_error_if_model_is_wrong_typeis not raised.
def _predict(self, input_data: InferenceData): This is the entry point for Wallaroo to perform the inference. This will receive the inference data, then perform whatever steps and return a dictionary of numpy arrays.
class ImageClusteringBuilder(InferenceBuilder): Loads the model and prepares it for inferencing.def inference(self) -> ImageClustering: Sets the inference class being used for the inferences.def create(self, config: CustomInferenceConfig) -> ImageClustering: Creates an inference subclass, assigning the model and any attributes required for it to function.
All other methods used for the functioning of these classes are optional, as long as they meet the requirements listed above.
Tutorial Prerequisites
- A Wallaroo version 2023.2.1 or above instance.
References
VGG16 Model Training Steps
This process will train a dummy KMeans model for clustering images using a pre-trained VGG16 model on cifar10 as a feature extractor. This model consists of the following elements:
- All elements are stored in the folder
models/vgg16_clustering. This will be converted to the zip filemodel-auto-conversion-BYOP-vgg16-clustering.zip. models/vgg16_clusteringwill contain the following:- All necessary model artifacts
- One or multiple Python files implementing the classes
InferenceandInferenceBuilder. The implemented classes can have any naming they desire as long as they inherit from the appropriate base classes. - a
requirements.txtfile with all necessary pip requirements to successfully run the inference
Import Libraries
The first step is to import the libraries we’ll be using. These are included by default in the Wallaroo instance’s JupyterHub service.
import numpy as np
import pandas as pd
import json
import os
import pickle
import pyarrow as pa
import tensorflow as tf
import warnings
warnings.filterwarnings('ignore')
from sklearn.cluster import KMeans
from tensorflow.keras.datasets import cifar10
from tensorflow.keras import Model
from tensorflow.keras.layers import Flatten
2023-07-07 16:16:26.511340: W tensorflow/stream_executor/platform/default/dso_loader.cc:64] Could not load dynamic library 'libcudart.so.11.0'; dlerror: libcudart.so.11.0: cannot open shared object file: No such file or directory
2023-07-07 16:16:26.511369: I tensorflow/stream_executor/cuda/cudart_stub.cc:29] Ignore above cudart dlerror if you do not have a GPU set up on your machine.
Variables
We’ll use these variables in later steps rather than hard code them in. In this case, the directory where we’ll store our artifacts.
model_directory = './models/vgg16_clustering'
Load Data Set
In this section, we will load our sample data and shape it.
# Load and preprocess the CIFAR-10 dataset
(X_train, y_train), (X_test, y_test) = cifar10.load_data()
# Normalize the pixel values to be between 0 and 1
X_train = X_train / 255.0
X_test = X_test / 255.0
X_train.shape
(50000, 32, 32, 3)
Train KMeans with VGG16 as feature extractor
Now we will train our model.
pretrained_model = tf.keras.applications.VGG16(include_top=False,
weights='imagenet',
input_shape=(32, 32, 3)
)
embedding_model = Model(inputs=pretrained_model.input,
outputs=Flatten()(pretrained_model.output))
2023-07-07 16:16:30.207936: W tensorflow/stream_executor/platform/default/dso_loader.cc:64] Could not load dynamic library 'libcuda.so.1'; dlerror: libcuda.so.1: cannot open shared object file: No such file or directory
2023-07-07 16:16:30.207966: W tensorflow/stream_executor/cuda/cuda_driver.cc:269] failed call to cuInit: UNKNOWN ERROR (303)
2023-07-07 16:16:30.207987: I tensorflow/stream_executor/cuda/cuda_diagnostics.cc:156] kernel driver does not appear to be running on this host (jupyter-john-2ehummel-40wallaroo-2eai): /proc/driver/nvidia/version does not exist
2023-07-07 16:16:30.208169: I tensorflow/core/platform/cpu_feature_guard.cc:151] This TensorFlow binary is optimized with oneAPI Deep Neural Network Library (oneDNN) to use the following CPU instructions in performance-critical operations: AVX2 AVX512F FMA
To enable them in other operations, rebuild TensorFlow with the appropriate compiler flags.
X_train_embeddings = embedding_model.predict(X_train[:100])
X_test_embeddings = embedding_model.predict(X_test[:100])
kmeans = KMeans(n_clusters=2, random_state=0).fit(X_train_embeddings)
Save Models
Let’s first create the directory where the model artifacts will be saved:
os.makedirs(model_directory, exist_ok=True)
And now save the two models:
with open(f'{model_directory}/kmeans.pkl', 'wb') as fp:
pickle.dump(kmeans, fp)
embedding_model.save(f'{model_directory}/feature_extractor.h5')
WARNING:tensorflow:Compiled the loaded model, but the compiled metrics have yet to be built. `model.compile_metrics` will be empty until you train or evaluate the model.
All needed model artifacts have been now saved under our model directory.
Sample Arbitrary Python Script
The following shows an example of extending the Inference and InferenceBuilder classes for our specific model. This script is located in our model directory under ./models/vgg16_clustering.
"""This module features an example implementation of a custom Inference and its
corresponding InferenceBuilder."""
import pathlib
import pickle
from typing import Any, Set
import tensorflow as tf
from mac.config.inference import CustomInferenceConfig
from mac.inference import Inference
from mac.inference.creation import InferenceBuilder
from mac.types import InferenceData
from sklearn.cluster import KMeans
class ImageClustering(Inference):
"""Inference class for image clustering, that uses
a pre-trained VGG16 model on cifar10 as a feature extractor
and performs clustering on a trained KMeans model.
Attributes:
- feature_extractor: The embedding model we will use
as a feature extractor (i.e. a trained VGG16).
- expected_model_types: A set of model instance types that are expected by this inference.
- model: The model on which the inference is calculated.
"""
def __init__(self, feature_extractor: tf.keras.Model):
self.feature_extractor = feature_extractor
super().__init__()
@property
def expected_model_types(self) -> Set[Any]:
return {KMeans}
@Inference.model.setter # type: ignore
def model(self, model) -> None:
"""Sets the model on which the inference is calculated.
:param model: A model instance on which the inference is calculated.
:raises TypeError: If the model is not an instance of expected_model_types
(i.e. KMeans).
"""
self._raise_error_if_model_is_wrong_type(model) # this will make sure an error will be raised if the model is of wrong type
self._model = model
def _predict(self, input_data: InferenceData) -> InferenceData:
"""Calculates the inference on the given input data.
This is the core function that each subclass needs to implement
in order to calculate the inference.
:param input_data: The input data on which the inference is calculated.
It is of type InferenceData, meaning it comes as a dictionary of numpy
arrays.
:raises InferenceDataValidationError: If the input data is not valid.
Ideally, every subclass should raise this error if the input data is not valid.
:return: The output of the model, that is a dictionary of numpy arrays.
"""
# input_data maps to the input_schema we have defined
# with PyArrow, coming as a dictionary of numpy arrays
inputs = input_data["images"]
# Forward inputs to the models
embeddings = self.feature_extractor(inputs)
predictions = self.model.predict(embeddings.numpy())
# Return predictions as dictionary of numpy arrays
return {"predictions": predictions}
class ImageClusteringBuilder(InferenceBuilder):
"""InferenceBuilder subclass for ImageClustering, that loads
a pre-trained VGG16 model on cifar10 as a feature extractor
and a trained KMeans model, and creates an ImageClustering object."""
@property
def inference(self) -> ImageClustering:
return ImageClustering
def create(self, config: CustomInferenceConfig) -> ImageClustering:
"""Creates an Inference subclass and assigns a model and additionally
needed attributes to it.
:param config: Custom inference configuration. In particular, we're
interested in `config.model_path` that is a pathlib.Path object
pointing to the folder where the model artifacts are saved.
Every artifact we need to load from this folder has to be
relative to `config.model_path`.
:return: A custom Inference instance.
"""
feature_extractor = self._load_feature_extractor(
config.model_path / "feature_extractor.h5"
)
inference = self.inference(feature_extractor)
model = self._load_model(config.model_path / "kmeans.pkl")
inference.model = model
return inference
def _load_feature_extractor(
self, file_path: pathlib.Path
) -> tf.keras.Model:
return tf.keras.models.load_model(file_path)
def _load_model(self, file_path: pathlib.Path) -> KMeans:
with open(file_path.as_posix(), "rb") as fp:
model = pickle.load(fp)
return model
Create Requirements File
As a last step we need to create a requirements.txt file and save it under our vgg_clustering/. The file should contain all the necessary pip requirements needed to run the inference. It will have this data inside.
- IMPORTANT NOTE: Verify that the library versions match the required model versions and libraries for Wallaroo. Otherwise the deployed models
tensorflow==2.8.0
scikit-learn==1.2.2
Zip model folder
Assuming we have stored the following files inside out model directory models/vgg_clustering/:
feature_extractor.h5kmeans.pklcustom_inference.pyrequirements.txt
Now we will zip the file. This is performed with the zip command and the -r option to zip the contents of the entire directory.
zip -r model-auto-conversion-BYOP-vgg16-clustering.zip vgg16_clustering/
The arbitrary Python custom model can now be uploaded to the Wallaroo instance.
2.2 - Wallaroo SDK Upload Arbitrary Python Tutorial: Deploy VGG16 Model
How to deploy a VGG166 model as a arbitrary python model in Wallaroo.
This tutorial can be downloaded as part of the Wallaroo Tutorials repository.
Arbitrary Python Tutorial Deploy Model in Wallaroo Upload and Deploy
This tutorial demonstrates how to use arbitrary python as a ML Model in Wallaroo. Arbitrary Python allows organizations to use Python scripts that require specific libraries and artifacts as models in the Wallaroo engine. This allows for highly flexible use of ML models with supporting scripts.
Tutorial Goals
This tutorial is split into two parts:
- Wallaroo SDK Upload Arbitrary Python Tutorial: Generate Model: Train a dummy
KMeansmodel for clustering images using a pre-trainedVGG16model oncifar10as a feature extractor. The Python entry points used for Wallaroo deployment will be added and described.- A copy of the arbitrary Python model
models/model-auto-conversion-BYOP-vgg16-clustering.zipis included in this tutorial, so this step can be skipped.
- A copy of the arbitrary Python model
- Arbitrary Python Tutorial Deploy Model in Wallaroo Upload and Deploy: Deploys the
KMeansmodel in an arbitrary Python package in Wallaroo, and perform sample inferences. The filemodels/model-auto-conversion-BYOP-vgg16-clustering.zipis provided so users can go right to testing deployment.
Arbitrary Python Script Requirements
The entry point of the arbitrary python model is any python script that must include the following.
class ImageClustering(Inference): The default inference class. This is used to perform the actual inferences. Wallaroo uses the_predictmethod to receive the inference data and call the appropriate functions for the inference.def __init__: Used to initialize this class and load in any other classes or other required settings.def expected_model_types: Used by Wallaroo to anticipate what model types are used by the script.def model(self, model): Defines the model used for the inference. Accepts the model instance used in the inference.self._raise_error_if_model_is_wrong_type(model): Returns the error if the wrong model type is used. This verifies that only the anticipated model type is used for the inference.self._model = model: Sets the submitted model as the model for this class, provided_raise_error_if_model_is_wrong_typeis not raised.
def _predict(self, input_data: InferenceData): This is the entry point for Wallaroo to perform the inference. This will receive the inference data, then perform whatever steps and return a dictionary of numpy arrays.
class ImageClusteringBuilder(InferenceBuilder): Loads the model and prepares it for inferencing.def inference(self) -> ImageClustering: Sets the inference class being used for the inferences.def create(self, config: CustomInferenceConfig) -> ImageClustering: Creates an inference subclass, assigning the model and any attributes required for it to function.
All other methods used for the functioning of these classes are optional, as long as they meet the requirements listed above.
Tutorial Prerequisites
- A Wallaroo version 2023.2.1 or above instance.
References
Tutorial Steps
Import Libraries
The first step is to import the libraries we’ll be using. These are included by default in the Wallaroo instance’s JupyterHub service.
import numpy as np
import pandas as pd
import json
import os
import pickle
import pyarrow as pa
import tensorflow as tf
import wallaroo
from sklearn.cluster import KMeans
from tensorflow.keras.datasets import cifar10
from tensorflow.keras import Model
from tensorflow.keras.layers import Flatten
from wallaroo.pipeline import Pipeline
from wallaroo.deployment_config import DeploymentConfigBuilder
from wallaroo.framework import Framework
from wallaroo.object import EntityNotFoundError
Open a Connection to Wallaroo
The next step is connect to Wallaroo through the Wallaroo client. The Python library is included in the Wallaroo install and available through the Jupyter Hub interface provided with your Wallaroo environment.
This is accomplished using the wallaroo.Client() command, which provides a URL to grant the SDK permission to your specific Wallaroo environment. When displayed, enter the URL into a browser and confirm permissions. Store the connection into a variable that can be referenced later.
If logging into the Wallaroo instance through the internal JupyterHub service, use wl = wallaroo.Client(). If logging in externally, update the wallarooPrefix and wallarooSuffix variables with the proper DNS information. For more information on Wallaroo DNS settings, see the Wallaroo DNS Integration Guide.
wl = wallaroo.Client()
Set Variables and Helper Functions
We’ll set the name of our workspace, pipeline, models and files. Workspace names must be unique across the Wallaroo workspace. For this, we’ll add in a randomly generated 4 characters to the workspace name to prevent collisions with other users’ workspaces. If running this tutorial, we recommend hard coding the workspace name so it will function in the same workspace each time it’s run.
We’ll set up some helper functions that will either use existing workspaces and pipelines, or create them if they do not already exist.
# import string
# import random
# # make a random 4 character suffix to prevent overwriting other user's workspaces
# suffix= ''.join(random.choice(string.ascii_lowercase) for i in range(4))
suffix=''
workspace_name = f'vgg16-clustering-workspace{suffix}'
pipeline_name = f'vgg16-clustering-pipeline'
model_name = 'vgg16-clustering'
model_file_name = './models/model-auto-conversion-BYOP-vgg16-clustering.zip'
def get_workspace(name):
workspace = None
for ws in wl.list_workspaces():
if ws.name() == name:
workspace= ws
if(workspace == None):
workspace = wl.create_workspace(name)
return workspace
def get_pipeline(name):
try:
pipeline = wl.pipelines_by_name(name)[0]
except EntityNotFoundError:
pipeline = wl.build_pipeline(name)
return pipeline
Create Workspace and Pipeline
We will now create the Wallaroo workspace to store our model and set it as the current workspace. Future commands will default to this workspace for pipeline creation, model uploads, etc. We’ll create our Wallaroo pipeline that is used to deploy our arbitrary Python model.
workspace = get_workspace(workspace_name)
wl.set_current_workspace(workspace)
pipeline = get_pipeline(pipeline_name)
Upload Arbitrary Python Model
Arbitrary Python models are uploaded to Wallaroo through the Wallaroo Client upload_model method.
Upload Arbitrary Python Model Parameters
The following parameters are required for Arbitrary Python models. Note that while some fields are considered as optional for the upload_model method, they are required for proper uploading of a Arbitrary Python model to Wallaroo.
| Parameter | Type | Description |
|---|---|---|
name | string (Required) | The name of the model. Model names are unique per workspace. Models that are uploaded with the same name are assigned as a new version of the model. |
path | string (Required) | The path to the model file being uploaded. |
framework | string (Upload Method Optional, Arbitrary Python model Required) | Set as Framework.CUSTOM. |
input_schema | pyarrow.lib.Schema (Upload Method Optional, Arbitrary Python model Required) | The input schema in Apache Arrow schema format. |
output_schema | pyarrow.lib.Schema (Upload Method Optional, Arbitrary Python model Required) | The output schema in Apache Arrow schema format. |
convert_wait | bool (Upload Method Optional, Arbitrary Python model Optional) (Default: True) |
|
Once the upload process starts, the model is containerized by the Wallaroo instance. This process may take up to 10 minutes.
Upload Arbitrary Python Model Return
The following is returned with a successful model upload and conversion.
| Field | Type | Description |
|---|---|---|
name | string | The name of the model. |
version | string | The model version as a unique UUID. |
file_name | string | The file name of the model as stored in Wallaroo. |
image_path | string | The image used to deploy the model in the Wallaroo engine. |
last_update_time | DateTime | When the model was last updated. |
For our example, we’ll start with setting the input_schema and output_schema that is expected by our ImageClustering._predict() method.
input_schema = pa.schema([
pa.field('images', pa.list_(
pa.list_(
pa.list_(
pa.int64(),
list_size=3
),
list_size=32
),
list_size=32
)),
])
output_schema = pa.schema([
pa.field('predictions', pa.int64()),
])
Upload Model
Now we’ll upload our model. The framework is Framework.CUSTOM for arbitrary Python models, and we’ll specify the input and output schemas for the upload.
model = wl.upload_model(model_name,
model_file_name,
framework=Framework.CUSTOM,
input_schema=input_schema,
output_schema=output_schema,
convert_wait=True)
model
Waiting for model loading - this will take up to 10.0min.
Model is pending loading to a container runtime..
Model is attempting loading to a container runtime..........................successful
Ready
| Name | vgg16-clustering |
| Version | 49e8e007-27ae-49da-8a69-6ed5c4aec890 |
| File Name | model-auto-conversion-BYOP-vgg16-clustering.zip |
| SHA | 7bb3362b1768c92ea7e593451b2b8913d3b7616c19fd8d25b73fb6990f9283e0 |
| Status | ready |
| Image Path | proxy.replicated.com/proxy/wallaroo/ghcr.io/wallaroolabs/mlflow-deploy:v2023.4.0-main-4005 |
| Architecture | None |
| Updated At | 2023-20-Oct 15:40:13 |
model.config().runtime()
'flight'
Deploy Pipeline
The model is uploaded and ready for use. We’ll add it as a step in our pipeline, then deploy the pipeline. For this example we’re allocated 0.25 cpu and 4 Gi RAM to the pipeline through the pipeline’s deployment configuration.
pipeline.add_model_step(model)
| name | vgg16-clustering-pipeline |
|---|---|
| created | 2023-10-20 15:37:53.960266+00:00 |
| last_updated | 2023-10-20 15:37:53.960266+00:00 |
| deployed | (none) |
| tags | |
| versions | a7cc9967-3311-4540-93d6-9ea30fa48cd5 |
| steps | |
| published | False |
deployment_config = DeploymentConfigBuilder() \
.cpus(0.25).memory('4Gi') \
.build()
pipeline.deploy(deployment_config=deployment_config)
pipeline.status()
pipeline.status()
{'status': 'Error',
'details': [],
'engines': [{'ip': '10.244.3.130',
'name': 'engine-6fcbccd45c-wrrfq',
'status': 'Running',
'reason': None,
'details': [],
'pipeline_statuses': {'pipelines': [{'id': 'vgg16-clustering-pipeline',
'status': 'Running'}]},
'model_statuses': {'models': [{'name': 'vgg16-clustering',
'version': '49e8e007-27ae-49da-8a69-6ed5c4aec890',
'sha': '7bb3362b1768c92ea7e593451b2b8913d3b7616c19fd8d25b73fb6990f9283e0',
'status': 'Running'}]}}],
'engine_lbs': [{'ip': '10.244.2.188',
'name': 'engine-lb-584f54c899-ssbjw',
'status': 'Running',
'reason': None,
'details': []}],
'sidekicks': [{'ip': '10.244.3.129',
'name': 'engine-sidekick-vgg16-clustering-55-7bcb767b67-ljl6k',
'status': 'Running',
'reason': None,
'details': [],
'statuses': None}]}
Run inference
Everything is in place - we’ll now run a sample inference with some toy data. In this case we’re randomly generating some values in the data shape the model expects, then submitting an inference request through our deployed pipeline.
input_data = {
"images": [np.random.randint(0, 256, (32, 32, 3), dtype=np.uint8)] * 2,
}
dataframe = pd.DataFrame(input_data)
dataframe
| images | |
|---|---|
| 0 | [[[181, 128, 112], [109, 189, 153], [127, 171,... |
| 1 | [[[181, 128, 112], [109, 189, 153], [127, 171,... |
pipeline.infer(dataframe, timeout=10000)
| time | in.images | out.predictions | check_failures | |
|---|---|---|---|---|
| 0 | 2023-10-20 15:41:48.657 | [181, 128, 112, 109, 189, 153, 127, 171, 206, ... | 1 | 0 |
| 1 | 2023-10-20 15:41:48.657 | [181, 128, 112, 109, 189, 153, 127, 171, 206, ... | 1 | 0 |
Undeploy Pipelines
The inference is successful, so we will undeploy the pipeline and return the resources back to the cluster.
pipeline.undeploy()
3 - Wallaroo SDK Upload Tutorials: Hugging Face
How to upload different Hugging Face models to Wallaroo.
The following tutorials cover how to upload sample Hugging Face models. The complete list of supported Hugging Face pipelines are as follows.
| Parameter | Description |
|---|---|
| Web Site | https://huggingface.co/models |
| Supported Libraries |
|
| Frameworks | The following Hugging Face pipelines are supported by Wallaroo.
|
| Runtime | Containerized flight |
During the model upload process, the Wallaroo instance will attempt to convert the model to a Native Wallaroo Runtime. If unsuccessful based , it will create a Wallaroo Containerized Runtime for the model. See the model deployment section for details on how to configure pipeline resources based on the model’s runtime.
Hugging Face Schemas
Input and output schemas for each Hugging Face pipeline are defined below. Note that adding additional inputs not specified below will raise errors, except for the following:
Framework.HUGGING_FACE_IMAGE_TO_TEXTFramework.HUGGING_FACE_TEXT_CLASSIFICATIONFramework.HUGGING_FACE_SUMMARIZATIONFramework.HUGGING_FACE_TRANSLATION
Additional inputs added to these Hugging Face pipelines will be added as key/pair value arguments to the model’s generate method. If the argument is not required, then the model will default to the values coded in the original Hugging Face model’s source code.
See the Hugging Face Pipeline documentation for more details on each pipeline and framework.
| Wallaroo Framework | Reference |
|---|---|
Framework.HUGGING_FACE_FEATURE_EXTRACTION |
Schemas:
input_schema = pa.schema([
pa.field('inputs', pa.string())
])
output_schema = pa.schema([
pa.field('output', pa.list_(
pa.list_(
pa.float64(),
list_size=128
),
))
])
| Wallaroo Framework | Reference |
|---|---|
Framework.HUGGING_FACE_IMAGE_CLASSIFICATION |
Schemas:
input_schema = pa.schema([
pa.field('inputs', pa.list_(
pa.list_(
pa.list_(
pa.int64(),
list_size=3
),
list_size=100
),
list_size=100
)),
pa.field('top_k', pa.int64()),
])
output_schema = pa.schema([
pa.field('score', pa.list_(pa.float64(), list_size=2)),
pa.field('label', pa.list_(pa.string(), list_size=2)),
])
| Wallaroo Framework | Reference |
|---|---|
Framework.HUGGING_FACE_IMAGE_SEGMENTATION |
Schemas:
input_schema = pa.schema([
pa.field('inputs',
pa.list_(
pa.list_(
pa.list_(
pa.int64(),
list_size=3
),
list_size=100
),
list_size=100
)),
pa.field('threshold', pa.float64()),
pa.field('mask_threshold', pa.float64()),
pa.field('overlap_mask_area_threshold', pa.float64()),
])
output_schema = pa.schema([
pa.field('score', pa.list_(pa.float64())),
pa.field('label', pa.list_(pa.string())),
pa.field('mask',
pa.list_(
pa.list_(
pa.list_(
pa.int64(),
list_size=100
),
list_size=100
),
)),
])
| Wallaroo Framework | Reference |
|---|---|
Framework.HUGGING_FACE_IMAGE_TO_TEXT |
Any parameter that is not part of the required inputs list will be forwarded to the model as a key/pair value to the underlying models generate method. If the additional input is not supported by the model, an error will be returned.
Schemas:
input_schema = pa.schema([
pa.field('inputs', pa.list_( #required
pa.list_(
pa.list_(
pa.int64(),
list_size=3
),
list_size=100
),
list_size=100
)),
# pa.field('max_new_tokens', pa.int64()), # optional
])
output_schema = pa.schema([
pa.field('generated_text', pa.list_(pa.string())),
])
| Wallaroo Framework | Reference |
|---|---|
Framework.HUGGING_FACE_OBJECT_DETECTION |
Schemas:
input_schema = pa.schema([
pa.field('inputs',
pa.list_(
pa.list_(
pa.list_(
pa.int64(),
list_size=3
),
list_size=100
),
list_size=100
)),
pa.field('threshold', pa.float64()),
])
output_schema = pa.schema([
pa.field('score', pa.list_(pa.float64())),
pa.field('label', pa.list_(pa.string())),
pa.field('box',
pa.list_( # dynamic output, i.e. dynamic number of boxes per input image, each sublist contains the 4 box coordinates
pa.list_(
pa.int64(),
list_size=4
),
),
),
])
| Wallaroo Framework | Reference |
|---|---|
Framework.HUGGING_FACE_QUESTION_ANSWERING |
Schemas:
input_schema = pa.schema([
pa.field('question', pa.string()),
pa.field('context', pa.string()),
pa.field('top_k', pa.int64()),
pa.field('doc_stride', pa.int64()),
pa.field('max_answer_len', pa.int64()),
pa.field('max_seq_len', pa.int64()),
pa.field('max_question_len', pa.int64()),
pa.field('handle_impossible_answer', pa.bool_()),
pa.field('align_to_words', pa.bool_()),
])
output_schema = pa.schema([
pa.field('score', pa.float64()),
pa.field('start', pa.int64()),
pa.field('end', pa.int64()),
pa.field('answer', pa.string()),
])
| Wallaroo Framework | Reference |
|---|---|
Framework.HUGGING_FACE_STABLE_DIFFUSION_TEXT_2_IMG |
Schemas:
input_schema = pa.schema([
pa.field('prompt', pa.string()),
pa.field('height', pa.int64()),
pa.field('width', pa.int64()),
pa.field('num_inference_steps', pa.int64()), # optional
pa.field('guidance_scale', pa.float64()), # optional
pa.field('negative_prompt', pa.string()), # optional
pa.field('num_images_per_prompt', pa.string()), # optional
pa.field('eta', pa.float64()) # optional
])
output_schema = pa.schema([
pa.field('images', pa.list_(
pa.list_(
pa.list_(
pa.int64(),
list_size=3
),
list_size=128
),
list_size=128
)),
])
| Wallaroo Framework | Reference |
|---|---|
Framework.HUGGING_FACE_SUMMARIZATION |
Any parameter that is not part of the required inputs list will be forwarded to the model as a key/pair value to the underlying models generate method. If the additional input is not supported by the model, an error will be returned.
Schemas:
input_schema = pa.schema([
pa.field('inputs', pa.string()),
pa.field('return_text', pa.bool_()),
pa.field('return_tensors', pa.bool_()),
pa.field('clean_up_tokenization_spaces', pa.bool_()),
# pa.field('extra_field', pa.int64()), # every extra field you specify will be forwarded as a key/value pair
])
output_schema = pa.schema([
pa.field('summary_text', pa.string()),
])
| Wallaroo Framework | Reference |
|---|---|
Framework.HUGGING_FACE_TEXT_CLASSIFICATION |
Schemas
input_schema = pa.schema([
pa.field('inputs', pa.string()), # required
pa.field('top_k', pa.int64()), # optional
pa.field('function_to_apply', pa.string()), # optional
])
output_schema = pa.schema([
pa.field('label', pa.list_(pa.string(), list_size=2)), # list with a number of items same as top_k, list_size can be skipped but may lead in worse performance
pa.field('score', pa.list_(pa.float64(), list_size=2)), # list with a number of items same as top_k, list_size can be skipped but may lead in worse performance
])
| Wallaroo Framework | Reference |
|---|---|
Framework.HUGGING_FACE_TRANSLATION |
Any parameter that is not part of the required inputs list will be forwarded to the model as a key/pair value to the underlying models generate method. If the additional input is not supported by the model, an error will be returned.
Schemas:
input_schema = pa.schema([
pa.field('inputs', pa.string()), # required
pa.field('return_tensors', pa.bool_()), # optional
pa.field('return_text', pa.bool_()), # optional
pa.field('clean_up_tokenization_spaces', pa.bool_()), # optional
pa.field('src_lang', pa.string()), # optional
pa.field('tgt_lang', pa.string()), # optional
# pa.field('extra_field', pa.int64()), # every extra field you specify will be forwarded as a key/value pair
])
output_schema = pa.schema([
pa.field('translation_text', pa.string()),
])
| Wallaroo Framework | Reference |
|---|---|
Framework.HUGGING_FACE_ZERO_SHOT_CLASSIFICATION |
Schemas:
input_schema = pa.schema([
pa.field('inputs', pa.string()), # required
pa.field('candidate_labels', pa.list_(pa.string(), list_size=2)), # required
pa.field('hypothesis_template', pa.string()), # optional
pa.field('multi_label', pa.bool_()), # optional
])
output_schema = pa.schema([
pa.field('sequence', pa.string()),
pa.field('scores', pa.list_(pa.float64(), list_size=2)), # same as number of candidate labels, list_size can be skipped by may result in slightly worse performance
pa.field('labels', pa.list_(pa.string(), list_size=2)), # same as number of candidate labels, list_size can be skipped by may result in slightly worse performance
])
| Wallaroo Framework | Reference |
|---|---|
Framework.HUGGING_FACE_ZERO_SHOT_IMAGE_CLASSIFICATION |
Schemas:
input_schema = pa.schema([
pa.field('inputs', # required
pa.list_(
pa.list_(
pa.list_(
pa.int64(),
list_size=3
),
list_size=100
),
list_size=100
)),
pa.field('candidate_labels', pa.list_(pa.string(), list_size=2)), # required
pa.field('hypothesis_template', pa.string()), # optional
])
output_schema = pa.schema([
pa.field('score', pa.list_(pa.float64(), list_size=2)), # same as number of candidate labels
pa.field('label', pa.list_(pa.string(), list_size=2)), # same as number of candidate labels
])
| Wallaroo Framework | Reference |
|---|---|
Framework.HUGGING_FACE_ZERO_SHOT_OBJECT_DETECTION |
Schemas:
input_schema = pa.schema([
pa.field('images',
pa.list_(
pa.list_(
pa.list_(
pa.int64(),
list_size=3
),
list_size=640
),
list_size=480
)),
pa.field('candidate_labels', pa.list_(pa.string(), list_size=3)),
pa.field('threshold', pa.float64()),
# pa.field('top_k', pa.int64()), # we want the model to return exactly the number of predictions, we shouldn't specify this
])
output_schema = pa.schema([
pa.field('score', pa.list_(pa.float64())), # variable output, depending on detected objects
pa.field('label', pa.list_(pa.string())), # variable output, depending on detected objects
pa.field('box',
pa.list_( # dynamic output, i.e. dynamic number of boxes per input image, each sublist contains the 4 box coordinates
pa.list_(
pa.int64(),
list_size=4
),
),
),
])
| Wallaroo Framework | Reference |
|---|---|
Framework.HUGGING_FACE_SENTIMENT_ANALYSIS | Hugging Face Sentiment Analysis |
| Wallaroo Framework | Reference |
|---|---|
Framework.HUGGING_FACE_TEXT_GENERATION |
Any parameter that is not part of the required inputs list will be forwarded to the model as a key/pair value to the underlying models generate method. If the additional input is not supported by the model, an error will be returned.
input_schema = pa.schema([
pa.field('inputs', pa.string()),
pa.field('return_tensors', pa.bool_()), # optional
pa.field('return_text', pa.bool_()), # optional
pa.field('return_full_text', pa.bool_()), # optional
pa.field('clean_up_tokenization_spaces', pa.bool_()), # optional
pa.field('prefix', pa.string()), # optional
pa.field('handle_long_generation', pa.string()), # optional
# pa.field('extra_field', pa.int64()), # every extra field you specify will be forwarded as a key/value pair
])
output_schema = pa.schema([
pa.field('generated_text', pa.list_(pa.string(), list_size=1))
])
| Wallaroo Framework | Reference |
|---|---|
Framework.HUGGING_FACE_AUTOMATIC_SPEECH_RECOGNITION |
Sample input and output schema.
input_schema = pa.schema([
pa.field('inputs', pa.list_(pa.float32())), # required: the audio stored in numpy arrays of shape (num_samples,) and data type `float32`
pa.field('return_timestamps', pa.string()) # optional: return start & end times for each predicted chunk
])
output_schema = pa.schema([
pa.field('text', pa.string()), # required: the output text corresponding to the audio input
pa.field('chunks', pa.list_(pa.struct([('text', pa.string()), ('timestamp', pa.list_(pa.float32()))]))), # required (if `return_timestamps` is set), start & end times for each predicted chunk
])
3.1 - Wallaroo API Upload Tutorial: Hugging Face Zero Shot Classification
How to upload a Hugging Face Zero Shot Classification model to Wallaroo via the MLOps API.
The Wallaroo 101 tutorial can be downloaded as part of the Wallaroo Tutorials repository.
Wallaroo Model Upload via MLops API: Hugging Face Zero Shot Classification
The following tutorial demonstrates how to upload a Hugging Face Zero Shot model to a Wallaroo instance.
Tutorial Goals
Demonstrate the following:
- Upload a Hugging Face Zero Shot Model to a Wallaroo instance.
- Create a pipeline and add the model as a pipeline step.
- Perform a sample inference.
Prerequisites
- A Wallaroo version 2023.2.1 or above instance
References
- Wallaroo MLOps API Essentials Guide: Model Upload and Registrations
- Wallaroo API Connection Guide
- DNS Integration Guide
Tutorial Steps
Import Libraries
import json
import os
import requests
import base64
import wallaroo
from wallaroo.pipeline import Pipeline
from wallaroo.deployment_config import DeploymentConfigBuilder
from wallaroo.framework import Framework
import pyarrow as pa
import numpy as np
import pandas as pd
Connect to Wallaroo
To perform the various Wallaroo MLOps API requests, we will use the Wallaroo SDK to generate the necessary tokens. For details on other methods of requesting and using authentication tokens with the Wallaroo MLOps API, see the Wallaroo API Connection Guide.
This is accomplished using the wallaroo.Client() command, which provides a URL to grant the SDK permission to your specific Wallaroo environment. When displayed, enter the URL into a browser and confirm permissions. Store the connection into a variable that can be referenced later.
If logging into the Wallaroo instance through the internal JupyterHub service, use wl = wallaroo.Client(). For more information on Wallaroo Client settings, see the Client Connection guide.
wl = wallaroo.Client()
Variables
The following variables will be set for the rest of the tutorial to set the following:
- Wallaroo Workspace
- Wallaroo Pipeline
- Wallaroo Model name and path
- Wallaroo Model Framework
- The DNS prefix and suffix for the Wallaroo instance.
To allow this tutorial to be run multiple times or by multiple users in the same Wallaroo instance, a random 4 character prefix will be added to the workspace, pipeline, and model.
Verify that the DNS prefix and suffix match the Wallaroo instance used for this tutorial. See the DNS Integration Guide for more details.
import string
import random
# make a random 4 character suffix to prevent overwriting other user's workspaces
suffix= ''.join(random.choice(string.ascii_lowercase) for i in range(4))
workspace_name = f'hugging-face-zero-shot-api{suffix}'
pipeline_name = f'hugging-face-zero-shot'
model_name = f'zero-shot-classification'
model_file_name = "./models/model-auto-conversion_hugging-face_dummy-pipelines_zero-shot-classification-pipeline.zip"
framework = "hugging-face-zero-shot-classification"
wallarooPrefix = "YOUR PREFIX."
wallarooPrefix = "YOUR SUFFIX"
APIURL=f"https://{wallarooPrefix}api.{wallarooSuffix}"
APIURL
'https://doc-test.api.wallarooexample.ai'
Create the Workspace
In a production environment, the Wallaroo workspace that contains the pipeline and models would be created and deployed. We will quickly recreate those steps using the MLOps API.
Workspaces are created through the MLOps API with the /v1/api/workspaces/create command. This requires the workspace name be provided, and that the workspace not already exist in the Wallaroo instance.
Reference: MLOps API Create Workspace
# Retrieve the token
headers = wl.auth.auth_header()
# set Content-Type type
headers['Content-Type']='application/json'
# Create workspace
apiRequest = f"{APIURL}/v1/api/workspaces/create"
data = {
"workspace_name": workspace_name
}
response = requests.post(apiRequest, json=data, headers=headers, verify=True).json()
display(response)
# Stored for future examples
workspaceId = response['workspace_id']
{'workspace_id': 9}
Upload the Model
- Endpoint:
/v1/api/models/upload_and_convert
- Headers:
- Content-Type:
multipart/form-data
- Content-Type:
- Parameters
- name (String Required): The model name.
- visibility (String Required): Either
publicorprivate. - workspace_id (String Required): The numerical ID of the workspace to upload the model to.
- conversion (String Required): The conversion parameters that include the following:
- framework (String Required): The framework of the model being uploaded. See the list of supported models for more details.
- python_version (String Required): The version of Python required for model.
- requirements (String Required): Required libraries. Can be
[]if the requirements are default Wallaroo JupyterHub libraries. - input_schema (String Optional): The input schema from the Apache Arrow
pyarrow.lib.Schemaformat, encoded withbase64.b64encode. Only required for non-native runtime models. - output_schema (String Optional): The output schema from the Apache Arrow
pyarrow.lib.Schemaformat, encoded withbase64.b64encode. Only required for non-native runtime models.
Set the Schemas
The input and output schemas will be defined according to the Wallaroo Hugging Face schema requirements. The inputs are then base64 encoded for attachment in the API request.
input_schema = pa.schema([
pa.field('inputs', pa.string()), # required
pa.field('candidate_labels', pa.list_(pa.string(), list_size=2)), # required
pa.field('hypothesis_template', pa.string()), # optional
pa.field('multi_label', pa.bool_()), # optional
])
output_schema = pa.schema([
pa.field('sequence', pa.string()),
pa.field('scores', pa.list_(pa.float64(), list_size=2)), # same as number of candidate labels, list_size can be skipped by may result in slightly worse performance
pa.field('labels', pa.list_(pa.string(), list_size=2)), # same as number of candidate labels, list_size can be skipped by may result in slightly worse performance
])
encoded_input_schema = base64.b64encode(
bytes(input_schema.serialize())
).decode("utf8")
encoded_output_schema = base64.b64encode(
bytes(output_schema.serialize())
).decode("utf8")
Build the Request
We will now build the request to include the required data. We will be using the workspaceId returned when we created our workspace in a previous step, specifying the input and output schemas, and the framework.
metadata = {
"name": model_name,
"visibility": "private",
"workspace_id": workspaceId,
"conversion": {
"framework": framework,
"python_version": "3.8",
"requirements": []
},
"input_schema": encoded_input_schema,
"output_schema": encoded_output_schema,
}
Upload Model API Request
Now we will make our upload and convert request. The model is is stored for the next set of steps.
headers = wl.auth.auth_header()
files = {
'metadata': (None, json.dumps(metadata), "application/json"),
'file': (model_name, open(model_file_name,'rb'),'application/octet-stream')
}
response = requests.post(f'{APIURL}/v1/api/models/upload_and_convert',
headers=headers,
files=files)
print(response.json())
{'insert_models': {'returning': [{'models': [{'id': 9}]}]}}
# Get the model details
# Retrieve the token
headers = wl.auth.auth_header()
# set Content-Type type
headers['Content-Type']='application/json'
apiRequest = f"{APIURL}/v1/api/models/list_versions"
data = {
"model_id": model_name,
"models_pk_id" : modelId
}
status = None
while status != 'ready':
response = requests.post(apiRequest, json=data, headers=headers, verify=True).json()
# verify we have the right version
display(model)
model = next(model for model in response if model["id"] == modelId)
display(model)
status = model['status']
{'sha': '3dcc14dd925489d4f0a3960e90a7ab5917ab685ce955beca8924aa7bb9a69398',
'models_pk_id': 7,
'model_version': '284a2e7c-679a-40cc-9121-2747b81a0228',
'owner_id': '""',
'model_id': 'zero-shot-classification',
'id': 7,
'file_name': 'zero-shot-classification',
'image_path': 'proxy.replicated.com/proxy/wallaroo/ghcr.io/wallaroolabs/mlflow-deploy:v2023.3.0-main-3509',
'status': 'ready'}
{‘sha’: ‘3dcc14dd925489d4f0a3960e90a7ab5917ab685ce955beca8924aa7bb9a69398’,
‘models_pk_id’: 7,
‘model_version’: ‘284a2e7c-679a-40cc-9121-2747b81a0228’,
‘owner_id’: ‘""’,
‘model_id’: ‘zero-shot-classification’,
‘id’: 7,
‘file_name’: ‘zero-shot-classification’,
‘image_path’: ‘proxy.replicated.com/proxy/wallaroo/ghcr.io/wallaroolabs/mlflow-deploy:v2023.3.0-main-3509’,
‘status’: ‘ready’}
Model Upload Complete
With that, the model upload is complete and can be deployed into a Wallaroo pipeline.
3.2 - Wallaroo SDK Upload Tutorial: Hugging Face Zero Shot Classification
How to upload a Hugging Face Zero Shot Classification model to Wallaroo via the Wallaroo SDK.
The Wallaroo 101 tutorial can be downloaded as part of the Wallaroo Tutorials repository.
Wallaroo Model Upload via the Wallaroo SDK: Hugging Face Zero Shot Classification
The following tutorial demonstrates how to upload a Hugging Face Zero Shot model to a Wallaroo instance.
Tutorial Goals
Demonstrate the following:
- Upload a Hugging Face Zero Shot Model to a Wallaroo instance.
- Create a pipeline and add the model as a pipeline step.
- Perform a sample inference.
Prerequisites
- A Wallaroo version 2023.2.1 or above instance.
References
- Wallaroo MLOps API Essentials Guide: Model Upload and Registrations
- Wallaroo API Connection Guide
- DNS Integration Guide
Tutorial Steps
Import Libraries
The first step is to import the libraries we’ll be using. These are included by default in the Wallaroo instance’s JupyterHub service.
import json
import os
import wallaroo
from wallaroo.pipeline import Pipeline
from wallaroo.deployment_config import DeploymentConfigBuilder
from wallaroo.framework import Framework
from wallaroo.object import EntityNotFoundError
import os
os.environ["MODELS_ENABLED"] = "true"
import pyarrow as pa
import numpy as np
import pandas as pd
Open a Connection to Wallaroo
The next step is connect to Wallaroo through the Wallaroo client. The Python library is included in the Wallaroo install and available through the Jupyter Hub interface provided with your Wallaroo environment.
This is accomplished using the wallaroo.Client() command, which provides a URL to grant the SDK permission to your specific Wallaroo environment. When displayed, enter the URL into a browser and confirm permissions. Store the connection into a variable that can be referenced later.
If logging into the Wallaroo instance through the internal JupyterHub service, use wl = wallaroo.Client(). If logging in externally, update the wallarooPrefix and wallarooSuffix variables with the proper DNS information. For more information on Wallaroo DNS settings, see the Wallaroo DNS Integration Guide.
wl = wallaroo.Client()
Set Variables and Helper Functions
We’ll set the name of our workspace, pipeline, models and files. Workspace names must be unique across the Wallaroo workspace. For this, we’ll add in a randomly generated 4 characters to the workspace name to prevent collisions with other users’ workspaces. If running this tutorial, we recommend hard coding the workspace name so it will function in the same workspace each time it’s run.
We’ll set up some helper functions that will either use existing workspaces and pipelines, or create them if they do not already exist.
def get_workspace(name):
    workspace = None
    for ws in wl.list_workspaces():
        if ws.name() == name:
            workspace= ws
    if(workspace == None):
        workspace = wl.create_workspace(name)
    return workspace

def get_pipeline(name):
    try:
        pipeline = wl.pipelines_by_name(name)[0]
    except EntityNotFoundError:
        pipeline = wl.build_pipeline(name)
    return pipeline
import string
import random
# make a random 4 character suffix to prevent overwriting other user's workspaces
suffix= ''.join(random.choice(string.ascii_lowercase) for i in range(4))
suffix=''
workspace_name = f'hf-zero-shot-classification{suffix}'
pipeline_name = f'hf-zero-shot-classification'
model_name = 'hf-zero-shot-classification'
model_file_name = './models/model-auto-conversion_hugging-face_dummy-pipelines_zero-shot-classification-pipeline.zip'
Create Workspace and Pipeline
We will now create the Wallaroo workspace to store our model and set it as the current workspace. Future commands will default to this workspace for pipeline creation, model uploads, etc. We’ll create our Wallaroo pipeline to deploy our model.
workspace = get_workspace(workspace_name)
wl.set_current_workspace(workspace)

pipeline = get_pipeline(pipeline_name)
Configure Data Schemas
The following parameters are required for Hugging Face models. Note that while some fields are considered as optional for the upload_model method, they are required for proper uploading of a Hugging Face model to Wallaroo.
| Parameter | Type | Description |
|---|---|---|
name | string (Required) | The name of the model. Model names are unique per workspace. Models that are uploaded with the same name are assigned as a new version of the model. |
path | string (Required) | The path to the model file being uploaded. |
framework | string (Upload Method Optional, Hugging Face model Required) | Set as the framework. |
input_schema | pyarrow.lib.Schema (Upload Method Optional, Hugging Face model Required) | The input schema in Apache Arrow schema format. |
output_schema | pyarrow.lib.Schema (Upload Method Optional, Hugging Face model Required) | The output schema in Apache Arrow schema format. |
convert_wait | bool (Upload Method Optional, Hugging Face model Optional) (Default: True) |
|
The input and output schemas will be configured for the data inputs and outputs. More information on the available inputs under the official 🤗 Hugging Face source code.
input_schema = pa.schema([
    pa.field('inputs', pa.string()), # required
    pa.field('candidate_labels', pa.list_(pa.string(), list_size=2)), # required
    pa.field('hypothesis_template', pa.string()), # optional
    pa.field('multi_label', pa.bool_()), # optional
])

output_schema = pa.schema([
    pa.field('sequence', pa.string()),
    pa.field('scores', pa.list_(pa.float64(), list_size=2)), # same as number of candidate labels, list_size can be skipped by may result in slightly worse performance
    pa.field('labels', pa.list_(pa.string(), list_size=2)), # same as number of candidate labels, list_size can be skipped by may result in slightly worse performance
])
Upload Model
The model will be uploaded with the framework set as Framework.HUGGING_FACE_ZERO_SHOT_CLASSIFICATION.
framework=Framework.HUGGING_FACE_ZERO_SHOT_CLASSIFICATION
model = wl.upload_model(model_name,
model_file_name,
framework=framework,
input_schema=input_schema,
output_schema=output_schema,
convert_wait=True)
model
Waiting for model loading - this will take up to 10.0min.
Model is pending loading to a container runtime..
Model is attempting loading to a container runtime................................................successful
Ready
| Name | hf-zero-shot-classification |
| Version | 6953b047-bfea-424e-9496-348b1f57039f |
| File Name | model-auto-conversion_hugging-face_dummy-pipelines_zero-shot-classification-pipeline.zip |
| SHA | 3dcc14dd925489d4f0a3960e90a7ab5917ab685ce955beca8924aa7bb9a69398 |
| Status | ready |
| Image Path | proxy.replicated.com/proxy/wallaroo/ghcr.io/wallaroolabs/mlflow-deploy:v2023.4.0-main-4005 |
| Architecture | None |
| Updated At | 2023-20-Oct 15:50:58 |
model.config().runtime()
'flight'
Deploy Pipeline
The model is uploaded and ready for use. We’ll add it as a step in our pipeline, then deploy the pipeline. For this example we’re allocated 0.25 cpu and 4 Gi RAM to the pipeline through the pipeline’s deployment configuration.
deployment_config = DeploymentConfigBuilder() \
.cpus(0.25).memory('1Gi') \
.build()
pipeline = get_pipeline(pipeline_name)
# clear the pipeline if used previously
pipeline.undeploy()
pipeline.clear()
pipeline.add_model_step(model)
pipeline.deploy(deployment_config=deployment_config)
pipeline.status()
Run Inference
A sample inference will be run. First the pandas DataFrame used for the inference is created, then the inference run through the pipeline’s infer method.
input_data = {
"inputs": ["this is a test", "this is another test"], # required
"candidate_labels": [["english", "german"], ["english", "german"]], # optional: using the defaults, similar to not passing this parameter
"hypothesis_template": ["This example is {}.", "This example is {}."], # optional: using the defaults, similar to not passing this parameter
"multi_label": [False, False], # optional: using the defaults, similar to not passing this parameter
}
dataframe = pd.DataFrame(input_data)
dataframe
| inputs | candidate_labels | hypothesis_template | multi_label | |
|---|---|---|---|---|
| 0 | this is a test | [english, german] | This example is {}. | False |
| 1 | this is another test | [english, german] | This example is {}. | False |
%time
pipeline.infer(dataframe)
CPU times: user 2 µs, sys: 0 ns, total: 2 µs
Wall time: 5.48 µs
| time | in.candidate_labels | in.hypothesis_template | in.inputs | in.multi_label | out.labels | out.scores | out.sequence | check_failures | |
|---|---|---|---|---|---|---|---|---|---|
| 0 | 2023-10-20 15:52:07.129 | [english, german] | This example is {}. | this is a test | False | [english, german] | [0.504054605960846, 0.49594545364379883] | this is a test | 0 |
| 1 | 2023-10-20 15:52:07.129 | [english, german] | This example is {}. | this is another test | False | [english, german] | [0.5037839412689209, 0.4962160289287567] | this is another test | 0 |
Undeploy Pipelines
With the tutorial complete, the pipeline is undeployed to return the resources back to the cluster.
pipeline.undeploy()
Waiting for undeployment - this will take up to 45s ........................................ ok
| name | hf-zero-shot-classification |
|---|---|
| created | 2023-10-20 15:46:51.341680+00:00 |
| last_updated | 2023-10-20 15:51:04.118540+00:00 |
| deployed | False |
| tags | |
| versions | d63a6bd8-7bf0-4af1-a22a-ca19c72bde52, 66b81ce8-8ab5-4634-8e6b-5534f328ef34 |
| steps | hf-zero-shot-classification |
| published | False |
4 - Wallaroo SDK Upload Tutorials: Python Step Shape
How to upload different Python Step Shape models to Wallaroo.
The following tutorials cover how to upload sample Python Step Shape models into a Wallaroo instance.
Python scripts are uploaded to Wallaroo and and treated like an ML Models in Pipeline steps. These will be referred to as Python steps.
Python steps can include:
- Preprocessing steps to prepare the data received to be handed to ML Model deployed as another Pipeline step.
- Postprocessing steps to take data output by a ML Model as part of a Pipeline step, and prepare the data to be received by some other data store or entity.
- A model contained within a Python script.
In all of these, the requirements for uploading a Python script as a ML Model in Wallaroo are the same.
| Parameter | Description |
|---|---|
| Web Site | https://www.python.org/ |
| Supported Libraries | python==3.8 |
| Framework | Framework.PYTHON aka python |
| Runtime | Native aka python |
Python models uploaded to Wallaroo are executed as a native runtime.
Note that Python models - aka “Python steps” - are standalone python scripts that use the python libraries natively supported by the Wallaroo platform. These are used for either simple model deployment (such as ARIMA Statsmodels), or data formatting such as the postprocessing steps. A Wallaroo Python model will be composed of one Python script that matches the Wallaroo requirements.
This is contrasted with Arbitrary Python models, also known as Bring Your Own Predict (BYOP) allow for custom model deployments with supporting scripts and artifacts. These are used with pre-trained models (PyTorch, Tensorflow, etc) along with whatever supporting artifacts they require. Supporting artifacts can include other Python modules, model files, etc. These are zipped with all scripts, artifacts, and a requirements.txt file that indicates what other Python models need to be imported that are outside of the typical Wallaroo platform.
Python Models Requirements
Python models uploaded to Wallaroo are Python scripts that must include the wallaroo_json method as the entry point for the Wallaroo engine to use it as a Pipeline step.
This method receives the results of the previous Pipeline step, and its return value will be used in the next Pipeline step.
If the Python model is the first step in the pipeline, then it will be receiving the inference request data (for example: a preprocessing step). If it is the last step in the pipeline, then it will be the data returned from the inference request.
In the example below, the Python model is used as a post processing step for another ML model. The Python model expects to receive data from a ML Model who’s output is a DataFrame with the column dense_2. It then extracts the values of that column as a list, selects the first element, and returns a DataFrame with that element as the value of the column output.
def wallaroo_json(data: pd.DataFrame):
print(data)
return [{"output": [data["dense_2"].to_list()[0][0]]}]
In line with other Wallaroo inference results, the outputs of a Python step that returns a pandas DataFrame or Arrow Table will be listed in the out. metadata, with all inference outputs listed as out.{variable 1}, out.{variable 2}, etc. In the example above, this results the output field as the out.output field in the Wallaroo inference result.
| time | in.tensor | out.output | check_failures | |
|---|---|---|---|---|
| 0 | 2023-06-20 20:23:28.395 | [0.6878518042, 0.1760734021, -0.869514083, 0.3.. | [12.886651039123535] | 0 |
4.1 - Python Model Shape Upload to Wallaroo with the Wallaroo SDK
How to upload a Python Step Shape model to Wallaroo via the SDK
This tutorial can be downloaded as part of the Wallaroo Tutorials repository.
Python Model Upload to Wallaroo
Python scripts can be deployed to Wallaroo as Python Models. These are treated like other models, and are used for:
- ML Models: Models written entirely in Python script.
- Data Formatting: Typically preprocess or post process modules that shape incoming data into what a ML model expects, or receives data output by a ML model and changes the data for other processes to accept.
Models are added to Wallaroo pipelines as pipeline steps, with the data from the previous step submitted to the next one. Python steps require the entry method wallaroo_json. These methods should be structured to receive and send pandas DataFrames as the inputs and outputs.
This allows inference requests to a Wallaroo pipeline to receive pandas DataFrames or Apache Arrow tables, and return the same for consistent results.
This tutorial will:
- Create a Wallaroo workspace and pipeline.
- Upload the sample Python model and ONNX model.
- Demonstrate the outputs of the ONNX model to an inference request.
- Demonstrate the functionality of the Python model in reshaping data after an inference request.
- Use both the ONNX model and the Python model together as pipeline steps to perform an inference request and export the data for use.
Prerequisites
- A Wallaroo version 2023.2.1 or above instance.
References
Tutorial Steps
Import Libraries
We’ll start with importing the libraries we need for the tutorial. The main libraries used are:
- Wallaroo: To connect with the Wallaroo instance and perform the MLOps commands.
pyarrow: Used for formatting the data.pandas: Used for pandas DataFrame tables.
import wallaroo
from wallaroo.object import EntityNotFoundError
from wallaroo.framework import Framework
from wallaroo.deployment_config import DeploymentConfigBuilder
import pandas as pd
#import os
# import json
import pyarrow as pa
Connect to the Wallaroo Instance through the User Interface
The next step is to connect to Wallaroo through the Wallaroo client. The Python library is included in the Wallaroo install and available through the Jupyter Hub interface provided with your Wallaroo environment.
This is accomplished using the wallaroo.Client() command, which provides a URL to grant the SDK permission to your specific Wallaroo environment. When displayed, enter the URL into a browser and confirm permissions. Store the connection into a variable that can be referenced later.
If logging into the Wallaroo instance through the internal JupyterHub service, use wl = wallaroo.Client(). For more information on Wallaroo Client settings, see the Client Connection guide.
# Login through local Wallaroo instance
wl = wallaroo.Client()
Set Variables and Helper Functions
We’ll set the name of our workspace, pipeline, models and files. Workspace names must be unique across the Wallaroo workspace. For this, we’ll add in a randomly generated 4 characters to the workspace name to prevent collisions with other users’ workspaces. If running this tutorial, we recommend hard coding the workspace name so it will function in the same workspace each time it’s run.
We’ll set up some helper functions that will either use existing workspaces and pipelines, or create them if they do not already exist.
import string
import random
# make a random 4 character suffix to prevent overwriting other user's workspaces
suffix= ''.join(random.choice(string.ascii_lowercase) for i in range(4))
suffix='jch'
workspace_name = f'python-demo{suffix}'
pipeline_name = f'python-step-demo-pipeline'
onnx_model_name = 'house-price-sample'
onnx_model_file_name = './models/house_price_keras.onnx'
python_model_name = 'python-step'
python_model_file_name = './models/step.py'
def get_workspace(name):
workspace = None
for ws in wl.list_workspaces():
if ws.name() == name:
workspace= ws
if(workspace == None):
workspace = wl.create_workspace(name)
return workspace
def get_pipeline(name):
try:
pipeline = wl.pipelines_by_name(name)[0]
except EntityNotFoundError:
pipeline = wl.build_pipeline(name)
return pipeline
Create a New Workspace
For our tutorial, we’ll create the workspace, set it as the current workspace, then the pipeline we’ll add our models to.
Create New Workspace References
- Wallaroo SDK Essentials Guide: Workspace Management
- Wallaroo SDK Essentials Guide: Pipeline Management
workspace = get_workspace(workspace_name)
wl.set_current_workspace(workspace)

pipeline = get_pipeline(pipeline_name)
pipeline
Model Descriptions
We have two models we’ll be using.
./models/house_price_keras.onnx: A ML model trained to forecast hour prices based on inputs. This forecast is stored in the columndense_2../models/step.py: A Python script that accepts the data from the house price model, and reformats the output. We’ll be using it as a post-processing step.
For the Python step, it contains the method wallaroo_json as the entry point used by Wallaroo when deployed as a pipeline step. Our sample script has the following:
# take a dataframe output of the house price model, and reformat the `dense_2`
# column as `output`
def wallaroo_json(data: pd.DataFrame):
print(data)
return [{"output": [data["dense_2"].to_list()[0][0]]}]
As seen from the description, all those function will do it take the DataFrame output of the house price model, and output a DataFrame replacing the first element in the list from column dense_2 with output.
Upload Models
Both of these models will be uploaded to our current workspace using the method upload_model(name, path, framework).configure(framework, input_schema, output_schema).
- For
./models/house_price_keras.onnx, we will specify it asFramework.ONNX. We do not need to specify the input and output schemas. - For
./models/step.py, we will set the input and output schemas in the requiredpyarrow.lib.Schemaformat.
Upload Model References
- Wallaroo SDK Essentials Guide: Model Uploads and Registrations: ONNX
- Wallaroo SDK Essentials Guide: Model Uploads and Registrations: Python Models
house_price_model = (wl.upload_model(onnx_model_name,
onnx_model_file_name,
framework=Framework.ONNX)
.configure('onnx',
tensor_fields=["tensor"]
)
)
input_schema = pa.schema([
pa.field('dense_2', pa.list_(pa.float64()))
])
output_schema = pa.schema([
pa.field('output', pa.list_(pa.float64()))
])
step = (wl.upload_model(python_model_name,
python_model_file_name,
framework=Framework.PYTHON)
.configure(
'python',
input_schema=input_schema,
output_schema=output_schema
)
)
Pipeline Steps
With our models uploaded, we’ll perform different configurations of the pipeline steps.
First we’ll add just the house price model to the pipeline, deploy it, and submit a sample inference.
# used to restrict the resources needed for this demonstration
deployment_config = DeploymentConfigBuilder() \
    .cpus(0.25).memory('1Gi') \
    .build()
# clear the pipeline if this tutorial was run before
pipeline.undeploy()
pipeline.clear()
pipeline.add_model_step(house_price_model).deploy(deployment_config=deployment_config)
## sample inference data
data = pd.DataFrame.from_dict({"tensor": [[0.6878518042239091,
0.17607340208535074,
-0.8695140830357148,
0.34638762962802144,
-0.0916270832672289,
-0.022063226781124278,
-0.13969884765926363,
1.002792335666138,
-0.3067449033633758,
0.9272000630461978,
0.28326687982544635,
0.35935375728372815,
-0.682562654045523,
0.532642794275658,
-0.22705189652659302,
0.5743846356405602,
-0.18805086358065454
]]})
results = pipeline.infer(data)
display(results)
Inference with Pipeline Step
Our inference result had the results in the out.dense_2 column. We’ll clear the pipeline, then add in as the pipeline step just the Python postprocessing step we’ve created. Then for our inference request, we’ll just submit the output of the house price model. Our result should be the first element in the array returned in the out.output column.
pipeline.clear()
pipeline.add_model_step(step)
pipeline.deploy(deployment_config=deployment_config)
data = pd.DataFrame.from_dict({"dense_2": [12.886651]})
python_result = pipeline.infer(data)
display(python_result)
Putting Both Models Together
Now we’ll do one last pipeline deployment with 2 steps:
- First the house price model that outputs the inference result into
dense_2. - Second the python step so it will accept the output of the house price model, and reshape it into
output.
import datetime
inference_start = datetime.datetime.now()
pipeline.undeploy()
pipeline.clear()
pipeline.add_model_step(house_price_model)
pipeline.add_model_step(step)
pipeline.deploy(deployment_config=deployment_config)
pipeline.status()
data = pd.DataFrame.from_dict({"tensor": [[0.6878518042239091,
0.17607340208535074,
-0.8695140830357148,
0.34638762962802144,
-0.0916270832672289,
-0.022063226781124278,
-0.13969884765926363,
1.002792335666138,
-0.3067449033633758,
0.9272000630461978,
0.28326687982544635,
0.35935375728372815,
-0.682562654045523,
0.532642794275658,
-0.22705189652659302,
0.5743846356405602,
-0.18805086358065454
]]})
results = pipeline.infer(data)
display(results)
Pipeline Logs
As the data was exported by the pipeline step as a pandas DataFrame, it will be reflected in the pipeline logs. We’ll retrieve the most recent log from our most recent inference.
inference_end = datetime.datetime.now()
pipeline.logs(start_datetime=inference_start, end_datetime=inference_end)
Undeploy the Pipeline
With our tutorial complete, we’ll undeploy the pipeline and return the resources back to the cluster.
This process demonstrated how to structure a postprocessing Python script as a Wallaroo Pipeline step. This can be used for pre or post processing, Python based models, and other use cases.
pipeline.undeploy()
5 - Wallaroo SDK Upload Tutorials: Pytorch
How to upload different Pytorch models to Wallaroo.
The following tutorials cover how to upload sample Pytorch models.
| Parameter | Description |
|---|---|
| Web Site | https://pytorch.org/ |
| Supported Libraries |
|
| Framework | Framework.PYTORCH aka pytorch |
| Supported File Types | pt ot pth in TorchScript format |
| Runtime | onnx/flight |
- IMPORTANT NOTE: The PyTorch model must be in TorchScript format. scripting (i.e.
torch.jit.script()is always recommended over tracing (i.e.torch.jit.trace()). From the PyTorch documentation: “Scripting preserves dynamic control flow and is valid for inputs of different sizes.” For more details, see TorchScript-based ONNX Exporter: Tracing vs Scripting.
During the model upload process, the Wallaroo instance will attempt to convert the model to a Native Wallaroo Runtime. If unsuccessful based , it will create a Wallaroo Containerized Runtime for the model. See the model deployment section for details on how to configure pipeline resources based on the model’s runtime.
- IMPORTANT CONFIGURATION NOTE: For PyTorch input schemas, the floats must be
pyarrow.float32()for the PyTorch model to be converted to the Native Wallaroo Runtime during the upload process.
5.1 - Wallaroo SDK Upload Tutorial: Pytorch Single IO
How to upload a Pytorch model with single input/output to Wallaroo
This tutorial can be downloaded as part of the Wallaroo Tutorials repository.
Wallaroo Model Upload via the Wallaroo SDK: Pytorch Single Input Output
The following tutorial demonstrates how to upload a Pytorch Single Input Output model to a Wallaroo instance.
Tutorial Goals
Demonstrate the following:
- Upload a Pytorch Single Input Output to a Wallaroo instance.
- Create a pipeline and add the model as a pipeline step.
- Perform a sample inference.
Prerequisites
- A Wallaroo version 2023.2.1 or above instance.
References
- Wallaroo MLOps API Essentials Guide: Model Upload and Registrations
- Wallaroo API Connection Guide
- DNS Integration Guide
Tutorial Steps
Import Libraries
The first step is to import the libraries we’ll be using. These are included by default in the Wallaroo instance’s JupyterHub service.
import json
import os
import pickle
import wallaroo
from wallaroo.pipeline import Pipeline
from wallaroo.deployment_config import DeploymentConfigBuilder
from wallaroo.object import EntityNotFoundError
from wallaroo.framework import Framework
import pyarrow as pa
import numpy as np
import pandas as pd
Open a Connection to Wallaroo
The next step is connect to Wallaroo through the Wallaroo client. The Python library is included in the Wallaroo install and available through the Jupyter Hub interface provided with your Wallaroo environment.
This is accomplished using the wallaroo.Client() command, which provides a URL to grant the SDK permission to your specific Wallaroo environment. When displayed, enter the URL into a browser and confirm permissions. Store the connection into a variable that can be referenced later.
If logging into the Wallaroo instance through the internal JupyterHub service, use wl = wallaroo.Client(). If logging in externally, update the wallarooPrefix and wallarooSuffix variables with the proper DNS information. For more information on Wallaroo DNS settings, see the Wallaroo DNS Integration Guide.
wl = wallaroo.Client()
Set Variables and Helper Functions
We’ll set the name of our workspace, pipeline, models and files. Workspace names must be unique across the Wallaroo workspace. For this, we’ll add in a randomly generated 4 characters to the workspace name to prevent collisions with other users’ workspaces. If running this tutorial, we recommend hard coding the workspace name so it will function in the same workspace each time it’s run.
We’ll set up some helper functions that will either use existing workspaces and pipelines, or create them if they do not already exist.
def get_workspace(name):
workspace = None
for ws in wl.list_workspaces():
if ws.name() == name:
workspace= ws
if(workspace == None):
workspace = wl.create_workspace(name)
return workspace
def get_pipeline(name):
try:
pipeline = wl.pipelines_by_name(name)[0]
except EntityNotFoundError:
pipeline = wl.build_pipeline(name)
return pipeline
import string
import random
# make a random 4 character suffix to prevent overwriting other user's workspaces
suffix= ''.join(random.choice(string.ascii_lowercase) for i in range(4))
suffix=''
workspace_name = f'pytorch-single-io{suffix}'
pipeline_name = 'pytorch-single-io'
model_name = 'pytorch-single-io'
model_file_name = "./models/model-auto-conversion_pytorch_single_io_model.pt"
Create Workspace and Pipeline
We will now create the Wallaroo workspace to store our model and set it as the current workspace. Future commands will default to this workspace for pipeline creation, model uploads, etc. We’ll create our Wallaroo pipeline to deploy our model.
workspace = get_workspace(workspace_name)
wl.set_current_workspace(workspace)
pipeline = get_pipeline(pipeline_name)
Configure Data Schemas
The following parameters are required for PyTorch models. Note that while some fields are considered as optional for the upload_model method, they are required for proper uploading of a PyTorch model to Wallaroo.
| Parameter | Type | Description |
|---|---|---|
name | string (Required) | The name of the model. Model names are unique per workspace. Models that are uploaded with the same name are assigned as a new version of the model. |
path | string (Required) | The path to the model file being uploaded. |
framework | string (Upload Method Optional, PyTorch model Required) | Set as the Framework.PyTorch. |
input_schema | pyarrow.lib.Schema (Upload Method Optional, PyTorch model Required) | The input schema in Apache Arrow schema format. Note that float values must be pyarrow.float32(). |
output_schema | pyarrow.lib.Schema (Upload Method Optional, PyTorch model Required) | The output schema in Apache Arrow schema format. Note that float values must be pyarrow.float32(). |
convert_wait | bool (Upload Method Optional, PyTorch model Optional) (Default: True) |
|
Once the upload process starts, the model is containerized by the Wallaroo instance. This process may take up to 10 minutes.
input_schema = pa.schema([
pa.field('input', pa.list_(pa.float32(), list_size=10))
])
output_schema = pa.schema([
pa.field('output', pa.list_(pa.float32(), list_size=1))
])
Upload Model
The model will be uploaded with the framework set as Framework.PYTORCH.
model = wl.upload_model(model_name,
model_file_name,
framework=Framework.PYTORCH,
input_schema=input_schema,
output_schema=output_schema
)
model
Waiting for model loading - this will take up to 10.0min.
Model is pending loading to a native runtime..
Ready
| Name | pytorch-single-io |
| Version | 7e8be792-3b25-4be0-b0b8-e687e501f8df |
| File Name | model-auto-conversion_pytorch_single_io_model.pt |
| SHA | 23bdbafc51c3df7ac84e5f8b2833c592d7da2b27715a7da3e45bf732ea85b8bb |
| Status | ready |
| Image Path | None |
| Architecture | None |
| Updated At | 2023-23-Oct 19:14:00 |
model.config().runtime()
'onnx'
Deploy Pipeline
The model is uploaded and ready for use. We’ll add it as a step in our pipeline, then deploy the pipeline. For this example we’re allocated 0.25 cpu and 4 Gi RAM to the pipeline through the pipeline’s deployment configuration.
deployment_config = DeploymentConfigBuilder() \
.cpus(0.25).memory('1Gi') \
.build()
# clear the pipeline if it was used before
pipeline.undeploy()
pipeline.clear()
pipeline.add_model_step(model)
pipeline.deploy(deployment_config=deployment_config)
ok
Waiting for deployment - this will take up to 45s ................................... ok
| name | pytorch-single-io |
|---|---|
| created | 2023-10-19 21:44:22.896716+00:00 |
| last_updated | 2023-10-23 19:14:02.453910+00:00 |
| deployed | True |
| tags | |
| versions | 8221fbd5-2dc6-4761-82a7-1744aa05d81a, 0f430725-0252-4585-80ea-ec0e2028316d, 64edbfa5-d1bb-44e2-beb2-c6ee87d1a4d9 |
| steps | pytorch-single-io |
| published | False |
Run Inference
A sample inference will be run. First the pandas DataFrame used for the inference is created, then the inference run through the pipeline’s infer method.
mock_inference_data = np.random.rand(10, 10)
mock_dataframe = pd.DataFrame({"input": mock_inference_data.tolist()})
pipeline.infer(mock_dataframe)
| time | in.input | out.output | check_failures | |
|---|---|---|---|---|
| 0 | 2023-10-23 19:14:39.424 | [0.4474957532, 0.1724440529, 0.9187094437, 0.7... | [-0.07964326] | 0 |
| 1 | 2023-10-23 19:14:39.424 | [0.4042578849, 0.0492679987, 0.8344617226, 0.0... | [0.04861839] | 0 |
| 2 | 2023-10-23 19:14:39.424 | [0.5826077484, 0.1242290539, 0.8257548413, 0.2... | [-0.040291503] | 0 |
| 3 | 2023-10-23 19:14:39.424 | [0.5482710709, 0.8289840296, 0.4642728375, 0.8... | [-0.1577661] | 0 |
| 4 | 2023-10-23 19:14:39.424 | [0.7409150425, 0.093049813, 0.7461292107, 0.70... | [-0.07514663] | 0 |
| 5 | 2023-10-23 19:14:39.424 | [0.1703855753, 0.7154656468, 0.7717122989, 0.5... | [-0.027950048] | 0 |
| 6 | 2023-10-23 19:14:39.424 | [0.8858337747, 0.3015204777, 0.5810049274, 0.9... | [-0.20391503] | 0 |
| 7 | 2023-10-23 19:14:39.424 | [0.0857726256, 0.17188405, 0.1614009234, 0.095... | [-0.058097966] | 0 |
| 8 | 2023-10-23 19:14:39.424 | [0.0874623336, 0.1636057129, 0.5464519563, 0.0... | [-0.027925014] | 0 |
| 9 | 2023-10-23 19:14:39.424 | [0.4850890686, 0.7002499257, 0.6851349698, 0.0... | [0.088012084] | 0 |
Undeploy Pipelines
With the tutorial complete, the pipeline is undeployed to return the resources back to the cluster.
pipeline.undeploy()
Waiting for undeployment - this will take up to 45s .................................... ok
| name | pytorch-single-io |
|---|---|
| created | 2023-10-19 21:44:22.896716+00:00 |
| last_updated | 2023-10-23 19:14:02.453910+00:00 |
| deployed | False |
| tags | |
| versions | 8221fbd5-2dc6-4761-82a7-1744aa05d81a, 0f430725-0252-4585-80ea-ec0e2028316d, 64edbfa5-d1bb-44e2-beb2-c6ee87d1a4d9 |
| steps | pytorch-single-io |
| published | False |
5.2 - Wallaroo SDK Upload Tutorial: Pytorch Multiple IO
How to upload a Pytorch model with Multiple input/output to Wallaroo
This tutorial can be downloaded as part of the Wallaroo Tutorials repository.
Wallaroo Model Upload via the Wallaroo SDK: Pytorch Multiple Input Output
The following tutorial demonstrates how to upload a Pytorch Multiple Input Output model to a Wallaroo instance.
Tutorial Goals
Demonstrate the following:
- Upload a Pytorch Multiple Input Output to a Wallaroo instance.
- Create a pipeline and add the model as a pipeline step.
- Perform a sample inference.
Prerequisites
- A Wallaroo version 2023.2.1 or above instance.
References
- Wallaroo MLOps API Essentials Guide: Model Upload and Registrations
- Wallaroo API Connection Guide
- DNS Integration Guide
Tutorial Steps
Import Libraries
The first step is to import the libraries we’ll be using. These are included by default in the Wallaroo instance’s JupyterHub service.
import json
import os
import pickle
import wallaroo
from wallaroo.pipeline import Pipeline
from wallaroo.deployment_config import DeploymentConfigBuilder
from wallaroo.object import EntityNotFoundError
from wallaroo.framework import Framework
import pyarrow as pa
import numpy as np
import pandas as pd
Open a Connection to Wallaroo
The next step is connect to Wallaroo through the Wallaroo client. The Python library is included in the Wallaroo install and available through the Jupyter Hub interface provided with your Wallaroo environment.
This is accomplished using the wallaroo.Client() command, which provides a URL to grant the SDK permission to your specific Wallaroo environment. When displayed, enter the URL into a browser and confirm permissions. Store the connection into a variable that can be referenced later.
If logging into the Wallaroo instance through the internal JupyterHub service, use wl = wallaroo.Client(). If logging in externally, update the wallarooPrefix and wallarooSuffix variables with the proper DNS information. For more information on Wallaroo DNS settings, see the Wallaroo DNS Integration Guide.
wl = wallaroo.Client()
Set Variables and Helper Functions
We’ll set the name of our workspace, pipeline, models and files. Workspace names must be unique across the Wallaroo workspace. For this, we’ll add in a randomly generated 4 characters to the workspace name to prevent collisions with other users’ workspaces. If running this tutorial, we recommend hard coding the workspace name so it will function in the same workspace each time it’s run.
We’ll set up some helper functions that will either use existing workspaces and pipelines, or create them if they do not already exist.
def get_workspace(name):
workspace = None
for ws in wl.list_workspaces():
if ws.name() == name:
workspace= ws
if(workspace == None):
workspace = wl.create_workspace(name)
return workspace
def get_pipeline(name):
try:
pipeline = wl.pipelines_by_name(name)[0]
except EntityNotFoundError:
pipeline = wl.build_pipeline(name)
return pipeline
import string
import random
# make a random 4 character suffix to prevent overwriting other user's workspaces
suffix= ''.join(random.choice(string.ascii_lowercase) for i in range(4))
suffix=''
workspace_name = f'pytorch-multi-io{suffix}'
pipeline_name = f'pytorch-multi-io'
model_name = 'pytorch-multi-io'
model_file_name = "./models/model-auto-conversion_pytorch_multi_io_model.pt"
Create Workspace and Pipeline
We will now create the Wallaroo workspace to store our model and set it as the current workspace. Future commands will default to this workspace for pipeline creation, model uploads, etc. We’ll create our Wallaroo pipeline to deploy our model.
workspace = get_workspace(workspace_name)
wl.set_current_workspace(workspace)
pipeline = get_pipeline(pipeline_name)
Configure Data Schemas
The following parameters are required for PyTorch models. Note that while some fields are considered as optional for the upload_model method, they are required for proper uploading of a PyTorch model to Wallaroo.
| Parameter | Type | Description |
|---|---|---|
name | string (Required) | The name of the model. Model names are unique per workspace. Models that are uploaded with the same name are assigned as a new version of the model. |
path | string (Required) | The path to the model file being uploaded. |
framework | string (Upload Method Optional, PyTorch model Required) | Set as the Framework.PyTorch. |
input_schema | pyarrow.lib.Schema (Upload Method Optional, PyTorch model Required) | The input schema in Apache Arrow schema format. Note that float values must be pyarrow.float32(). |
output_schema | pyarrow.lib.Schema (Upload Method Optional, PyTorch model Required) | The output schema in Apache Arrow schema format. Note that float values must be pyarrow.float32(). |
convert_wait | bool (Upload Method Optional, PyTorch model Optional) (Default: True) |
|
Once the upload process starts, the model is containerized by the Wallaroo instance. This process may take up to 10 minutes.
input_schema = pa.schema([
pa.field('input_1', pa.list_(pa.float32(), list_size=10)),
pa.field('input_2', pa.list_(pa.float32(), list_size=5))
])
output_schema = pa.schema([
pa.field('output_1', pa.list_(pa.float32(), list_size=3)),
pa.field('output_2', pa.list_(pa.float32(), list_size=2))
])
Upload Model
The model will be uploaded with the framework set as Framework.PYTORCH.
model = wl.upload_model(model_name,
model_file_name,
framework=Framework.PYTORCH,
input_schema=input_schema,
output_schema=output_schema
)
model
Waiting for model loading - this will take up to 10.0min.
Model is pending loading to a native runtime..
Ready
| Name | pytorch-multi-io |
| Version | f8df148e-a006-42c5-ac99-796f115897b8 |
| File Name | model-auto-conversion_pytorch_multi_io_model.pt |
| SHA | 792db9ee9f41aded3c1d4705f50ccdedd21cafb8b6232c03e4a849b6da1050a8 |
| Status | ready |
| Image Path | None |
| Architecture | None |
| Updated At | 2023-23-Oct 19:08:41 |
model.config().runtime()
'onnx'
Deploy Pipeline
The model is uploaded and ready for use. We’ll add it as a step in our pipeline, then deploy the pipeline. For this example we’re allocated 0.25 cpu and 4 Gi RAM to the pipeline through the pipeline’s deployment configuration.
deployment_config = DeploymentConfigBuilder() \
.cpus(0.25).memory('1Gi') \
.build()
# clear the pipeline if it was used before
pipeline.clear()
pipeline.add_model_step(model)
pipeline.deploy(deployment_config=deployment_config)
pipeline.status()
Waiting for deployment - this will take up to 45s .................................. ok
{'status': 'Running',
'details': [],
'engines': [{'ip': '10.244.3.164',
'name': 'engine-8549d6985f-qfgsp',
'status': 'Running',
'reason': None,
'details': [],
'pipeline_statuses': {'pipelines': [{'id': 'pytorch-multi-io',
'status': 'Running'}]},
'model_statuses': {'models': [{'name': 'pytorch-multi-io',
'version': 'f8df148e-a006-42c5-ac99-796f115897b8',
'sha': '792db9ee9f41aded3c1d4705f50ccdedd21cafb8b6232c03e4a849b6da1050a8',
'status': 'Running'}]}}],
'engine_lbs': [{'ip': '10.244.2.215',
'name': 'engine-lb-584f54c899-n8t26',
'status': 'Running',
'reason': None,
'details': []}],
'sidekicks': []}
Run Inference
A sample inference will be run. First the pandas DataFrame used for the inference is created, then the inference run through the pipeline’s infer method.
mock_inference_data = [np.random.rand(10, 10), np.random.rand(10, 5)]
mock_dataframe = pd.DataFrame(
{
"input_1": mock_inference_data[0].tolist(),
"input_2": mock_inference_data[1].tolist(),
}
)
pipeline.infer(mock_dataframe)
| time | in.input_1 | in.input_2 | out.output_1 | out.output_2 | check_failures | |
|---|---|---|---|---|---|---|
| 0 | 2023-10-23 19:09:20.035 | [0.5520269716, 0.353031825, 0.5972010785, 0.77... | [0.2850280321, 0.8368284642, 0.532692657, 0.53... | [-0.12692596, -0.048615545, 0.16396174] | [0.037088655, -0.07631089] | 0 |
| 1 | 2023-10-23 19:09:20.035 | [0.665654034, 0.2721328048, 0.611313055, 0.742... | [0.2229083231, 0.0462179945, 0.6249161412, 0.4... | [0.05110594, -0.0646694, 0.26961502] | [0.14888486, -0.011880934] | 0 |
| 2 | 2023-10-23 19:09:20.035 | [0.7482700902, 0.867766789, 0.7562958282, 0.14... | [0.5123290316, 0.619602395, 0.6079586226, 0.67... | [0.025596283, -0.04604797, 0.33752537] | [0.20393606, 0.020352483] | 0 |
| 3 | 2023-10-23 19:09:20.035 | [0.7405163748, 0.8286719088, 0.165741416, 0.89... | [0.3027072867, 0.3416387734, 0.2969483802, 0.1... | [0.007636443, -0.09208804, 0.23095742] | [0.09487003, 0.08022867] | 0 |
| 4 | 2023-10-23 19:09:20.035 | [0.1383739731, 0.1535340384, 0.5779792315, 0.0... | [0.3376164512, 0.969855208, 0.1542470748, 0.25... | [-0.14555773, 0.1504708, 0.07537982] | [0.049346283, -0.15848272] | 0 |
| 5 | 2023-10-23 19:09:20.035 | [0.6635943228, 0.1642769142, 0.5543163791, 0.4... | [0.822826152, 0.4580905361, 0.9199056247, 0.64... | [-0.018602632, -0.057865076, 0.31042594] | [-0.028693462, -0.06809359] | 0 |
| 6 | 2023-10-23 19:09:20.035 | [0.4162411861, 0.0306481021, 0.9126412322, 0.8... | [0.8228113533, 0.351936158, 0.5182544133, 0.74... | [0.030514084, -0.063929394, 0.24837358] | [-0.05689506, 0.047190517] | 0 |
| 7 | 2023-10-23 19:09:20.035 | [0.5263343174, 0.3983799972, 0.6999939214, 0.6... | [0.3230482528, 0.2033379246, 0.6991399275, 0.0... | [-0.008261979, 0.06275801, 0.16552104] | [0.15914191, 0.044295207] | 0 |
| 8 | 2023-10-23 19:09:20.035 | [0.5231957471, 0.2019007135, 0.7899041536, 0.2... | [0.633605919, 0.1939292389, 0.0518512061, 0.28... | [0.0014905855, 0.072615415, 0.21212187] | [0.16694427, -0.0021356493] | 0 |
| 9 | 2023-10-23 19:09:20.035 | [0.0287641209, 0.9260014076, 0.540519311, 0.10... | [0.9722058029, 0.8047130284, 0.671538585, 0.61... | [-0.07756777, -0.11604313, 0.25187707] | [-0.014747229, 0.03463669] | 0 |
Undeploy Pipelines
With the tutorial complete, the pipeline is undeployed to return the resources back to the cluster.
pipeline.undeploy()
Waiting for undeployment - this will take up to 45s .................................... ok
| name | pytorch-multi-io |
|---|---|
| created | 2023-10-19 21:47:11.881873+00:00 |
| last_updated | 2023-10-23 19:08:43.867731+00:00 |
| deployed | False |
| tags | |
| versions | 75b823f2-7f60-4423-ae54-3a52c0de67c4, 39168af2-bd41-49f8-8f5e-b1aba608ee68, d543d8ac-ba93-4dd5-a8d4-8bd2b405eb18, c55a8525-f108-404a-b0da-2f78f2ea2e34, c0358f0b-22b1-431f-8eee-73eef2ce8bbc |
| steps | pytorch-multi-io |
| published | False |
6 - Wallaroo SDK Upload Tutorials: SKLearn
How to upload different SKLearn models to Wallaroo.
The following tutorials cover how to upload sample SKLearn models.
Sci-kit Learn aka SKLearn.
| Parameter | Description |
|---|---|
| Web Site | https://scikit-learn.org/stable/index.html |
| Supported Libraries |
|
| Framework | Framework.SKLEARN aka sklearn |
| Runtime | onnx / flight |
During the model upload process, the Wallaroo instance will attempt to convert the model to a Native Wallaroo Runtime. If unsuccessful based , it will create a Wallaroo Containerized Runtime for the model. See the model deployment section for details on how to configure pipeline resources based on the model’s runtime.
SKLearn Schema Inputs
SKLearn schema follows a different format than other models. To prevent inputs from being out of order, the inputs should be submitted in a single row in the order the model is trained to accept, with all of the data types being the same. For example, the following DataFrame has 4 columns, each column a float.
| sepal length (cm) | sepal width (cm) | petal length (cm) | petal width (cm) | |
|---|---|---|---|---|
| 0 | 5.1 | 3.5 | 1.4 | 0.2 |
| 1 | 4.9 | 3.0 | 1.4 | 0.2 |
For submission to an SKLearn model, the data input schema will be a single array with 4 float values.
input_schema = pa.schema([
pa.field('inputs', pa.list_(pa.float64(), list_size=4))
])
When submitting as an inference, the DataFrame is converted to rows with the column data expressed as a single array. The data must be in the same order as the model expects, which is why the data is submitted as a single array rather than JSON labeled columns: this insures that the data is submitted in the exact order as the model is trained to accept.
Original DataFrame:
| sepal length (cm) | sepal width (cm) | petal length (cm) | petal width (cm) | |
|---|---|---|---|---|
| 0 | 5.1 | 3.5 | 1.4 | 0.2 |
| 1 | 4.9 | 3.0 | 1.4 | 0.2 |
Converted DataFrame:
| inputs | |
|---|---|
| 0 | [5.1, 3.5, 1.4, 0.2] |
| 1 | [4.9, 3.0, 1.4, 0.2] |
SKLearn Schema Outputs
Outputs for SKLearn that are meant to be predictions or probabilities when output by the model are labeled in the output schema for the model when uploaded to Wallaroo. For example, a model that outputs either 1 or 0 as its output would have the output schema as follows:
output_schema = pa.schema([
pa.field('predictions', pa.int32())
])
When used in Wallaroo, the inference result is contained in the out metadata as out.predictions.
pipeline.infer(dataframe)
| time | in.inputs | out.predictions | check_failures | |
|---|---|---|---|---|
| 0 | 2023-07-05 15:11:29.776 | [5.1, 3.5, 1.4, 0.2] | 0 | 0 |
| 1 | 2023-07-05 15:11:29.776 | [4.9, 3.0, 1.4, 0.2] | 0 | 0 |
6.1 - Wallaroo SDK Upload Tutorial: SKLearn Clustering Kmeans
How to upload a SKLearn Clustering Kmeans to Wallaroo
This tutorial can be downloaded as part of the Wallaroo Tutorials repository.
Wallaroo Model Upload via the Wallaroo SDK: SKLearn Clustering KMeans
The following tutorial demonstrates how to upload a SKLearn Clustering KMeans model to a Wallaroo instance.
Tutorial Goals
Demonstrate the following:
- Upload a SKLearn Clustering KMeans model to a Wallaroo instance.
- Create a pipeline and add the model as a pipeline step.
- Perform a sample inference.
Prerequisites
- A Wallaroo version 2023.2.1 or above instance.
References
- Wallaroo MLOps API Essentials Guide: Model Upload and Registrations
- Wallaroo API Connection Guide
- DNS Integration Guide
Tutorial Steps
Import Libraries
The first step is to import the libraries we’ll be using. These are included by default in the Wallaroo instance’s JupyterHub service.
import json
import os
import pickle
import wallaroo
from wallaroo.pipeline import Pipeline
from wallaroo.deployment_config import DeploymentConfigBuilder
from wallaroo.object import EntityNotFoundError
from wallaroo.framework import Framework
import os
os.environ["MODELS_ENABLED"] = "true"
import pyarrow as pa
import numpy as np
import pandas as pd
Open a Connection to Wallaroo
The next step is connect to Wallaroo through the Wallaroo client. The Python library is included in the Wallaroo install and available through the Jupyter Hub interface provided with your Wallaroo environment.
This is accomplished using the wallaroo.Client() command, which provides a URL to grant the SDK permission to your specific Wallaroo environment. When displayed, enter the URL into a browser and confirm permissions. Store the connection into a variable that can be referenced later.
If logging into the Wallaroo instance through the internal JupyterHub service, use wl = wallaroo.Client(). If logging in externally, update the wallarooPrefix and wallarooSuffix variables with the proper DNS information. For more information on Wallaroo DNS settings, see the Wallaroo DNS Integration Guide.
wl = wallaroo.Client()
Set Variables and Helper Functions
We’ll set the name of our workspace, pipeline, models and files. Workspace names must be unique across the Wallaroo workspace. For this, we’ll add in a randomly generated 4 characters to the workspace name to prevent collisions with other users’ workspaces. If running this tutorial, we recommend hard coding the workspace name so it will function in the same workspace each time it’s run.
We’ll set up some helper functions that will either use existing workspaces and pipelines, or create them if they do not already exist.
def get_workspace(name):
workspace = None
for ws in wl.list_workspaces():
if ws.name() == name:
workspace= ws
if(workspace == None):
workspace = wl.create_workspace(name)
return workspace
def get_pipeline(name):
try:
pipeline = wl.pipelines_by_name(name)[0]
except EntityNotFoundError:
pipeline = wl.build_pipeline(name)
return pipeline
import string
import random
# make a random 4 character suffix to prevent overwriting other user's workspaces
suffix= ''.join(random.choice(string.ascii_lowercase) for i in range(4))
suffix=''
workspace_name = f'sklearn-clustering-kmeans{suffix}'
pipeline_name = f'sklearn-clustering-kmeans'
model_name = 'sklearn-clustering-kmeans'
model_file_name = "models/model-auto-conversion_sklearn_kmeans.pkl"
Create Workspace and Pipeline
We will now create the Wallaroo workspace to store our model and set it as the current workspace. Future commands will default to this workspace for pipeline creation, model uploads, etc. We’ll create our Wallaroo pipeline to deploy our model.
workspace = get_workspace(workspace_name)
wl.set_current_workspace(workspace)
pipeline = get_pipeline(pipeline_name)
Configure Data Schemas
SKLearn models are uploaded to Wallaroo through the Wallaroo Client upload_model method.
Upload SKLearn Model Parameters
The following parameters are required for SKLearn models. Note that while some fields are considered as optional for the upload_model method, they are required for proper uploading of a SKLearn model to Wallaroo.
| Parameter | Type | Description |
|---|---|---|
name | string (Required) | The name of the model. Model names are unique per workspace. Models that are uploaded with the same name are assigned as a new version of the model. |
path | string (Required) | The path to the model file being uploaded. |
framework | string (Upload Method Optional, SKLearn model Required) | Set as the Framework.SKLEARN. |
input_schema | pyarrow.lib.Schema (Upload Method Optional, SKLearn model Required) | The input schema in Apache Arrow schema format. |
output_schema | pyarrow.lib.Schema (Upload Method Optional, SKLearn model Required) | The output schema in Apache Arrow schema format. |
convert_wait | bool (Upload Method Optional, SKLearn model Optional) (Default: True) |
|
Once the upload process starts, the model is containerized by the Wallaroo instance. This process may take up to 10 minutes.
input_schema = pa.schema([
pa.field('inputs', pa.list_(pa.float64(), list_size=4))
])
output_schema = pa.schema([
pa.field('predictions', pa.int32())
])
Upload Model
The model will be uploaded with the framework set as Framework.SKLEARN.
model = wl.upload_model(model_name,
model_file_name,
framework=Framework.SKLEARN,
input_schema=input_schema,
output_schema=output_schema,
)
model
Waiting for model loading - this will take up to 10.0min.
Model is pending loading to a native runtime..
Model is attempting loading to a native runtime..incompatible
Model is pending loading to a container runtime..
Model is attempting loading to a container runtime..............successful
Ready
| Name | sklearn-clustering-kmeans |
| Version | 34e40a39-41a1-42b9-a13f-7d49f0c52830 |
| File Name | model-auto-conversion_sklearn_kmeans.pkl |
| SHA | b378a614854619dd573ec65b9b4ac73d0b397d50a048e733d96b68c5fdbec896 |
| Status | ready |
| Image Path | proxy.replicated.com/proxy/wallaroo/ghcr.io/wallaroolabs/mlflow-deploy:v2023.4.0-main-4005 |
| Architecture | None |
| Updated At | 2023-20-Oct 21:04:46 |
model.config().runtime()
'flight'
Deploy Pipeline
The model is uploaded and ready for use. We’ll add it as a step in our pipeline, then deploy the pipeline. For this example we’re allocated 0.25 cpu and 4 Gi RAM to the pipeline through the pipeline’s deployment configuration.
deployment_config = DeploymentConfigBuilder() \
.cpus(0.25).memory('1Gi') \
.build()
# clear the pipeline if it was used before
pipeline.undeploy()
pipeline.clear()
pipeline.add_model_step(model)
pipeline.deploy(deployment_config=deployment_config)
Inference
SKLearn models must have all of the data as one line to prevent columns from being read out of order when submitting in JSON. The following will take in the data, convert the rows into a single inputs for the table, then perform the inference. From the output_schema we have defined the output as predictions which will be displayed in our inference result output as out.predictions.
data = pd.read_json('./data/test-sklearn-kmeans.json')
display(data)
# move the column values to a single array input
mock_dataframe = pd.DataFrame({"inputs": data[:2].values.tolist()})
display(mock_dataframe)
| sepal length (cm) | sepal width (cm) | petal length (cm) | petal width (cm) | |
|---|---|---|---|---|
| 0 | 5.1 | 3.5 | 1.4 | 0.2 |
| 1 | 4.9 | 3.0 | 1.4 | 0.2 |
| inputs | |
|---|---|
| 0 | [5.1, 3.5, 1.4, 0.2] |
| 1 | [4.9, 3.0, 1.4, 0.2] |
result = pipeline.infer(mock_dataframe)
display(result)
| time | in.inputs | out.predictions | check_failures | |
|---|---|---|---|---|
| 0 | 2023-10-20 21:08:04.496 | [5.1, 3.5, 1.4, 0.2] | 1 | 0 |
| 1 | 2023-10-20 21:08:04.496 | [4.9, 3.0, 1.4, 0.2] | 1 | 0 |
Undeploy Pipelines
With the tutorial complete, the pipeline is undeployed to return the resources back to the cluster.
pipeline.undeploy()
Waiting for undeployment - this will take up to 45s ..................................... ok
| name | sklearn-clustering-kmeans |
|---|---|
| created | 2023-10-20 20:47:07.107730+00:00 |
| last_updated | 2023-10-20 21:05:30.043676+00:00 |
| deployed | False |
| tags | |
| versions | 7df8f5d9-01db-40ae-bd47-2a871db46058, afbe6d0e-ecb6-47e0-9982-2eb1228f82a2, 35562729-c690-4da2-a1fd-37a760b3909f, d9bf604a-0310-4783-ae52-c6606eb3e228, f33e9409-c562-404c-a09e-a0d6d8e63d1a, a4caed26-a5d7-4d08-9c84-11be2f2c02e8 |
| steps | sklearn-clustering-kmeans |
| published | False |
6.2 - Wallaroo SDK Upload Tutorial: SKLearn Clustering SVM
How to upload a SKLearn Clustering SVM to Wallaroo
This tutorial can be downloaded as part of the Wallaroo Tutorials repository.
Wallaroo Model Upload via the Wallaroo SDK: Sklearn Clustering SVM
The following tutorial demonstrates how to upload a SKLearn Clustering Support Vector Machine(SVM) model to a Wallaroo instance.
Tutorial Goals
Demonstrate the following:
- Upload a Sklearn Clustering SVM model to a Wallaroo instance.
- Create a pipeline and add the model as a pipeline step.
- Perform a sample inference.
Prerequisites
- A Wallaroo version 2023.2.1 or above instance.
References
- Wallaroo MLOps API Essentials Guide: Model Upload and Registrations
- Wallaroo API Connection Guide
- DNS Integration Guide
Tutorial Steps
Import Libraries
The first step is to import the libraries we’ll be using. These are included by default in the Wallaroo instance’s JupyterHub service.
import json
import os
import pickle
import wallaroo
from wallaroo.pipeline import Pipeline
from wallaroo.deployment_config import DeploymentConfigBuilder
from wallaroo.object import EntityNotFoundError
from wallaroo.framework import Framework
import os
os.environ["MODELS_ENABLED"] = "true"
import pyarrow as pa
import numpy as np
import pandas as pd
Open a Connection to Wallaroo
The next step is connect to Wallaroo through the Wallaroo client. The Python library is included in the Wallaroo install and available through the Jupyter Hub interface provided with your Wallaroo environment.
This is accomplished using the wallaroo.Client() command, which provides a URL to grant the SDK permission to your specific Wallaroo environment. When displayed, enter the URL into a browser and confirm permissions. Store the connection into a variable that can be referenced later.
If logging into the Wallaroo instance through the internal JupyterHub service, use wl = wallaroo.Client(). If logging in externally, update the wallarooPrefix and wallarooSuffix variables with the proper DNS information. For more information on Wallaroo DNS settings, see the Wallaroo DNS Integration Guide.
wl = wallaroo.Client()
Set Variables and Helper Functions
We’ll set the name of our workspace, pipeline, models and files. Workspace names must be unique across the Wallaroo workspace. For this, we’ll add in a randomly generated 4 characters to the workspace name to prevent collisions with other users’ workspaces. If running this tutorial, we recommend hard coding the workspace name so it will function in the same workspace each time it’s run.
We’ll set up some helper functions that will either use existing workspaces and pipelines, or create them if they do not already exist.
def get_workspace(name):
workspace = None
for ws in wl.list_workspaces():
if ws.name() == name:
workspace= ws
if(workspace == None):
workspace = wl.create_workspace(name)
return workspace
def get_pipeline(name):
try:
pipeline = wl.pipelines_by_name(name)[0]
except EntityNotFoundError:
pipeline = wl.build_pipeline(name)
return pipeline
import string
import random
# make a random 4 character suffix to prevent overwriting other user's workspaces
suffix= ''.join(random.choice(string.ascii_lowercase) for i in range(4))
suffix=''
workspace_name = f'sklearn-clustering-svm{suffix}'
pipeline_name = f'sklearn-clustering-svm'
model_name = 'sklearn-clustering-svm'
model_file_name = './models/model-auto-conversion_sklearn_svm_pipeline.pkl'
Create Workspace and Pipeline
We will now create the Wallaroo workspace to store our model and set it as the current workspace. Future commands will default to this workspace for pipeline creation, model uploads, etc. We’ll create our Wallaroo pipeline to deploy our model.
workspace = get_workspace(workspace_name)
wl.set_current_workspace(workspace)
pipeline = get_pipeline(pipeline_name)
Configure Data Schemas
SKLearn models are uploaded to Wallaroo through the Wallaroo Client upload_model method.
Upload SKLearn Model Parameters
The following parameters are required for SKLearn models. Note that while some fields are considered as optional for the upload_model method, they are required for proper uploading of a SKLearn model to Wallaroo.
| Parameter | Type | Description |
|---|---|---|
name | string (Required) | The name of the model. Model names are unique per workspace. Models that are uploaded with the same name are assigned as a new version of the model. |
path | string (Required) | The path to the model file being uploaded. |
framework | string (Upload Method Optional, SKLearn model Required) | Set as the Framework.SKLEARN. |
input_schema | pyarrow.lib.Schema (Upload Method Optional, SKLearn model Required) | The input schema in Apache Arrow schema format. |
output_schema | pyarrow.lib.Schema (Upload Method Optional, SKLearn model Required) | The output schema in Apache Arrow schema format. |
convert_wait | bool (Upload Method Optional, SKLearn model Optional) (Default: True) |
|
Once the upload process starts, the model is containerized by the Wallaroo instance. This process may take up to 10 minutes.
input_schema = pa.schema([
pa.field('inputs', pa.list_(pa.float64(), list_size=4))
])
output_schema = pa.schema([
pa.field('predictions', pa.int32())
])
Upload Model
The model will be uploaded with the framework set as Framework.SKLEARN.
model = wl.upload_model(model_name,
model_file_name,
framework=Framework.SKLEARN,
input_schema=input_schema,
output_schema=output_schema)
model
Waiting for model loading - this will take up to 10.0min.
Model is pending loading to a native runtime..
Model is attempting loading to a native runtime..incompatible
Model is pending loading to a container runtime.
Model is attempting loading to a container runtime.........successful
Ready
| Name | sklearn-clustering-svm |
| Version | 9e9f6913-999d-4a19-894c-ecc372debcaf |
| File Name | model-auto-conversion_sklearn_svm_pipeline.pkl |
| SHA | c6eec69d96f7eeb3db034600dea6b12da1d2b832c39252ec4942d02f68f52f40 |
| Status | ready |
| Image Path | proxy.replicated.com/proxy/wallaroo/ghcr.io/wallaroolabs/mlflow-deploy:v2023.4.0-main-4005 |
| Architecture | None |
| Updated At | 2023-20-Oct 21:10:50 |
model.config().runtime()
'flight'
Deploy Pipeline
The model is uploaded and ready for use. We’ll add it as a step in our pipeline, then deploy the pipeline. For this example we’re allocated 0.25 cpu and 4 Gi RAM to the pipeline through the pipeline’s deployment configuration.
deployment_config = DeploymentConfigBuilder() \
.cpus(0.25).memory('1Gi') \
.build()
# clear the pipeline if it was used before
pipeline.undeploy()
pipeline.clear()
pipeline.add_model_step(model)
pipeline.deploy(deployment_config=deployment_config)
ok
Waiting for deployment - this will take up to 45s ...........................................
*** An error occurred while deploying your pipeline.
Deployment failed. See status for details.
Status: {'status': 'Error', 'details': [], 'engines': [{'ip': '10.244.3.151', 'name': 'engine-8444db4dcb-md57f', 'status': 'Running', 'reason': None, 'details': [], 'pipeline_statuses': {'pipelines': [{'id': 'sklearn-clustering-svm', 'status': 'Running'}]}, 'model_statuses': {'models': [{'name': 'sklearn-clustering-svm', 'version': '9e9f6913-999d-4a19-894c-ecc372debcaf', 'sha': 'c6eec69d96f7eeb3db034600dea6b12da1d2b832c39252ec4942d02f68f52f40', 'status': 'Running'}]}}], 'engine_lbs': [{'ip': '10.244.2.207', 'name': 'engine-lb-584f54c899-nkj9h', 'status': 'Running', 'reason': None, 'details': []}], 'sidekicks': [{'ip': '10.244.3.150', 'name': 'engine-sidekick-sklearn-clustering-svm-71-59bc7cf755-vkq92', 'status': 'Running', 'reason': None, 'details': [], 'statuses': None}]}
Inference
SKLearn models must have all of the data as one line to prevent columns from being read out of order when submitting in JSON. The following will take in the data, convert the rows into a single inputs for the table, then perform the inference. From the output_schema we have defined the output as predictions which will be displayed in our inference result output as out.predictions.
data = pd.read_json('./data/test_cluster-svm.json')
display(data)
# move the column values to a single array input
dataframe = pd.DataFrame({"inputs": data[:2].values.tolist()})
display(dataframe)
| sepal length (cm) | sepal width (cm) | petal length (cm) | petal width (cm) | |
|---|---|---|---|---|
| 0 | 5.1 | 3.5 | 1.4 | 0.2 |
| 1 | 4.9 | 3.0 | 1.4 | 0.2 |
| inputs | |
|---|---|
| 0 | [5.1, 3.5, 1.4, 0.2] |
| 1 | [4.9, 3.0, 1.4, 0.2] |
pipeline.infer(dataframe)
| time | in.inputs | out.predictions | check_failures | |
|---|---|---|---|---|
| 0 | 2023-10-20 21:11:44.879 | [5.1, 3.5, 1.4, 0.2] | 0 | 0 |
| 1 | 2023-10-20 21:11:44.879 | [4.9, 3.0, 1.4, 0.2] | 0 | 0 |
Undeploy Pipelines
With the tutorial complete, the pipeline is undeployed to return the resources back to the cluster.
pipeline.undeploy()
Waiting for undeployment - this will take up to 45s ..................................... ok
| name | sklearn-clustering-svm |
|---|---|
| created | 2023-10-20 21:00:38.923149+00:00 |
| last_updated | 2023-10-20 21:10:52.412340+00:00 |
| deployed | False |
| tags | |
| versions | bf6b7315-b5c8-47fe-b088-ded36b18a3c6, 1758d8ac-6f86-4863-b194-1d7baf20fc1f, 8a5fbd0d-028a-478d-990d-4aa34a8e2b1b |
| steps | sklearn-clustering-svm |
| published | False |
6.3 - Wallaroo SDK Upload Tutorial: SKLearn Linear Regression
How to upload a SKLearn Linear Regression model to Wallaroo
This tutorial can be downloaded as part of the Wallaroo Tutorials repository.
Wallaroo Model Upload via the Wallaroo SDK: SKLearn Linear Regression
The following tutorial demonstrates how to upload a SKLearn Linear Regression model to a Wallaroo instance.
Tutorial Goals
Demonstrate the following:
- Upload a SKLearn Linear Regression model to a Wallaroo instance.
- Create a pipeline and add the model as a pipeline step.
- Perform a sample inference.
Prerequisites
- A Wallaroo version 2023.2.1 or above instance.
References
- Wallaroo MLOps API Essentials Guide: Model Upload and Registrations
- Wallaroo API Connection Guide
- DNS Integration Guide
Tutorial Steps
Import Libraries
The first step is to import the libraries we’ll be using. These are included by default in the Wallaroo instance’s JupyterHub service.
import json
import os
import pickle
import wallaroo
from wallaroo.pipeline import Pipeline
from wallaroo.deployment_config import DeploymentConfigBuilder
from wallaroo.object import EntityNotFoundError
from wallaroo.framework import Framework
import os
os.environ["MODELS_ENABLED"] = "true"
import pyarrow as pa
import numpy as np
import pandas as pd
Open a Connection to Wallaroo
The next step is connect to Wallaroo through the Wallaroo client. The Python library is included in the Wallaroo install and available through the Jupyter Hub interface provided with your Wallaroo environment.
This is accomplished using the wallaroo.Client() command, which provides a URL to grant the SDK permission to your specific Wallaroo environment. When displayed, enter the URL into a browser and confirm permissions. Store the connection into a variable that can be referenced later.
If logging into the Wallaroo instance through the internal JupyterHub service, use wl = wallaroo.Client(). If logging in externally, update the wallarooPrefix and wallarooSuffix variables with the proper DNS information. For more information on Wallaroo DNS settings, see the Wallaroo DNS Integration Guide.
wl = wallaroo.Client()
Set Variables and Helper Functions
We’ll set the name of our workspace, pipeline, models and files. Workspace names must be unique across the Wallaroo workspace. For this, we’ll add in a randomly generated 4 characters to the workspace name to prevent collisions with other users’ workspaces. If running this tutorial, we recommend hard coding the workspace name so it will function in the same workspace each time it’s run.
We’ll set up some helper functions that will either use existing workspaces and pipelines, or create them if they do not already exist.
def get_workspace(name):
workspace = None
for ws in wl.list_workspaces():
if ws.name() == name:
workspace= ws
if(workspace == None):
workspace = wl.create_workspace(name)
return workspace
def get_pipeline(name):
try:
pipeline = wl.pipelines_by_name(name)[0]
except EntityNotFoundError:
pipeline = wl.build_pipeline(name)
return pipeline
import string
import random
# make a random 4 character suffix to prevent overwriting other user's workspaces
suffix= ''.join(random.choice(string.ascii_lowercase) for i in range(4))
suffix=''
workspace_name = f'sklearn-linear-regression{suffix}'
pipeline_name = f'sklearn-linear-regression'
model_name = 'sklearn-linear-regression'
model_file_name = 'models/model-auto-conversion_sklearn_linreg_diabetes.pkl'
Create Workspace and Pipeline
We will now create the Wallaroo workspace to store our model and set it as the current workspace. Future commands will default to this workspace for pipeline creation, model uploads, etc. We’ll create our Wallaroo pipeline to deploy our model.
workspace = get_workspace(workspace_name)
wl.set_current_workspace(workspace)
pipeline = get_pipeline(pipeline_name)
Configure Data Schemas
SKLearn models are uploaded to Wallaroo through the Wallaroo Client upload_model method.
Upload SKLearn Model Parameters
The following parameters are required for SKLearn models. Note that while some fields are considered as optional for the upload_model method, they are required for proper uploading of a SKLearn model to Wallaroo.
| Parameter | Type | Description |
|---|---|---|
name | string (Required) | The name of the model. Model names are unique per workspace. Models that are uploaded with the same name are assigned as a new version of the model. |
path | string (Required) | The path to the model file being uploaded. |
framework | string (Upload Method Optional, SKLearn model Required) | Set as the Framework.SKLEARN. |
input_schema | pyarrow.lib.Schema (Upload Method Optional, SKLearn model Required) | The input schema in Apache Arrow schema format. |
output_schema | pyarrow.lib.Schema (Upload Method Optional, SKLearn model Required) | The output schema in Apache Arrow schema format. |
convert_wait | bool (Upload Method Optional, SKLearn model Optional) (Default: True) |
|
Once the upload process starts, the model is containerized by the Wallaroo instance. This process may take up to 10 minutes.
input_schema = pa.schema([
pa.field('inputs', pa.list_(pa.float64(), list_size=10))
])
output_schema = pa.schema([
pa.field('predictions', pa.float32())
])
Upload Model
The model will be uploaded with the framework set as Framework.SKLEARN.
model = wl.upload_model(model_name,
model_file_name,
framework=Framework.SKLEARN,
input_schema=input_schema,
output_schema=output_schema)
model
Waiting for model loading - this will take up to 10.0min.
Model is pending loading to a native runtime..
Model is attempting loading to a native runtime..incompatible
Model is pending loading to a container runtime.
Model is attempting loading to a container runtime...........successful
Ready
| Name | sklearn-linear-regression |
| Version | 44d45548-b606-4c53-a741-072a8948b26c |
| File Name | model-auto-conversion_sklearn_linreg_diabetes.pkl |
| SHA | 6a9085e2d65bf0379934651d2272d3c6c4e020e36030933d85df3a8d15135a45 |
| Status | ready |
| Image Path | proxy.replicated.com/proxy/wallaroo/ghcr.io/wallaroolabs/mlflow-deploy:v2023.4.0-main-4005 |
| Architecture | None |
| Updated At | 2023-20-Oct 21:12:03 |
model.config().runtime()
'flight'
Deploy Pipeline
The model is uploaded and ready for use. We’ll add it as a step in our pipeline, then deploy the pipeline. For this example we’re allocated 0.25 cpu and 4 Gi RAM to the pipeline through the pipeline’s deployment configuration.
deployment_config = DeploymentConfigBuilder() \
.cpus(0.25).memory('1Gi') \
.build()
# clear the pipeline if it was used before
pipeline.undeploy()
pipeline.clear()
pipeline.add_model_step(model)
pipeline.deploy(deployment_config=deployment_config)
Inference
SKLearn models must have all of the data as one line to prevent columns from being read out of order when submitting in JSON. The following will take in the data, convert the rows into a single inputs for the table, then perform the inference. From the output_schema we have defined the output as predictions which will be displayed in our inference result output as out.predictions.
data = pd.read_json('data/test_linear_regression_data.json')
display(data)
# move the column values to a single array input
dataframe = pd.DataFrame({"inputs": data[:2].values.tolist()})
display(dataframe)
| age | sex | bmi | bp | s1 | s2 | s3 | s4 | s5 | s6 | |
|---|---|---|---|---|---|---|---|---|---|---|
| 0 | 0.038076 | 0.050680 | 0.061696 | 0.021872 | -0.044223 | -0.034821 | -0.043401 | -0.002592 | 0.019907 | -0.017646 |
| 1 | -0.001882 | -0.044642 | -0.051474 | -0.026328 | -0.008449 | -0.019163 | 0.074412 | -0.039493 | -0.068332 | -0.092204 |
| inputs | |
|---|---|
| 0 | [0.0380759064, 0.0506801187, 0.0616962065, 0.0... |
| 1 | [-0.0018820165, -0.0446416365, -0.051474061200... |
pipeline.infer(dataframe)
| time | in.inputs | out.predictions | check_failures | |
|---|---|---|---|---|
| 0 | 2023-10-20 21:13:02.803 | [0.0380759064, 0.0506801187, 0.0616962065, 0.0... | 206.116677 | 0 |
| 1 | 2023-10-20 21:13:02.803 | [-0.0018820165, -0.0446416365, -0.0514740612, ... | 68.071033 | 0 |
Undeploy Pipelines
With the tutorial complete, the pipeline is undeployed to return the resources back to the cluster.
pipeline.undeploy()
Waiting for undeployment - this will take up to 45s ...................................... ok
| name | sklearn-linear-regression |
|---|---|
| created | 2023-10-20 21:10:45.329449+00:00 |
| last_updated | 2023-10-20 21:12:08.793882+00:00 |
| deployed | False |
| tags | |
| versions | 96565b51-c90c-4d0d-bee8-8c1a777af534, 682a9e09-a139-4546-a469-969be071ffcb |
| steps | sklearn-linear-regression |
| published | False |
6.4 - Wallaroo SDK Upload Tutorial: SKLearn Logistic Regression
How to upload a SKLearn Logistic Regression to Wallaroo
This tutorial can be downloaded as part of the Wallaroo Tutorials repository.
Wallaroo Model Upload via the Wallaroo SDK: SKLearn Logistic Regression
The following tutorial demonstrates how to upload a SKLearn Logistic Regression model to a Wallaroo instance.
Tutorial Goals
Demonstrate the following:
- Upload a SKLearn Logistic Regression model to a Wallaroo instance.
- Create a pipeline and add the model as a pipeline step.
- Perform a sample inference.
Prerequisites
- A Wallaroo version 2023.2.1 or above instance.
References
- Wallaroo MLOps API Essentials Guide: Model Upload and Registrations
- Wallaroo API Connection Guide
- DNS Integration Guide
Tutorial Steps
Import Libraries
The first step is to import the libraries we’ll be using. These are included by default in the Wallaroo instance’s JupyterHub service.
import json
import os
import pickle
import wallaroo
from wallaroo.pipeline import Pipeline
from wallaroo.deployment_config import DeploymentConfigBuilder
from wallaroo.object import EntityNotFoundError
from wallaroo.framework import Framework
import os
os.environ["MODELS_ENABLED"] = "true"
import pyarrow as pa
import numpy as np
import pandas as pd
Open a Connection to Wallaroo
The next step is connect to Wallaroo through the Wallaroo client. The Python library is included in the Wallaroo install and available through the Jupyter Hub interface provided with your Wallaroo environment.
This is accomplished using the wallaroo.Client() command, which provides a URL to grant the SDK permission to your specific Wallaroo environment. When displayed, enter the URL into a browser and confirm permissions. Store the connection into a variable that can be referenced later.
If logging into the Wallaroo instance through the internal JupyterHub service, use wl = wallaroo.Client(). If logging in externally, update the wallarooPrefix and wallarooSuffix variables with the proper DNS information. For more information on Wallaroo DNS settings, see the Wallaroo DNS Integration Guide.
wl = wallaroo.Client()
Set Variables and Helper Functions
We’ll set the name of our workspace, pipeline, models and files. Workspace names must be unique across the Wallaroo workspace. For this, we’ll add in a randomly generated 4 characters to the workspace name to prevent collisions with other users’ workspaces. If running this tutorial, we recommend hard coding the workspace name so it will function in the same workspace each time it’s run.
We’ll set up some helper functions that will either use existing workspaces and pipelines, or create them if they do not already exist.
def get_workspace(name):
workspace = None
for ws in wl.list_workspaces():
if ws.name() == name:
workspace= ws
if(workspace == None):
workspace = wl.create_workspace(name)
return workspace
def get_pipeline(name):
try:
pipeline = wl.pipelines_by_name(name)[0]
except EntityNotFoundError:
pipeline = wl.build_pipeline(name)
return pipeline
import string
import random
# make a random 4 character suffix to prevent overwriting other user's workspaces
suffix= ''.join(random.choice(string.ascii_lowercase) for i in range(4))
suffix=''
workspace_name = f'sklearn-logistic-regression{suffix}'
pipeline_name = f'sklearn-logistic-regression'
model_name = 'sklearn-logistic-regression'
model_file_name = 'models/logreg.pkl'
Create Workspace and Pipeline
We will now create the Wallaroo workspace to store our model and set it as the current workspace. Future commands will default to this workspace for pipeline creation, model uploads, etc. We’ll create our Wallaroo pipeline to deploy our model.
workspace = get_workspace(workspace_name)
wl.set_current_workspace(workspace)
pipeline = get_pipeline(pipeline_name)
Configure Data Schemas
SKLearn models are uploaded to Wallaroo through the Wallaroo Client upload_model method.
Upload SKLearn Model Parameters
The following parameters are required for SKLearn models. Note that while some fields are considered as optional for the upload_model method, they are required for proper uploading of a SKLearn model to Wallaroo.
| Parameter | Type | Description |
|---|---|---|
name | string (Required) | The name of the model. Model names are unique per workspace. Models that are uploaded with the same name are assigned as a new version of the model. |
path | string (Required) | The path to the model file being uploaded. |
framework | string (Upload Method Optional, SKLearn model Required) | Set as the Framework.SKLEARN. |
input_schema | pyarrow.lib.Schema (Upload Method Optional, SKLearn model Required) | The input schema in Apache Arrow schema format. |
output_schema | pyarrow.lib.Schema (Upload Method Optional, SKLearn model Required) | The output schema in Apache Arrow schema format. |
convert_wait | bool (Upload Method Optional, SKLearn model Optional) (Default: True) |
|
Once the upload process starts, the model is containerized by the Wallaroo instance. This process may take up to 10 minutes.
input_schema = pa.schema([
pa.field('inputs', pa.list_(pa.float64(), list_size=4))
])
output_schema = pa.schema([
pa.field('predictions', pa.int32()),
pa.field('probabilities', pa.list_(pa.float64(), list_size=3))
])
Upload Model
The model will be uploaded with the framework set as Framework.SKLEARN.
model = wl.upload_model(model_name,
model_file_name,
framework=Framework.SKLEARN,
input_schema=input_schema,
output_schema=output_schema)
model
Waiting for model loading - this will take up to 10.0min.
Model is pending loading to a native runtime..
Model is attempting loading to a native runtime..incompatible
Model is pending loading to a container runtime.
Model is attempting loading to a container runtime...........successful
Ready
| Name | sklearn-logistic-regression |
| Version | 56627137-162a-4437-a417-5f7af8c4241d |
| File Name | logreg.pkl |
| SHA | 9302df6cc64a2c0d12daa257657f07f9db0bb2072bb3fb92396500b21358e0b9 |
| Status | ready |
| Image Path | proxy.replicated.com/proxy/wallaroo/ghcr.io/wallaroolabs/mlflow-deploy:v2023.4.0-main-4005 |
| Architecture | None |
| Updated At | 2023-20-Oct 21:11:53 |
model.config().runtime()
'flight'
Deploy Pipeline
The model is uploaded and ready for use. We’ll add it as a step in our pipeline, then deploy the pipeline. For this example we’re allocated 0.25 cpu and 4 Gi RAM to the pipeline through the pipeline’s deployment configuration.
deployment_config = DeploymentConfigBuilder() \
.cpus(0.25).memory('1Gi') \
.build()
# clear the pipeline if it was used before
pipeline.undeploy()
pipeline.clear()
pipeline.add_model_step(model)
pipeline.deploy(deployment_config=deployment_config)
Inference
SKLearn models must have all of the data as one line to prevent columns from being read out of order when submitting in JSON. The following will take in the data, convert the rows into a single inputs for the table, then perform the inference. From the output_schema we have defined the output as predictions which will be displayed in our inference result output as out.predictions.
data = pd.read_json('data/test_logreg_data.json')
display(data)
# move the column values to a single array input
dataframe = pd.DataFrame({"inputs": data[:2].values.tolist()})
display(dataframe)
| sepal length (cm) | sepal width (cm) | petal length (cm) | petal width (cm) | |
|---|---|---|---|---|
| 0 | 5.1 | 3.5 | 1.4 | 0.2 |
| 1 | 4.9 | 3.0 | 1.4 | 0.2 |
| inputs | |
|---|---|
| 0 | [5.1, 3.5, 1.4, 0.2] |
| 1 | [4.9, 3.0, 1.4, 0.2] |
pipeline.infer(dataframe)
| time | in.inputs | out.predictions | out.probabilities | check_failures | |
|---|---|---|---|---|---|
| 0 | 2023-10-20 21:12:53.100 | [5.1, 3.5, 1.4, 0.2] | 0 | [0.9815821465852236, 0.018417838912958125, 1.4... | 0 |
| 1 | 2023-10-20 21:12:53.100 | [4.9, 3.0, 1.4, 0.2] | 0 | [0.9713374799347873, 0.028662489870060148, 3.0... | 0 |
Undeploy Pipelines
With the tutorial complete, the pipeline is undeployed to return the resources back to the cluster.
pipeline.undeploy()
Waiting for undeployment - this will take up to 45s .................................... ok
| name | sklearn-logistic-regression |
|---|---|
| created | 2023-10-20 21:10:37.789707+00:00 |
| last_updated | 2023-10-20 21:11:58.541031+00:00 |
| deployed | False |
| tags | |
| versions | b8170bfd-fafb-44ce-a62c-c82c6da46f4c, 7b233ca1-b1bb-4448-a948-b8fbb1481b75 |
| steps | sklearn-logistic-regression |
| published | False |
6.5 - Wallaroo SDK Upload Tutorial: SKLearn SVM PCA
How to upload a SKLearn SVM PCA to Wallaroo
This tutorial can be downloaded as part of the Wallaroo Tutorials repository.
Wallaroo Model Upload via the Wallaroo SDK: Sklearn Clustering SVM PCA
The following tutorial demonstrates how to upload a SKLearn Clustering Support Vector Machine(SVM) Principal Component Analysis (PCA) model to a Wallaroo instance.
Tutorial Goals
Demonstrate the following:
- Upload a Sklearn Clustering SVM PCA model to a Wallaroo instance.
- Create a pipeline and add the model as a pipeline step.
- Perform a sample inference.
Prerequisites
- A Wallaroo version 2023.2.1 or above instance.
References
- Wallaroo MLOps API Essentials Guide: Model Upload and Registrations
- Wallaroo API Connection Guide
- DNS Integration Guide
Tutorial Steps
Import Libraries
The first step is to import the libraries we’ll be using. These are included by default in the Wallaroo instance’s JupyterHub service.
import json
import os
import pickle
import wallaroo
from wallaroo.pipeline import Pipeline
from wallaroo.deployment_config import DeploymentConfigBuilder
from wallaroo.object import EntityNotFoundError
from wallaroo.framework import Framework
import os
os.environ["MODELS_ENABLED"] = "true"
import pyarrow as pa
import numpy as np
import pandas as pd
Open a Connection to Wallaroo
The next step is connect to Wallaroo through the Wallaroo client. The Python library is included in the Wallaroo install and available through the Jupyter Hub interface provided with your Wallaroo environment.
This is accomplished using the wallaroo.Client() command, which provides a URL to grant the SDK permission to your specific Wallaroo environment. When displayed, enter the URL into a browser and confirm permissions. Store the connection into a variable that can be referenced later.
If logging into the Wallaroo instance through the internal JupyterHub service, use wl = wallaroo.Client(). If logging in externally, update the wallarooPrefix and wallarooSuffix variables with the proper DNS information. For more information on Wallaroo DNS settings, see the Wallaroo DNS Integration Guide.
wl = wallaroo.Client()
Set Variables and Helper Functions
We’ll set the name of our workspace, pipeline, models and files. Workspace names must be unique across the Wallaroo workspace. For this, we’ll add in a randomly generated 4 characters to the workspace name to prevent collisions with other users’ workspaces. If running this tutorial, we recommend hard coding the workspace name so it will function in the same workspace each time it’s run.
We’ll set up some helper functions that will either use existing workspaces and pipelines, or create them if they do not already exist.
def get_workspace(name):
workspace = None
for ws in wl.list_workspaces():
if ws.name() == name:
workspace= ws
if(workspace == None):
workspace = wl.create_workspace(name)
return workspace
def get_pipeline(name):
try:
pipeline = wl.pipelines_by_name(name)[0]
except EntityNotFoundError:
pipeline = wl.build_pipeline(name)
return pipeline
import string
import random
# make a random 4 character suffix to prevent overwriting other user's workspaces
suffix= ''.join(random.choice(string.ascii_lowercase) for i in range(4))
suffix=''
workspace_name = f'sklearn-clustering-svm-pca{suffix}'
pipeline_name = f'sklearn-clustering-svm-pca'
model_name = 'sklearn-clustering-svm-pca'
model_file_name = 'models/model-auto-conversion_sklearn_svm_pca_pipeline.pkl'
Create Workspace and Pipeline
We will now create the Wallaroo workspace to store our model and set it as the current workspace. Future commands will default to this workspace for pipeline creation, model uploads, etc. We’ll create our Wallaroo pipeline to deploy our model.
workspace = get_workspace(workspace_name)
wl.set_current_workspace(workspace)
pipeline = get_pipeline(pipeline_name)
Configure Data Schemas
SKLearn models are uploaded to Wallaroo through the Wallaroo Client upload_model method.
Upload SKLearn Model Parameters
The following parameters are required for SKLearn models. Note that while some fields are considered as optional for the upload_model method, they are required for proper uploading of a SKLearn model to Wallaroo.
| Parameter | Type | Description |
|---|---|---|
name | string (Required) | The name of the model. Model names are unique per workspace. Models that are uploaded with the same name are assigned as a new version of the model. |
path | string (Required) | The path to the model file being uploaded. |
framework | string (Upload Method Optional, SKLearn model Required) | Set as the Framework.SKLEARN. |
input_schema | pyarrow.lib.Schema (Upload Method Optional, SKLearn model Required) | The input schema in Apache Arrow schema format. |
output_schema | pyarrow.lib.Schema (Upload Method Optional, SKLearn model Required) | The output schema in Apache Arrow schema format. |
convert_wait | bool (Upload Method Optional, SKLearn model Optional) (Default: True) |
|
Once the upload process starts, the model is containerized by the Wallaroo instance. This process may take up to 10 minutes.
input_schema = pa.schema([
pa.field('inputs', pa.list_(pa.float64(), list_size=4))
])
output_schema = pa.schema([
pa.field('predictions', pa.int32())
])
Upload Model
The model will be uploaded with the framework set as Framework.SKLEARN.
model = wl.upload_model(model_name,
model_file_name,
framework=Framework.SKLEARN,
input_schema=input_schema,
output_schema=output_schema)
model
Waiting for model loading - this will take up to 10.0min.
Model is pending loading to a native runtime..
Model is attempting loading to a native runtime..incompatible
Model is pending loading to a container runtime.
Model is attempting loading to a container runtime.............successful
Ready
| Name | sklearn-clustering-svm-pca |
| Version | 8568d7b1-1f50-48c8-839b-00b6d0dfb734 |
| File Name | model-auto-conversion_sklearn_svm_pca_pipeline.pkl |
| SHA | 524b05d22f13fa4ce5feaf07b86710b447f0c80a02601be86ee5b6bc748fe7fd |
| Status | ready |
| Image Path | proxy.replicated.com/proxy/wallaroo/ghcr.io/wallaroolabs/mlflow-deploy:v2023.4.0-main-4005 |
| Architecture | None |
| Updated At | 2023-20-Oct 21:06:26 |
model.config().runtime()
'flight'
Deploy Pipeline
The model is uploaded and ready for use. We’ll add it as a step in our pipeline, then deploy the pipeline. For this example we’re allocated 0.25 cpu and 4 Gi RAM to the pipeline through the pipeline’s deployment configuration.
deployment_config = DeploymentConfigBuilder() \
.cpus(0.25).memory('1Gi') \
.build()
# clear the pipeline if it was used before
pipeline.undeploy()
pipeline.clear()
pipeline.add_model_step(model)
pipeline.deploy(deployment_config=deployment_config)
Inference
SKLearn models must have all of the data as one line to prevent columns from being read out of order when submitting in JSON. The following will take in the data, convert the rows into a single inputs for the table, then perform the inference. From the output_schema we have defined the output as predictions which will be displayed in our inference result output as out.predictions.
data = pd.read_json('data/test-sklearn-kmeans.json')
display(data)
# move the column values to a single array input
dataframe = pd.DataFrame({"inputs": data[:2].values.tolist()})
display(dataframe)
| sepal length (cm) | sepal width (cm) | petal length (cm) | petal width (cm) | |
|---|---|---|---|---|
| 0 | 5.1 | 3.5 | 1.4 | 0.2 |
| 1 | 4.9 | 3.0 | 1.4 | 0.2 |
| inputs | |
|---|---|
| 0 | [5.1, 3.5, 1.4, 0.2] |
| 1 | [4.9, 3.0, 1.4, 0.2] |
pipeline.infer(dataframe)
| time | in.inputs | out.predictions | check_failures | |
|---|---|---|---|---|
| 0 | 2023-10-20 21:08:35.188 | [5.1, 3.5, 1.4, 0.2] | 0 | 0 |
| 1 | 2023-10-20 21:08:35.188 | [4.9, 3.0, 1.4, 0.2] | 0 | 0 |
Undeploy Pipelines
With the tutorial complete, the pipeline is undeployed to return the resources back to the cluster.
pipeline.undeploy()
Waiting for undeployment - this will take up to 45s ...................................... ok
| name | sklearn-clustering-svm-pca |
|---|---|
| created | 2023-10-20 20:49:31.399831+00:00 |
| last_updated | 2023-10-20 21:06:27.900292+00:00 |
| deployed | False |
| tags | |
| versions | 4f174cb4-a314-4f62-9960-e1bb7dcb8782, 0b7b909b-10e1-4ae4-a2e9-6c07d020fe27, 984f5d05-2799-4d36-a0eb-deb076c1d1be, 76968e9f-774e-4730-9c84-3c4143b5e123 |
| steps | sklearn-clustering-svm-pca |
| published | False |
7 - Wallaroo SDK Upload Tutorials: Tensorflow
How to upload different Tensorflow models to Wallaroo.
The following tutorials cover how to upload sample Tensorflow models.
| Parameter | Description |
|---|---|
| Web Site | https://www.tensorflow.org/ |
| Supported Libraries | tensorflow==2.9.3 |
| Framework | Framework.TENSORFLOW aka tensorflow |
| Runtime | Native aka tensorflow |
| Supported File Types | SavedModel format as .zip file |
IMPORTANT NOTE
These requirements are not for Tensorflow Keras models, only for non-Keras Tensorflow models in the SavedModel format. For Tensorflow Keras deployment in Wallaroo, see the Tensorflow Keras requirements.TensorFlow File Format
TensorFlow models are .zip file of the SavedModel format. For example, the Aloha sample TensorFlow model is stored in the directory alohacnnlstm:
├── saved_model.pb
└── variables
├── variables.data-00000-of-00002
├── variables.data-00001-of-00002
└── variables.index
This is compressed into the .zip file alohacnnlstm.zip with the following command:
zip -r alohacnnlstm.zip alohacnnlstm/
ML models that meet the Tensorflow and SavedModel format will run as Wallaroo Native runtimes by default.
See the SavedModel guide for full details.
7.1 - Wallaroo SDK Upload Tutorial: Tensorflow Aloha
How to upload the Tensorflow Aloha model to Wallaroo
This tutorial and the assets can be downloaded as part of the Wallaroo Tutorials repository.
Wallaroo SDK Upload Tutorial: Tensorflow
In this notebook we will walk through uploading a Tensorflow model to a Wallaroo instance and performing sample inferences. For this example we will be using an open source model that uses an Aloha CNN LSTM model for classifying Domain names as being either legitimate or being used for nefarious purposes such as malware distribution.
Prerequisites
- An installed Wallaroo instance.
- The following Python libraries installed:
Tutorial Goals
For our example, we will perform the following:
- Create a workspace for our work.
- Upload the Aloha model.
- Create a pipeline that can ingest our submitted data, submit it to the model, and export the results.
All sample data and models are available through the Wallaroo Quick Start Guide Samples repository.
Connect to the Wallaroo Instance
The first step is to connect to Wallaroo through the Wallaroo client. The Python library is included in the Wallaroo install and available through the Jupyter Hub interface provided with your Wallaroo environment.
This is accomplished using the wallaroo.Client() command, which provides a URL to grant the SDK permission to your specific Wallaroo environment. When displayed, enter the URL into a browser and confirm permissions. Store the connection into a variable that can be referenced later.
If logging into the Wallaroo instance through the internal JupyterHub service, use wl = wallaroo.Client(). For more information on Wallaroo Client settings, see the Client Connection guide.e/wallaroo-sdk-essentials-client/).
import wallaroo
from wallaroo.object import EntityNotFoundError
from wallaroo.framework import Framework
# to display dataframe tables
from IPython.display import display
# used to display dataframe information without truncating
import os
os.environ["MODELS_ENABLED"] = "true"
import pandas as pd
pd.set_option('display.max_colwidth', None)
import pyarrow as pa
# Login through local Wallaroo instance

wl = wallaroo.Client()
Create the Workspace
We will create a workspace to work in and call it the “alohaworkspace”, then set it as current workspace environment. We’ll also create our pipeline in advance as alohapipeline. The model name and the model file will be specified for use in later steps.
To allow this tutorial to be run multiple times or by multiple users in the same Wallaroo instance, a random 4 character prefix will be added to the workspace, pipeline, and model.
import string
import random
# make a random 4 character suffix to verify uniqueness in tutorials
suffix= ''.join(random.choice(string.ascii_lowercase) for i in range(4))
suffix=''
workspace_name = f'tensorflowuploadexampleworkspace{suffix}'
pipeline_name = f'tensorflowuploadexample{suffix}'
model_name = f'tensorflowuploadexample{suffix}'
model_file_name = './models/alohacnnlstm.zip'
def get_workspace(name):
    workspace = None
    for ws in wl.list_workspaces():
        if ws.name() == name:
            workspace= ws
    if(workspace == None):
        workspace = wl.create_workspace(name)
    return workspace

def get_pipeline(name):
    try:
        pipeline = wl.pipelines_by_name(name)[0]
    except EntityNotFoundError:
        pipeline = wl.build_pipeline(name)
    return pipeline
workspace = get_workspace(workspace_name)
wl.set_current_workspace(workspace)
aloha_pipeline = get_pipeline(pipeline_name)
aloha_pipeline
| name | tensorflowuploadexample |
|---|---|
| created | 2023-10-20 21:15:17.379310+00:00 |
| last_updated | 2023-10-20 21:15:17.379310+00:00 |
| deployed | (none) |
| tags | |
| versions | dce97e55-97d7-4bf9-8c75-8f9115e40e23 |
| steps | |
| published | False |
We can verify the workspace is created the current default workspace with the get_current_workspace() command.
wl.get_current_workspace()
{'name': 'tensorflowuploadexampleworkspace', 'id': 83, 'archived': False, 'created_by': '420ff140-d2a0-4425-9c12-cac5ed602472', 'created_at': '2023-10-20T21:15:17.207568+00:00', 'models': [], 'pipelines': [{'name': 'tensorflowuploadexample', 'create_time': datetime.datetime(2023, 10, 20, 21, 15, 17, 379310, tzinfo=tzutc()), 'definition': '[]'}]}
Upload the Models
Now we will upload our models. Note that for this example we are applying the model from a .ZIP file. The Aloha model is a protobuf file that has been defined for evaluating web pages, and we will configure it to use data in the tensorflow format.
The following parameters are required for TensorFlow models. Tensorflow models are native runtimes in Wallaroo, so the input_schema and output_schema parameters are optional.
| Parameter | Type | Description |
|---|---|---|
name | string (Required) | The name of the model. Model names are unique per workspace. Models that are uploaded with the same name are assigned as a new version of the model. |
path | string (Required) | The path to the model file being uploaded. |
framework | string (Required) | Set as the Framework.TENSORFLOW. |
input_schema | pyarrow.lib.Schema (Optional) | The input schema in Apache Arrow schema format. |
output_schema | pyarrow.lib.Schema (Optional) | The output schema in Apache Arrow schema format. |
convert_wait | bool (Optional) (Default: True) | Not required for native runtimes.
|
TensorFlow File Format
TensorFlow models are .zip file of the SavedModel format. For example, the Aloha sample TensorFlow model is stored in the directory alohacnnlstm:
├── saved_model.pb
└── variables
├── variables.data-00000-of-00002
├── variables.data-00001-of-00002
└── variables.index
This is compressed into the .zip file alohacnnlstm.zip with the following command:
zip -r alohacnnlstm.zip alohacnnlstm/
model = wl.upload_model(model_name, model_file_name, Framework.TENSORFLOW).configure("tensorflow")
model.config().runtime()
'tensorflow'
Deploy a model
Now that we have a model that we want to use we will create a deployment for it.
We will tell the deployment we are using a tensorflow model and give the deployment name and the configuration we want for the deployment.
aloha_pipeline.add_model_step(model)
| name | tensorflowuploadexample |
|---|---|
| created | 2023-10-20 21:15:17.379310+00:00 |
| last_updated | 2023-10-20 21:15:17.379310+00:00 |
| deployed | (none) |
| tags | |
| versions | dce97e55-97d7-4bf9-8c75-8f9115e40e23 |
| steps | |
| published | False |
aloha_pipeline.deploy()
Waiting for deployment - this will take up to 45s ........ ok
| name | tensorflowuploadexample |
|---|---|
| created | 2023-10-20 21:15:17.379310+00:00 |
| last_updated | 2023-10-20 21:15:17.786848+00:00 |
| deployed | True |
| tags | |
| versions | ceffdd27-2887-4a32-ba90-4eec496aafb1, dce97e55-97d7-4bf9-8c75-8f9115e40e23 |
| steps | tensorflowuploadexample |
| published | False |
We can verify that the pipeline is running and list what models are associated with it.
aloha_pipeline.status()
{'status': 'Running',
'details': [],
'engines': [{'ip': '10.244.0.33',
'name': 'engine-69b5b9c587-cg8rx',
'status': 'Running',
'reason': None,
'details': [],
'pipeline_statuses': {'pipelines': [{'id': 'tensorflowuploadexample',
'status': 'Running'}]},
'model_statuses': {'models': [{'name': 'tensorflowuploadexample',
'version': '5d6ca253-93b4-4f16-b117-6d116450b108',
'sha': 'd71d9ffc61aaac58c2b1ed70a2db13d1416fb9d3f5b891e5e4e2e97180fe22f8',
'status': 'Running'}]}}],
'engine_lbs': [{'ip': '10.244.2.210',
'name': 'engine-lb-584f54c899-z5pcp',
'status': 'Running',
'reason': None,
'details': []}],
'sidekicks': []}
Interferences
Infer 1 row
Now that the pipeline is deployed and our Aloha model is in place, we’ll perform a smoke test to verify the pipeline is up and running properly. We’ll use the infer_from_file command to load a single encoded URL into the inference engine and print the results back out.
The result should tell us that the tokenized URL is legitimate (0) or fraud (1). This sample data should return close to 1 in out.main.
smoke_test = pd.DataFrame.from_records(
[
{
"text_input":[
0,
0,
0,
0,
0,
0,
0,
0,
0,
0,
0,
0,
0,
0,
0,
0,
0,
0,
0,
0,
0,
0,
0,
0,
0,
0,
0,
0,
0,
0,
0,
0,
0,
0,
0,
0,
0,
0,
0,
0,
28,
16,
32,
23,
29,
32,
30,
19,
26,
17
]
}
]
)
result = aloha_pipeline.infer(smoke_test)
display(result.loc[:, ["time","out.main"]])
| time | out.main | |
|---|---|---|
| 0 | 2023-10-20 21:15:26.393 | [0.997564] |
Undeploy Pipeline
When finished with our tests, we will undeploy the pipeline so we have the Kubernetes resources back for other tasks. Note that if the deployment variable is unchanged aloha_pipeline.deploy() will restart the inference engine in the same configuration as before.
aloha_pipeline.undeploy()
Waiting for undeployment - this will take up to 45s ..................................... ok
| name | tensorflowuploadexample |
|---|---|
| created | 2023-10-20 21:15:17.379310+00:00 |
| last_updated | 2023-10-20 21:15:17.786848+00:00 |
| deployed | False |
| tags | |
| versions | ceffdd27-2887-4a32-ba90-4eec496aafb1, dce97e55-97d7-4bf9-8c75-8f9115e40e23 |
| steps | tensorflowuploadexample |
| published | False |
8 - Wallaroo SDK Upload Tutorials: Tensorflow Keras
How to upload different Tensorflow Keras models to Wallaroo.
The following tutorials cover how to upload sample Tensorflow Keras models.
| Parameter | Description |
|---|---|
| Web Site | https://www.tensorflow.org/api_docs/python/tf/keras/Model |
| Supported Libraries |
|
| Framework | Framework.KERAS aka keras |
| Supported File Types | SavedModel format as .zip file and HDF5 format |
| Runtime | onnx/flight |
During the model upload process, the Wallaroo instance will attempt to convert the model to a Native Wallaroo Runtime. If unsuccessful based , it will create a Wallaroo Containerized Runtime for the model. See the model deployment section for details on how to configure pipeline resources based on the model’s runtime.
TensorFlow Keras SavedModel Format
TensorFlow Keras SavedModel models are .zip file of the SavedModel format. For example, the Aloha sample TensorFlow model is stored in the directory alohacnnlstm:
├── saved_model.pb
└── variables
├── variables.data-00000-of-00002
├── variables.data-00001-of-00002
└── variables.index
This is compressed into the .zip file alohacnnlstm.zip with the following command:
zip -r alohacnnlstm.zip alohacnnlstm/
See the SavedModel guide for full details.
TensorFlow Keras H5 Format
Wallaroo supports the H5 for Tensorflow Keras models.
8.1 - Wallaroo SDK Upload Tutorial: Keras Sequential Single IO
How to upload a Keras Sequential Single IO model to Wallaroo via the Wallaroo SDK
This tutorial can be downloaded as part of the Wallaroo Tutorials repository.
Wallaroo Model Upload via the Wallaroo SDK: TensorFlow keras Sequential Single IO
The following tutorial demonstrates how to upload a TensorFlow keras Sequential Single IO model to a Wallaroo instance.
Tutorial Goals
Demonstrate the following:
- Upload a TensorFlow keras Sequential Single IO to a Wallaroo instance.
- Create a pipeline and add the model as a pipeline step.
- Perform a sample inference.
Prerequisites
- A Wallaroo version 2023.2.1 or above instance.
References
- Wallaroo MLOps API Essentials Guide: Model Upload and Registrations
- Wallaroo API Connection Guide
- DNS Integration Guide
Tutorial Steps
Import Libraries
The first step is to import the libraries we’ll be using. These are included by default in the Wallaroo instance’s JupyterHub service.
import json
import os
import pickle
import wallaroo
from wallaroo.pipeline import Pipeline
from wallaroo.deployment_config import DeploymentConfigBuilder
from wallaroo.framework import Framework
from wallaroo.object import EntityNotFoundError
import os
os.environ["MODELS_ENABLED"] = "true"
import pyarrow as pa
import numpy as np
import pandas as pd
from sklearn.datasets import load_iris
from sklearn.linear_model import LogisticRegression
import datetime
Open a Connection to Wallaroo
The next step is connect to Wallaroo through the Wallaroo client. The Python library is included in the Wallaroo install and available through the Jupyter Hub interface provided with your Wallaroo environment.
This is accomplished using the wallaroo.Client() command, which provides a URL to grant the SDK permission to your specific Wallaroo environment. When displayed, enter the URL into a browser and confirm permissions. Store the connection into a variable that can be referenced later.
If logging into the Wallaroo instance through the internal JupyterHub service, use wl = wallaroo.Client(). If logging in externally, update the wallarooPrefix and wallarooSuffix variables with the proper DNS information. For more information on Wallaroo DNS settings, see the Wallaroo DNS Integration Guide.
wl = wallaroo.Client()
Set Variables and Helper Functions
We’ll set the name of our workspace, pipeline, models and files. Workspace names must be unique across the Wallaroo workspace. For this, we’ll add in a randomly generated 4 characters to the workspace name to prevent collisions with other users’ workspaces. If running this tutorial, we recommend hard coding the workspace name so it will function in the same workspace each time it’s run.
We’ll set up some helper functions that will either use existing workspaces and pipelines, or create them if they do not already exist.
def get_workspace(name):
workspace = None
for ws in wl.list_workspaces():
if ws.name() == name:
workspace= ws
if(workspace == None):
workspace = wl.create_workspace(name)
return workspace
def get_pipeline(name):
try:
pipeline = wl.pipelines_by_name(name)[0]
except EntityNotFoundError:
pipeline = wl.build_pipeline(name)
return pipeline
import string
import random
# make a random 4 character suffix to prevent overwriting other user's workspaces
suffix= ''.join(random.choice(string.ascii_lowercase) for i in range(4))
suffix=''
workspace_name = f'keras-sequential-single-io{suffix}'
pipeline_name = f'keras-sequential-single-io'
model_name = 'keras-sequential-single-io'
model_file_name = 'models/model-auto-conversion_keras_single_io_keras_sequential_model.h5'
Create Workspace and Pipeline
We will now create the Wallaroo workspace to store our model and set it as the current workspace. Future commands will default to this workspace for pipeline creation, model uploads, etc. We’ll create our Wallaroo pipeline to deploy our model.
workspace = get_workspace(workspace_name)
wl.set_current_workspace(workspace)

pipeline = get_pipeline(pipeline_name)
Configure Data Schemas
The following parameters are required for TensorFlow keras models. Note that while some fields are considered as optional for the upload_model method, they are required for proper uploading of a TensorFlow Keras model to Wallaroo.
| Parameter | Type | Description |
|---|---|---|
name | string (Required) | The name of the model. Model names are unique per workspace. Models that are uploaded with the same name are assigned as a new version of the model. |
path | string (Required) | The path to the model file being uploaded. |
framework | string (Upload Method Optional, TensorFlow keras model Required) | Set as the Framework.KERAS. |
input_schema | pyarrow.lib.Schema (Upload Method Optional, TensorFlow Keras model Required) | The input schema in Apache Arrow schema format. |
output_schema | pyarrow.lib.Schema (Upload Method Optional, TensorFlow Keras model Required) | The output schema in Apache Arrow schema format. |
convert_wait | bool (Upload Method Optional, TensorFlow model Optional) (Default: True) |
|
Once the upload process starts, the model is containerized by the Wallaroo instance. This process may take up to 10 minutes.
input_schema = pa.schema([
pa.field('input', pa.list_(pa.float64(), list_size=10))
])
output_schema = pa.schema([
pa.field('output', pa.list_(pa.float64(), list_size=32))
])
Upload Model
The model will be uploaded with the framework set as Framework.KERAS.
framework=Framework.KERAS
model = wl.upload_model(model_name,
model_file_name,
framework=framework,
input_schema=input_schema,
output_schema=output_schema)
model
Waiting for model loading - this will take up to 10.0min.
Model is pending loading to a native runtime.
Model is pending loading to a container runtime..
Model is attempting loading to a container runtime.....................successful
Ready
| Name | keras-sequential-single-io |
| Version | 3aa90e63-f61b-4418-a70a-1631edfcb7e6 |
| File Name | model-auto-conversion_keras_single_io_keras_sequential_model.h5 |
| SHA | f7e49538e38bebe066ce8df97bac8be239ae8c7d2733e500c8cd633706ae95a8 |
| Status | ready |
| Image Path | proxy.replicated.com/proxy/wallaroo/ghcr.io/wallaroolabs/mlflow-deploy:v2023.4.0-main-4005 |
| Architecture | None |
| Updated At | 2023-20-Oct 17:52:05 |
model.config().runtime()
'flight'
Deploy Pipeline
The model is uploaded and ready for use. We’ll add it as a step in our pipeline, then deploy the pipeline. For this example we’re allocated 0.25 cpu and 4 Gi RAM to the pipeline through the pipeline’s deployment configuration.
deployment_config = DeploymentConfigBuilder() \
    .cpus(0.25).memory('1Gi') \
    .build()
# clear the pipeline if used in a previous tutorial
pipeline.undeploy()
pipeline.clear()
pipeline.add_model_step(model)
pipeline.deploy(deployment_config=deployment_config)
pipeline.status()
Run Inference
A sample inference will be run. First the pandas DataFrame used for the inference is created, then the inference run through the pipeline’s infer method.
input_data = np.random.rand(10, 10)
mock_dataframe = pd.DataFrame({
"input": input_data.tolist()
})
mock_dataframe
| input | |
|---|---|
| 0 | [0.1991693928323468, 0.7669068394222905, 0.310... |
| 1 | [0.5845813884987883, 0.9974851461171536, 0.641... |
| 2 | [0.932340919861926, 0.5378812209722794, 0.1672... |
| 3 | [0.40557019984163867, 0.49709830678629907, 0.6... |
| 4 | [0.044116334060004925, 0.8634686667900255, 0.2... |
| 5 | [0.9516672781081118, 0.5804880585685775, 0.858... |
| 6 | [0.6956141885467453, 0.7382529966340766, 0.392... |
| 7 | [0.21926011010552227, 0.6843926552276196, 0.78... |
| 8 | [0.9941171972816318, 0.45451319048527616, 0.95... |
| 9 | [0.3712231387032263, 0.08633906733980612, 0.87... |
pipeline.infer(mock_dataframe)
| time | in.input | out.output | check_failures | |
|---|---|---|---|---|
| 0 | 2023-10-20 17:58:27.143 | [0.1991693928, 0.7669068394, 0.3105885385, 0.2... | [0.028634641, 0.023895813, 0.040356454, 0.0244... | 0 |
| 1 | 2023-10-20 17:58:27.143 | [0.5845813885, 0.9974851461, 0.6415301842, 0.8... | [0.039276116, 0.01871082, 0.047833905, 0.01654... | 0 |
| 2 | 2023-10-20 17:58:27.143 | [0.9323409199, 0.537881221, 0.1672841103, 0.79... | [0.016344877, 0.039013684, 0.03176823, 0.03096... | 0 |
| 3 | 2023-10-20 17:58:27.143 | [0.4055701998, 0.4970983068, 0.6517088712, 0.2... | [0.03115139, 0.019364284, 0.03944681, 0.024314... | 0 |
| 4 | 2023-10-20 17:58:27.143 | [0.0441163341, 0.8634686668, 0.212879749, 0.62... | [0.024984468, 0.031172493, 0.06482109, 0.02364... | 0 |
| 5 | 2023-10-20 17:58:27.143 | [0.9516672781, 0.5804880586, 0.8585948355, 0.8... | [0.03174607, 0.024760708, 0.051566537, 0.02118... | 0 |
| 6 | 2023-10-20 17:58:27.143 | [0.6956141885, 0.7382529966, 0.3924137787, 0.9... | [0.031668007, 0.025940748, 0.06299812, 0.02237... | 0 |
| 7 | 2023-10-20 17:58:27.143 | [0.2192601101, 0.6843926552, 0.78983548, 0.939... | [0.03280156, 0.025590684, 0.0276087, 0.0241528... | 0 |
| 8 | 2023-10-20 17:58:27.143 | [0.9941171973, 0.4545131905, 0.95580094, 0.179... | [0.024180355, 0.02735067, 0.051267277, 0.03041... | 0 |
| 9 | 2023-10-20 17:58:27.143 | [0.3712231387, 0.0863390673, 0.8778721234, 0.0... | [0.02604158, 0.02733598, 0.04093318, 0.0291493... | 0 |
Undeploy Pipelines
With the tutorial complete, the pipeline is undeployed to return the resources back to the cluster.
pipeline.undeploy()
Waiting for undeployment - this will take up to 45s .............
9 - Wallaroo SDK Upload Tutorials: XGBoost
How to upload different XGBoost models to Wallaroo.
The following tutorials cover how to upload sample XGBoost models.
| Parameter | Description |
|---|---|
| Web Site | https://xgboost.ai/ |
| Supported Libraries |
|
| Framework | Framework.XGBOOST aka xgboost |
| Supported File Types | pickle (XGB files are not supported.) |
| Runtime | onnx / flight |
During the model upload process, the Wallaroo instance will attempt to convert the model to a Native Wallaroo Runtime. If unsuccessful based , it will create a Wallaroo Containerized Runtime for the model. See the model deployment section for details on how to configure pipeline resources based on the model’s runtime.
XGBoost Schema Inputs
XGBoost schema follows a different format than other models. To prevent inputs from being out of order, the inputs should be submitted in a single row in the order the model is trained to accept, with all of the data types being the same. If a model is originally trained to accept inputs of different data types, it will need to be retrained to only accept one data type for each column - typically pa.float64() is a good choice.
For example, the following DataFrame has 4 columns, each column a float.
| sepal length (cm) | sepal width (cm) | petal length (cm) | petal width (cm) | |
|---|---|---|---|---|
| 0 | 5.1 | 3.5 | 1.4 | 0.2 |
| 1 | 4.9 | 3.0 | 1.4 | 0.2 |
For submission to an XGBoost model, the data input schema will be a single array with 4 float values.
input_schema = pa.schema([
pa.field('inputs', pa.list_(pa.float64(), list_size=4))
])
When submitting as an inference, the DataFrame is converted to rows with the column data expressed as a single array. The data must be in the same order as the model expects, which is why the data is submitted as a single array rather than JSON labeled columns: this insures that the data is submitted in the exact order as the model is trained to accept.
Original DataFrame:
| sepal length (cm) | sepal width (cm) | petal length (cm) | petal width (cm) | |
|---|---|---|---|---|
| 0 | 5.1 | 3.5 | 1.4 | 0.2 |
| 1 | 4.9 | 3.0 | 1.4 | 0.2 |
Converted DataFrame:
| inputs | |
|---|---|
| 0 | [5.1, 3.5, 1.4, 0.2] |
| 1 | [4.9, 3.0, 1.4, 0.2] |
XGBoost Schema Outputs
Outputs for XGBoost are labeled based on the trained model outputs. For this example, the output is simply a single output listed as output. In the Wallaroo inference result, it is grouped with the metadata out as out.output.
output_schema = pa.schema([
pa.field('output', pa.int32())
])
pipeline.infer(dataframe)
| time | in.inputs | out.output | check_failures | |
|---|---|---|---|---|
| 0 | 2023-07-05 15:11:29.776 | [5.1, 3.5, 1.4, 0.2] | 0 | 0 |
| 1 | 2023-07-05 15:11:29.776 | [4.9, 3.0, 1.4, 0.2] | 0 | 0 |
9.1 - Wallaroo SDK Upload Tutorial: RF Regressor Tutorial
How to upload a RF Regressor Tutorial to Wallaroo
This tutorial can be downloaded as part of the Wallaroo Tutorials repository.
Wallaroo Model Upload via the Wallaroo SDK: XGBoost RF Regressor
The following tutorial demonstrates how to upload a XGBoost RF Regressor model to a Wallaroo instance.
Tutorial Goals
Demonstrate the following:
- Upload a XGBoost RF Regressor model to a Wallaroo instance.
- Create a pipeline and add the model as a pipeline step.
- Perform a sample inference.
Prerequisites
- A Wallaroo version 2023.2.1 or above instance.
References
- Wallaroo MLOps API Essentials Guide: Model Upload and Registrations
- Wallaroo API Connection Guide
- DNS Integration Guide
Tutorial Steps
Import Libraries
The first step is to import the libraries we’ll be using. These are included by default in the Wallaroo instance’s JupyterHub service.
import json
import os
import pickle
import wallaroo
from wallaroo.pipeline import Pipeline
from wallaroo.deployment_config import DeploymentConfigBuilder
from wallaroo.object import EntityNotFoundError
from wallaroo.framework import Framework
import os
os.environ["MODELS_ENABLED"] = "true"
import pyarrow as pa
import numpy as np
import pandas as pd
Open a Connection to Wallaroo
The next step is connect to Wallaroo through the Wallaroo client. The Python library is included in the Wallaroo install and available through the Jupyter Hub interface provided with your Wallaroo environment.
This is accomplished using the wallaroo.Client() command, which provides a URL to grant the SDK permission to your specific Wallaroo environment. When displayed, enter the URL into a browser and confirm permissions. Store the connection into a variable that can be referenced later.
If logging into the Wallaroo instance through the internal JupyterHub service, use wl = wallaroo.Client(). If logging in externally, update the wallarooPrefix and wallarooSuffix variables with the proper DNS information. For more information on Wallaroo DNS settings, see the Wallaroo DNS Integration Guide.
wl = wallaroo.Client()
Set Variables and Helper Functions
We’ll set the name of our workspace, pipeline, models and files. Workspace names must be unique across the Wallaroo workspace. For this, we’ll add in a randomly generated 4 characters to the workspace name to prevent collisions with other users’ workspaces. If running this tutorial, we recommend hard coding the workspace name so it will function in the same workspace each time it’s run.
We’ll set up some helper functions that will either use existing workspaces and pipelines, or create them if they do not already exist.
def get_workspace(name):
workspace = None
for ws in wl.list_workspaces():
if ws.name() == name:
workspace= ws
if(workspace == None):
workspace = wl.create_workspace(name)
return workspace
def get_pipeline(name):
try:
pipeline = wl.pipelines_by_name(name)[0]
except EntityNotFoundError:
pipeline = wl.build_pipeline(name)
return pipeline
import string
import random
# make a random 4 character suffix to prevent overwriting other user's workspaces
suffix= ''.join(random.choice(string.ascii_lowercase) for i in range(4))
suffix=''
workspace_name = f'xgboost-rf-regressor{suffix}'
pipeline_name = f'xgboost-rf-regressor'
model_name = 'xgboost-rf-regressor'
model_file_name = 'models/model-auto-conversion_xgboost_xgb_rf_regressor_diabetes.pkl'
Create Workspace and Pipeline
We will now create the Wallaroo workspace to store our model and set it as the current workspace. Future commands will default to this workspace for pipeline creation, model uploads, etc. We’ll create our Wallaroo pipeline to deploy our model.
workspace = get_workspace(workspace_name)
wl.set_current_workspace(workspace)
pipeline = get_pipeline(pipeline_name)
Configure Data Schemas
XGBoost models are uploaded to Wallaroo through the Wallaroo Client upload_model method.
Upload XGBoost Model Parameters
The following parameters are required for XGBoost models. Note that while some fields are considered as optional for the upload_model method, they are required for proper uploading of a XGBoost model to Wallaroo.
| Parameter | Type | Description |
|---|---|---|
name | string (Required) | The name of the model. Model names are unique per workspace. Models that are uploaded with the same name are assigned as a new version of the model. |
path | string (Required) | The path to the model file being uploaded. |
framework | string (Upload Method Optional, SKLearn model Required) | Set as the Framework.XGBOOST. |
input_schema | pyarrow.lib.Schema (Upload Method Optional, SKLearn model Required) | The input schema in Apache Arrow schema format. |
output_schema | pyarrow.lib.Schema (Upload Method Optional, SKLearn model Required) | The output schema in Apache Arrow schema format. |
convert_wait | bool (Upload Method Optional, SKLearn model Optional) (Default: True) |
|
Once the upload process starts, the model is containerized by the Wallaroo instance. This process may take up to 10 minutes.
XGBoost Schema Inputs
XGBoost schema follows a different format than other models. To prevent inputs from being out of order, the inputs should be submitted in a single row in the order the model is trained to accept, with all of the data types being the same. If a model is originally trained to accept inputs of different data types, it will need to be retrained to only accept one data type for each column - typically pa.float64() is a good choice.
For example, the following DataFrame has 4 columns, each column a float.
| sepal length (cm) | sepal width (cm) | petal length (cm) | petal width (cm) | |
|---|---|---|---|---|
| 0 | 5.1 | 3.5 | 1.4 | 0.2 |
| 1 | 4.9 | 3.0 | 1.4 | 0.2 |
For submission to an XGBoost model, the data input schema will be a single array with 4 float values.
input_schema = pa.schema([
pa.field('inputs', pa.list_(pa.float64(), list_size=4))
])
When submitting as an inference, the DataFrame is converted to rows with the column data expressed as a single array. The data must be in the same order as the model expects, which is why the data is submitted as a single array rather than JSON labeled columns: this insures that the data is submitted in the exact order as the model is trained to accept.
Original DataFrame:
| sepal length (cm) | sepal width (cm) | petal length (cm) | petal width (cm) | |
|---|---|---|---|---|
| 0 | 5.1 | 3.5 | 1.4 | 0.2 |
| 1 | 4.9 | 3.0 | 1.4 | 0.2 |
Converted DataFrame:
| inputs | |
|---|---|
| 0 | [5.1, 3.5, 1.4, 0.2] |
| 1 | [4.9, 3.0, 1.4, 0.2] |
XGBoost Schema Outputs
Outputs for XGBoost are labeled based on the trained model outputs. For this example, the output is simply a single output listed as output. In the Wallaroo inference result, it is grouped with the metadata out as out.output.
output_schema = pa.schema([
pa.field('output', pa.int32())
])
pipeline.infer(dataframe)
| time | in.inputs | out.output | check_failures | |
|---|---|---|---|---|
| 0 | 2023-07-05 15:11:29.776 | [5.1, 3.5, 1.4, 0.2] | 0 | 0 |
| 1 | 2023-07-05 15:11:29.776 | [4.9, 3.0, 1.4, 0.2] | 0 | 0 |
input_schema = pa.schema([
pa.field('inputs', pa.list_(pa.float64(), list_size=10))
])
output_schema = pa.schema([
pa.field('output', pa.float64())
])
Upload Model
The model will be uploaded with the framework set as Framework.XGBOOST.
model = wl.upload_model(model_name,
model_file_name,
framework=Framework.XGBOOST,
input_schema=input_schema,
output_schema=output_schema)
model
model.config().runtime()
'flight'
Deploy Pipeline
The model is uploaded and ready for use. We’ll add it as a step in our pipeline, then deploy the pipeline. For this example we’re allocated 0.25 cpu and 4 Gi RAM to the pipeline through the pipeline’s deployment configuration.
deployment_config = DeploymentConfigBuilder() \
.cpus(0.25).memory('1Gi') \
.build()
# clear the pipeline if it was used before
pipeline.undeploy()
pipeline.clear()

pipeline.add_model_step(model)

pipeline.deploy(deployment_config=deployment_config)
Run Inference
A sample inference will be run. First the pandas DataFrame used for the inference is created, then the inference run through the pipeline’s infer method.
data = pd.read_json('./data/test_xgb_rf-regressor.json')
display(data)
dataframe = pd.DataFrame({"inputs": data[:2].values.tolist()})
display(dataframe)
pipeline.infer(dataframe)
| age | sex | bmi | bp | s1 | s2 | s3 | s4 | s5 | s6 | |
|---|---|---|---|---|---|---|---|---|---|---|
| 0 | 0.038076 | 0.050680 | 0.061696 | 0.021872 | -0.044223 | -0.034821 | -0.043401 | -0.002592 | 0.019907 | -0.017646 |
| 1 | -0.001882 | -0.044642 | -0.051474 | -0.026328 | -0.008449 | -0.019163 | 0.074412 | -0.039493 | -0.068332 | -0.092204 |
| inputs | |
|---|---|
| 0 | [0.0380759064, 0.0506801187, 0.0616962065, 0.0... |
| 1 | [-0.0018820165, -0.0446416365, -0.051474061200... |
| time | in.inputs | out.output | check_failures | |
|---|---|---|---|---|
| 0 | 2023-10-20 21:25:41.653 | [0.0380759064, 0.0506801187, 0.0616962065, 0.0... | 166.61877 | 0 |
| 1 | 2023-10-20 21:25:41.653 | [-0.0018820165, -0.0446416365, -0.0514740612, ... | 76.18958 | 0 |
Undeploy Pipelines
With the tutorial complete, the pipeline is undeployed to return the resources back to the cluster.
pipeline.undeploy()
Waiting for undeployment - this will take up to 45s ......................................... ok
| name | xgboost-rf-regressor |
|---|---|
| created | 2023-10-20 21:18:03.238552+00:00 |
| last_updated | 2023-10-20 21:22:34.399963+00:00 |
| deployed | False |
| tags | |
| versions | d7d97f0e-8078-401f-aec7-bb33fae69c83, 165e0dd6-5ca4-4bc7-a6ae-8941ce05321c |
| steps | xgboost-rf-regressor |
| published | False |
9.2 - Wallaroo SDK Upload Tutorial: XGBoost Classification
How to upload a XGBoost Classification to Wallaroo
This tutorial can be downloaded as part of the Wallaroo Tutorials repository.
Wallaroo Model Upload via the Wallaroo SDK: XGBoost Classification
The following tutorial demonstrates how to upload a XGBoost Classification model to a Wallaroo instance.
Tutorial Goals
Demonstrate the following:
- Upload a XGBoost Classification model to a Wallaroo instance.
- Create a pipeline and add the model as a pipeline step.
- Perform a sample inference.
Prerequisites
- A Wallaroo version 2023.2.1 or above instance.
References
- Wallaroo MLOps API Essentials Guide: Model Upload and Registrations
- Wallaroo API Connection Guide
- DNS Integration Guide
Tutorial Steps
Import Libraries
The first step is to import the libraries we’ll be using. These are included by default in the Wallaroo instance’s JupyterHub service.
import json
import os
import pickle
import wallaroo
from wallaroo.pipeline import Pipeline
from wallaroo.deployment_config import DeploymentConfigBuilder
from wallaroo.object import EntityNotFoundError
from wallaroo.framework import Framework
import os
os.environ["MODELS_ENABLED"] = "true"
import pyarrow as pa
import numpy as np
import pandas as pd
Open a Connection to Wallaroo
The next step is connect to Wallaroo through the Wallaroo client. The Python library is included in the Wallaroo install and available through the Jupyter Hub interface provided with your Wallaroo environment.
This is accomplished using the wallaroo.Client() command, which provides a URL to grant the SDK permission to your specific Wallaroo environment. When displayed, enter the URL into a browser and confirm permissions. Store the connection into a variable that can be referenced later.
If logging into the Wallaroo instance through the internal JupyterHub service, use wl = wallaroo.Client(). If logging in externally, update the wallarooPrefix and wallarooSuffix variables with the proper DNS information. For more information on Wallaroo DNS settings, see the Wallaroo DNS Integration Guide.
wl = wallaroo.Client()
Set Variables and Helper Functions
We’ll set the name of our workspace, pipeline, models and files. Workspace names must be unique across the Wallaroo workspace. For this, we’ll add in a randomly generated 4 characters to the workspace name to prevent collisions with other users’ workspaces. If running this tutorial, we recommend hard coding the workspace name so it will function in the same workspace each time it’s run.
We’ll set up some helper functions that will either use existing workspaces and pipelines, or create them if they do not already exist.
def get_workspace(name):
workspace = None
for ws in wl.list_workspaces():
if ws.name() == name:
workspace= ws
if(workspace == None):
workspace = wl.create_workspace(name)
return workspace
def get_pipeline(name):
try:
pipeline = wl.pipelines_by_name(name)[0]
except EntityNotFoundError:
pipeline = wl.build_pipeline(name)
return pipeline
import string
import random
# make a random 4 character suffix to prevent overwriting other user's workspaces
suffix= ''.join(random.choice(string.ascii_lowercase) for i in range(4))
suffix=''
workspace_name = f'xgboost-classification{suffix}'
pipeline_name = f'xgboost-classification'
model_name = 'xgboost-classification'
model_file_name = './models/model-auto-conversion_xgboost_xgb_classification_iris.pkl'
Create Workspace and Pipeline
We will now create the Wallaroo workspace to store our model and set it as the current workspace. Future commands will default to this workspace for pipeline creation, model uploads, etc. We’ll create our Wallaroo pipeline to deploy our model.
workspace = get_workspace(workspace_name)
wl.set_current_workspace(workspace)

pipeline = get_pipeline(pipeline_name)
Configure Data Schemas
XGBoost models are uploaded to Wallaroo through the Wallaroo Client upload_model method.
Upload XGBoost Model Parameters
The following parameters are required for XGBoost models. Note that while some fields are considered as optional for the upload_model method, they are required for proper uploading of a XGBoost model to Wallaroo.
| Parameter | Type | Description |
|---|---|---|
name | string (Required) | The name of the model. Model names are unique per workspace. Models that are uploaded with the same name are assigned as a new version of the model. |
path | string (Required) | The path to the model file being uploaded. |
framework | string (Upload Method Optional, SKLearn model Required) | Set as the Framework.XGBOOST. |
input_schema | pyarrow.lib.Schema (Upload Method Optional, SKLearn model Required) | The input schema in Apache Arrow schema format. |
output_schema | pyarrow.lib.Schema (Upload Method Optional, SKLearn model Required) | The output schema in Apache Arrow schema format. |
convert_wait | bool (Upload Method Optional, SKLearn model Optional) (Default: True) |
|
Once the upload process starts, the model is containerized by the Wallaroo instance. This process may take up to 10 minutes.
XGBoost Schema Inputs
XGBoost schema follows a different format than other models. To prevent inputs from being out of order, the inputs should be submitted in a single row in the order the model is trained to accept, with all of the data types being the same. If a model is originally trained to accept inputs of different data types, it will need to be retrained to only accept one data type for each column - typically pa.float64() is a good choice.
For example, the following DataFrame has 4 columns, each column a float.
| sepal length (cm) | sepal width (cm) | petal length (cm) | petal width (cm) | |
|---|---|---|---|---|
| 0 | 5.1 | 3.5 | 1.4 | 0.2 |
| 1 | 4.9 | 3.0 | 1.4 | 0.2 |
For submission to an XGBoost model, the data input schema will be a single array with 4 float values.
input_schema = pa.schema([
pa.field('inputs', pa.list_(pa.float64(), list_size=4))
])
When submitting as an inference, the DataFrame is converted to rows with the column data expressed as a single array. The data must be in the same order as the model expects, which is why the data is submitted as a single array rather than JSON labeled columns: this insures that the data is submitted in the exact order as the model is trained to accept.
Original DataFrame:
| sepal length (cm) | sepal width (cm) | petal length (cm) | petal width (cm) | |
|---|---|---|---|---|
| 0 | 5.1 | 3.5 | 1.4 | 0.2 |
| 1 | 4.9 | 3.0 | 1.4 | 0.2 |
Converted DataFrame:
| inputs | |
|---|---|
| 0 | [5.1, 3.5, 1.4, 0.2] |
| 1 | [4.9, 3.0, 1.4, 0.2] |
XGBoost Schema Outputs
Outputs for XGBoost are labeled based on the trained model outputs. For this example, the output is simply a single output listed as output. In the Wallaroo inference result, it is grouped with the metadata out as out.output.
output_schema = pa.schema([
pa.field('output', pa.int32())
])
pipeline.infer(dataframe)
| time | in.inputs | out.output | check_failures | |
|---|---|---|---|---|
| 0 | 2023-07-05 15:11:29.776 | [5.1, 3.5, 1.4, 0.2] | 0 | 0 |
| 1 | 2023-07-05 15:11:29.776 | [4.9, 3.0, 1.4, 0.2] | 0 | 0 |
input_schema = pa.schema([
pa.field('inputs', pa.list_(pa.float64(), list_size=4))
])
output_schema = pa.schema([
pa.field('output', pa.float64())
])
Upload Model
The model will be uploaded with the framework set as Framework.XGBOOST.
model = wl.upload_model(model_name,
model_file_name,
framework=Framework.XGBOOST,
input_schema=input_schema,
output_schema=output_schema)
model
Waiting for model loading - this will take up to 10.0min.
Model is pending loading to a native runtime..
Model is attempting loading to a native runtime..incompatible
Model is pending loading to a container runtime.
Model is attempting loading to a container runtime............successful
Ready
| Name | xgboost-classification |
| Version | 7d116e96-1b77-44b4-b689-3355263ac042 |
| File Name | model-auto-conversion_xgboost_xgb_classification_iris.pkl |
| SHA | 4a1844c460e8c8503207305fb807e3a28e788062588925021807c54ee80cc7f9 |
| Status | ready |
| Image Path | proxy.replicated.com/proxy/wallaroo/ghcr.io/wallaroolabs/mlflow-deploy:v2023.4.0-main-4005 |
| Architecture | None |
| Updated At | 2023-20-Oct 21:23:59 |
model.config().runtime()
'flight'
Deploy Pipeline
The model is uploaded and ready for use. We’ll add it as a step in our pipeline, then deploy the pipeline. For this example we’re allocated 0.25 cpu and 4 Gi RAM to the pipeline through the pipeline’s deployment configuration.
deployment_config = DeploymentConfigBuilder() \
    .cpus(0.25).memory('1Gi') \
    .build()
# clear the pipeline if it was used before
pipeline.undeploy()
pipeline.clear()
pipeline.add_model_step(model)
pipeline.deploy(deployment_config=deployment_config)
Run Inference
A sample inference will be run. First the pandas DataFrame used for the inference is created, then the inference run through the pipeline’s infer method.
data = pd.read_json('data/test-xgboost-classification-data.json')
display(data)
dataframe = pd.DataFrame({"inputs": data[:2].values.tolist()})
display(dataframe)
results = pipeline.infer(dataframe)
display(results)
| sepal length (cm) | sepal width (cm) | petal length (cm) | petal width (cm) | |
|---|---|---|---|---|
| 0 | 5.1 | 3.5 | 1.4 | 0.2 |
| 1 | 4.9 | 3.0 | 1.4 | 0.2 |
| inputs | |
|---|---|
| 0 | [5.1, 3.5, 1.4, 0.2] |
| 1 | [4.9, 3.0, 1.4, 0.2] |
| time | in.inputs | out.output | check_failures | |
|---|---|---|---|---|
| 0 | 2023-10-20 21:25:56.406 | [5.1, 3.5, 1.4, 0.2] | 0 | 0 |
| 1 | 2023-10-20 21:25:56.406 | [4.9, 3.0, 1.4, 0.2] | 0 | 0 |
Undeploy Pipelines
With the tutorial complete, the pipeline is undeployed to return the resources back to the cluster.
pipeline.undeploy()
Waiting for undeployment - this will take up to 45s ..................................... ok
| name | xgboost-classification |
|---|---|
| created | 2023-10-20 21:17:45.439768+00:00 |
| last_updated | 2023-10-20 21:25:04.938567+00:00 |
| deployed | False |
| tags | |
| versions | c3659936-2f53-46f3-85b7-22563d396e95, 00973faf-6767-4584-9dbf-b0efbb55ae52 |
| steps | xgboost-classification |
| published | False |
9.3 - Wallaroo SDK Upload Tutorial: XGBoost Regressor
How to upload a XGBoost Regressor to Wallaroo
This tutorial can be downloaded as part of the Wallaroo Tutorials repository.
Wallaroo Model Upload via the Wallaroo SDK: XGBoost Regressor
The following tutorial demonstrates how to upload a XGBoost Regressor model to a Wallaroo instance.
Tutorial Goals
Demonstrate the following:
- Upload a XGBoost Regressor model to a Wallaroo instance.
- Create a pipeline and add the model as a pipeline step.
- Perform a sample inference.
Prerequisites
- A Wallaroo version 2023.2.1 or above instance.
References
- Wallaroo MLOps API Essentials Guide: Model Upload and Registrations
- Wallaroo API Connection Guide
- DNS Integration Guide
Tutorial Steps
Import Libraries
The first step is to import the libraries we’ll be using. These are included by default in the Wallaroo instance’s JupyterHub service.
import json
import os
import pickle
import wallaroo
from wallaroo.pipeline import Pipeline
from wallaroo.deployment_config import DeploymentConfigBuilder
from wallaroo.object import EntityNotFoundError
from wallaroo.framework import Framework
import os
os.environ["MODELS_ENABLED"] = "true"
import pyarrow as pa
import numpy as np
import pandas as pd
Open a Connection to Wallaroo
The next step is connect to Wallaroo through the Wallaroo client. The Python library is included in the Wallaroo install and available through the Jupyter Hub interface provided with your Wallaroo environment.
This is accomplished using the wallaroo.Client() command, which provides a URL to grant the SDK permission to your specific Wallaroo environment. When displayed, enter the URL into a browser and confirm permissions. Store the connection into a variable that can be referenced later.
If logging into the Wallaroo instance through the internal JupyterHub service, use wl = wallaroo.Client(). If logging in externally, update the wallarooPrefix and wallarooSuffix variables with the proper DNS information. For more information on Wallaroo DNS settings, see the Wallaroo DNS Integration Guide.
wl = wallaroo.Client()
Set Variables and Helper Functions
We’ll set the name of our workspace, pipeline, models and files. Workspace names must be unique across the Wallaroo workspace. For this, we’ll add in a randomly generated 4 characters to the workspace name to prevent collisions with other users’ workspaces. If running this tutorial, we recommend hard coding the workspace name so it will function in the same workspace each time it’s run.
We’ll set up some helper functions that will either use existing workspaces and pipelines, or create them if they do not already exist.
def get_workspace(name):
workspace = None
for ws in wl.list_workspaces():
if ws.name() == name:
workspace= ws
if(workspace == None):
workspace = wl.create_workspace(name)
return workspace
def get_pipeline(name):
try:
pipeline = wl.pipelines_by_name(name)[0]
except EntityNotFoundError:
pipeline = wl.build_pipeline(name)
return pipeline
import string
import random
# make a random 4 character suffix to prevent overwriting other user's workspaces
suffix= ''.join(random.choice(string.ascii_lowercase) for i in range(4))
suffix=''
workspace_name = f'xgboost-regressor{suffix}'
pipeline_name = f'xgboost-regressor'
model_name = 'xgboost-regressor'
model_file_name = 'models/model-auto-conversion_xgboost_xgb_regressor_diabetes.pkl'
Create Workspace and Pipeline
We will now create the Wallaroo workspace to store our model and set it as the current workspace. Future commands will default to this workspace for pipeline creation, model uploads, etc. We’ll create our Wallaroo pipeline to deploy our model.
workspace = get_workspace(workspace_name)
wl.set_current_workspace(workspace)
pipeline = get_pipeline(pipeline_name)
Configure Data Schemas
XGBoost models are uploaded to Wallaroo through the Wallaroo Client upload_model method.
Upload XGBoost Model Parameters
The following parameters are required for XGBoost models. Note that while some fields are considered as optional for the upload_model method, they are required for proper uploading of a XGBoost model to Wallaroo.
| Parameter | Type | Description |
|---|---|---|
name | string (Required) | The name of the model. Model names are unique per workspace. Models that are uploaded with the same name are assigned as a new version of the model. |
path | string (Required) | The path to the model file being uploaded. |
framework | string (Upload Method Optional, SKLearn model Required) | Set as the Framework.XGBOOST. |
input_schema | pyarrow.lib.Schema (Upload Method Optional, SKLearn model Required) | The input schema in Apache Arrow schema format. |
output_schema | pyarrow.lib.Schema (Upload Method Optional, SKLearn model Required) | The output schema in Apache Arrow schema format. |
convert_wait | bool (Upload Method Optional, SKLearn model Optional) (Default: True) |
|
Once the upload process starts, the model is containerized by the Wallaroo instance. This process may take up to 10 minutes.
XGBoost Schema Inputs
XGBoost schema follows a different format than other models. To prevent inputs from being out of order, the inputs should be submitted in a single row in the order the model is trained to accept, with all of the data types being the same. If a model is originally trained to accept inputs of different data types, it will need to be retrained to only accept one data type for each column - typically pa.float64() is a good choice.
For example, the following DataFrame has 4 columns, each column a float.
| sepal length (cm) | sepal width (cm) | petal length (cm) | petal width (cm) | |
|---|---|---|---|---|
| 0 | 5.1 | 3.5 | 1.4 | 0.2 |
| 1 | 4.9 | 3.0 | 1.4 | 0.2 |
For submission to an XGBoost model, the data input schema will be a single array with 4 float values.
input_schema = pa.schema([
    pa.field('inputs', pa.list_(pa.float64(), list_size=4))
])
When submitting as an inference, the DataFrame is converted to rows with the column data expressed as a single array. The data must be in the same order as the model expects, which is why the data is submitted as a single array rather than JSON labeled columns: this insures that the data is submitted in the exact order as the model is trained to accept.
Original DataFrame:
| sepal length (cm) | sepal width (cm) | petal length (cm) | petal width (cm) | |
|---|---|---|---|---|
| 0 | 5.1 | 3.5 | 1.4 | 0.2 |
| 1 | 4.9 | 3.0 | 1.4 | 0.2 |
Converted DataFrame:
| inputs | |
|---|---|
| 0 | [5.1, 3.5, 1.4, 0.2] |
| 1 | [4.9, 3.0, 1.4, 0.2] |
XGBoost Schema Outputs
Outputs for XGBoost are labeled based on the trained model outputs. For this example, the output is simply a single output listed as output. In the Wallaroo inference result, it is grouped with the metadata out as out.output.
output_schema = pa.schema([
pa.field('output', pa.int32())
])
pipeline.infer(dataframe)
| time | in.inputs | out.output | check_failures | |
|---|---|---|---|---|
| 0 | 2023-07-05 15:11:29.776 | [5.1, 3.5, 1.4, 0.2] | 0 | 0 |
| 1 | 2023-07-05 15:11:29.776 | [4.9, 3.0, 1.4, 0.2] | 0 | 0 |
input_schema = pa.schema([
pa.field('inputs', pa.list_(pa.float64(), list_size=10))
])
output_schema = pa.schema([
pa.field('output', pa.float64())
])
Upload Model
The model will be uploaded with the framework set as Framework.XGBOOST.
model = wl.upload_model(model_name,
model_file_name,
framework=Framework.XGBOOST,
input_schema=input_schema,
output_schema=output_schema)
model
Waiting for model loading - this will take up to 10.0min.
Model is pending loading to a native runtime...........
Model is pending loading to a container runtime......
Model is attempting loading to a container runtime................successful
Ready
| Name | xgboost-regressor |
| Version | c7db517c-0e25-49ac-9189-da8dba06b929 |
| File Name | model-auto-conversion_xgboost_xgb_regressor_diabetes.pkl |
| SHA | 17e2e4e635b287f1234ed7c59a8447faebf4d69d7974749113233d0007b08e29 |
| Status | ready |
| Image Path | proxy.replicated.com/proxy/wallaroo/ghcr.io/wallaroolabs/mlflow-deploy:v2023.4.0-main-4005 |
| Architecture | None |
| Updated At | 2023-20-Oct 21:20:47 |
model.config().runtime()
'flight'
Deploy Pipeline
The model is uploaded and ready for use. We’ll add it as a step in our pipeline, then deploy the pipeline. For this example we’re allocated 0.25 cpu and 4 Gi RAM to the pipeline through the pipeline’s deployment configuration.
deployment_config = DeploymentConfigBuilder() \
.cpus(0.25).memory('1Gi') \
.build()
# clear the pipeline if it was used before
pipeline.undeploy()
pipeline.clear()
pipeline.add_model_step(model)
pipeline.deploy(deployment_config=deployment_config)
Run Inference
A sample inference will be run. First the pandas DataFrame used for the inference is created, then the inference run through the pipeline’s infer method.
data = pd.read_json('./data/test_xgb_regressor.json')
display(data)
dataframe = pd.DataFrame({"inputs": data[:2].values.tolist()})
display(dataframe)
results = pipeline.infer(dataframe)
display(results)
| age | sex | bmi | bp | s1 | s2 | s3 | s4 | s5 | s6 | |
|---|---|---|---|---|---|---|---|---|---|---|
| 0 | 0.038076 | 0.050680 | 0.061696 | 0.021872 | -0.044223 | -0.034821 | -0.043401 | -0.002592 | 0.019907 | -0.017646 |
| 1 | -0.001882 | -0.044642 | -0.051474 | -0.026328 | -0.008449 | -0.019163 | 0.074412 | -0.039493 | -0.068332 | -0.092204 |
| inputs | |
|---|---|
| 0 | [0.0380759064, 0.0506801187, 0.0616962065, 0.0... |
| 1 | [-0.0018820165, -0.0446416365, -0.051474061200... |
| time | in.inputs | out.output | check_failures | |
|---|---|---|---|---|
| 0 | 2023-10-20 21:21:57.555 | [0.0380759064, 0.0506801187, 0.0616962065, 0.0... | 151.00136 | 0 |
| 1 | 2023-10-20 21:21:57.555 | [-0.0018820165, -0.0446416365, -0.0514740612, ... | 74.99957 | 0 |
Undeploy Pipelines
With the tutorial complete, the pipeline is undeployed to return the resources back to the cluster.
pipeline.undeploy()
Waiting for undeployment - this will take up to 45s .................................... ok
| name | xgboost-regressor |
|---|---|
| created | 2023-10-20 21:17:53.229541+00:00 |
| last_updated | 2023-10-20 21:20:48.730760+00:00 |
| deployed | False |
| tags | |
| versions | 09ccbdb0-20a6-4952-9976-f6cbaeeaf12b, 3a7a1aa3-0c22-4839-a1a4-9739e3e187e3 |
| steps | xgboost-regressor |
| published | False |
9.4 - Wallaroo SDK Upload Tutorial: XGBoost RF Classification
How to upload a XGBoost RF Classification to Wallaroo
This tutorial can be downloaded as part of the Wallaroo Tutorials repository.
Wallaroo Model Upload via the Wallaroo SDK: XGBoost RF Classification
The following tutorial demonstrates how to upload a XGBoost RF Classification model to a Wallaroo instance.
Tutorial Goals
Demonstrate the following:
- Upload a XGBoost RF Classification model to a Wallaroo instance.
- Create a pipeline and add the model as a pipeline step.
- Perform a sample inference.
Prerequisites
- A Wallaroo version 2023.2.1 or above instance.
References
- Wallaroo MLOps API Essentials Guide: Model Upload and Registrations
- Wallaroo API Connection Guide
- DNS Integration Guide
Tutorial Steps
Import Libraries
The first step is to import the libraries we’ll be using. These are included by default in the Wallaroo instance’s JupyterHub service.
import json
import os
import pickle

import wallaroo
from wallaroo.pipeline import Pipeline
from wallaroo.deployment_config import DeploymentConfigBuilder
from wallaroo.object import EntityNotFoundError
from wallaroo.framework import Framework

import os
os.environ["MODELS_ENABLED"] = "true"

import pyarrow as pa
import numpy as np
import pandas as pd
Open a Connection to Wallaroo
The next step is connect to Wallaroo through the Wallaroo client. The Python library is included in the Wallaroo install and available through the Jupyter Hub interface provided with your Wallaroo environment.
This is accomplished using the wallaroo.Client() command, which provides a URL to grant the SDK permission to your specific Wallaroo environment. When displayed, enter the URL into a browser and confirm permissions. Store the connection into a variable that can be referenced later.
If logging into the Wallaroo instance through the internal JupyterHub service, use wl = wallaroo.Client(). If logging in externally, update the wallarooPrefix and wallarooSuffix variables with the proper DNS information. For more information on Wallaroo DNS settings, see the Wallaroo DNS Integration Guide.
wl = wallaroo.Client()
Set Variables and Helper Functions
We’ll set the name of our workspace, pipeline, models and files. Workspace names must be unique across the Wallaroo workspace. For this, we’ll add in a randomly generated 4 characters to the workspace name to prevent collisions with other users’ workspaces. If running this tutorial, we recommend hard coding the workspace name so it will function in the same workspace each time it’s run.
We’ll set up some helper functions that will either use existing workspaces and pipelines, or create them if they do not already exist.
def get_workspace(name):
workspace = None
for ws in wl.list_workspaces():
if ws.name() == name:
workspace= ws
if(workspace == None):
workspace = wl.create_workspace(name)
return workspace
def get_pipeline(name):
try:
pipeline = wl.pipelines_by_name(name)[0]
except EntityNotFoundError:
pipeline = wl.build_pipeline(name)
return pipeline
import string
import random
# make a random 4 character suffix to prevent overwriting other user's workspaces
suffix= ''.join(random.choice(string.ascii_lowercase) for i in range(4))
suffix=''
workspace_name = f'xgboost-rf-classification{suffix}'
pipeline_name = f'xgboost-rf-classification'
model_name = 'xgboost-rf-classification'
model_file_name = './models/model-auto-conversion_xgboost_xgb_rf_classification_iris.pkl'
Create Workspace and Pipeline
We will now create the Wallaroo workspace to store our model and set it as the current workspace. Future commands will default to this workspace for pipeline creation, model uploads, etc. We’ll create our Wallaroo pipeline to deploy our model.
workspace = get_workspace(workspace_name)
wl.set_current_workspace(workspace)

pipeline = get_pipeline(pipeline_name)
Configure Data Schemas
XGBoost models are uploaded to Wallaroo through the Wallaroo Client upload_model method.
Upload XGBoost Model Parameters
The following parameters are required for XGBoost models. Note that while some fields are considered as optional for the upload_model method, they are required for proper uploading of a XGBoost model to Wallaroo.
| Parameter | Type | Description |
|---|---|---|
name | string (Required) | The name of the model. Model names are unique per workspace. Models that are uploaded with the same name are assigned as a new version of the model. |
path | string (Required) | The path to the model file being uploaded. |
framework | string (Upload Method Optional, SKLearn model Required) | Set as the Framework.XGBOOST. |
input_schema | pyarrow.lib.Schema (Upload Method Optional, SKLearn model Required) | The input schema in Apache Arrow schema format. |
output_schema | pyarrow.lib.Schema (Upload Method Optional, SKLearn model Required) | The output schema in Apache Arrow schema format. |
convert_wait | bool (Upload Method Optional, SKLearn model Optional) (Default: True) |
|
Once the upload process starts, the model is containerized by the Wallaroo instance. This process may take up to 10 minutes.
XGBoost Schema Inputs
XGBoost schema follows a different format than other models. To prevent inputs from being out of order, the inputs should be submitted in a single row in the order the model is trained to accept, with all of the data types being the same. If a model is originally trained to accept inputs of different data types, it will need to be retrained to only accept one data type for each column - typically pa.float64() is a good choice.
For example, the following DataFrame has 4 columns, each column a float.
| sepal length (cm) | sepal width (cm) | petal length (cm) | petal width (cm) | |
|---|---|---|---|---|
| 0 | 5.1 | 3.5 | 1.4 | 0.2 |
| 1 | 4.9 | 3.0 | 1.4 | 0.2 |
For submission to an XGBoost model, the data input schema will be a single array with 4 float values.
input_schema = pa.schema([
pa.field('inputs', pa.list_(pa.float64(), list_size=4))
])
When submitting as an inference, the DataFrame is converted to rows with the column data expressed as a single array. The data must be in the same order as the model expects, which is why the data is submitted as a single array rather than JSON labeled columns: this insures that the data is submitted in the exact order as the model is trained to accept.
Original DataFrame:
| sepal length (cm) | sepal width (cm) | petal length (cm) | petal width (cm) | |
|---|---|---|---|---|
| 0 | 5.1 | 3.5 | 1.4 | 0.2 |
| 1 | 4.9 | 3.0 | 1.4 | 0.2 |
Converted DataFrame:
| inputs | |
|---|---|
| 0 | [5.1, 3.5, 1.4, 0.2] |
| 1 | [4.9, 3.0, 1.4, 0.2] |
XGBoost Schema Outputs
Outputs for XGBoost are labeled based on the trained model outputs. For this example, the output is simply a single output listed as output. In the Wallaroo inference result, it is grouped with the metadata out as out.output.
output_schema = pa.schema([
pa.field('output', pa.int32())
])
pipeline.infer(dataframe)
| time | in.inputs | out.output | check_failures | |
|---|---|---|---|---|
| 0 | 2023-07-05 15:11:29.776 | [5.1, 3.5, 1.4, 0.2] | 0 | 0 |
| 1 | 2023-07-05 15:11:29.776 | [4.9, 3.0, 1.4, 0.2] | 0 | 0 |
input_schema = pa.schema([
pa.field('inputs', pa.list_(pa.float64(), list_size=4))
])
output_schema = pa.schema([
pa.field('output', pa.float64())
])
Upload Model
The model will be uploaded with the framework set as Framework.XGBOOST.
model = wl.upload_model(model_name,
model_file_name,
framework=Framework.XGBOOST,
input_schema=input_schema,
output_schema=output_schema)
model
Waiting for model loading - this will take up to 10.0min.
Model is pending loading to a native runtime.............
Model is attempting loading to a native runtime..incompatible
Model is pending loading to a container runtime.Please log into the following URL in a web browser:
https://product-uat-ee.keycloak.wallarooexample.ai/auth/realms/master/device?user_code=CYBR-VWUQ
Login successful!
Ready
| Name | xgboost-rf-classification |
| Version | 4462b788-99b7-4a02-b346-a4ab47293791 |
| File Name | model-auto-conversion_xgboost_xgb_rf_classification_iris.pkl |
| SHA | 2aeb56c084a279770abdd26d14caba949159698c1a5d260d2aafe73090e6cb03 |
| Status | ready |
| Image Path | proxy.replicated.com/proxy/wallaroo/ghcr.io/wallaroolabs/mlflow-deploy:v2023.4.0-main-4005 |
| Architecture | None |
| Updated At | 2023-20-Oct 21:20:57 |
model.config().runtime()
'flight'
Deploy Pipeline
The model is uploaded and ready for use. We’ll add it as a step in our pipeline, then deploy the pipeline. For this example we’re allocated 0.25 cpu and 4 Gi RAM to the pipeline through the pipeline’s deployment configuration.
deployment_config = DeploymentConfigBuilder() \
    .cpus(0.25).memory('1Gi') \
    .build()
# clear the pipeline if it was used before
pipeline.undeploy()
pipeline.clear()

pipeline.add_model_step(model)

pipeline.deploy(deployment_config=deployment_config)
Run Inference
A sample inference will be run. First the pandas DataFrame used for the inference is created, then the inference run through the pipeline’s infer method.
data = pd.read_json('./data/test-xgboost-rf-classification-data.json')
data
dataframe = pd.DataFrame({"inputs": data[:2].values.tolist()})
dataframe
pipeline.infer(dataframe)
| time | in.inputs | out.output | check_failures | |
|---|---|---|---|---|
| 0 | 2023-10-20 21:25:28.029 | [5.1, 3.5, 1.4, 0.2] | 0 | 0 |
| 1 | 2023-10-20 21:25:28.029 | [4.9, 3.0, 1.4, 0.2] | 0 | 0 |
Undeploy Pipelines
With the tutorial complete, the pipeline is undeployed to return the resources back to the cluster.
pipeline.undeploy()
Waiting for undeployment - this will take up to 45s ........................................ ok
| name | xgboost-rf-classification |
|---|---|
| created | 2023-10-20 21:17:57.183979+00:00 |
| last_updated | 2023-10-20 21:22:13.552727+00:00 |
| deployed | False |
| tags | |
| versions | cee7509c-3060-423d-933d-f2da5841bef7, a4bc3896-3d85-4dda-ad64-4171cbf2c0b8 |
| steps | xgboost-rf-classification |
| published | False |
10 - Model Conversion Tutorials
How to convert ML models into a Wallaroo compatible format.
Wallaroo pipelines support the ONNX standard. The following guides offer tips on converting a ML model to ONNX.
See the Wallaroo ML Models Upload and Registrations tutorials for guides on uploading different model frameworks into a Wallaroo instance.
These sample guides and their machine language models can be downloaded from the Wallaroo Tutorials Repository.
10.1 - PyTorch to ONNX Outside Wallaroo
How to convert PyTorch ML models into the ONNX format.
This tutorial and the assets can be downloaded as part of the Wallaroo Tutorials repository.
How to Convert PyTorch to ONNX
The following tutorial is a brief example of how to convert a PyTorth (aka sk-learn) ML model to ONNX. This allows organizations that have trained sk-learn models to convert them and use them with Wallaroo.
This tutorial assumes that you have a Wallaroo instance and are running this Notebook from the Wallaroo Jupyter Hub service. This sample code is based on the guide Convert your PyTorch model to ONNX.
This tutorial provides the following:
pytorchbikeshare.pt: a RandomForestRegressor PyTorch model. This model has a total of 58 inputs, and uses the classBikeShareRegressor.
Prerequisites
- An installed Wallaroo instance.
- The following Python libraries installed:
ostorch
Conversion Process
Libraries
The first step is to import our libraries we will be using. For this example, the PyTorth torch library will be imported into this kernel.
# the Pytorch libraries
# Import into this kernel
import torch
import torch.onnx
Load the Model
To load a PyTorch model into a variable, the model’s class has to be defined. For out example we are using the BikeShareRegressor class as defined below.
class BikeShareRegressor(torch.nn.Module):
def __init__(self):
super(BikeShareRegressor, self).__init__()
self.net = nn.Sequential(nn.Linear(input_size, l1),
torch.nn.ReLU(),
torch.nn.Dropout(p=dropout),
nn.BatchNorm1d(l1),
nn.Linear(l1, l2),
torch.nn.ReLU(),
torch.nn.Dropout(p=dropout),
nn.BatchNorm1d(l2),
nn.Linear(l2, output_size))
def forward(self, x):
return self.net(x)
Now we will load the model into the variable pytorch_tobe_converted.
# load the Pytorch model
model = torch.load("./pytorch_bikesharingmodel.pt")
Convert_ONNX Inputs
Now we will define our method Convert_ONNX() which has the following inputs:
PyTorchModel: the PyTorch we are converting.
modelInputs: the model input or tuple for multiple inputs.
onnxPath: The location to save the onnx file.
opset_version: The ONNX version to export to.
input_names: Array of the model’s input names.
output_names: Array of the model’s output names.
dynamic_axes: Sets variable length axes in the format, replacing the
batch_sizeas necessary:{'modelInput' : { 0 : 'batch_size'}, 'modelOutput' : {0 : 'batch_size'}}export_params: Whether to store the trained parameter weight inside the model file. Defaults to
True.do_constant_folding: Sets whether to execute constant folding for optimization. Defaults to
True.
#Function to Convert to ONNX
def Convert_ONNX():
# set the model to inference mode
model.eval()
# Export the model
torch.onnx.export(model, # model being run
dummy_input, # model input (or a tuple for multiple inputs)
pypath, # where to save the model
export_params=True, # store the trained parameter weights inside the model file
opset_version=15, # the ONNX version to export the model to
do_constant_folding=True, # whether to execute constant folding for optimization
input_names = ['modelInput'], # the model's input names
output_names = ['modelOutput'], # the model's output names
dynamic_axes = {'modelInput' : {0 : 'batch_size'}, 'modelOutput' : {0 : 'batch_size'}} # variable length axes
)
print(" ")
print('Model has been converted to ONNX')
Convert the Model
We’ll now set our variables and run our conversion. For out example, the input_size is known to be 58, and the device value we’ll derive from torch.cuda. We’ll also set the ONNX version for exporting to 15.
pypath = "pytorchbikeshare.onnx"
input_size = 58
if torch.cuda.is_available():
device = 'cuda'
else:
device = 'cpu'
onnx_opset_version = 15
# Set up some dummy input tensor for the model
dummy_input = torch.randn(1, input_size, requires_grad=True).to(device)
Convert_ONNX()
================ Diagnostic Run torch.onnx.export version 2.0.0 ================
verbose: False, log level: Level.ERROR
======================= 0 NONE 0 NOTE 0 WARNING 0 ERROR ========================
Model has been converted to ONNX
Conclusion
And now our conversion is complete. Please feel free to use this sample code in your own projects.
10.2 - XGBoost Convert to ONNX
How to convert XGBoost to ONNX using the onnxmltools.convert library
This tutorial and the assets can be downloaded as part of the Wallaroo Tutorials repository.
How to Convert XGBoost to ONNX
The following tutorial is a brief example of how to convert a XGBoost ML model to the ONNX standard. This allows organizations that have trained XGBoost models to convert them and use them with Wallaroo.
This tutorial assumes that you have a Wallaroo instance and are running this Notebook from the Wallaroo Jupyter Hub service.
This tutorial provides the following:
housing_model_xgb.pkl: A pretrained model used as part of the Notebooks in Production tutorial. This model has a total of 18 columns.
Conversion Process
Libraries
The first step is to import our libraries we will be using.
import onnx
import pickle
from onnxmltools.convert import convert_xgboost
from skl2onnx.common.data_types import FloatTensorType, DoubleTensorType
Set Variables
The following variables are required to be known before the process can be started:
- number of columns: The number of columns used by the model.
- TARGET_OPSET: Verify the TARGET_OPSET value taht will be used in the conversion process matches the current Wallaroo model uploads requirements.
# set the number of columns
ncols = 18
TARGET_OPSET = 15
Load the XGBoost Model
Next we will load our model that has been saved in the pickle format and unpickle it.
# load the xgboost model
with open("housing_model_xgb.pkl", "rb") as f:
xgboost_model = pickle.load(f)
Conversion Inputs
The convert_xgboost method has the following format and requires the following inputs:
convert_xgboost({XGBoost Model},
{XGBoost Model Type},
[
('input',
{Tensor Data Type}([None, {ncols}]))
],
target_opset={TARGET_OPSET})
- XGBoost Model: The XGBoost Model to convert.
- XGBoost Model Type: The type of XGBoost model. In this example is it a
tree-based classifier. - Tensor Data Type: Either
FloatTensorTypeorDoubleTensorTypefrom theskl2onnx.common.data_typeslibrary. - ncols: Number of columns in the model.
- TARGET_OPSET: The target opset which can be derived in code showed below.
Convert the Model
With all of our data in place we can now convert our XBBoost model to ONNX using the convert_xgboost method.
onnx_model_converted = convert_xgboost(xgboost_model, 'tree-based classifier',
[('input', FloatTensorType([None, ncols]))],
target_opset=TARGET_OPSET)
Save the Model
With the model converted to ONNX, we can now save it and use it in a Wallaroo pipeline.
onnx.save_model(onnx_model_converted, "housing_model_xgb.onnx")