Upgrade Standard Cluster Installations of Wallaroo via Kots
Table of Contents
The upgrade Wallaroo follows these general steps.
- Pre-upgrade Checklist: Actions that should be performed before the upgrade process is initiated. See Upgrade Prerequisites for more details.
- Upgrade Procedure: Steps for upgrading Wallaroo to a specified version.
Upgrade Procedure
Depending on the size and number of workspaces and artifacts, a typical upgrade can take 30-60 minutes.
Verify allowVolumeExpansion is True
IMPORTANT NOTE
The Kubernetes settingallowVolumeExpansion must be true before starting the upgrade procedure. If volume expansion is required during the upgrade process and allowVolumeExpansion=false, the upgrade will fail.Verify that the Kubernetes setting allowVolumeExpansion is set to true through the following procedure.
From the command line of the Kubernetes administrative node, run
kubectl get sc. For example:kubectl get scThe result should resemble the following:
NAME                          PROVISIONER             RECLAIMPOLICY   VOLUMEBINDINGMODE      ALLOWVOLUMEEXPANSION   AGE
premium-rwo                   pd.csi.storage.gke.io   Delete          WaitForFirstConsumer   true                   453d
standard                      kubernetes.io/gce-pd    Delete          Immediate              true                   453d
standard-rwo (default)        pd.csi.storage.gke.io   Delete          WaitForFirstConsumer   true                   453d
wallaroo-standard (default)   pd.csi.storage.gke.io   Delete          WaitForFirstConsumer   true                   6d1h
For any nodes marked
(default)that are not namedwallaroo-standard, verify theAllowVolumeExpansionvalue through the following command:kubectl describe sc {name}Based on the following example, this node is
standard-rwo, making the describe command the following:kubectl describe sc standard-rwoThe following is a sample result from this command.
Name:                  standard-rwo
IsDefaultClass:        Yes
Annotations:           components.gke.io/component-name=pdcsi,components.gke.io/component-version=0.16.18,components.gke.io/layer=addon,storageclass.kubernetes.io/is-default-class=true
Provisioner:           pd.csi.storage.gke.io
Parameters:            type=pd-balanced
AllowVolumeExpansion:  True
MountOptions:          <none>
ReclaimPolicy:         Delete
VolumeBindingMode:     WaitForFirstConsumer
Events:                <none>
If
AllowVolumeExpansionisFalse, see the Kubernetes documentation on Volume expansion and follow the steps for your host environment on setting theAllowVolumeExpansionvalue toTruebefore proceeding.
Upgrade via Kots
The following procedure is used to upgrade a Wallaroo Ops instance via kots.
Kots Client Software Prerequisites
The following section details how to upgrade the kots plugin and cluster in preparation of upgrading the Wallaroo installation. Note that the default timeout for kots based installations are 10 minutes. For more details, see kots CLI flags documentation.
Kubernetes and Kots Client Software Prerequisites
Before installing or upgrading Wallaroo, the administrative node managing the Kubernetes cluster will require these tools.
The following are quick guides for installing kubectl for macOS.
To install kubectl on a macOS system using Homebrew:
Issue the
brew installcommand:brew install kubectlVerify the installation:
kubectl version --client
Upgrade Kots Client Procedure
To upgrade the version of kots used:
Upgrade the kubectl kots plugin to the specific version with the following command. For more details, see Installing the KOTS CLI.
curl https://kots.io/install/1.124.4 | bash
Upgrade Kots Cluster Application Procedure
Upgrade the kots version of an installed cluster to match your CLI kots version via the following command, replacing $NAMESPACE with the namespace the Wallaroo instance is installed in. For more details, see Update an Application: Using the KOTS CLI.
kubectl kots admin-console upgrade -n $NAMESPACE
For example, if the Wallaroo installation is in the default namespace wallaroo, the command is:
kubectl kots admin-console upgrade -n wallaroo
Upgrade Wallaroo via Kots Procedure
To upgrade a kots based installation of Wallaroo:
From a terminal shell with administrative access to the Kubernetes cluster hosting Wallaroo, launch the Kots Administrative Dashboard via the following command:
kubectl kots admin-console --namespace $NAMESPACEReplacing
$NAMESPACEwith the name of the namespace the Wallaroo Ops center is installed in, which iswallarooby default. For example:kubectl kots admin-console --namespace wallaroo • Press Ctrl+C to exit • Go to http://localhost:8800 to access the Admin Console
Access the Kots Administrative Dashboard via the domain name and port as provided in the previous step.
From the Kots Administrative Dashboard:
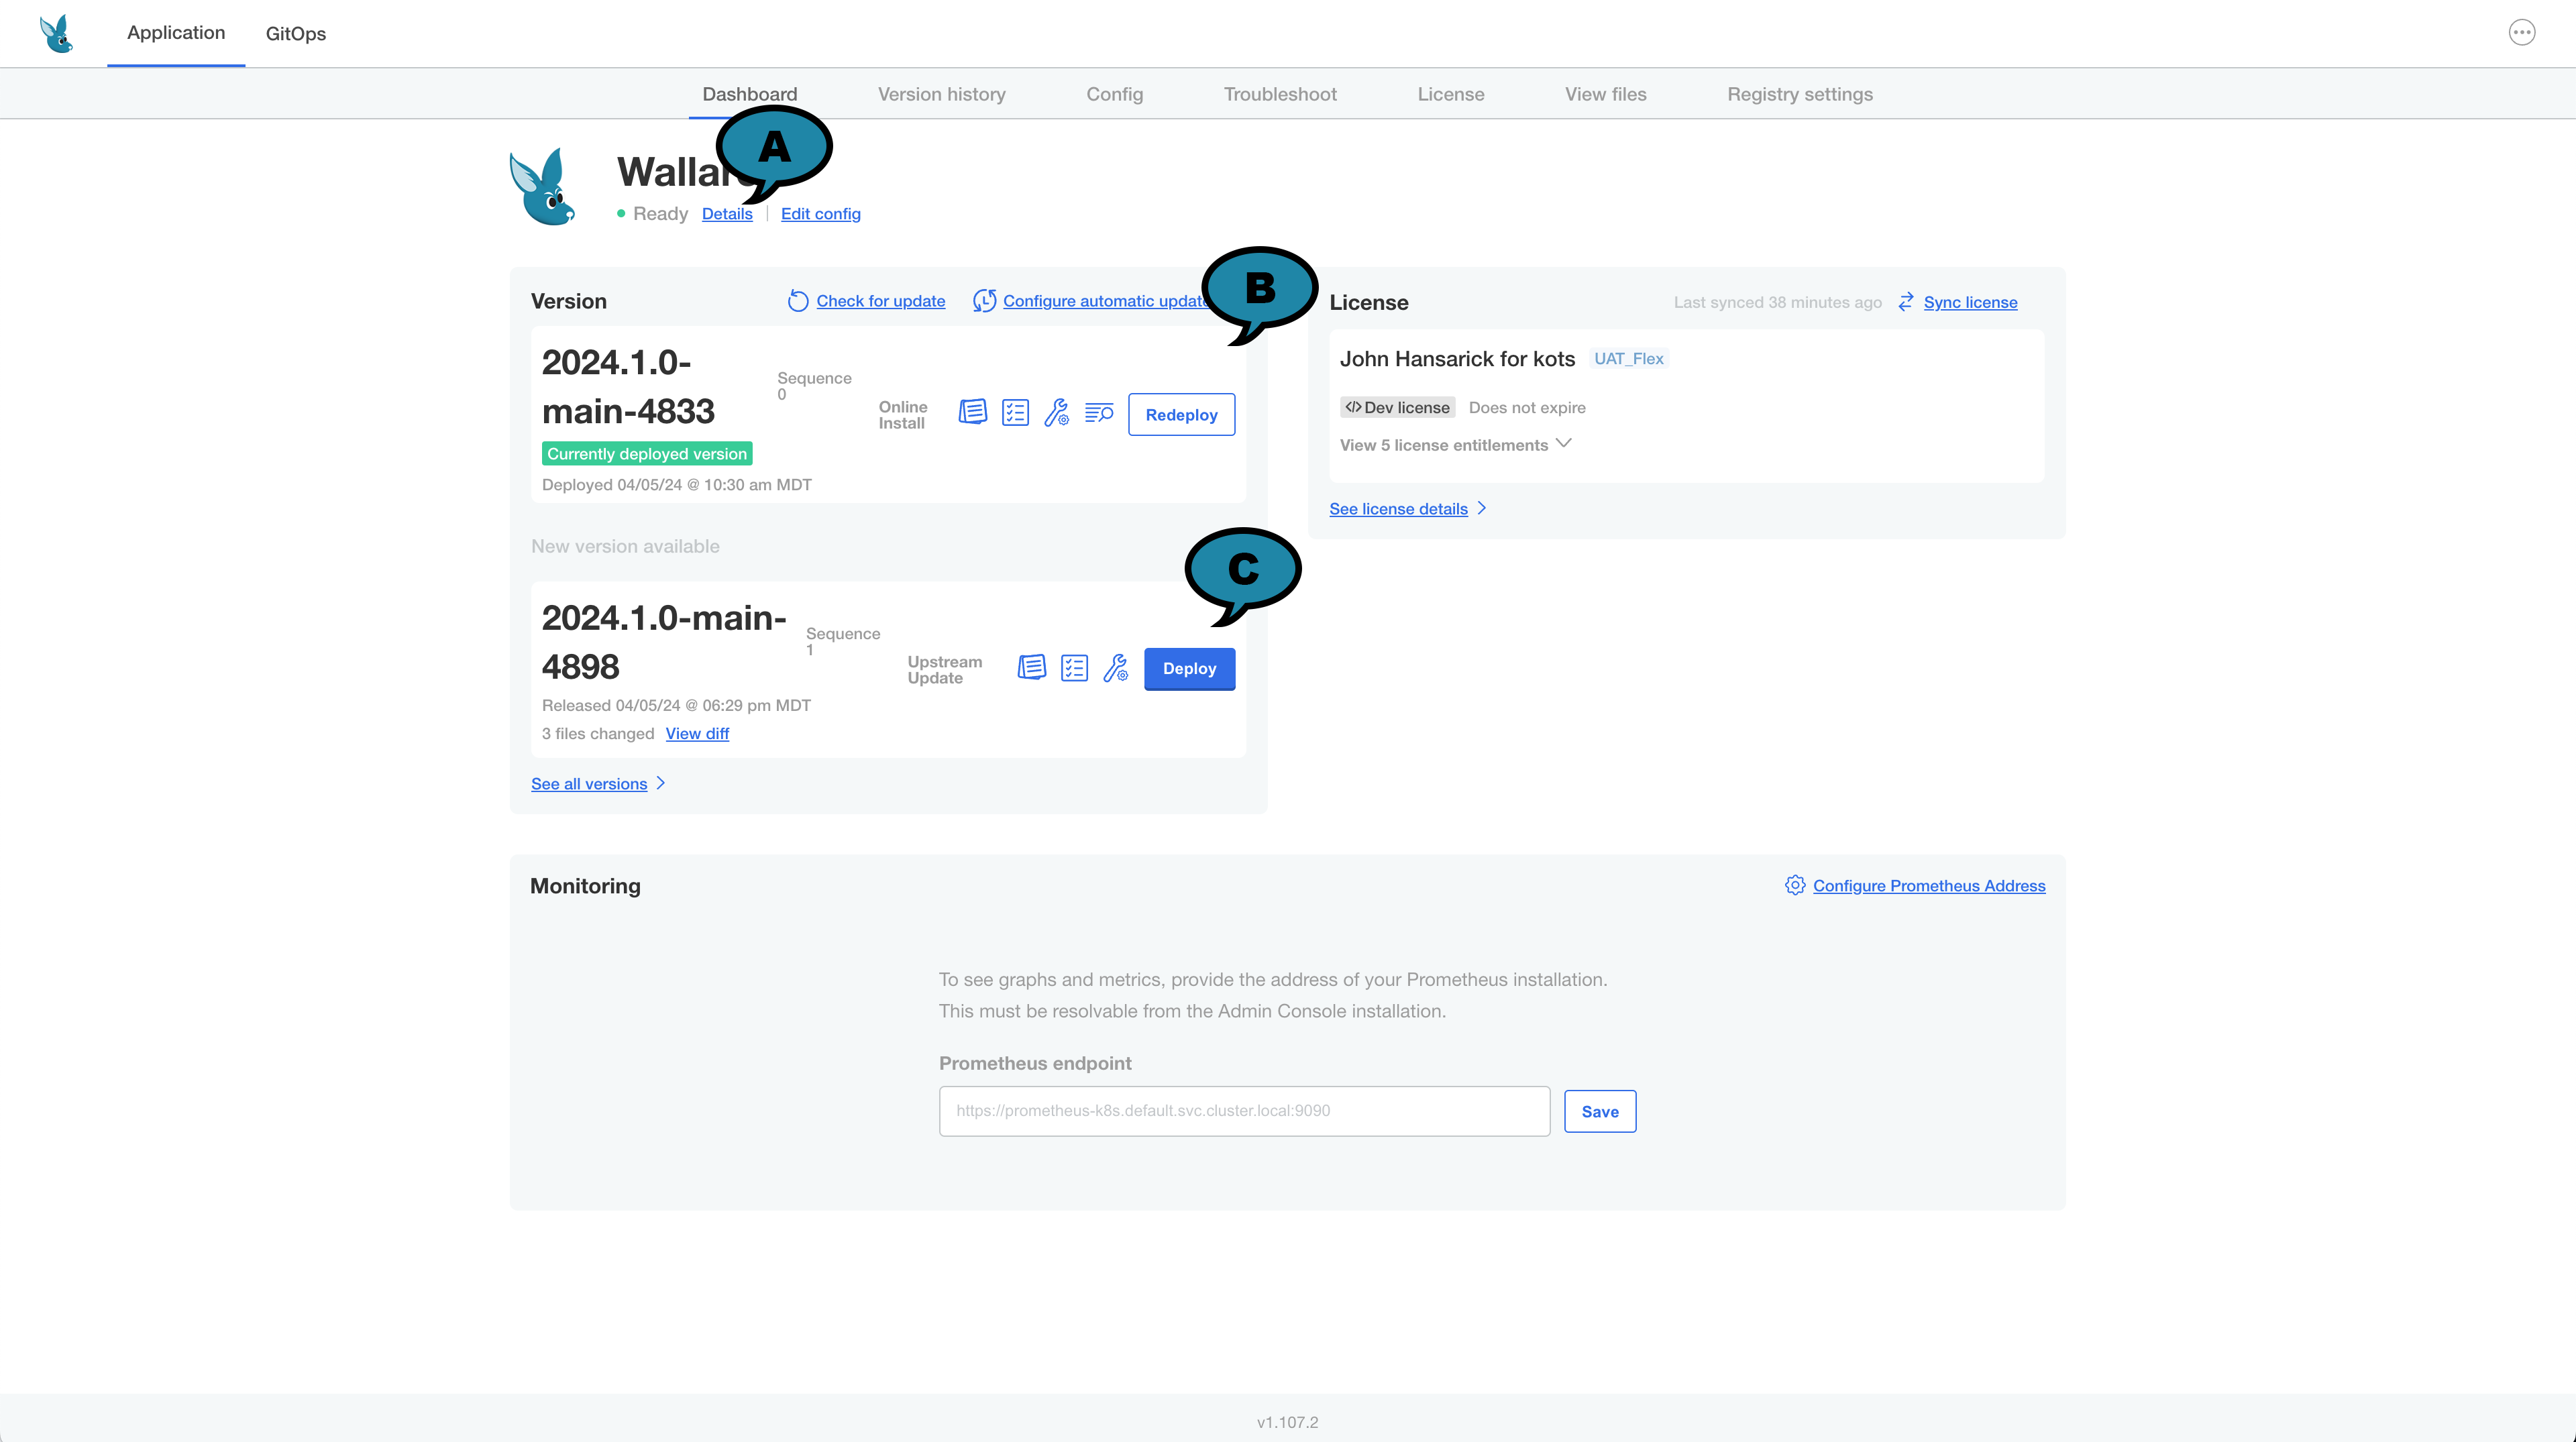
- If there is a new version of Wallaroo to install based on your Wallaroo license type, it will be displayed under the Version (B) display as New Version Available. Select Check for updates to check for updated versions.
- Select the version to upgrade to.
- To perform a preflight check, select the preflight icon and verify the cluster meets the requirements.
- If ready to upgrade, select Deploy (C).
- Verify the upgrade process by selecting Yes, Deploy.
During the upgrade process, the status indicator (A) changes from Ready to Unavailable. Selecting Details will show which services are available or are still being upgraded.
When the upgrade process is complete, the status indicator will change to Ready. At this point, users can resume their normal operations.