Wallaroo SSO for Google Cloud Platform
Table of Contents
Organizations can use Google Cloud Platform (GCP) as an identity provider for single sign-on (SSO) logins for users with Wallaroo Enterprise.
IMPORTANT NOTE
These instructions are for Wallaroo Enterprise edition only.Create GCP Credentials
To create the GCP credentials a Wallaroo instance uses to authenticate users:
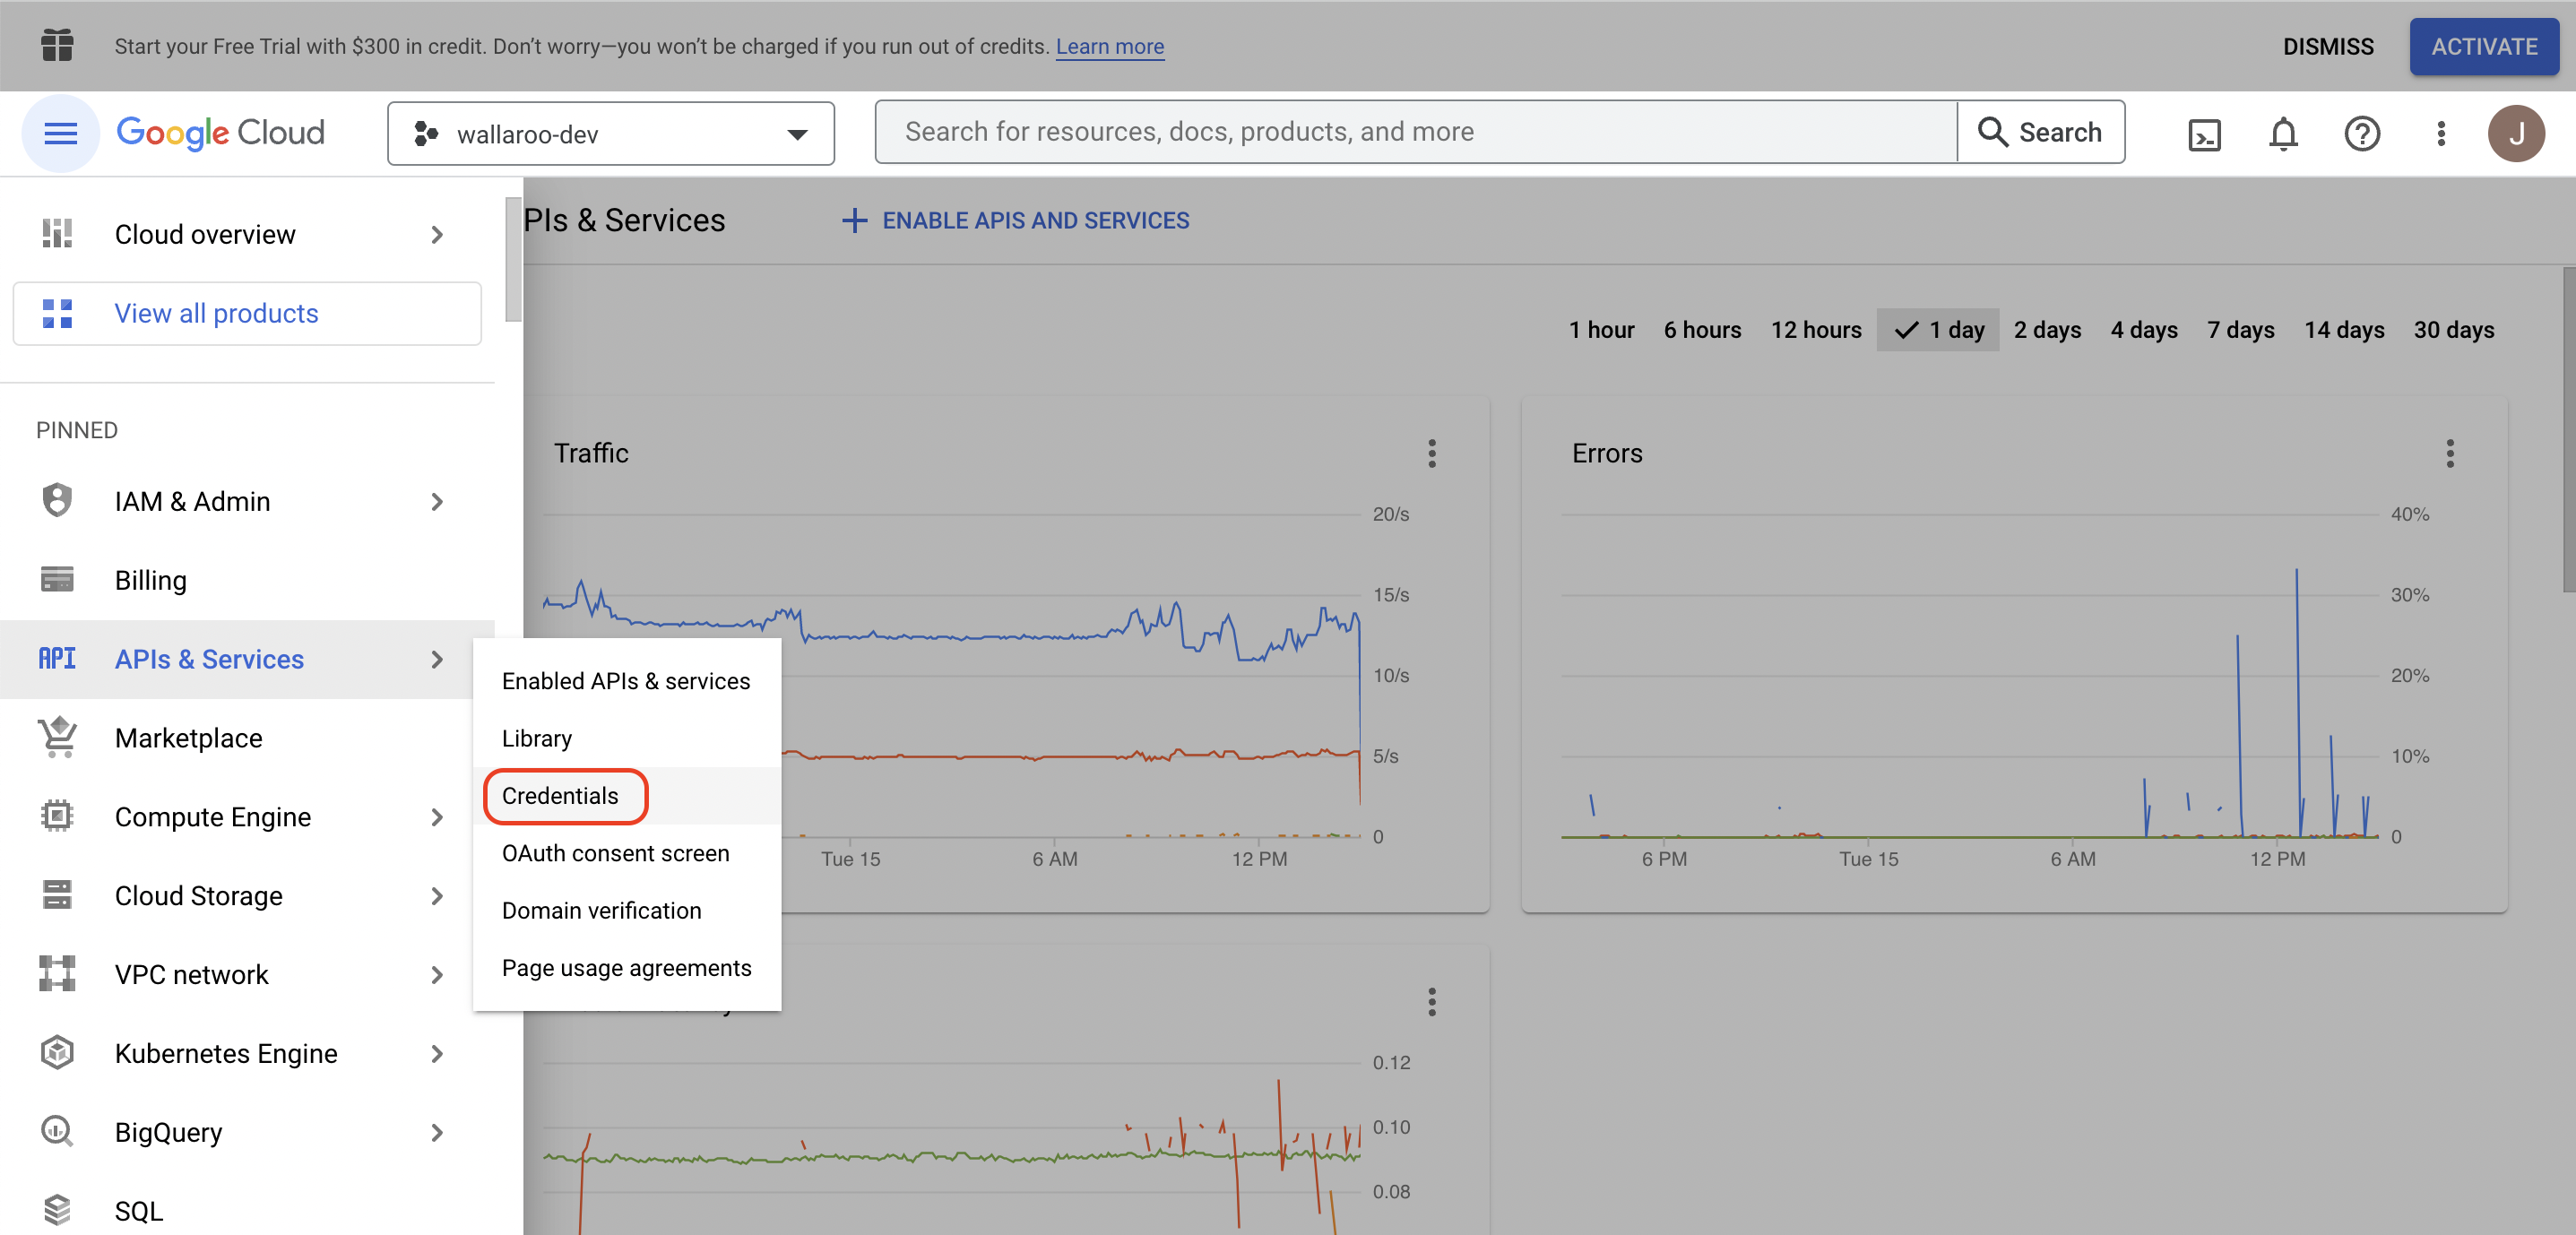
Log into Google Cloud Platform (GCP) console.
From the left side menu, select APIs and Services -> Credentials.
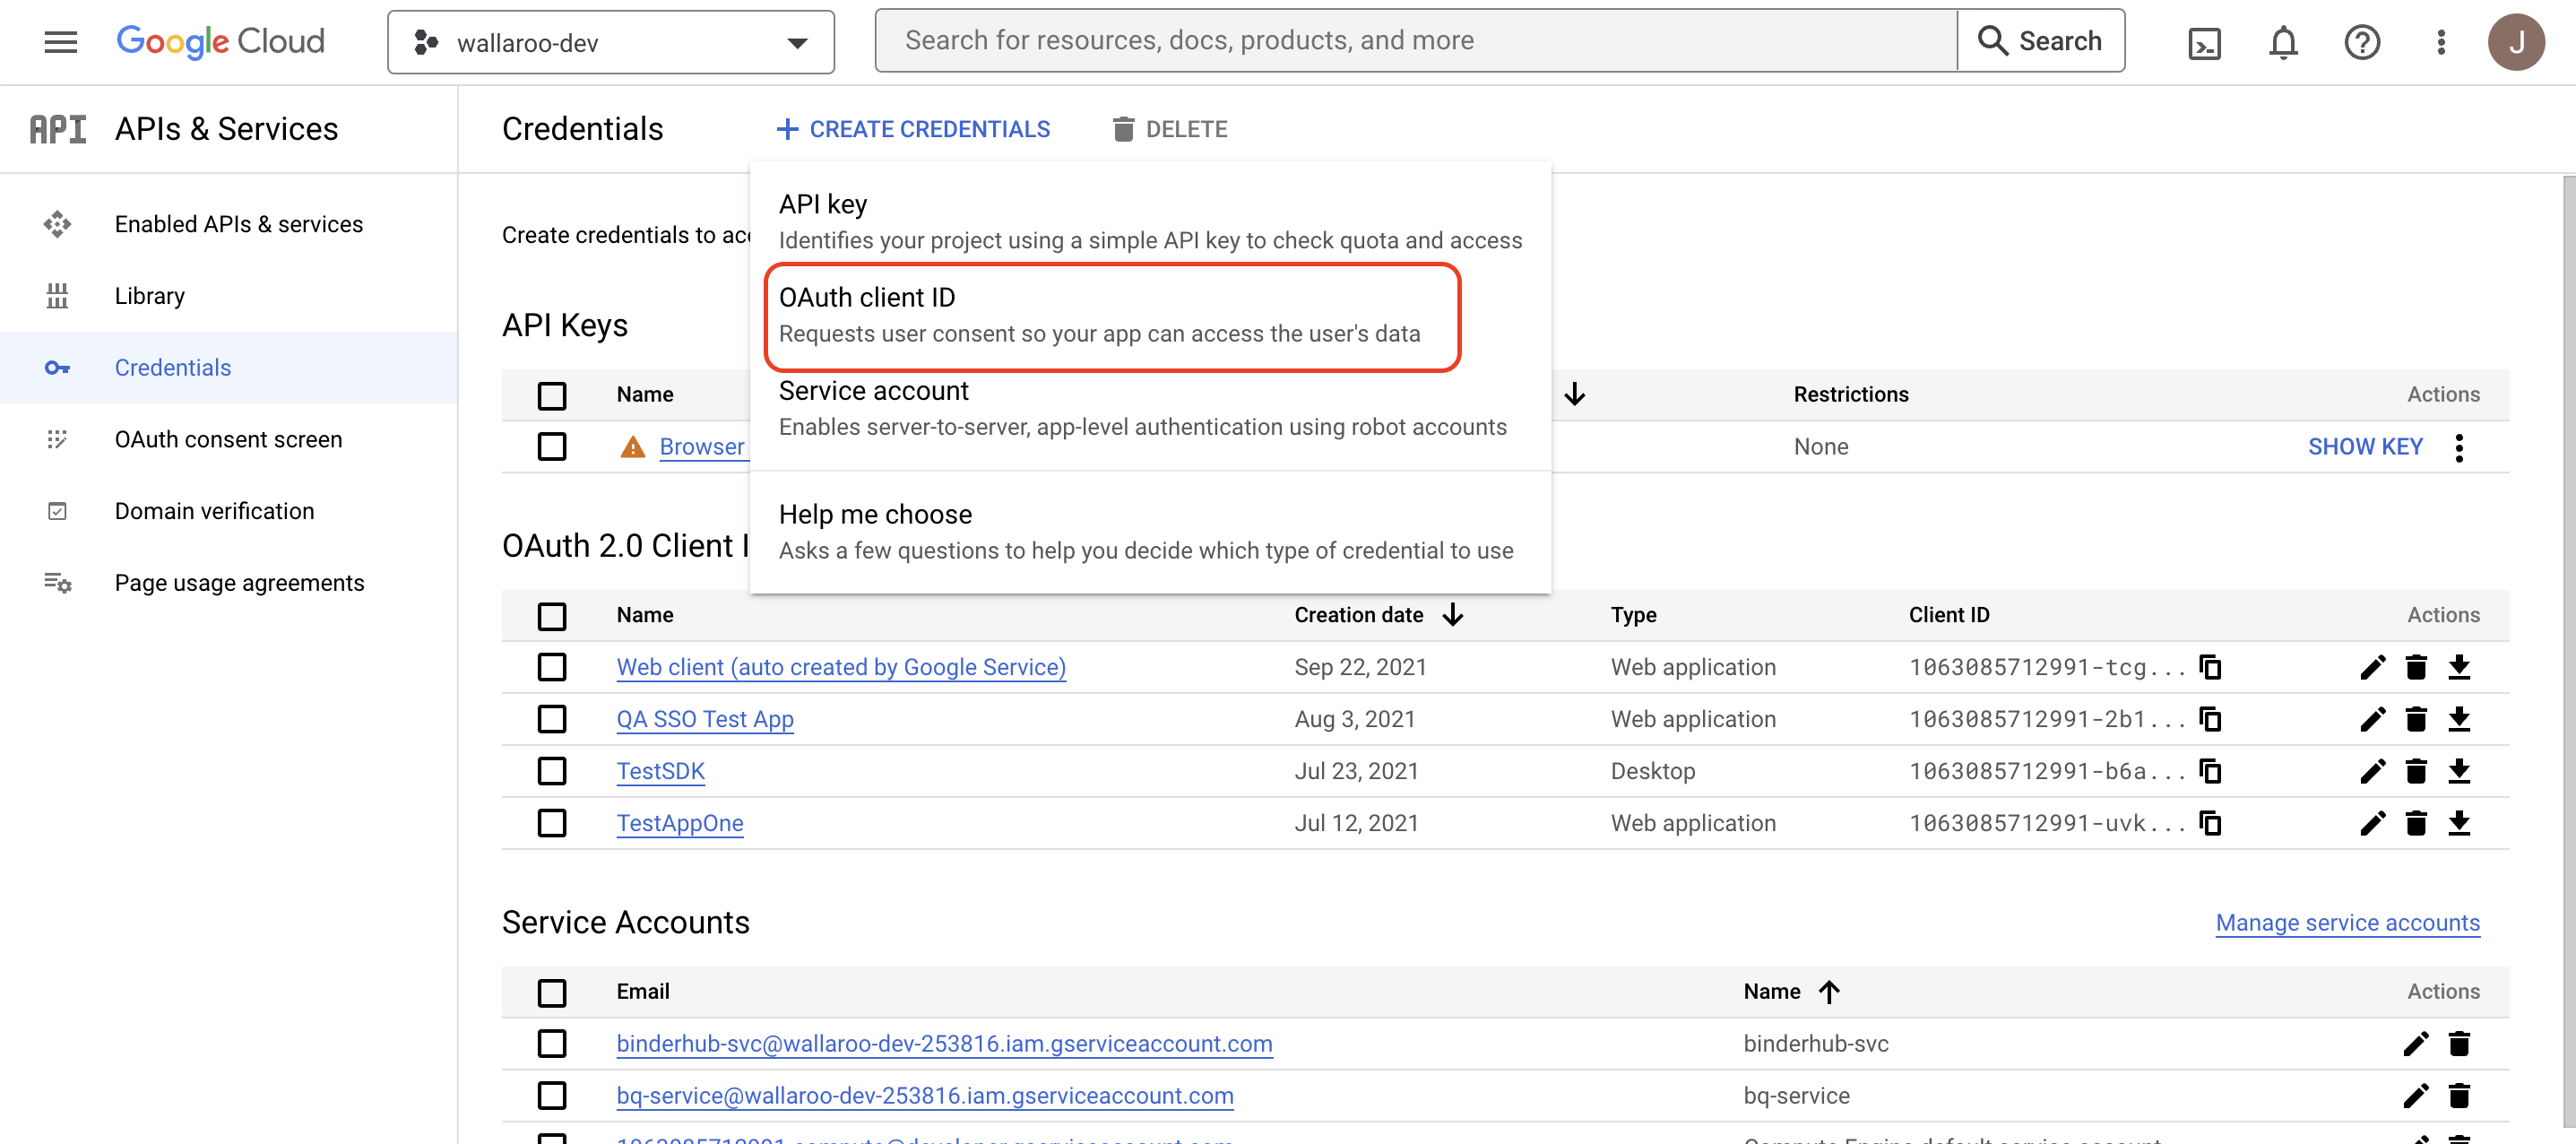
Select + CREATE CREDENTIALS->Oauth client ID.
Set Application type to Web application.
Set the following options:
Name: The name for this OAuth Client ID.
Authorized redirect URIs: This will be a link back to the Wallaroo Authentication endpoint URL in your Wallaroo instance in the format
https://$WALLAROO_DOMAIN/auth/realms/master/broker/google/endpoint.For example, if the Wallaroo domain is
wallaroo.example.com, then the Wallaroo Authentication endpoint URL iswallaroo.example.com/auth/realms/master/broker/google/endpoint. For more information see the DNS Integration Guide.
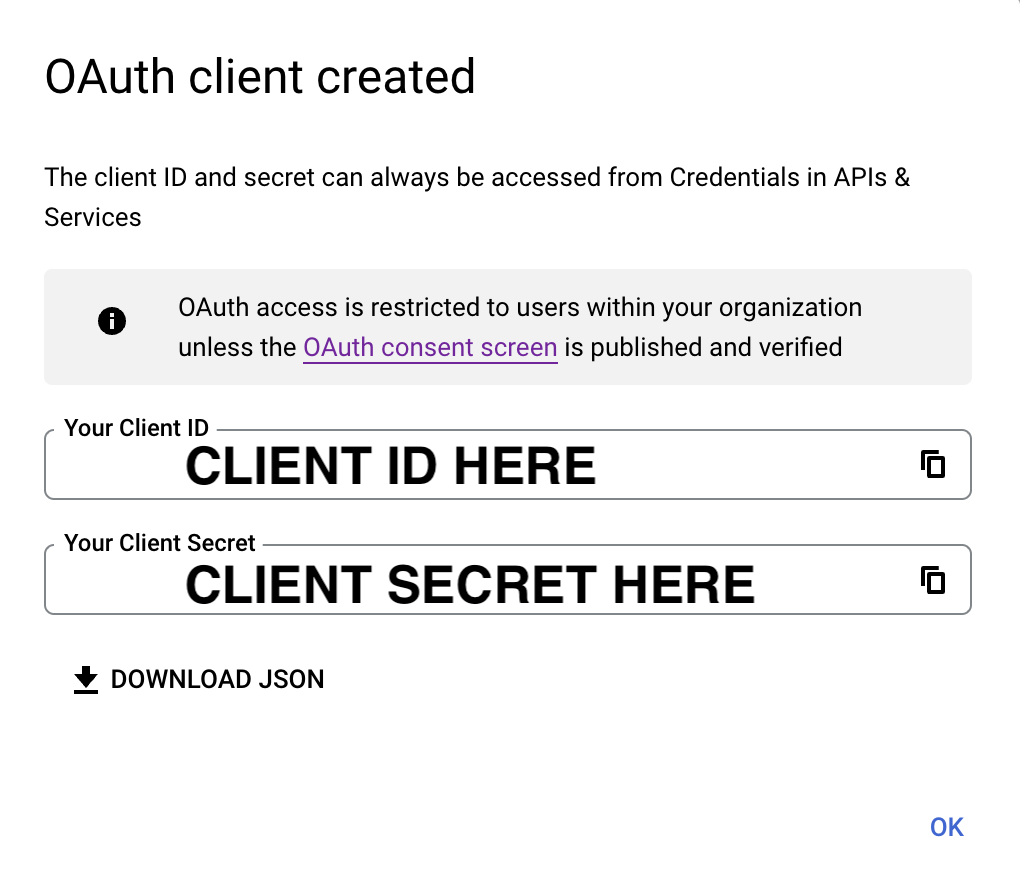
When the Oauth client is created, the Client ID and the Client Secret will be displayed. Store these for the next steps.
How to Access the Wallaroo Authentication Service
Most user administration features are performed by admins through the Platform Admin Dashboard.
Additional settings are available by directly access the Wallaroo Administrative Service. This requires the following:
A user credential with administrative access. If for some reason no user with administrative access is available, the default
adminuser and credentials are retrieved by a user withkubectland administrative access to the cluster with the following.Retrieve Admin Password
kubectl -n wallaroo \
get secret keycloak-admin-secret \
-o go-template='{{.data.KEYCLOAK_ADMIN_PASSWORD | base64decode }}'
Access the Wallaroo Authentication service through a browser as an administrator. The Wallaroo Authentication Service URL is in the format
$WALLAROODOMAIN/auth. For example, if the Wallaroo Domain iswallaroo.example.comthen the Wallaroo Authentication Service URL would bewallaroo.example.com/auth. See the DNS Integration Guide for more details on Wallaroo services with DNS.Select Administration Console, then log in with an administrator account.
Add GCP Credentials to Wallaroo
With the Client ID and Client Secret from Google, we can now add this to the Wallaroo Authentication Service.
IMPORTANT NOTE
Leaving the Hosted Domain value unset will allow any valid Google user to access the system. Set the Hosted Domain to restrict access to the desired Google domain such aswallaroo.ai. This must be a domain that is managed by Google. For more information, see the Keycloak Social Identity Providers documentation.Select Administration Console.
From the left navigation panel, select Identity Providers.
Select Add provider and select Google.
Enter the following:
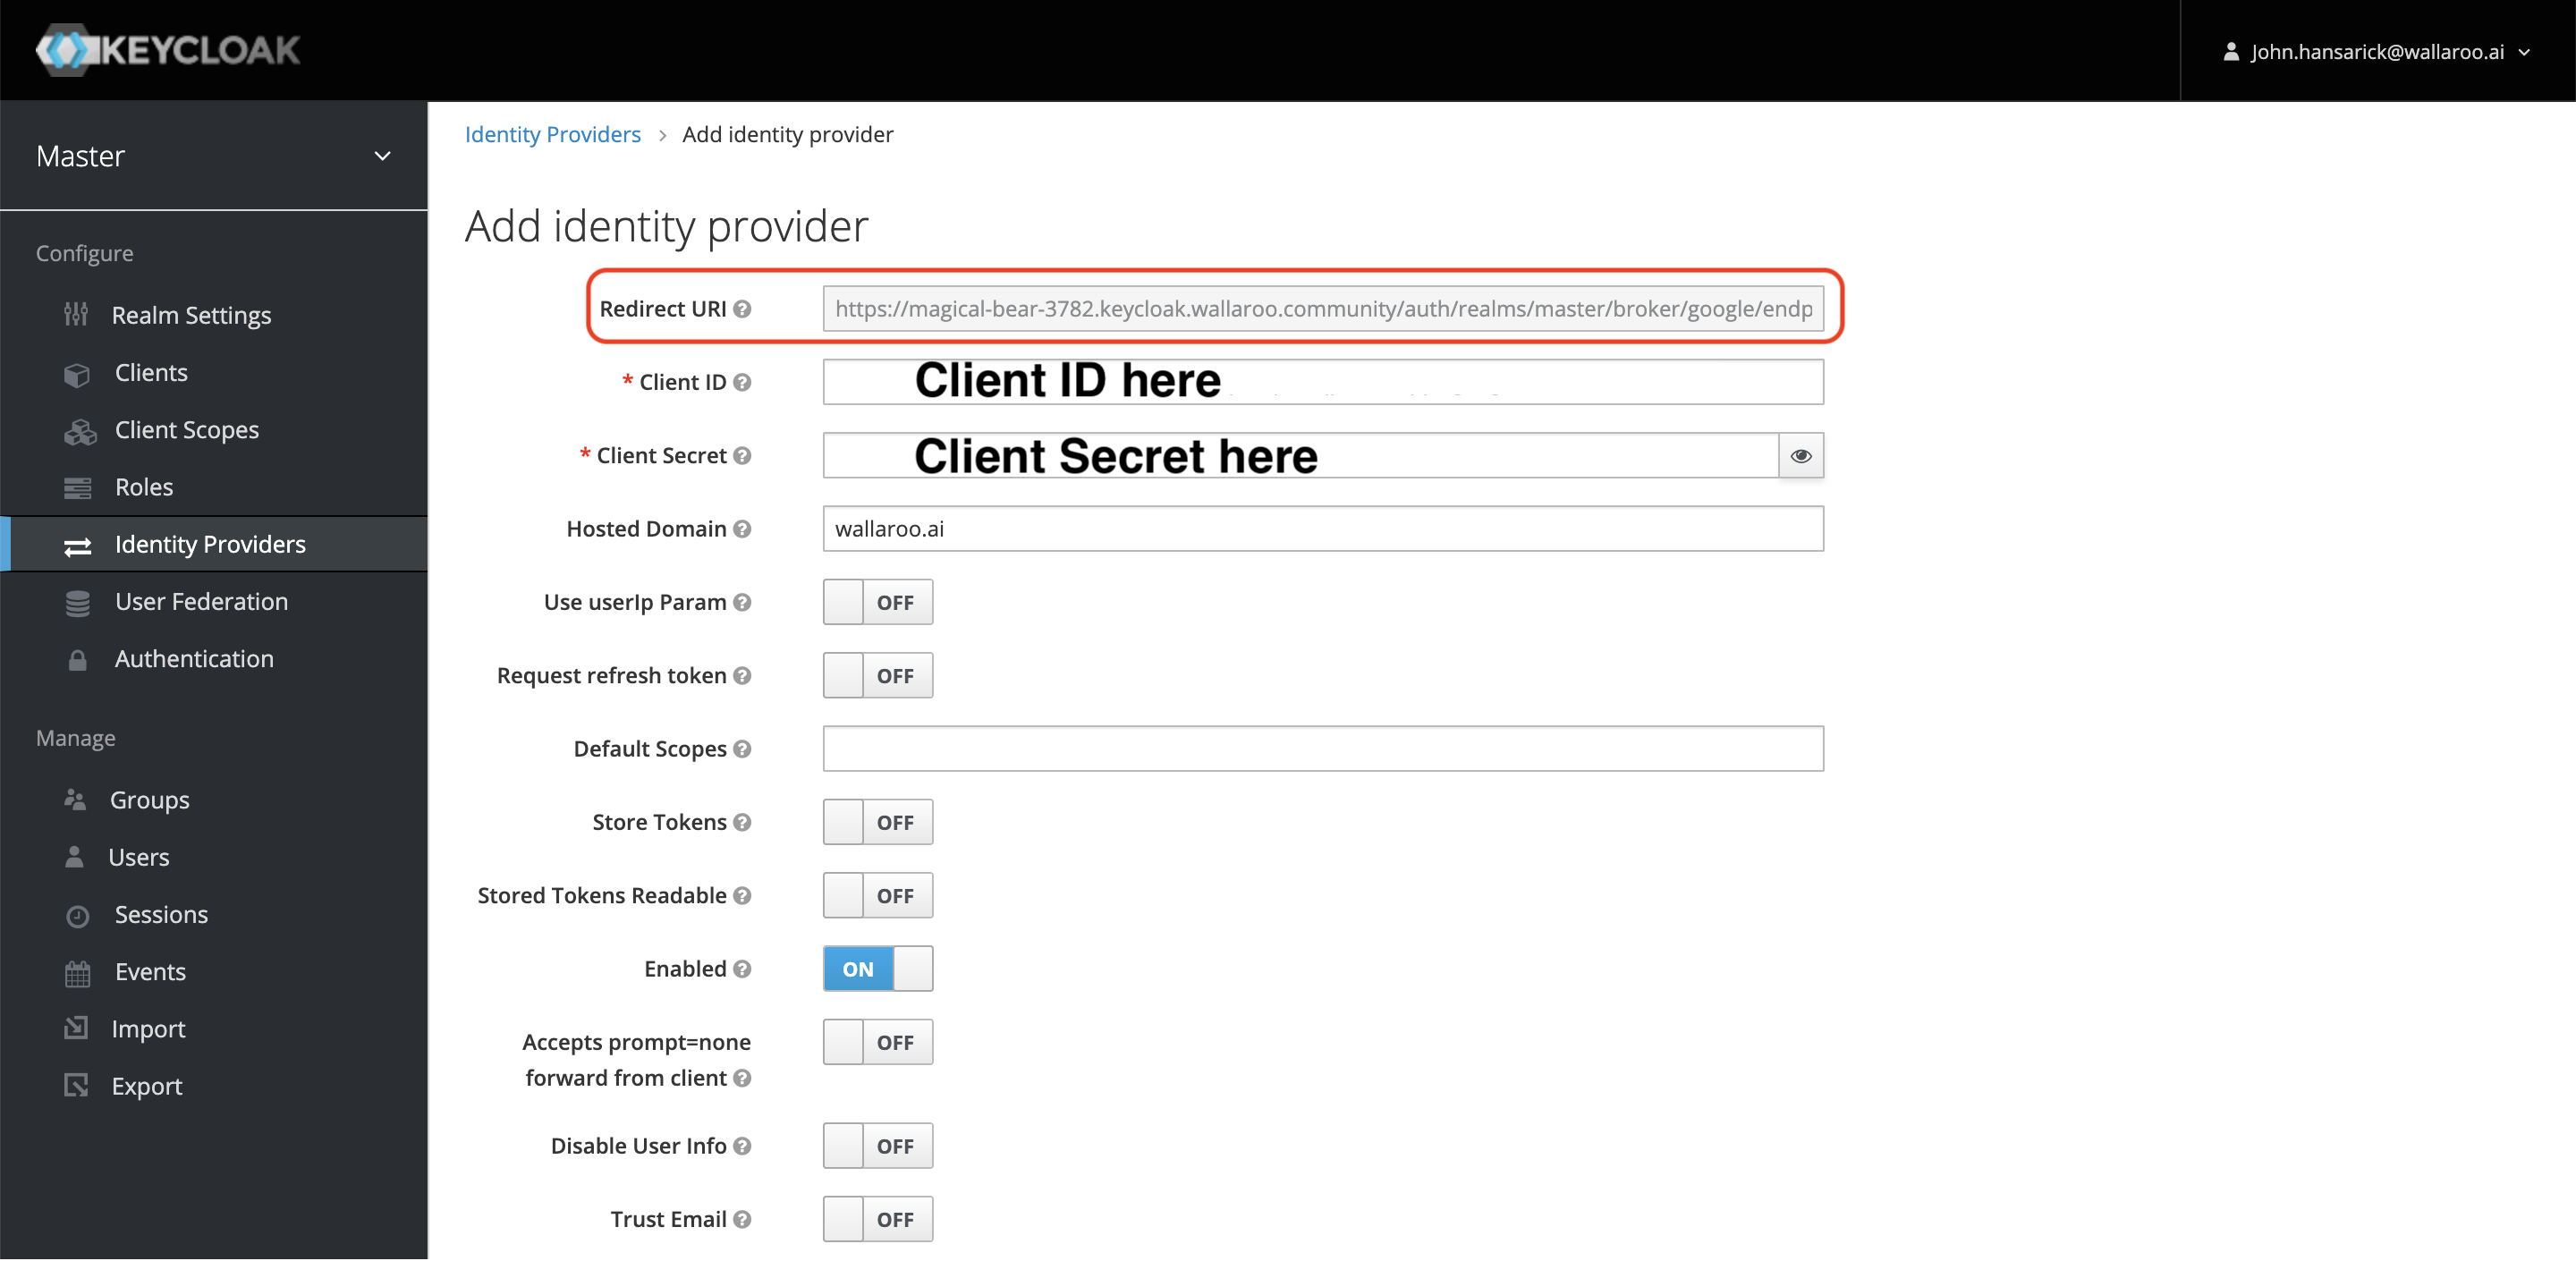
- Redirect URI: Verify this is the same endpoint defined in Create GCP Credentials.
- Client ID: Use the Client id from Get GCP Credentials.
- Client Secret: Use the Client secret from Get GCP Credentials.
- Hosted Domain: The domain that the user’s will be logging in from. For example:
wallaroo.ai. - Enabled: On
- For the other settings, see the Keycloak Social Identity Providers documentation.
Verify the Login
Once complete, log out of the Wallaroo instance and go back into the login screen. With the usual username and password screen should also be a google link at the bottom or whatever name was set for the identity provider.
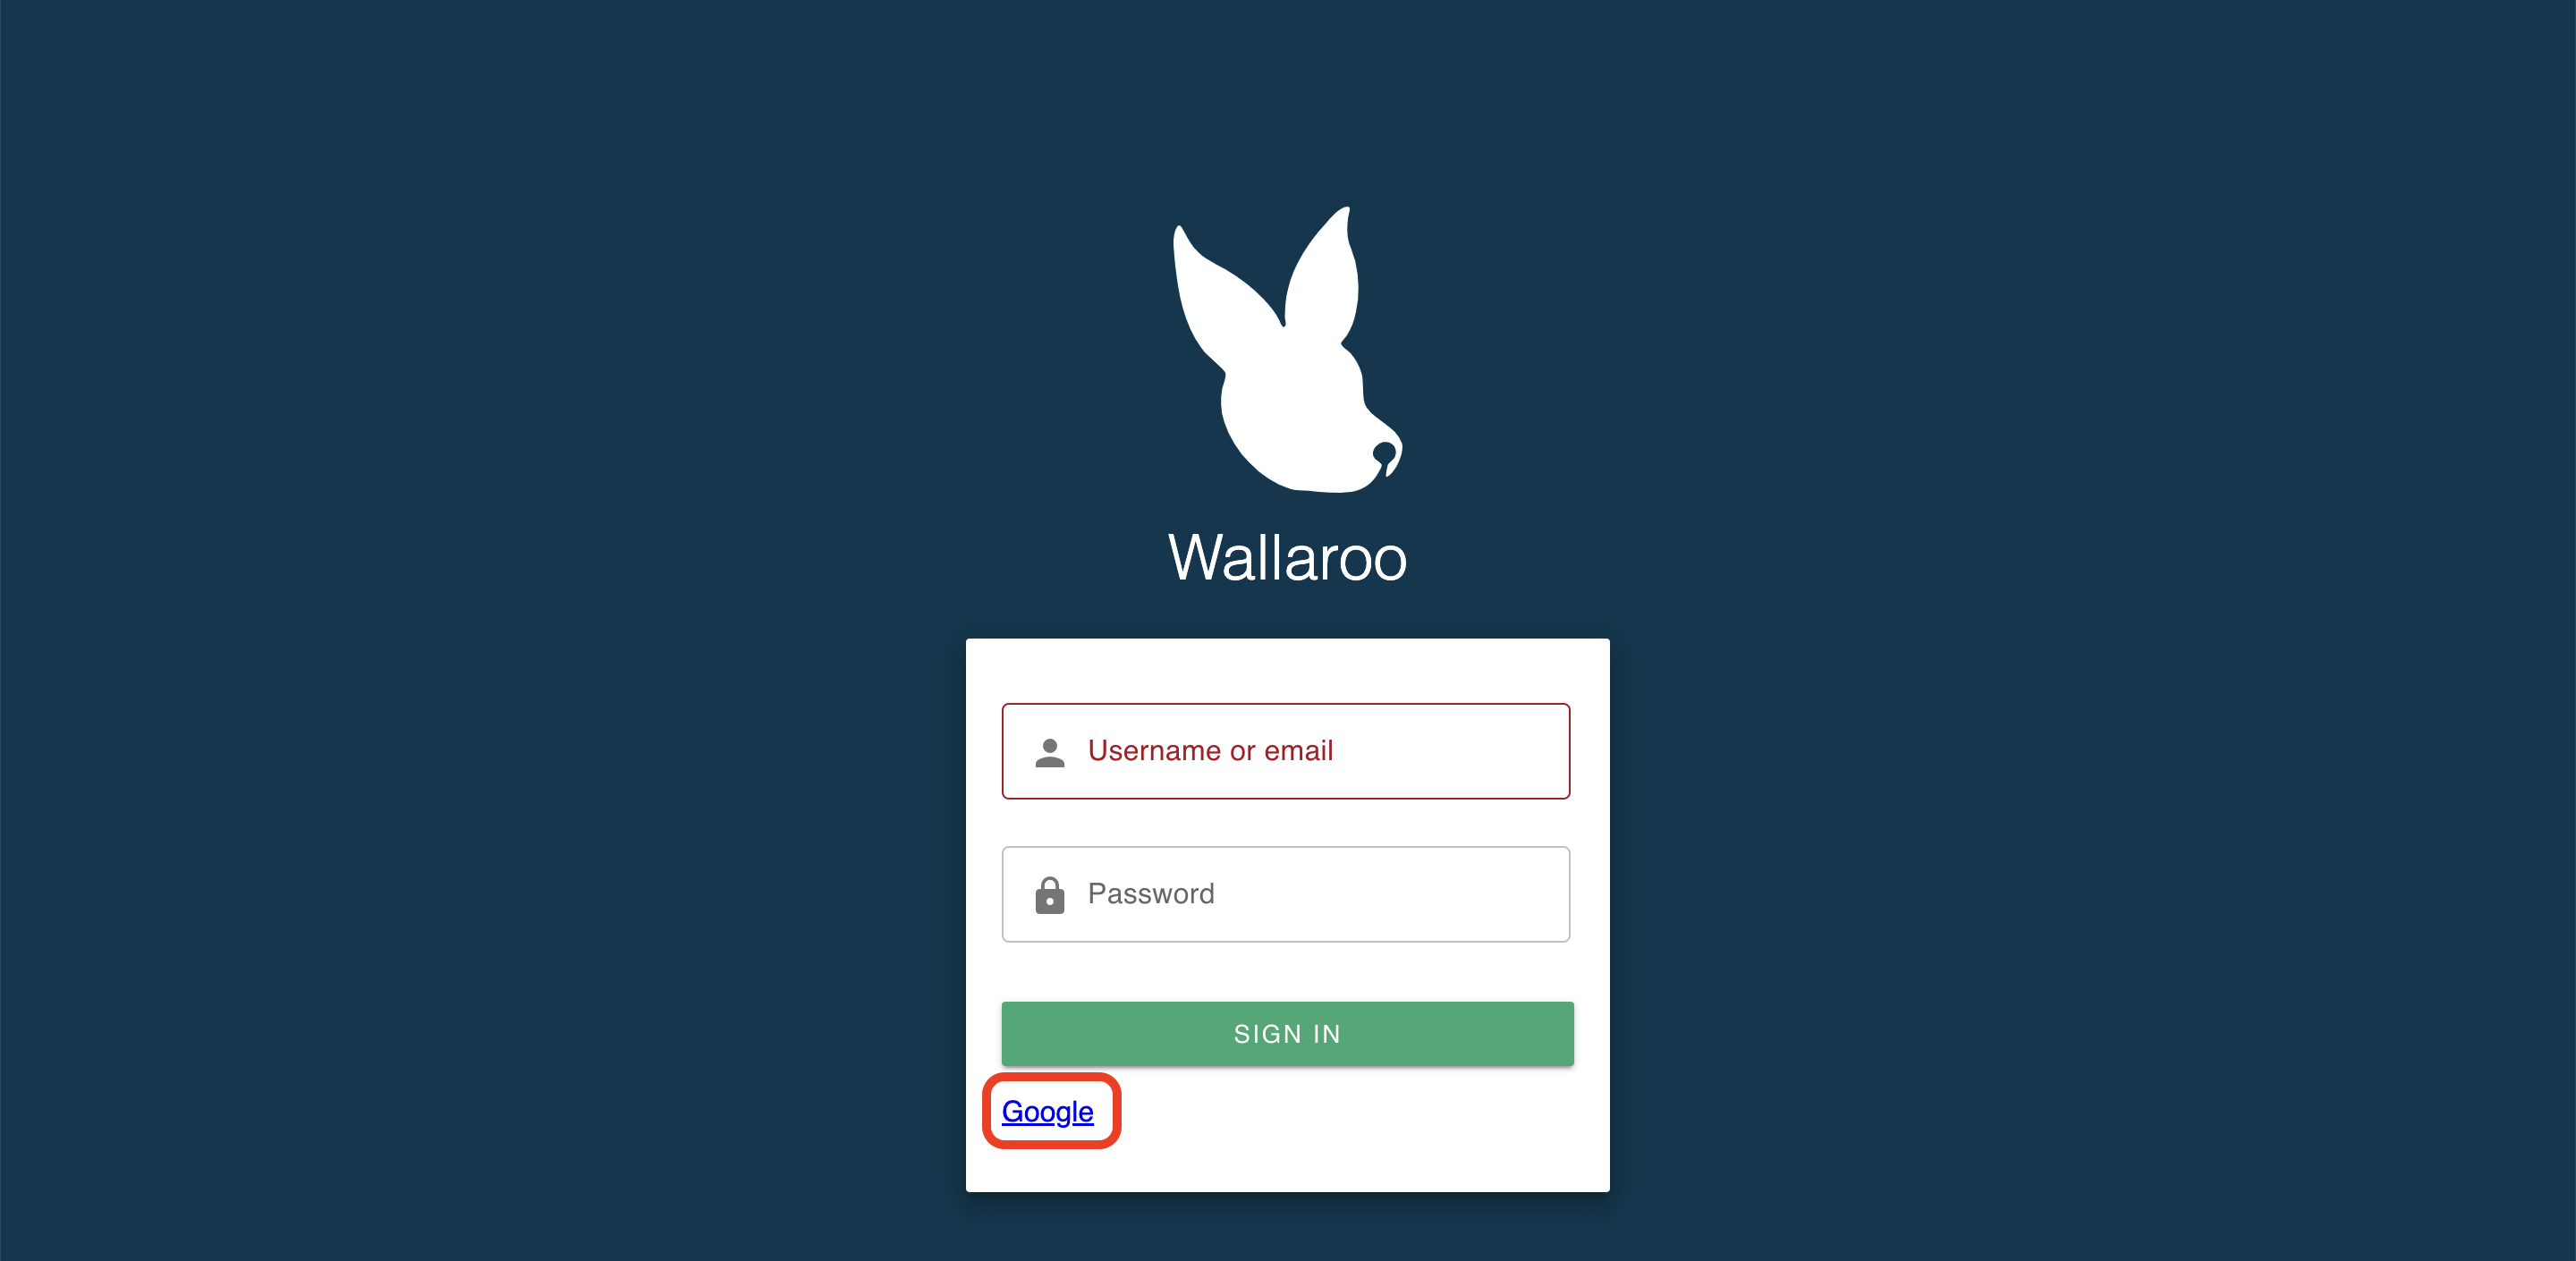
Select it, then select which Google user account to use. As long the domain matches the one listed in Add Google Credentials to Wallaroo, the login will succeed. The first time a user logs in through Google, the Wallaroo Authentication Service creates a new Wallaroo user account based on the Google credentials.
Troubleshooting
I get the error “This app’s request is invalid”
Double check the Google credentials from Get GCP Credentials and verify that the Authorized redirect URIs matches the one in the Wallaroo Authentication Service. This can be verified from logging into the Wallaroo Authentication Service, selecting Identity Providers, selecting the Google identity provider and Redirect URI from the top line.
