JupyterHub
Table of Contents
| Targeted Role |
|---|
| Dev Ops |
Organizations can configure their JupyterHub Lab settings for memory and storage limits. The following procedures are focused on existing JupyterHub Labs and users. For configurations that only apply to new JupyterHub Labs and Users, see Configure JupyterHub.
Select from the following options depending on the specific use case.
IMPORTANT NOTE
Changes to memory per Jupyter Lab are applied when the user shuts off their labs and restarts it - details provided in the procedures below.
Changes to storage for all users require each Jupyter Lab to be updated to deleted. All data in the lab will be lost. In this situation, users should informed to back up their data.
A process is provided for updating an individual Jupyter Lab without deleting it is included.
Use Cases
Memory and storage limits may need to be expended if the following occurs:
- Labs crash and are listed as “unavailable”, then are recovered. This can happen when memory limits are reached, such as when working with large model sizes.
- If DevOps are observing the Kubernetes pods, the system reports
OOMKilledfor JupyterLab pods.
Procedures
The following procedure sets memory and/or storage limits options for JupyterHub Labs for all users.
The configuration procedure depends on whether Wallaroo was installed via kots or helm. Select the appropriate procedure based on the organizations installation settings.
Select which method of installation was used, then whether to update Update Memory Limits For All Labs, or Update Memory and Storage Limits for All Labs.
Configure JupyterHub via Kots
This procedure updates the JupyterHub Lab settings for existing labs via kots.
Prerequisites for Kots Configuration
- A Wallaroo instance installed via
kots. See Wallaroo Installation Guides for more details. - Administrative access to the Kubernetes cluster through the
kubectlcommand with thekotsplugin.
Access Settings via Kots
To access the JupyterHub Settings via Kots:
Through
kubectl, launch the Kots Administrative Dashboard with the following:kubectl kots admin-console --namespace {Wallaroo Installed Namespace}Replace
{Wallaroo Installed Namespace}with the Kubernetes namespace the Wallaroo instance is installed in. By default, this iswallaroo. For example:kubectl kots admin-console --namespace wallarooBy default this launches the Kots Administrative Dashboard at
http://localhost:8080• Press Ctrl+C to exit • Go to http://localhost:8800 to access the Admin ConsoleLaunch a browser and access the Kots Administrative Dashboard at the URL shown.
Update Memory Limits For All Labs via Kots
The following procedure only updates memory aka ram settings for all users via kots. This takes the following steps:
- Kots Administrative Dashboard steps:
- Update the memory limit and memory guarantee settings.
- Deploy the changes.
- Inform existing users to stop and restart their Jupyter Lab. Instructions included in the process below.
Update the JupyterHub Lab settings with the new settings.
From the top navigation panel, select Config and scroll to Data Science Workspaces. Set the following options:
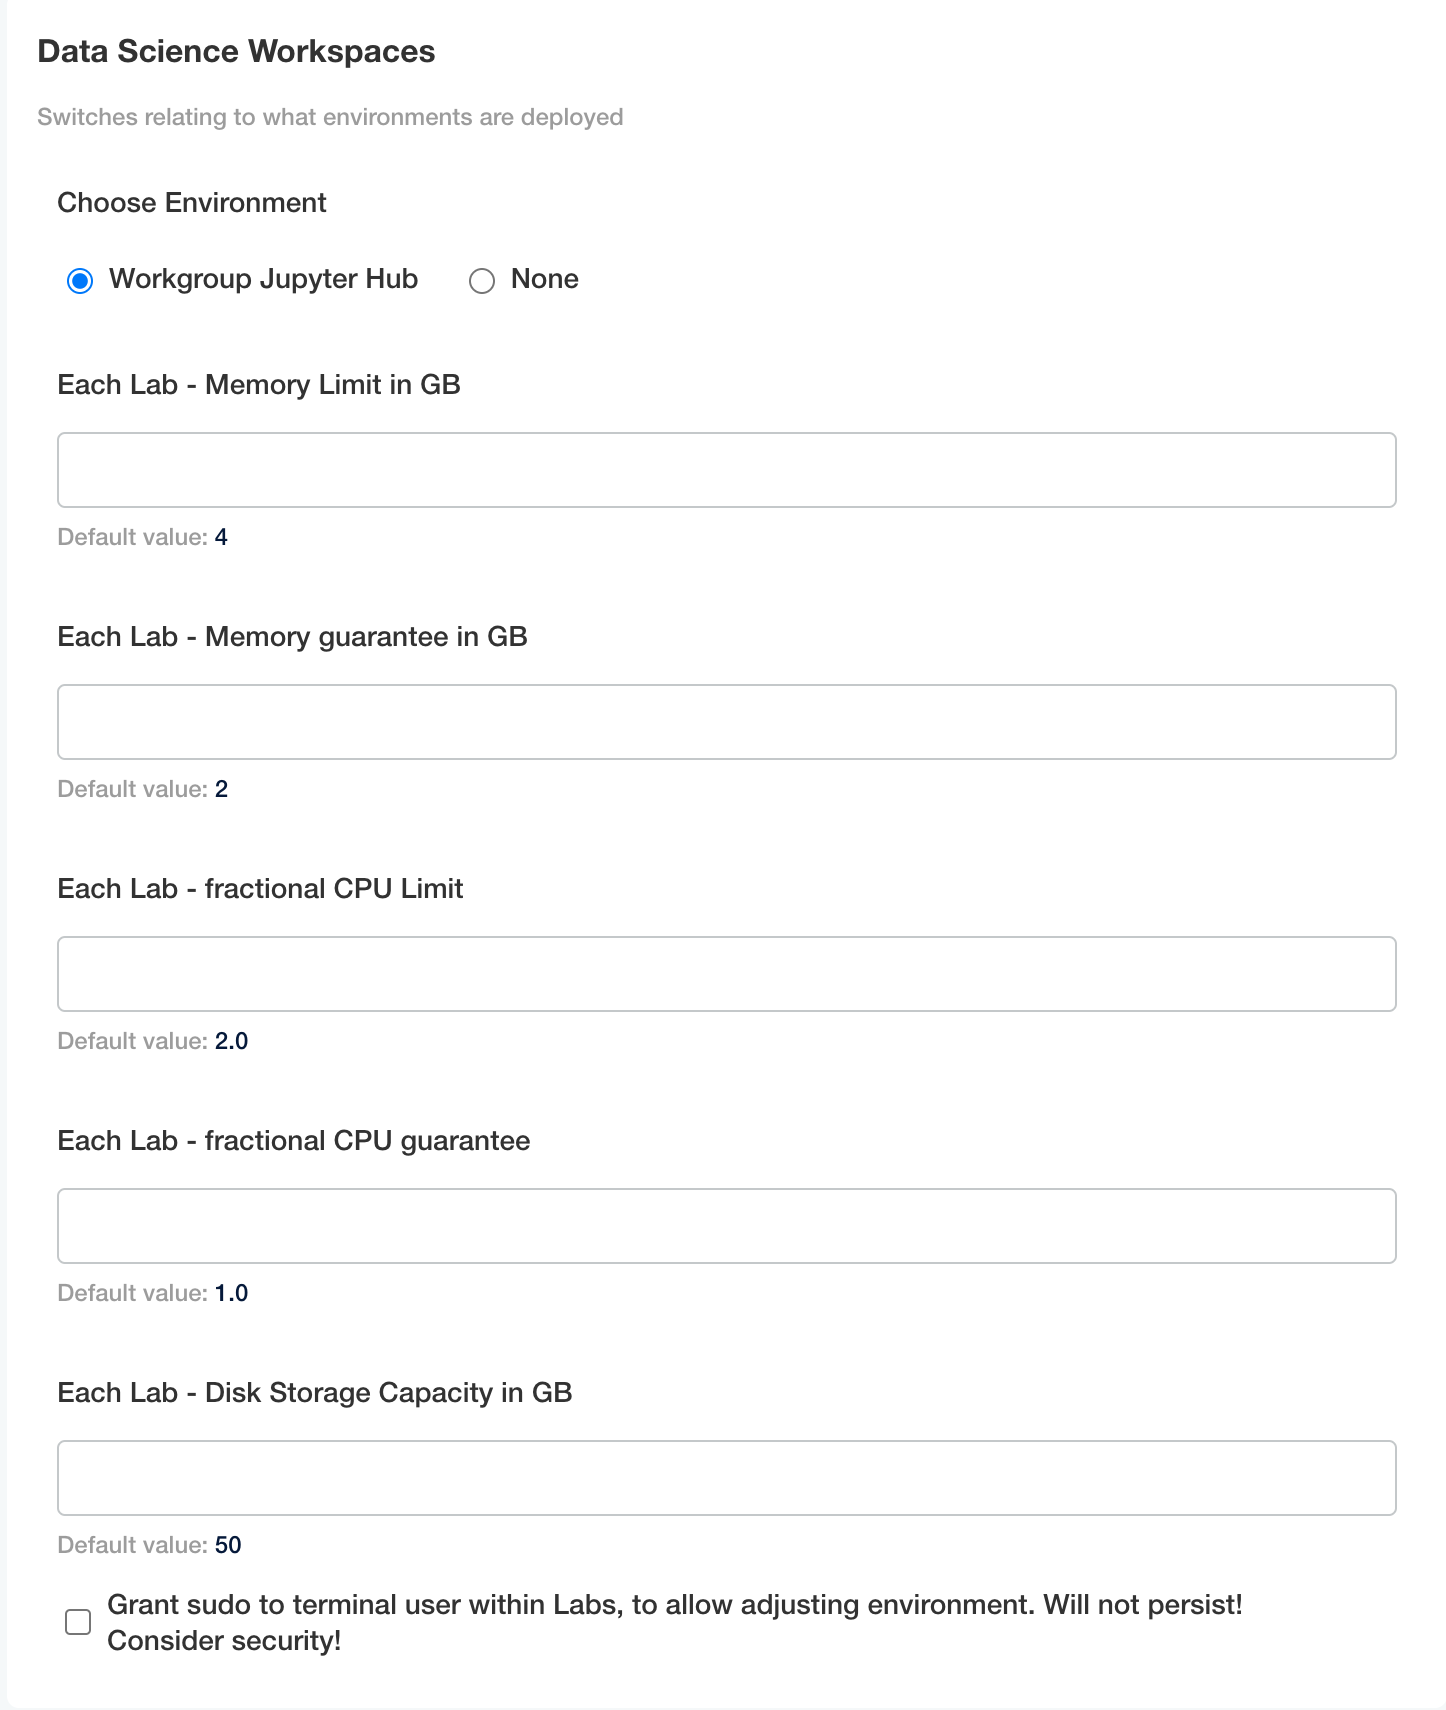
- Each Lab - Memory Limit in GB (Default: 4): The total maximum ram limit for each lab in GB.
- Each Lab - Memory guarantee in GB (Default: 2): The total ram guaranteed for each lab, and will not go below this limit.
- Each Lab - fractional CPU Limit (Default: 2.0): The maximum compute limit each lab can access.
- Each Lab - fractional CPU guarantee (Default: 1.0): The total compute guaranteed for each lab, and will not go below this limit.
Scroll to the bottom of the Config page and select Save Config.
Once the configuration is saved, select Go to updated version. The new configuration is at the top; select Deploy.
For new users, these settings are applied the first time they launch their JupyterHub Lab. For existing users:
- Inform the user with the expanded JupyterHub Lab to perform the following procedure:
Login to Wallaroo.
Select “Launch JupyterHub”.
Once launched, in JupyterHub select File->Hub Control Panel.
Select Stop My Server.
Once the Stop My Server option is no longer available, select Start My Server.

Once complete, the user’s lab storage capacity is expanded and available for their use.
Update Memory and Storage Limits For All Labs via Kots
The following procedure memory aka ram limits and storage limits for all users via kots. This takes the following steps:
- Using the Kots Administrative Dashboard, halt the JupyterHub service.
- Using the
kubectlterminal commands:- Delete the existing labs via
kubectlcommands.
- Delete the existing labs via
- Using the Kots Administrative Dashboard:
- Update the memory and storage settings.
- Deploy the changes.
Before starting, inform users to back up any Jupyter Lab artifacts.
Disable JupyterHub via Kots
Disable the JupyterHub through the Kots Administrative service through the following procedure.
From the top navigation panel, select Config and scroll to Data Science Workspaces. Set Choose Environment to None.

Scroll to the bottom of the Config page and select Save Config.
Once the configuration is saved, select Go to updated version. The new configuration is at the top; select Deploy.
Delete Existing Labs After Disabling via Kots
With the JupyterHub service disabled, the next step is to remove any existing labs so they can be recreated with the new memory specifications later. This is done through the kubectl tool.
List all current labs with
kubectl -n {Wallaroo Installed Namespace} get pods | grep jup. For example, if Wallaroo is installed in the default namespacewallaroo:kubectl -n wallaroo get pods | grep jup jupyter-ankush-2egarg-40wallaroo-2eai 1/1 Running 0 3d20h jupyter-john-2ehummel-40wallaroo-2eai 1/1 Running 0 4d20hFor each lab, delete it with
kubectl -n {Wallaroo Installed Namespace} delete pod/{Pod Name}For example, if Wallaroo is installed in the default namespacewallaroo:kubectl -n wallaroo delete pod/jupyter-ankush-2egarg-40wallaroo-2eai
Set Memory and Storage Limits via Kots
Update the JupyterHub Lab settings with the new settings through the Kots Administrative Dashboard.
From the top navigation panel, select Config and scroll to Data Science Workspaces. Set the following options:
- Each Lab - Memory Limit in GB (Default: 4): The total maximum ram limit for each lab in GB.
- Each Lab - Memory guarantee in GB (Default: 2): The total ram guaranteed for each lab, and will not go below this limit.
- Each Lab - fractional CPU Limit (Default: 2.0): The maximum compute limit each lab can access.
- Each Lab - fractional CPU guarantee (Default: 1.0): The total compute guaranteed for each lab, and will not go below this limit.
- Each Lab - Disk Storage Capacity in GB (Default: 50): The total file and artifact storage space granted to each lab in GB.
Scroll to the bottom of the Config page and select Save Config.
Once the configuration is saved, select Go to updated version. The new configuration is at the top; select Deploy.
Once the deploy process is complete, users who log into their JupyterHub service will have new Labs generated with the new storage options.
Configure JupyterHub via Helm
The following instructions are for installations of Wallaroo in a helm based installation.
JupyterHub Helm Settings
The following JupyterHub Lab settings are determined via helm:
| Parameter | Description | Default |
|---|---|---|
jupyter.enabled | If true, users are provided access to JupyterHub and assigned individual labs. If false, JupyterHub services are disabled. | true |
jupyter.memory.limit | The maximum amount of RAM each lab is guaranteed in GB. | "4" |
jupyter.memory.guarantee | The minimum amount of RAM each lab is guaranteed in GB. | "2" |
jupyter.cpu.limit | The maximum number of fractional CPUs (0.5, 1.0, etc) each lab is guaranteed. | "2.0" |
jupyter.cpu.guarantee | The minimum number of fractional CPUs (0.5, 1.0, etc) each lab is guaranteed. | "1.0" |
jupyter.storage.capacity | Disk storage capacity in GB for each lab. | "50" |
Update Memory Limits For All Labs via Helm
The following procedure only updates memory aka ram settings for all users via helm. This takes the following steps:
- Update the memory limit and memory guarantee settings via the
helmlocal-values.ymlor similar file. - Deploy the changes.
- Inform existing users to stop and restart their Jupyter Lab. Instructions included in the process below.
Update a helm yaml file to indicate the modified settings. The following is a minimum local-values.yaml file with the Wallaroo Domain set to wallaroo.example.com and the optional memory and cpu JupyterLab settings.
wallarooDomain: "wallaroo.example.com" # change to match the domain name

deploymentStage: cust # Deployment stage, must be set to "cust" when deployed
custTlsCert: "" # Customer provided certificate chain when deploymentStage is "cust".
custTlsKey: "" # Customer provided private key when deploymentStage is "cust".

ingress_mode: internal # internal (Default), external,or none

dashboard:
  clientName: "Wallaroo Helm Example" # Insert the name displayed in the Wallaroo Dashboard

kubernetes_distribution: ""   # Required. One of: aks, eks, gke, oke, or kurl.

# uncomment the settings below and set as needed
# jupyter:
#   memory:
#     limit: "4"                  # Each Lab - memory limit in GB
#     guarantee: "2"              # Each Lab - lemory guarantee in GB
#   cpu:
#     limit: "2.0"                # Each Lab - fractional CPU limit
#     guarantee: "1.0"            # Each Lab - fractional CPU guarantee
Update the
helmbased installation with thehelm upgradecommand in the following format:helm upgrade $RELEASE $REGISTRYURL --version $VERSION --values $LOCALVALUES.yaml --timeout 10m --wait --wait-for-jobsWhere:
$RELEASE: The name of the Helm release. By default,wallaroo.$REGISTRYURL: The URl for the Wallaroo container registry service.$VERSION: The version of Wallaroo to install. For this example,2025.2.5-6628.$LOCALVALUES: The .yaml file containing the local values overrides. For this example,local-values.yaml.
For example, for the release
wallaroothe command would be:helm upgrade wallaroo oci://registry.replicated.com/wallaroo/2025-2/wallaroo --version 2025.2.5-6628 --values local-values.yaml --timeout 10m --wait --wait-for-jobs
For new users, these settings are applied the first time they launch their JupyterHub Lab. For existing users:
- Inform the user with the expanded JupyterHub Lab to perform the following procedure:
Login to Wallaroo.
Select “Launch JupyterHub”.
Once launched, in JupyterHub select File->Hub Control Panel.
Select Stop My Server.
Once the Stop My Server option is no longer available, select Start My Server.
Once complete, the user’s lab storage capacity is expanded and available for their use.
Update Memory and Storage Limits For All Labs via Helm
The following procedure will update the memory and storage limits for all existing labs via helm. Note that this procedure will delete all current existing labs to set the new storage parameters.
Before starting, inform current Jupyter Lab users to back up their artifacts.
Disable JupyterHub via Helm
Update a helm yaml file with the updated jupyterhub.enabled setting to false.
The following is a minimum local-values.yaml file with the Wallaroo Domain set to wallaroo.example.com and the JupyterHub setting disabled.
wallarooDomain: "wallaroo.example.com" # change to match the domain name

deploymentStage: cust # Deployment stage, must be set to "cust" when deployed
custTlsCert: "" # Customer provided certificate chain when deploymentStage is "cust".
custTlsKey: "" # Customer provided private key when deploymentStage is "cust".

ingress_mode: internal # internal (Default), external,or none

dashboard:
  clientName: "Wallaroo Helm Example" # Insert the name displayed in the Wallaroo Dashboard

kubernetes_distribution: ""   # Required. One of: aks, eks, gke, oke, or kurl.

jupyter.enabled: false
Update the
helmbased installation with thehelm upgradecommand in the following format:helm upgrade $RELEASE $REGISTRYURL --version $VERSION --values $LOCALVALUES.yaml --timeout 10m --wait --wait-for-jobsWhere:
$RELEASE: The name of the Helm release. By default,wallaroo.$REGISTRYURL: The URl for the Wallaroo container registry service.$VERSION: The version of Wallaroo to install. For this example,2025.2.5-6628.$LOCALVALUES: The .yaml file containing the local values overrides. For this example,local-values.yaml.
For example, for the release
wallaroothe command would be:helm upgrade wallaroo oci://registry.replicated.com/wallaroo/2025-2/wallaroo --version 2025.2.5-6628 --values local-values.yaml --timeout 10m --wait --wait-for-jobs
Delete Existing Labs After Disabling via Helm
With the JupyterHub service disabled, the next step is to remove any existing labs so they can be recreated with the new memory specifications later. This is done through the kubectl tool.
List all current labs with
kubectl -n {Wallaroo Installed Namespace} get pods | grep jup. For example, if Wallaroo is installed in the default namespacewallaroo:kubectl -n wallaroo get pods | grep jup jupyter-ankush-2egarg-40wallaroo-2eai 1/1 Running 0 3d20h jupyter-john-2ehummel-40wallaroo-2eai 1/1 Running 0 4d20hFor each lab, delete it with
kubectl -n {Wallaroo Installed Namespace} delete pod/{Pod Name}For example, if Wallaroo is installed in the default namespacewallaroo:kubectl -n wallaroo delete pod/jupyter-ankush-2egarg-40wallaroo-2eai
Set Memory and Storage Limits via Helm
Update a helm yaml file to indicate the modified settings.
The following is a minimum local-values.yaml file with the Wallaroo Domain set to wallaroo.example.com and the optional JupyterLab settings.
wallarooDomain: "wallaroo.example.com" # change to match the domain name

deploymentStage: cust # Deployment stage, must be set to "cust" when deployed
custTlsCert: "" # Customer provided certificate chain when deploymentStage is "cust".
custTlsKey: "" # Customer provided private key when deploymentStage is "cust".

ingress_mode: internal # internal (Default), external,or none

dashboard:
  clientName: "Wallaroo Helm Example" # Insert the name displayed in the Wallaroo Dashboard

kubernetes_distribution: ""   # Required. One of: aks, eks, gke, oke, or kurl.

# uncomment and update the settings below as required
# jupyter:
#   memory:
#     limit: "4"                  # Each Lab - memory limit in GB
#     guarantee: "2"              # Each Lab - lemory guarantee in GB
#   cpu:
#     limit: "2.0"                # Each Lab - fractional CPU limit
#     guarantee: "1.0"            # Each Lab - fractional CPU guarantee
#   storage:
#     capacity: "50"              # Each Lab - disk storage capacity in GB
Update the
helmbased installation with thehelm upgradecommand in the following format:helm upgrade $RELEASE $REGISTRYURL --version $VERSION --values $LOCALVALUES.yaml --timeout 10m --wait --wait-for-jobsWhere:
$RELEASE: The name of the Helm release. By default,wallaroo.$REGISTRYURL: The URl for the Wallaroo container registry service.$VERSION: The version of Wallaroo to install. For this example,2025.2.5-6628.$LOCALVALUES: The .yaml file containing the local values overrides. For this example,local-values.yaml.
For example, for the release
wallaroothe command would be:helm upgrade wallaroo oci://registry.replicated.com/wallaroo/2025-2/wallaroo --version 2025.2.5-6628 --values local-values.yaml --timeout 10m --wait --wait-for-jobs
If users exceed the storage space of their JupyterHub Lab, they may see the following error message:
Unexpected error while saving file: dat/Untitled. ipynb database or disk is full

In these instances, users have the following options:
- Delete files from their JupyterHub Lab to remove the issue.
- Use the Wallaroo SDK from an external source to remove the limitations. For more details on installing and using the Wallaroo SDK, see the Wallaroo SDK Install Guides.
- Increase the storage capacity for an individual user.
To increase the storage capacity of a specific lab, update the PersistentVolumeClaim (PVC) for the lab through the following steps. This requires administrative access to the Kubernetes cluster hosting the Wallaroo instance.
These steps will only update one existing Lab at a time. To update multiple existing labs at once with new settings, see Configure JupyterHub Settings for All Existing Labs.
Verify
AllowVolumeExpansionis enabled with:kubectl describe sc wallaroo-standardThis returns a result like the following.
Name:                  wallaroo-standard
IsDefaultClass:        No
Annotations:           kots.io/app-slug=wallaroo,meta.helm.sh/release-name=wallaroo,meta.helm.sh/release-namespace=wallaroo
Provisioner:           pd.csi.storage.gke.io
Parameters:            type=pd-balanced
AllowVolumeExpansion:  True
MountOptions:          <none>
ReclaimPolicy:         Delete
VolumeBindingMode:     WaitForFirstConsumer
Events:                <none>
If it is not enabled, enable it with the following. NOTE: Not all cloud providers allow for volume expansion. Check with your cloud provider to verify. The following command uses a
vieditor.kubectl edit sc wallaroo-standardEnter
ito enter inset mode.Add at the top under any commend lines:
allowVolumeExpansion: trueIt will resemble the following:
# Please edit the object below. Lines beginning with a '#' will be ignored,
# and an empty file will abort the edit. If an error occurs while saving this file will be
# reopened with the relevant failures.
#
allowVolumeExpansion: true
apiVersion: storage.k8s.io/v1
kind: StorageClass
Press
Escto exit insert mode.Enter
:to access the menu and enterwqfor Write and Quit.
Find the PVC for the specific lab with the command
kubectl get pvc --namespace {Wallaroo Installed Namespace} | grep claim. For example, if Wallaroo is installed in the default namespacewallaroo:kubectl get pvc --namespace wallaroo | grep claimclaim-ankush-2egarg-40wallaroo-2eai Bound pvc-bf62479c-3b19-46e3-aaed-33d6f644e394 47Gi RWO standard-rwo 3d23h claim-john-2ehummel-40wallaroo-2eai Bound pvc-41238b6c-6941-4941-91be-0f7eaba71ea2 47Gi RWO standard-rwo 4d23h prometheus-alert-config-volume-pv-claim Bound pvc-9e80ac4c-20e1-4ba6-aa66-df5d2b13fe73 1Gi RWO standard-rwo 4d23hThe PVCs that contain the users names are the labs. Note that
-2ecorrespond to the.character, while-40corresponds to the@character. Soclaim-john-2ehummel-40wallaroo-2eaiisclaim-john.hummel@wallaroo.ai.Edit the PVC with the command
kubectl edit pvc --namespace {Wallaroo Installed Namespace} {PVC Name}, replacing{Wallaroo Installed Namespace}with the Kubernetes the Wallaroo instance was installed to, and replacing{PVC Name}with the PVC to edit. For example, if Wallaroo is installed in the default namespacewallaroo:kubectl edit pvc --namespace wallaroo claim-john-2ehummel-40wallaroo-2eaiPress
ito enter Insert mode. Updatespec:/resources:/requests:/storage:with the updated size. For example, the default setting is:spec: accessModes: - ReadWriteOnce resources: requests: storage: 50G storageClassName: standard-rwo volumeMode: FilesystemTo expand to 100 Gi of storage, update storage accordingly:
spec:
  accessModes:
  - ReadWriteOnce
  resources:
    requests:
      storage: 100G
  storageClassName: standard-rwo
  volumeMode: Filesystem
Exit the Insert mode with the
Esckey. Enter:to enter the menu, thenwqto Write and Quit. The PVC will update.Verify the update with
kubectl describe pvc --namespace {Wallaroo Install Namespace}. For example, the default install namespace iswallaroo, so the command would bekubectl describe pvc --namespace wallaroo. IfStatusisBound, then the process is complete.Once complete, inform the user with the expanded JupyterHub Lab to perform the following procedure:
Login to Wallaroo.
Select “Launch JupyterHub”.
Once launched, in JupyterHub select File->Hub Control Panel.
Select Stop My Server.
Once the Stop My Server option is no longer available, select Start My Server.
Once complete, the user’s lab storage capacity is expanded and available for their use.
Troubleshooting
What if the PersistentVolumeClaim Shows ‘Waiting’?
If the PersistentVolumeClaim (PVC) status still shows Waiting, check with the PersistentVolume (PV) settings and verify that the storage settings match the PVC.
When JupyterHub services are disabled, existing labs are still allocated storage space. The following procedure deletes the storage space assigned to JupyterHub labs.
This process requires the kubectl application and administrative access to the Kubernetes cluster hosting the Wallaroo installation.
List all current labs with
kubectl -n {Wallaroo Installed Namespace} get pods | grep jup. For example, if Wallaroo is installed in the default namespacewallaroo:kubectl -n wallaroo get pods | grep jup jupyter-ankush-2egarg-40wallaroo-2eai 1/1 Running 0 3d20h jupyter-john-2ehummel-40wallaroo-2eai 1/1 Running 0 4d20hFor each lab, delete it with
kubectl -n {Wallaroo Installed Namespace} delete pod/{Pod Name}For example, if Wallaroo is installed in the default namespacewallaroo:kubectl -n wallaroo delete pod/jupyter-ankush-2egarg-40wallaroo-2eaiWhen all pods are deleted, the process is complete.