Wallaroo Comprehensive Install Guide: OCI Marketplace Ampere VM
Table of Contents
The following guide demonstrates setting up a new Wallaroo installation on a Ampere VM through the the Oracle Cloud Infrastructure (OCI) Marketplace.
Prerequisites
Verify the prerequisites are met before creating the new Wallaroo instance through the OCI Marketplace:
- A Wallaroo license. See your Wallaroo support representative. This is stored as a YAML file.
- A SSH key (Optional): Oracle instances support pre-generated SSH keys or a new SSH key is generated when the new instance is created in the step Provision Wallaroo Installation from OCI Marketplace.
- A Virtual Cloud Network (VCN) with the following ports open. For more details, see Networking Scenarios: Scenario A: Public Subnet, with Step 5 detailing how to open external ports.
4433000080818443
- TLS Certificates: These are used to verify the DNS settings. For more information, see Configuring DNS Servers for Kubernetes Clusters and the Wallaroo DNS Configuration Guide. The following DNS requires are required.
- Wallaroo domain:
Arecord,NS(Name Server) record,SOA(Start Of Authority) record. For example:wallaroo.example.com. - The IP address for the DNS settings are retrieved at the Activate the new Wallaroo instance. process.
- Wallaroo domain:
The following steps detail:
- How to provision a new Wallaroo instance from the OCI Marketplace.
- Activate the new Wallaroo instance.
Provision Wallaroo Installation from OCI Marketplace
The following steps provisions a new Wallaroo installation from the OCI Marketplace.
During this process the following information must be stored:
- The generated or used SSH key.
- The public IP address set for the new instance.
Login to the OCI Marketplace. From the OCI Marketplace listing Wallaroo AI inference platform - Starter plan (Ampere), select Get App.
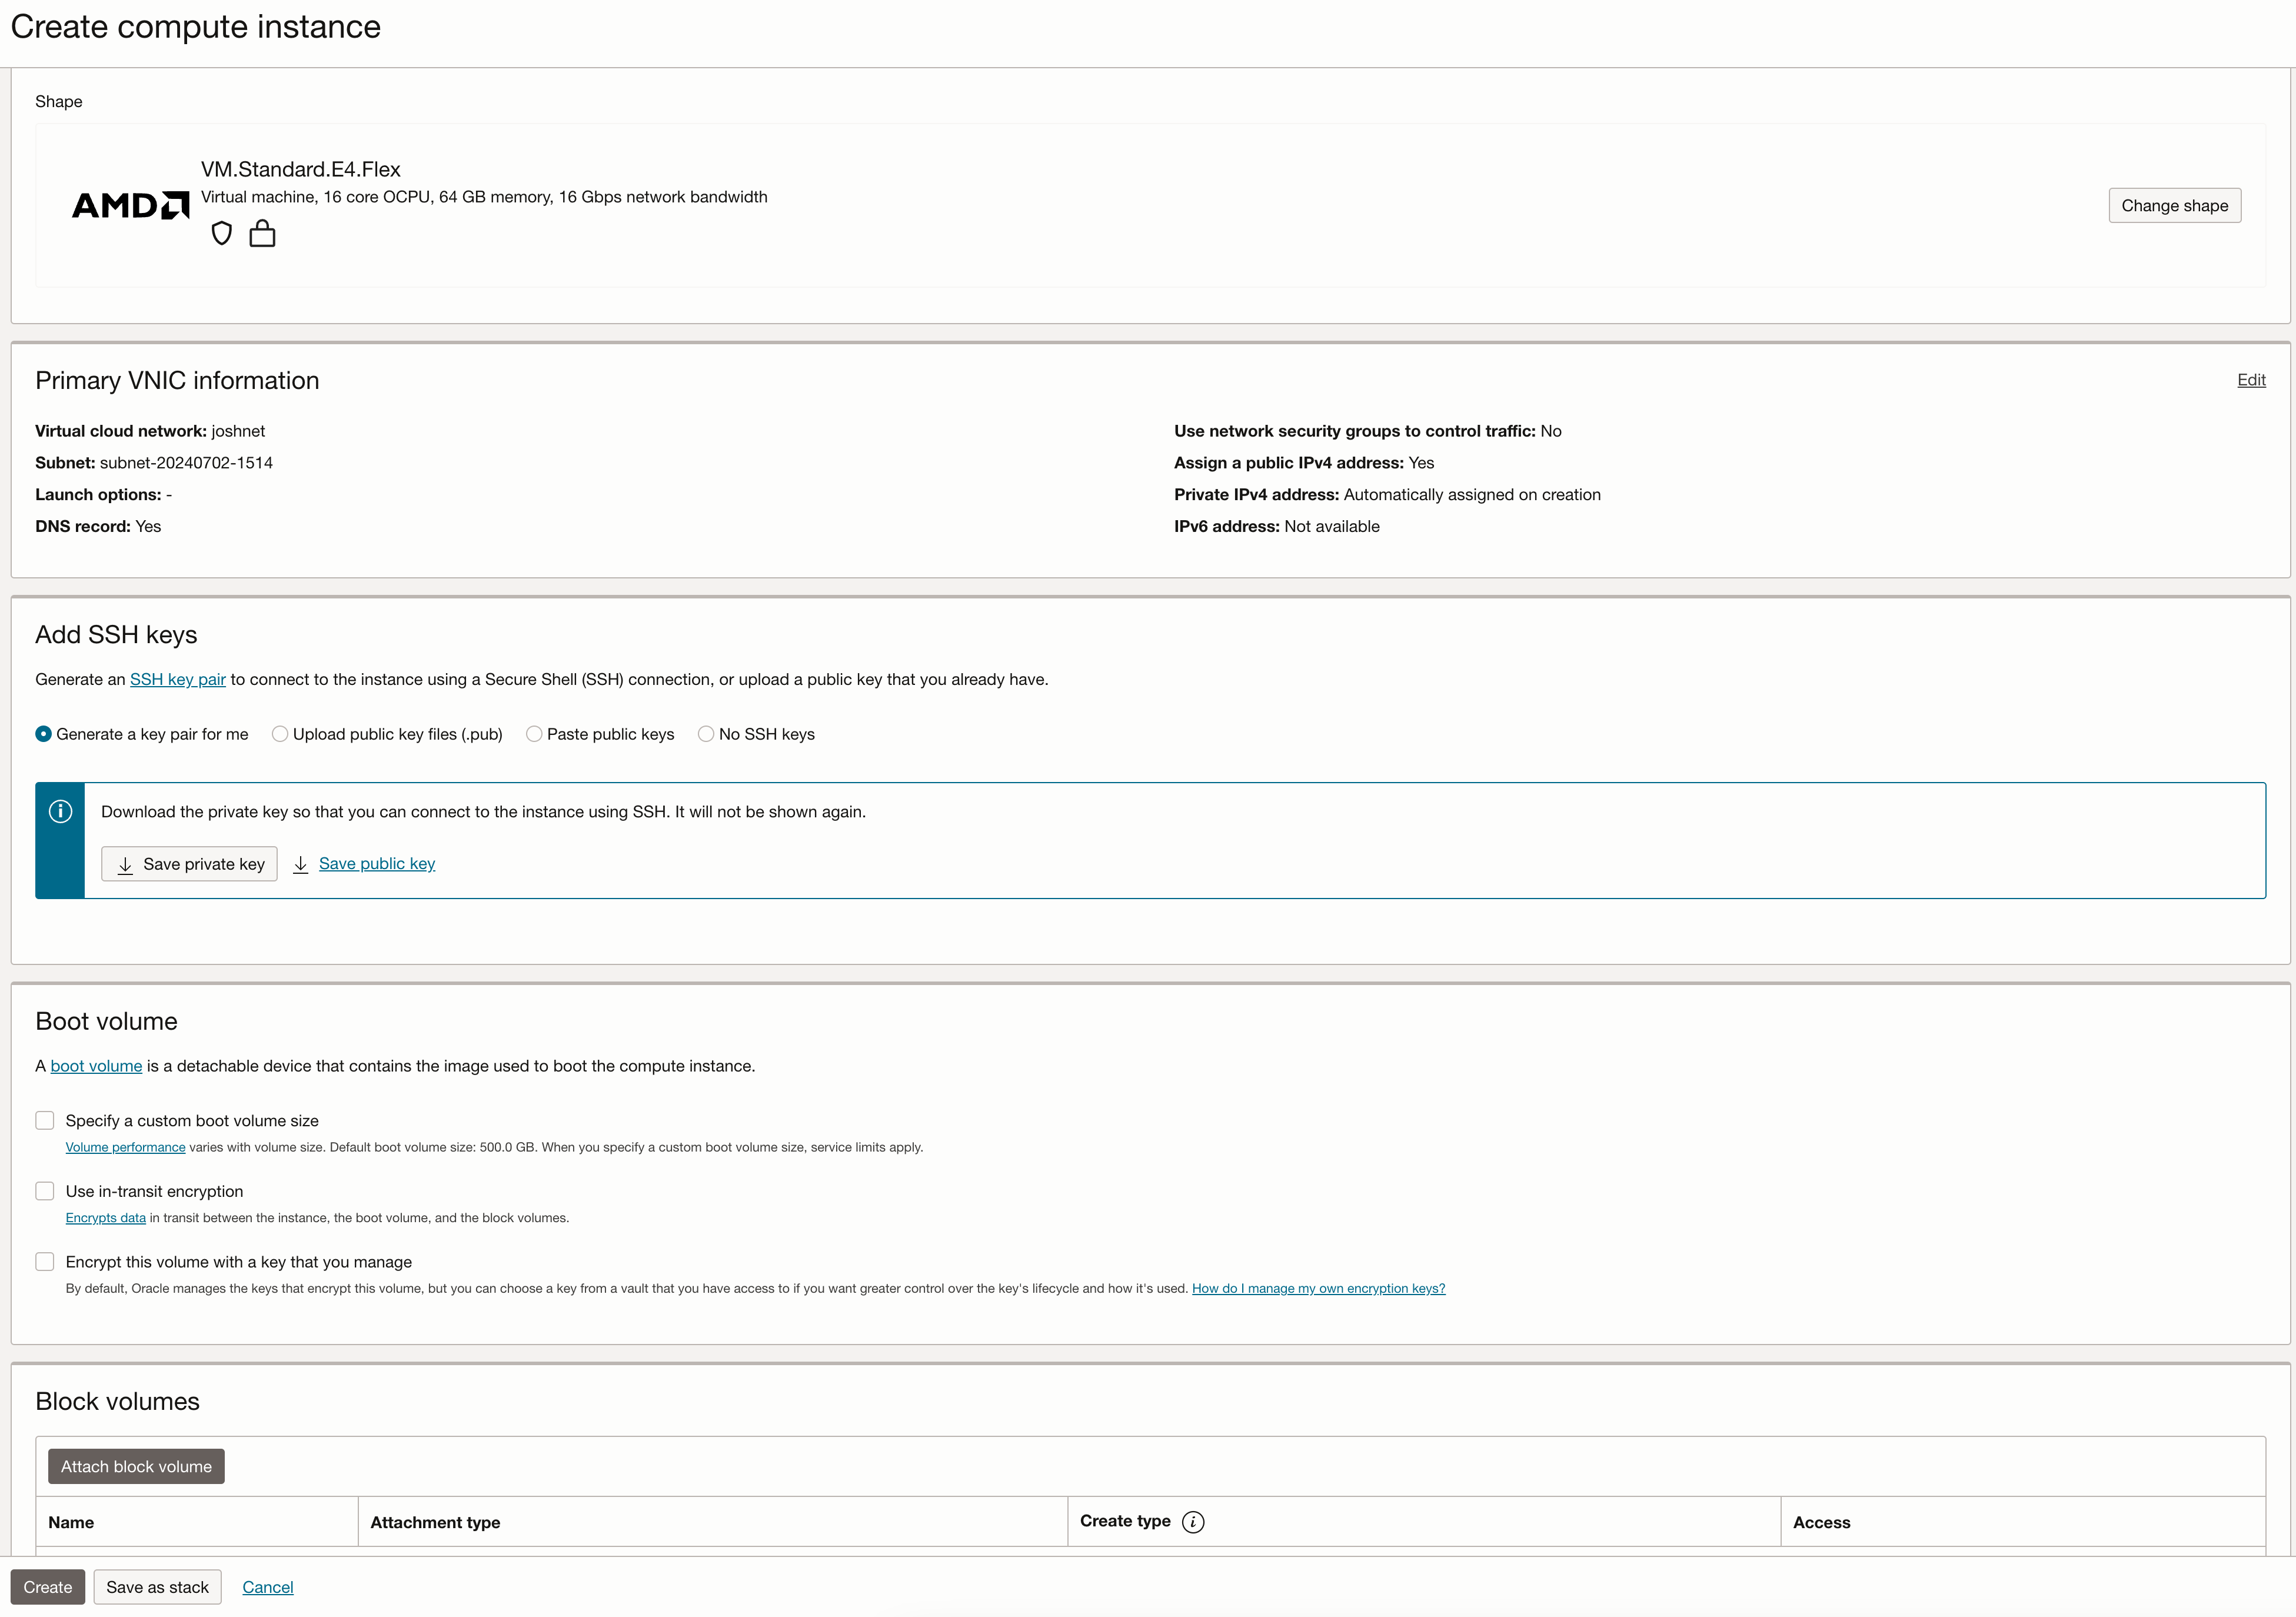
Set the following required options. For other options, refer to the Oracle Cloud Infrastructure documentation Creating an Instance.
- Name: The name of the new Wallaroo instance.
- Create in compartment: Select the OCI compartment the instance is created in. For more details, see What is a Compartment?.
- Image and Shape:
- Image: The OCI marketplace automatically selects the Wallaroo image.
- Shape: Select Change shape and set the following.
- Shape Name: VM.Standard.A1.Flex
- Number of ocpu: 32 ocpu
- Shape: 64gb E4.Flex
- Primary VNIC information
- Primary Network: Select Select existing virtual cloud network as defined in the Prerequisites.
- Add SSH Keys: Select one of the following.
- Select Generate a key pair for me, then select Save private key and Save public key. Save these in a secure location.
- Use a pre-created SSH key from the Prerequisites and either Upload public key files (.pub) or Paste public keys.
When finished, select Create.
Wait until the new instance state is Running then continue to activate the new Wallaroo instance.
Activate the Wallaroo Instance
Once the new Wallaroo instance State is Running, the new instance is activated through the following steps.
From the OCI Instances page, select the Public IP for the new Wallaroo instance.

From a browser, access the Kots Administrative Console from the instances public IP address through the following address:
http://instance-public-ip:30000
Login with the default password:
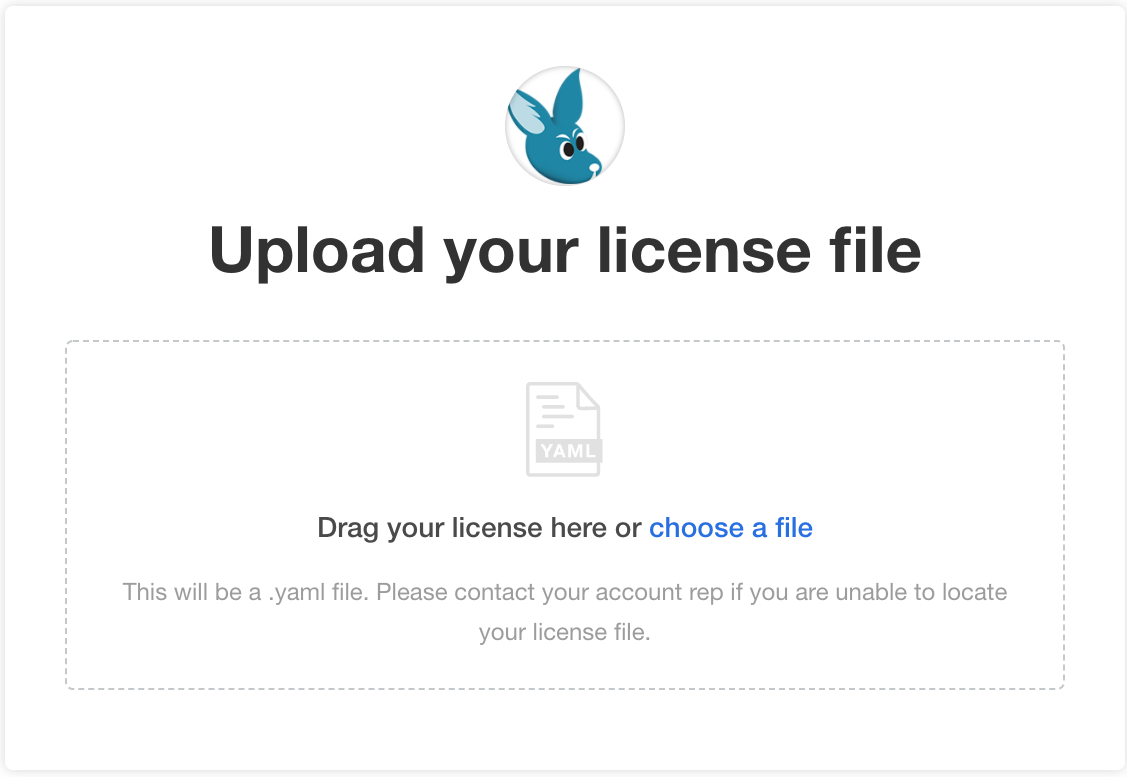
W@11y$.Upload your Wallaroo license file.
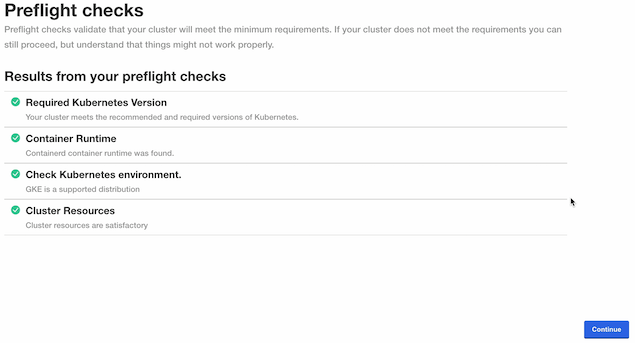
A preflight check verifies that all of the minimum requirements are met. This may take a few minutes. If there are any issues, Wallaroo can still be launched but may not function properly. When ready, select Continue.
The Configure Wallaroo page will be displayed which allows you to customize your Wallaroo environment. The following are the minimum required settings.
- Networking Configuration: Set whether the Wallaroo instance is available from outside the Kubernetes cluster, or only from within it. Set the following.
- Ingress Mode for Wallaroo Endpoints:
- Select Embedded: A direct connection to the host. This option is available for embedded installs on “bare metal” or single node Linux installs.
- Enable external URL inference endpoints: Creates pipeline inference endpoints. For more information, see Model Endpoints Guide.
- Select Embedded: A direct connection to the host. This option is available for embedded installs on “bare metal” or single node Linux installs.
- Ingress Mode for Wallaroo Endpoints:
- DNS
- Wallaroo Domain: The domain name of the Wallaroo instance.
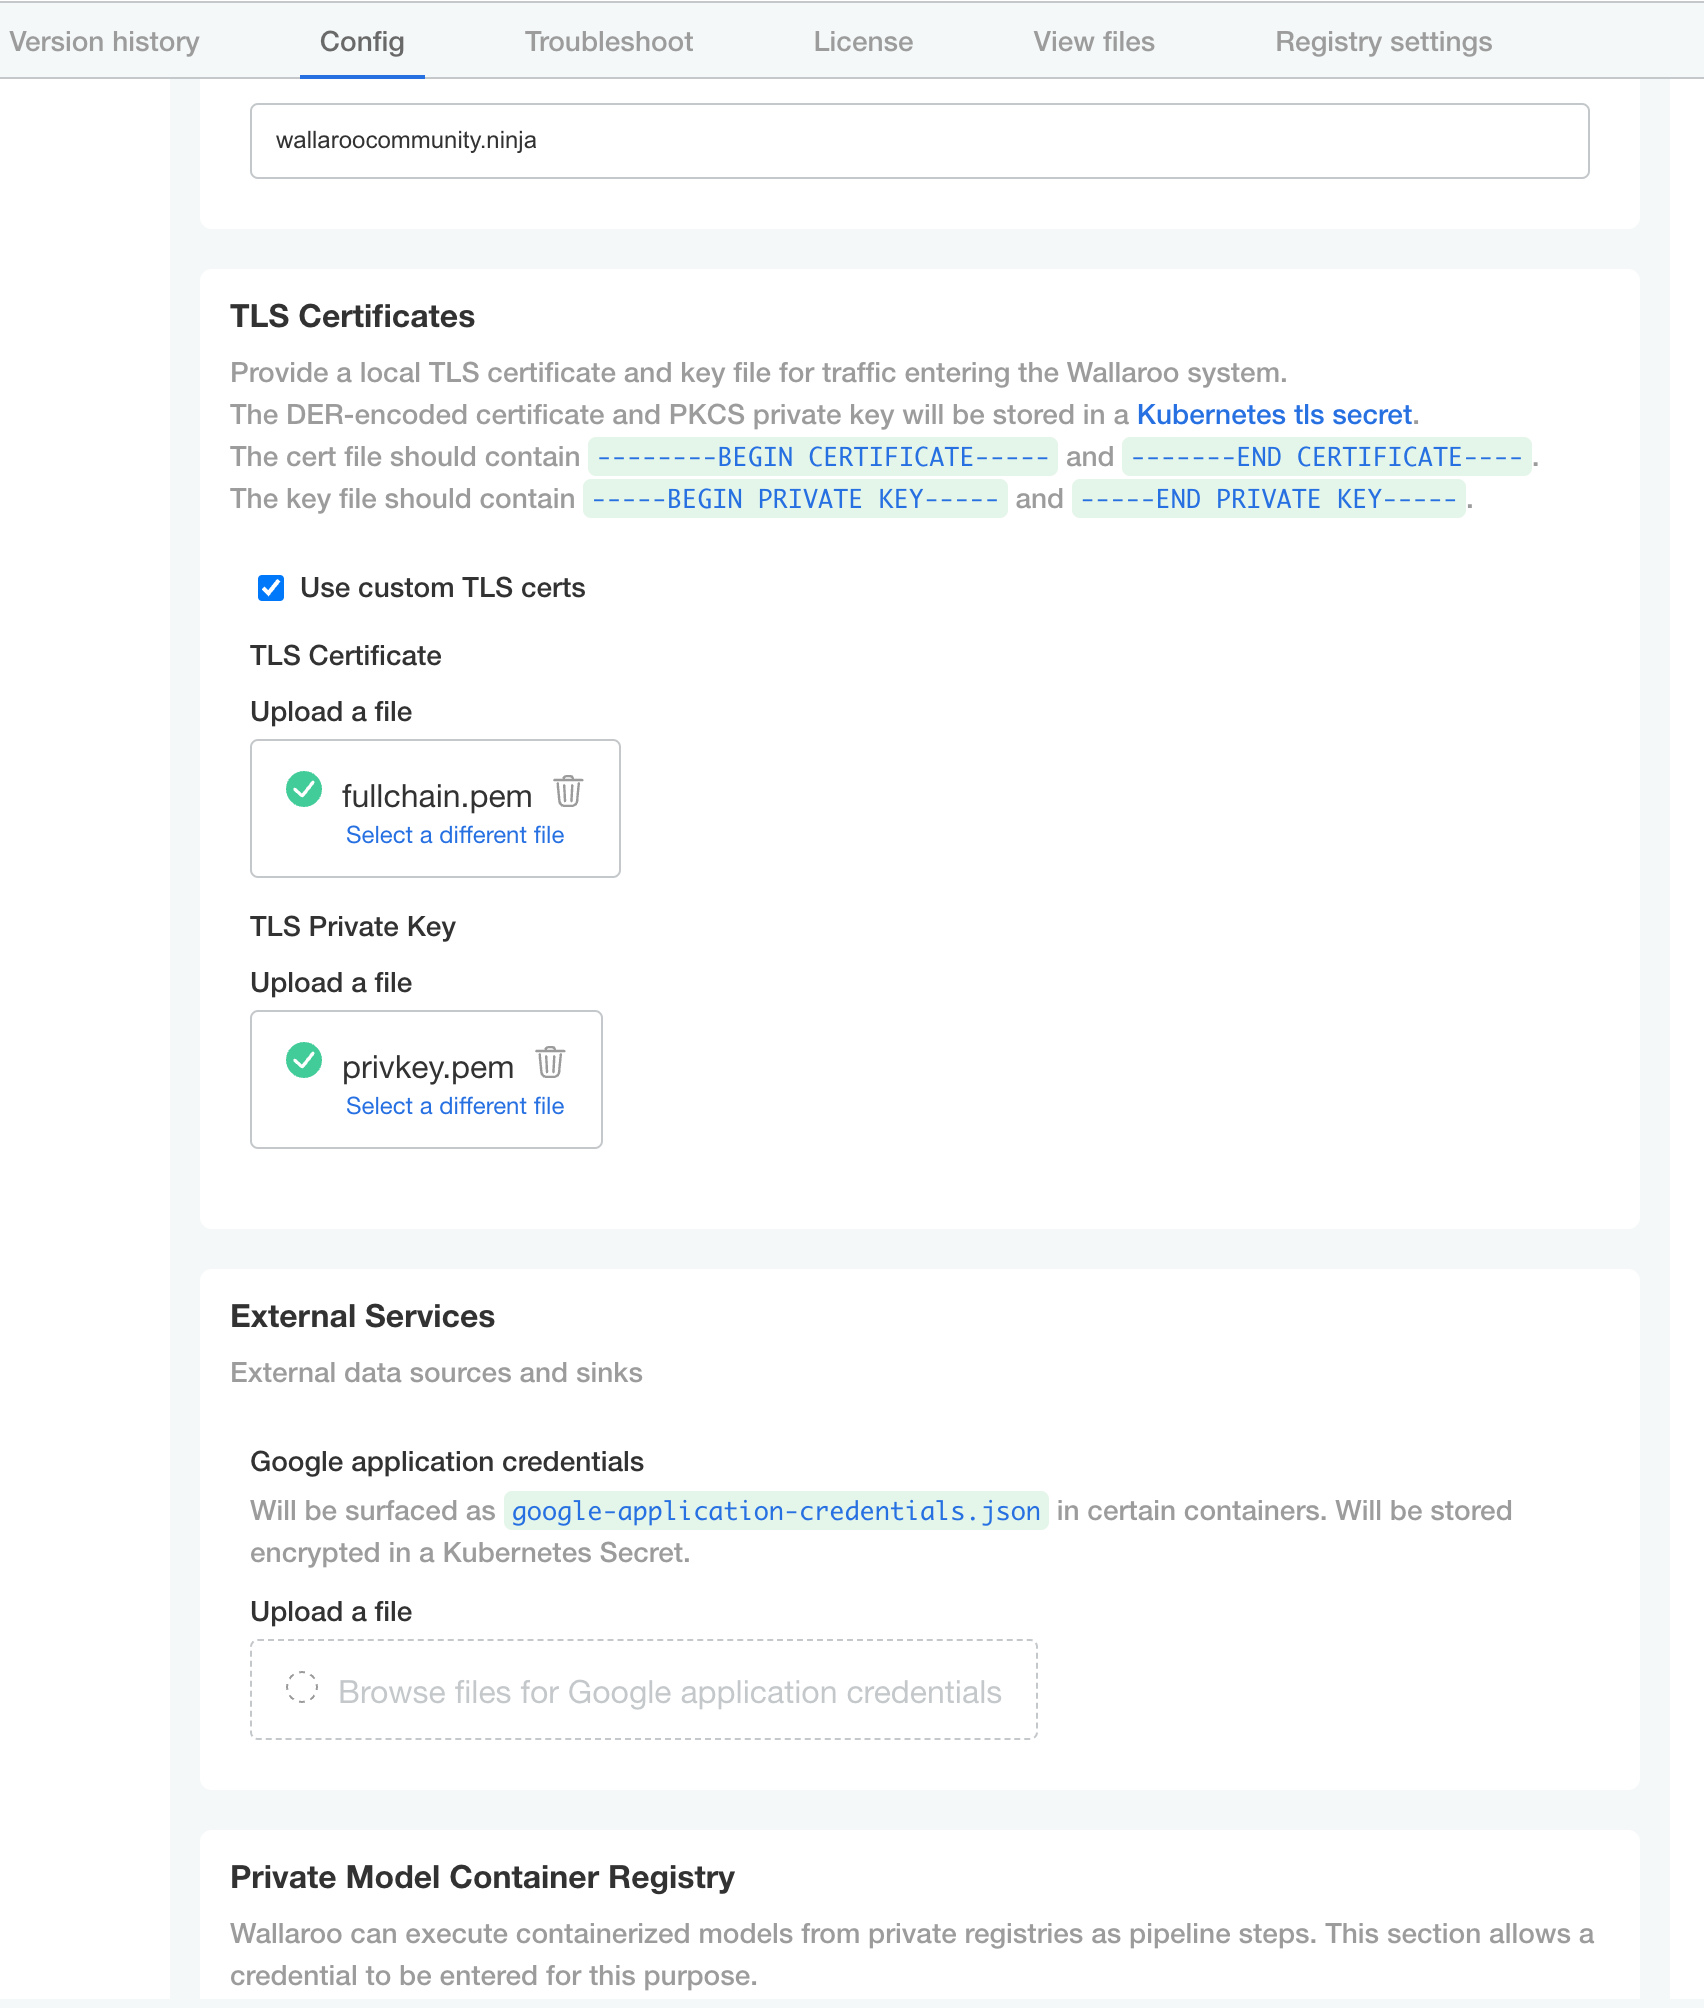
- TLS Certificates
- Use custom TLS Certs: Checked
- TLS Certificate: Enter your TLS Certificate (.crt or .pem file).
- TLS Private Key: Enter your TLS private key (.key or .pem file).
- Networking Configuration: Set whether the Wallaroo instance is available from outside the Kubernetes cluster, or only from within it. Set the following.
Edge Deployment Configuration
The following optional configurations to enable OCI Registry integration with Wallaroo for deploying models in edge and multi-cloud environments through Wallaroo. For more details, see Inference Anywhere.
To set the Edge Registry Settings through the Kots Administrative Dashboard:
Launch the Kots Administrative Dashboard using the following command, replacing the
--namespaceparameter with the Kubernetes namespace for the Wallaroo instance:kubectl kots admin-console --namespace wallarooOpen a browser at the URL detailed in the step above and authenticate using the console password set as described in the as detailed in the Wallaroo Install Guides.
From the top menu, select Config then scroll to Edge Deployment.
Enable Provide OCI registry credentials for pipelines.
Enter the following:
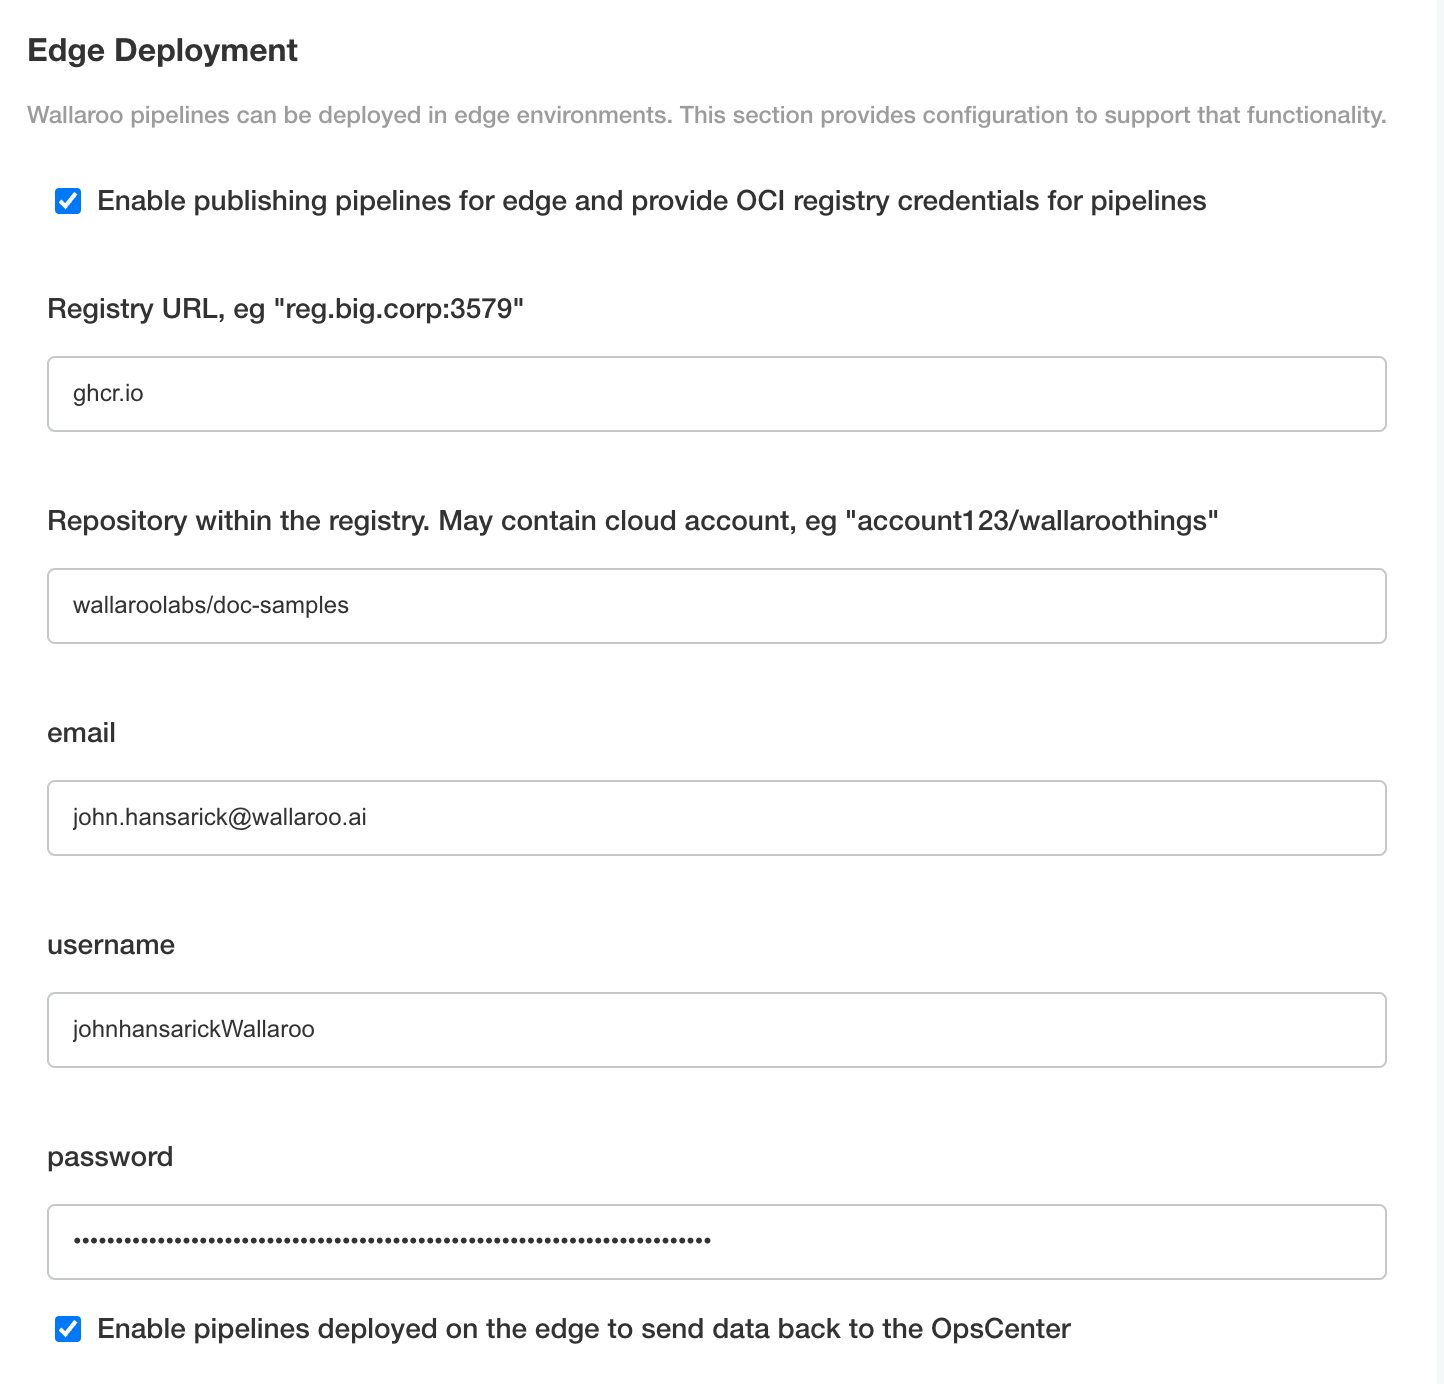
- Registry URL: The address of the registry service. For example:
us-west1-docker.pkg.dev. - email: The email address of the user account used to authenticate to the service.
- username: The account used to authenticate to the registry service.
- password: The password or token used to authenticate to the registry service.
- To enable edge observability, enable Enable pipelines deployed on the edge to send data back to the OpsCenter.
- Registry URL: The address of the registry service. For example:
- Once complete, scroll to the bottom of the Config page and select Deploy.
The Wallaroo instance will complete the deployment process. Wait until the Kots Administrative Console status is Ready before proceeding.
Update Kots Administrative Console Password
To change the default Kots Administrative Console Password:
- Access the Kots Administrative Console through the URL detailed above.
- Authenticate with the current Kots Administrative Console password.
- From the upper right corner, select the menu labeled
..., and select Change password. - Enter the current password, then enter the new password and confirm it. When finished, select Change Password.
Setup New Users
When the Wallaroo instance is finished deploying, the users are set up through the following process.
SSH into the Wallaroo instance through the following command:
ssh -i $PRIVATESSHKEY ubuntu@wallaroo-instance-ipFor example, if the private key is located in the file
~/.ssh/wallaroo-oci.pem, then the command would be:ssh -i ~/.ssh/wallaroo-oci.pem ubuntu@wallaroo-instance-ipRetrieve the
adminuser password with the following command:sudo wallaroo-admin-passwordStore the
adminpassword.Enter
exitto terminate thesshsession.Access the new Wallaroo instance through the public IP address:
https://wallaroo-instance-ip.Login with the username
adminand theadminuser password.Select Create Users and enter the following:
- User Email: The email address for the user. This must be in the valid email address format.
- Assign Type: Select Admin.
- Password: Enter the user’s password. This user password be sent to the new user.
- Temporary or Permanent:
- Temporary: The user will be forced to change their login password upon their next login (Recommended).
- Permanent: The user will keep their password.
Create any additional users as needed. When finished, select the Wallaroo icon drop down and select Logout.
Once complete, users login in through the new Wallaroo’s public IP address at: https://wallaroo-instance-ip.
For details on deploying models and performing inferences, see the ML Operations guides.
Next Steps
Ready for more? Time to deploy models and start inferencing.
- See the Wallaroo 101 for a run through of uploading, deploying, and inferencing on ML models.
- For Large Language Models, see the Large Language Models Operations guides.
- For edge and multi-cloud deployments, see the Run Anywhere Tutorials for instructions on deploying ML models in any cloud, any architecture, on any platform.
For access to these sample models and a demonstration on using LLMs with Wallaroo:
- Contact your Wallaroo Support Representative OR
- Schedule Your Wallaroo.AI Demo Today