Single Node Linux
Organizations can run Wallaroo within a single node Linux environment that meet the prerequisites.
The following guide is based on installing Wallaroo Enterprise into virtual machines based on Ubuntu 22.04.
For other environments and configurations, consult your Wallaroo support representative.
Prerequisites
Before starting the bare Linux installation, the following conditions must be met:
- Have a Wallaroo Enterprise license file. For more information, you can request a demonstration.
- A Linux bare-metal system or virtual machine with at least 32 cores and 64 GB RAM with Ubuntu 20.04 installed.
- See the Install Wallaroo with Minimum Services for installing Wallaroo with reduced services.
- 650 GB allocated for the root partition, plus 50 GB allocated per node and another 50 GB for the JupyterHub service. Enterprise users who deploy additional pipelines will require an additional 50 GB of storage per lab node deployed.
- Ensure memory swapping is disabled by removing it from
/etc/fstabif needed. - DNS services for integrating your Wallaroo Enterprise instance. See the DNS Integration Guide for the instructions on configuring Wallaroo Enterprise with your DNS services.
IMPORTANT NOTE
- Wallaroo requires out-bound network connections to download the required container images and other tasks. For situations that require limiting out-bound access, refer to the air-gap installation instructions or contact your Wallaroo support representative. Also note that if Wallaroo is being installed into a cloud environment such as Google Cloud Platform, Microsoft Azure, Amazon Web Services, etc, then additional considerations such as networking, DNS, certificates, and other considerations must be accounted for.
- The steps below are based on minimum requirements for install Wallaroo in a single node environment.
- For situations that require limiting external IP access or other questions, refer to your Wallaroo support representative.
Network Configurations
Wallaroo installations provide the following methods for connecting to the Wallaroo services:
- When using port forwarding or similar ingress modes, no ports need to be open.
- For connections to the Wallaroo Ops installation, the following ports must be open:
804438081and8443: Optional, used for Edge Observability.
For more details, see the Model Endpoints Guide.
Template Single Node Scripts
The following template scripts are provided as examples on how to create single node virtual machines that meet the requirements listed above in AWS, GCP, and Microsoft Azure environments, and open the required network ports.
AWS VM Template Script
The following is required to execute the AWS VM template script.
- AWS CLI
- IAM permissions to create resources. See IAM policies for Amazon EC2.
Note that the install instructions include details on how to open the required ports to the VM once created:
# Open port 22 and 443
aws ec2 authorize-security-group-ingress --group-name $NAME --protocol tcp --port 22 --cidr $MY_IP --no-cli-pager
aws ec2 authorize-security-group-ingress --group-name $NAME --protocol tcp --port 443 --cidr $MY_IP --no-cli-pager
Download template script here: aws-single-node.bash
# The name of the virtual machine
NAME=wallaroo                       # set the VM name here

# The image used : ubuntu/images/2024.1/hvm-ssd/ubuntu-jammy-22.04-amd64-server-20230208
IMAGE_ID=ami-0557a15b87f6559cf

# Instance type meeting the Wallaroo requirements.
INSTANCE_TYPE=c6i.8xlarge           # c6a.8xlarge is also acceptable

# key name - generate keys using Amazon EC2 Key Pairs
# https://docs.aws.amazon.com/AWSEC2/latest/UserGuide/ec2-key-pairs.html
MYKEY={INSERT YOUR KEY HERE}

# Whitelist the our source IP for maximum security -- use 0.0.0.0/0 to accept all
MY_IP=$(curl -s https://checkip.amazonaws.com)/32

# Create security group in the Default VPC
aws ec2 create-security-group --group-name $NAME --description "single node linux" --no-cli-pager # update description as required

# Open port 22 and 443
aws ec2 authorize-security-group-ingress --group-name $NAME --protocol tcp --port 22 --cidr $MY_IP --no-cli-pager
aws ec2 authorize-security-group-ingress --group-name $NAME --protocol tcp --port 443 --cidr $MY_IP --no-cli-pager
# If Edge Observability is enabled, also open ports 8081 and 8443, to admit incoming inference results
# aws ec2 authorize-security-group-ingress --group-name $NAME --protocol tcp --port 8081 --cidr $MY_IP --no-cli-pager
# aws ec2 authorize-security-group-ingress --group-name $NAME --protocol tcp --port 8443 --cidr $MY_IP --no-cli-pager

# Launch instance with a 650 GB Boot device.
aws ec2 run-instances --image-id $IMAGE_ID --count 1 --instance-type $INSTANCE_TYPE \
    --no-cli-pager \
    --key-name $MYKEY \
    --block-device-mappings '[{"DeviceName":"/dev/sda1","Ebs":{"VolumeSize":650,"VolumeType":"gp2"}}]'  \
    --tag-specifications "ResourceType=instance,Tags=[{Key=Name,Value=$NAME}]" \
    --security-groups $NAME
Azure VM Template Script
The following is required to execute the Azure template script.
Note that the install instructions include details on how to open the required ports to the VM once created:
# SSH port is open by default. This adds an application port.
az vm open-port --resource-group $RESOURCEGROUP --name $NAME --port 443
Download template script here: azure-single-node-vm.bash. Store the IP address generated from this step; this is used later in the Connection Options process.
# Variables list.  Update as per your organization's settings
NAME=wallaroo                          # the name of the cluster
RESOURCEGROUP={YOURRESOURCEGROUP}      # set your resource group
IMAGE=Canonical:0001-com-ubuntu-server-jammy:22_04-lts:22.04.202301140

# List the available locations and select one
#az account list-locations  -o table |egrep 'US|----|Name'
LOCATION={YOURREGION}                  # set the location here

# Create resource group, only needed if not using an existing resource group
az group create -l $LOCATION --name $RESOURCEGROUP

# Create VM. This will create ~/.ssh/id_rsa and id_rsa.pub - store these for later use.
az vm create --resource-group $RESOURCEGROUP --name $NAME --image $IMAGE  --generate-ssh-keys \
   --size Standard_D32s_v4 --os-disk-size-gb 500 --public-ip-sku Standard

# SSH port is open by default. This adds an application port.
az vm open-port --resource-group $RESOURCEGROUP --name $NAME --port 443
# If Edge Observability is enabled, also open ports 8081 and 8443, to admit incoming inference results
# az vm open-port --resource-group $RESOURCEGROUP --name $NAME --port 8443
# az vm open-port --resource-group $RESOURCEGROUP --name $NAME --port 8081
GCP VM Template Script
The following is required to execute the GCP template script.
- Gcloud CLI
- GCP Project ID
Note that ports 443 and 22 are open by default when the VM is created.
Download template script here: gcp-single-node-vm.bash. Store the IP address generated from this step; this is used later in the Connection Options process.
# Settings

NAME=wallaroo                   # change as required
ZONE=us-west1-a                 # For a complete list, use `gcloud compute zones list | egrep ^us-`
PROJECT=YOUR PROJECT ID     # Insert the GCP Project ID here

# Create VM

IMAGE=projects/ubuntu-os-cloud/global/images/ubuntu-2204-jammy-v20231030

# Port 22 and 443 open by default

# If Edge Observability is enabled, also open ports 8081 and 8443, to admit incoming inference results.  This applies to the entire account and cannot be added a second time
# gcloud compute firewall-rules create allow-tcp-edge-ports --allow tcp:8081,tcp:8443  --network default  --target-tags edge-server
# gcloud compute instances add-tags jcw-test --tags edge-server

gcloud compute instances create $NAME \
    --project=$PROJECT \
    --zone=$ZONE \
    --machine-type=e2-standard-32 \
    --network-interface=network-tier=STANDARD,subnet=default \
    --maintenance-policy=MIGRATE \
    --provisioning-model=STANDARD \
    --no-service-account \
    --no-scopes \
    --tags=https-server \
    --create-disk=boot=yes,image=${IMAGE},size=500,type=pd-standard \
    --no-shielded-secure-boot \
    --no-shielded-vtpm \
    --no-shielded-integrity-monitoring \
    --reservation-affinity=any


# Get the external IP address
gcloud compute instances describe $NAME --zone $ZONE --format='get(networkInterfaces[0].accessConfigs[0].natIP)'
To retrieve the IP address for the VM, see Locating IP addresses for an instance.
Connection Options
Once the VM is ready, commands are issued by opening an SSH connection and using the terminal commands. The following demonstrates how to SSH into the VM based on the cloud service.
To SSH into an AWS VM on a public domain name, you’ll need:
The private PM key saved to the file
/path/key-pair-name.pem.- If the current user does not have the PEM file, the private key can be generated. For more details, see Create a key pair for your Amazon EC2 instance.
The public IP address for the VM set to the environment variable
$IP. The following command retrieves the IP address of the VM, replacing the$INSTANCEIDwith the instance id returned when the VM was created.aws ec2 describe-instances --output text --instance-id $INSTANCEID \ --query 'Reservations[*].Instances[*].{ip:PublicIpAddress}'
The following command will ssh into the AWS EC2 VM provided the default AWS VM Template Script.
ssh -i /path/key-pair-name.pem ubuntu@$IP
For more details, see Connect to your Linux instance from Linux or macOS using SSH
To SSH into an Azure VM on a public domain name, you’ll need:
- The SSH key pair is generated from the Azure VM Template Script step.
- The VM’s IP address generated from the Azure VM Template Script step.
At this point, if the SSH keys are stored as ~/.ssh/id_rsa and ~/.ssh/id_rsa.pub, the SSH connection is made with the following:
ssh -i ~/.ssh/id_rsa $IP
For more details, see Connect to a Linux VM
In a GCP instance, gcloud is used to SSH connect to the VM with the following command, replacing $NAME with the name of the GCP instance, $ZONE with the zone it was installed into.
gcloud compute ssh $NAME --zone $ZONE
Kubernetes Installation Steps
The following script and steps will install the Kubernetes version and requirements into the Linux node that supports a Wallaroo single node installation. Before starting, open an SSH connection to the VM to issue following commands.
curl is installed into the VM using the default scripts provided above. Verify that it is installed if using some other platform.
Verify that the Ubuntu distribution is up to date, and reboot if necessary after updating.
sudo apt updatesudo apt upgradeRestart the VM. The following commands are available depending on the cloud service used. Replace the variables with those generated from the Template Single Node Scripts.
- GCP:
gcloud compute instances start $NAME --zone $ZONE - AWS:
aws ec2 reboot-instances --instance-id $INSTANCEID - Azure:
az vm start --resource-group $RESOURCEGROUP --name $NAME
- GCP:
Start the Kubernetes installation with the following script.
curl https://kurl.sh/wallaroo-ee | sudo bash- If prompted with
This application is incompatible with memory swapping enabled. Disable swap to continue? (Y/n), replyY.
- If prompted with
Set up the Kubernetes configuration with the following commands:
mkdir -p $HOME/.kubesudo cp -i /etc/kubernetes/admin.conf $HOME/.kube/configsudo chown $(id -u):$(id -g) $HOME/.kube/configchmod u+w $HOME/.kube/configecho 'export KUBECONFIG=$HOME/.kube/config' >> ~/.bashrcLog out, and log back in as the same user. Verify the installation was successful with the following:
kubectl get nodesIt should return results similar to the following:
NAME     STATUS   ROLES                  AGE     VERSION
wallux   Ready    control-plane,master   6m26s   v1.23.6
Exit the
sshsession. Any new connections will be made in subsequent steps.
Install Wallaroo
Wallaroo installations are available via two methods:
kotsbased installations.helmbased installations.
Kots Based Install of Wallaroo
Kots Install Guides
kots Quick Install Guide
The following are quick guides for installing kots for different operating systems. For more details, see the instructions for your specific environment.
IMPORTANT NOTE
As of this time, Wallaroo requires
kotsversion 1.107.2. Please verify that version is installed before starting the Wallaroo installation process.
Install
kotsby downloading the script and piping it into thebashshell, assumingcurlis installed:curl https://kots.io/install/1.107.2 | REPL_USE_SUDO=y bash
For instructions on updating the kots version for the Wallaroo Ops installation, see Updating KOTS.
Manual Kots Install
A manual method to install KOTS is:
Download from https://github.com/replicatedhq/kots/releases/tag/v1.107.2. Linux and MacOS are supported.
Unpack the release
Rename the kots executable to kubectl kots.
Copy the renamed kubectl kots to anywhere on the
PATH.Next, verify successful installation with the command
kubectl kots version. This should return the following:Replicated KOTS 1.107.2
Port forwarding port 8800 is used to for kots based installation to access the Kots Administrative Dashboard. Port forwarding opens a tunnel from the local machine to the remote VM machine. The following commands are used on the local system to establish that the ssh session plus the port forwarding.
The following examples demonstrate how to port forward via ssh based on the cloud environment the VM is installed to. This provides a terminal session into the VM while forwarding local port 8800 to the remote VM.
For rack mount single node Linux installations, see the ssh port forward documentation for your specific instance.
AWS Port Forward
To port forward via SSH into an AWS VM on a public domain name, you’ll need:
- The private key saved to the file
/path/key-pair-name.pem. - The public IP address for the VM set to the environment variable
$IP.
ssh -i /path/key-pair-name.pem ubuntu@$IP -L 8800:localhost:8800
For more details, see Connect to your Linux instance from Linux or macOS using SSH
Azure Port Forwarding
To port forward via SSH into an Azure VM on a public domain name, you’ll need:
- The SSH key pair is generated from the Azure VM Template Script step.
- The VM’s IP address generated from the Azure VM Template Script step.
At this point, if the SSH keys are stored as ~/.ssh/id_rsa and ~/.ssh/id_rsa.pub, the SSH forwarding is made with the following, setting the VM’s IP address to the variable $IP:
ssh $IP -L8800:localhost:8800
For more details, see Connect to a Linux VM
GCP Port Forwarding
To port forward via SSH in a GCP instance, gcloud is used to SSH connect to the VM with the following command, replacing $NAME with the name of the GCP VM, $ZONE with the zone it was installed into.
gcloud compute ssh $NAME --zone $ZONE -- -L 8800:localhost:8800
With the ssh port forwarding ready, the installation can begin from the same terminal prompt.
Install the Wallaroo Enterprise Edition using
kots install wallaroo/2024-1, specifying the namespace to install Wallaroo into. For example, ifwallaroois the namespace, then the command is:kubectl kots install wallaroo/2024-1 --namespace wallarooWallaroo Enterprise Edition will be downloaded and installed into your Kubernetes environment in the namespace specified. When prompted, set the default password for the Wallaroo environment. When complete, Wallaroo Enterprise Edition will display the URL for the Admin Console, and how to end the Admin Console from running.
• Deploying Admin Console
• Creating namespace ✓
• Waiting for datastore to be ready ✓
    Enter a new password to be used for the Admin Console: •••••••••••••
  • Waiting for Admin Console to be ready ✓

• Press Ctrl+C to exit
• Go to http://localhost:8800 to access the Admin Console
To relaunch the Kots Administrative Dashboard and make changes or updates, use the following command:
kubectl kots admin-console --namespace wallaroo
Initial Wallaroo Config
Once Wallaroo has been installed for the first time, we can perform initial configuration.
If Wallaroo Edition has not started, launch it with the following command:
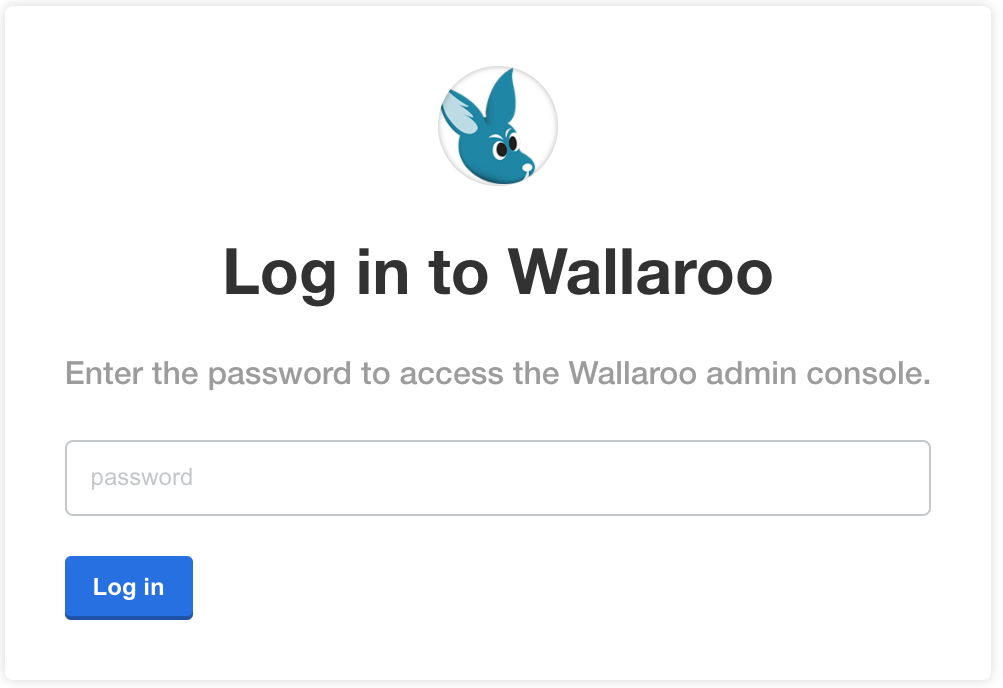
❯ kubectl kots admin-console --namespace wallaroo
  • Press Ctrl+C to exit
  • Go to http://localhost:8800 to access the Admin Console
Enter the Admin Console address into a browser. You will be prompted for the password set in the process above. Enter it and select Log in.
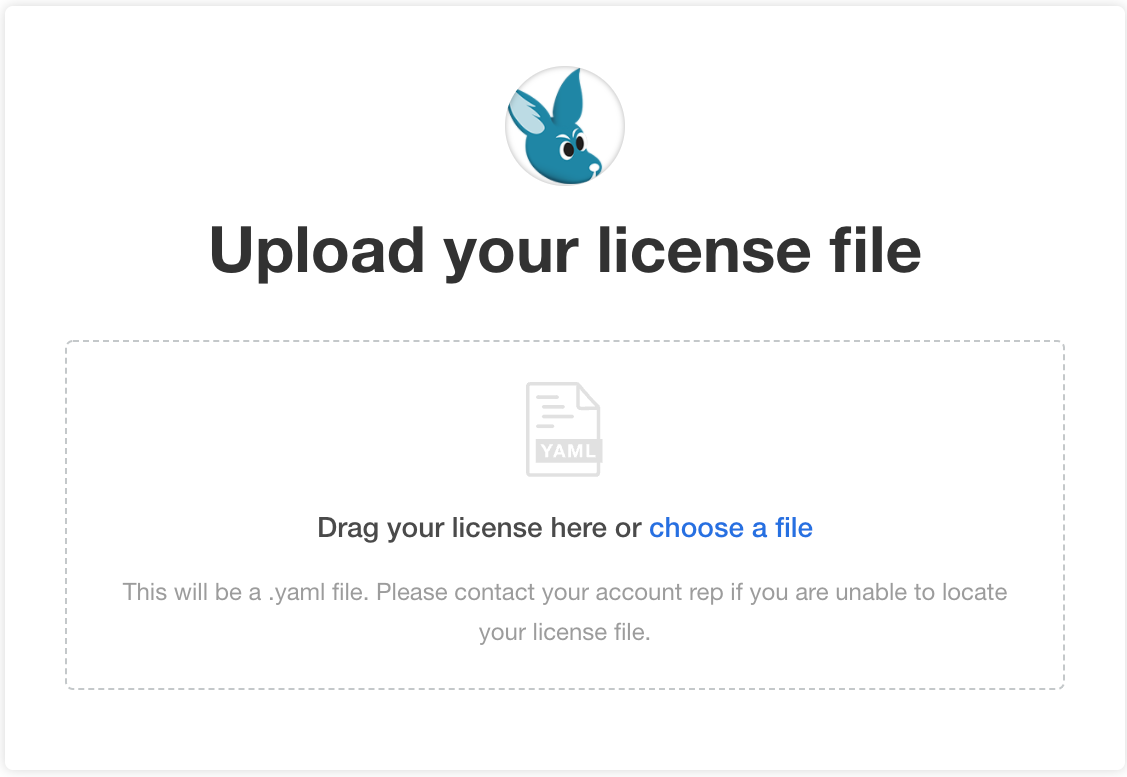
Upload your license file.
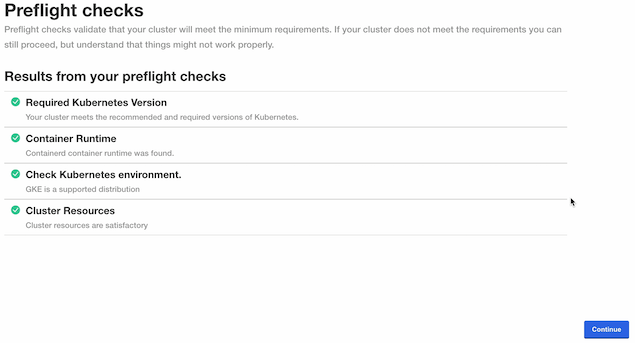
The Kots Administrative Dashboard will run the preflight checks to verify that all of the minimum requirements are met. This may take a few minutes. If there are any issues, Wallaroo can still be launched but may not function properly. When ready, select Continue.
The Configure Wallaroo page will be displayed which allows you to customize your Wallaroo environment. The following are the minimum required settings.
- Networking Configuration: Set whether the Wallaroo instance is available from outside the Kubernetes cluster, or only from within it. The following options should be used with single node installations.
- Ingress Mode for Wallaroo Endpoints:
- Select Embedded: A direct connection to the host. This option is available for embedded installs on “bare metal” or single node Linux installs.
- If connections will only be made via port forwarding or similar form, select None.
- Ingress Mode for Wallaroo Endpoints:
- DNS
- DNS Prefix (Optional): The domain name prefix for your Wallaroo instance.
- DNS Suffix (Mandatory): The domain name suffix for your Wallaroo instance.
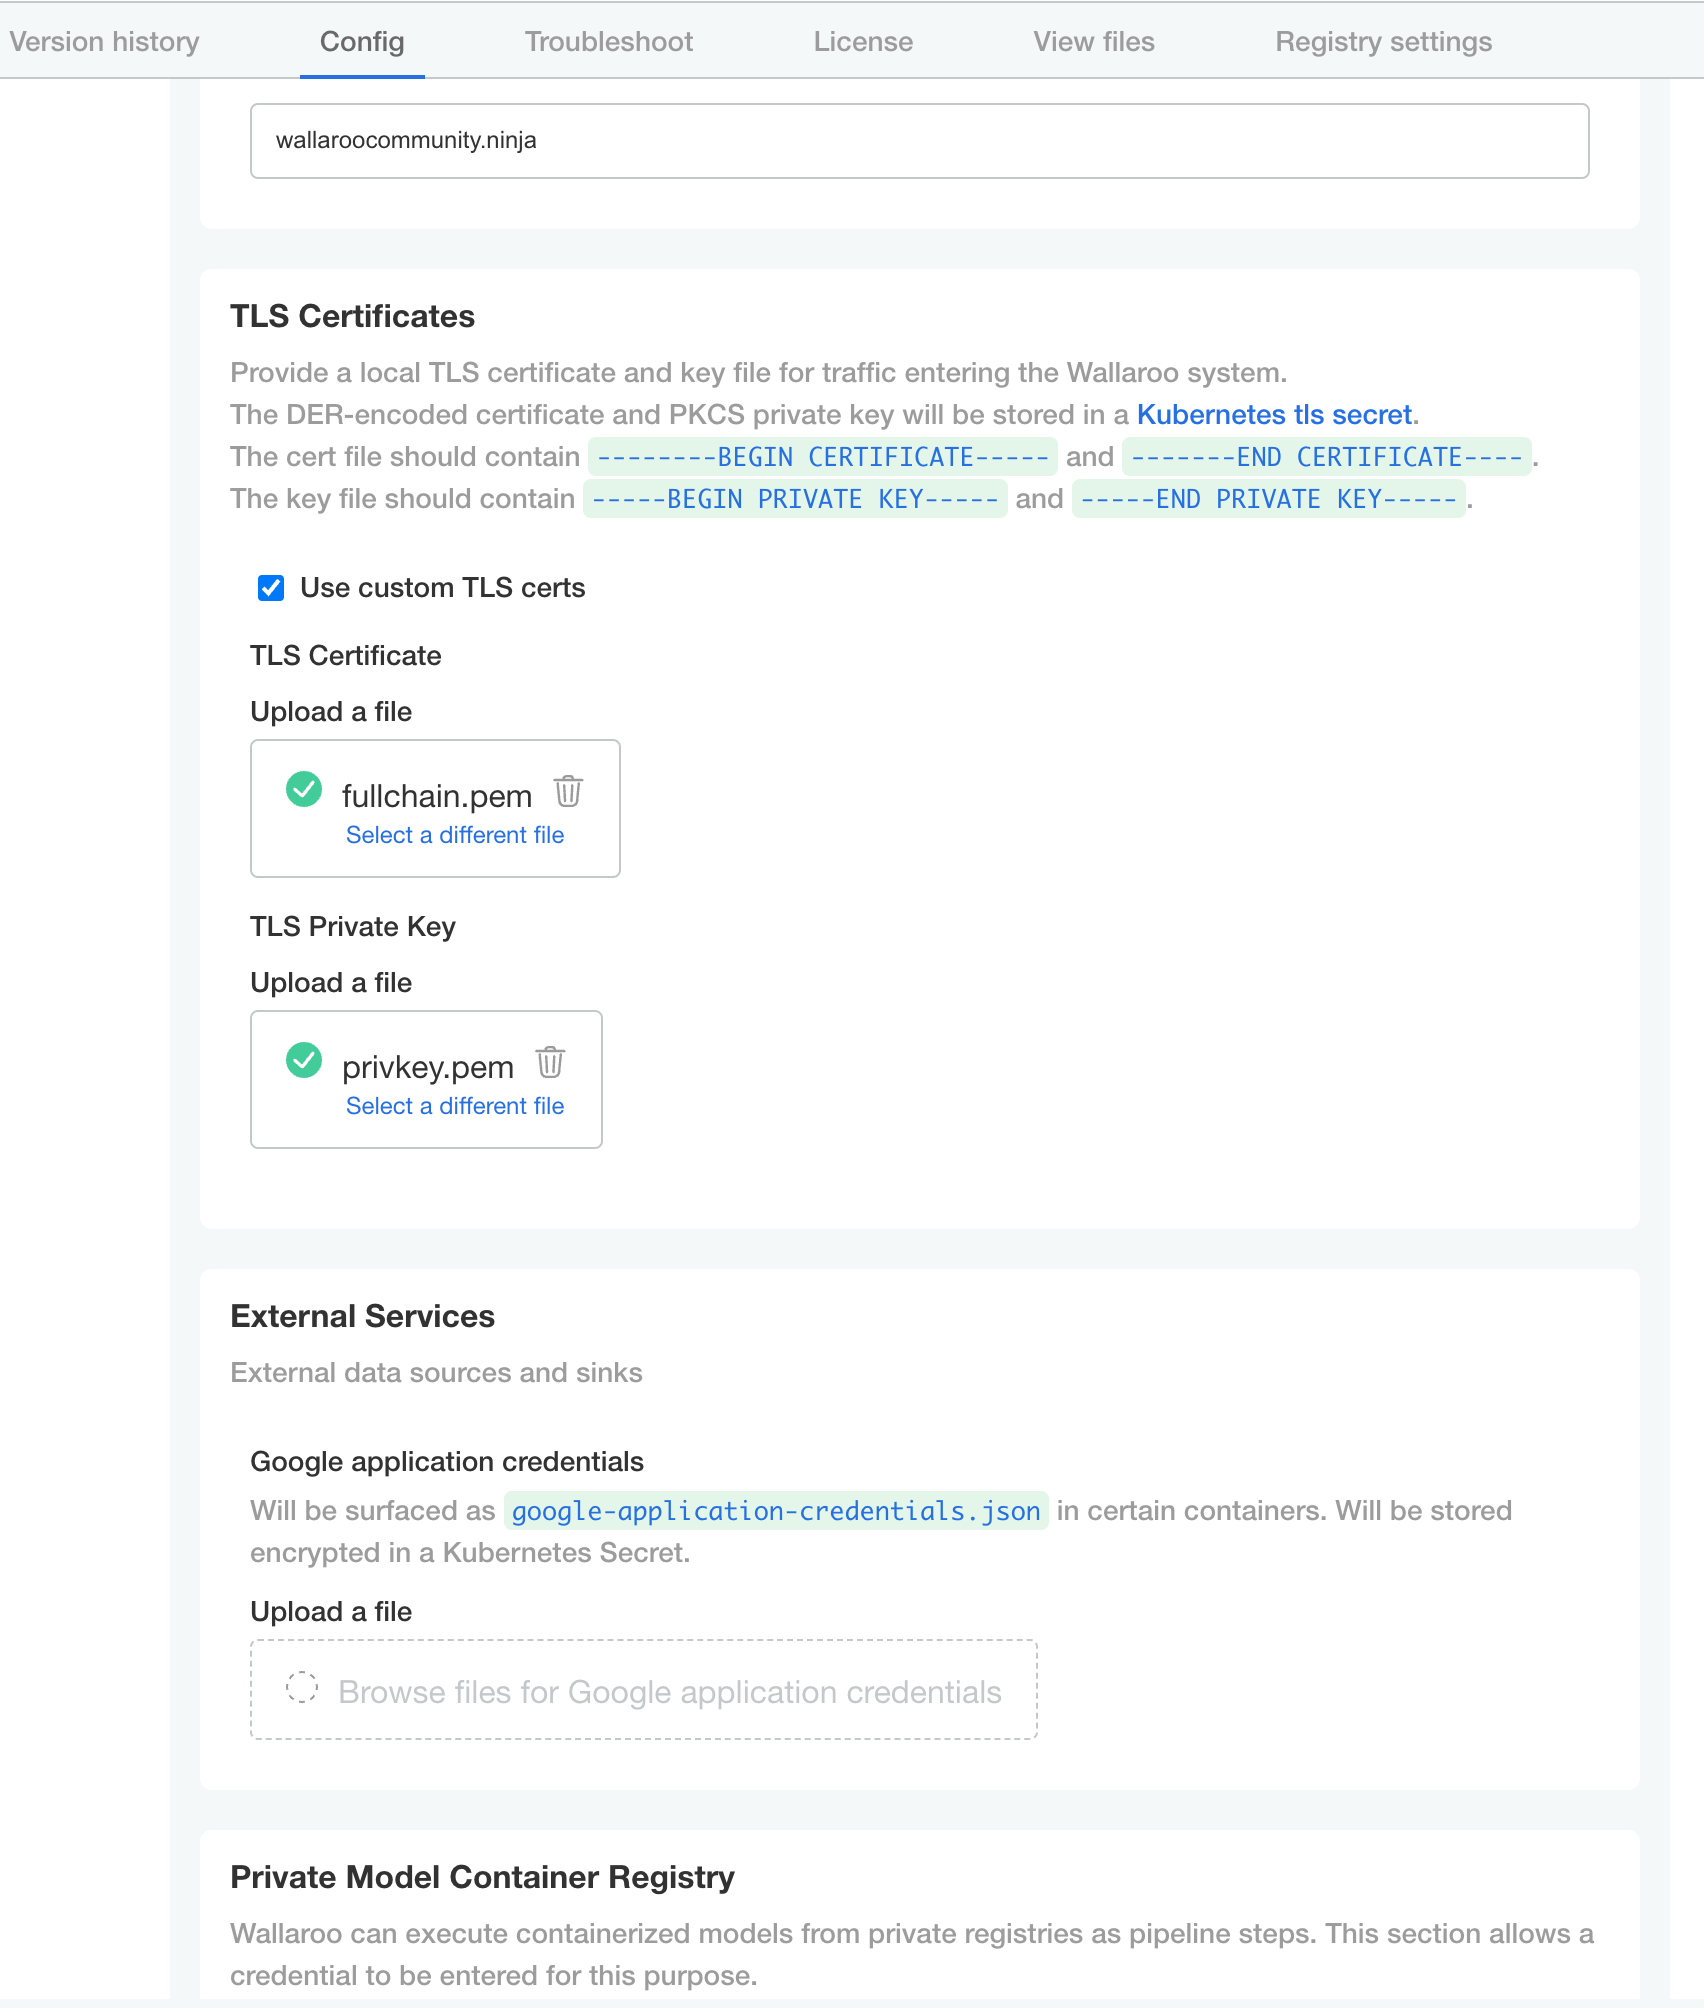
- TLS Certificates
- Use custom TLS Certs: Checked
- TLS Certificate: Enter your TLS Certificate (.crt file).
- TLS Private Key: Enter your TLS private key (.key file).
- Networking Configuration: Set whether the Wallaroo instance is available from outside the Kubernetes cluster, or only from within it. The following options should be used with single node installations.
Once complete, scroll to the bottom of the Config page and select Deploy.
At this point, continue to Required Installation Configurations for the required configuration settings.
Custom Tolerations and Node Selectors Configuration
By default, the following taints and labels are applied to nodepools used for Wallaroo installations.
| Nodepool | Taints | Labels | Description |
|---|---|---|---|
| general | N/A | wallaroo.ai/node-purpose: general | For general Wallaroo services. No taints are applied to this nodepool to allow any process not assigned with a deployment label to run in this space. |
| persistent | wallaroo.ai/persistent=true:NoSchedule | wallaroo.ai/node-purpose: persistent | For Wallaroo services with a persistentVolume settings, including JupyterHub, Minio, etc. |
| pipelines-x86 | wallaroo.ai/pipelines=true:NoSchedule | wallaroo.ai/node-purpose: pipelines | For deploying pipelines for default x86 architectures. The taints and label must be applied to any nodepool used for model deployments. |
The specific nodepool names may differ based on your cloud services naming requirements; check with the cloud services provider for the nodepool name requirements and adjust as needed.
For organizations that use custom Kubernetes taints and labels for their nodepools, the tolerations and node selectors for Wallaroo services will have to be modified to match. For full details, see the Custom Taints and Labels Guide.
To modify the tolerations and node selector labels to match the taints and labels set for the nodepools:
- From the Kots Administrative Dashboard, select Config
- Update each of the following as needed:
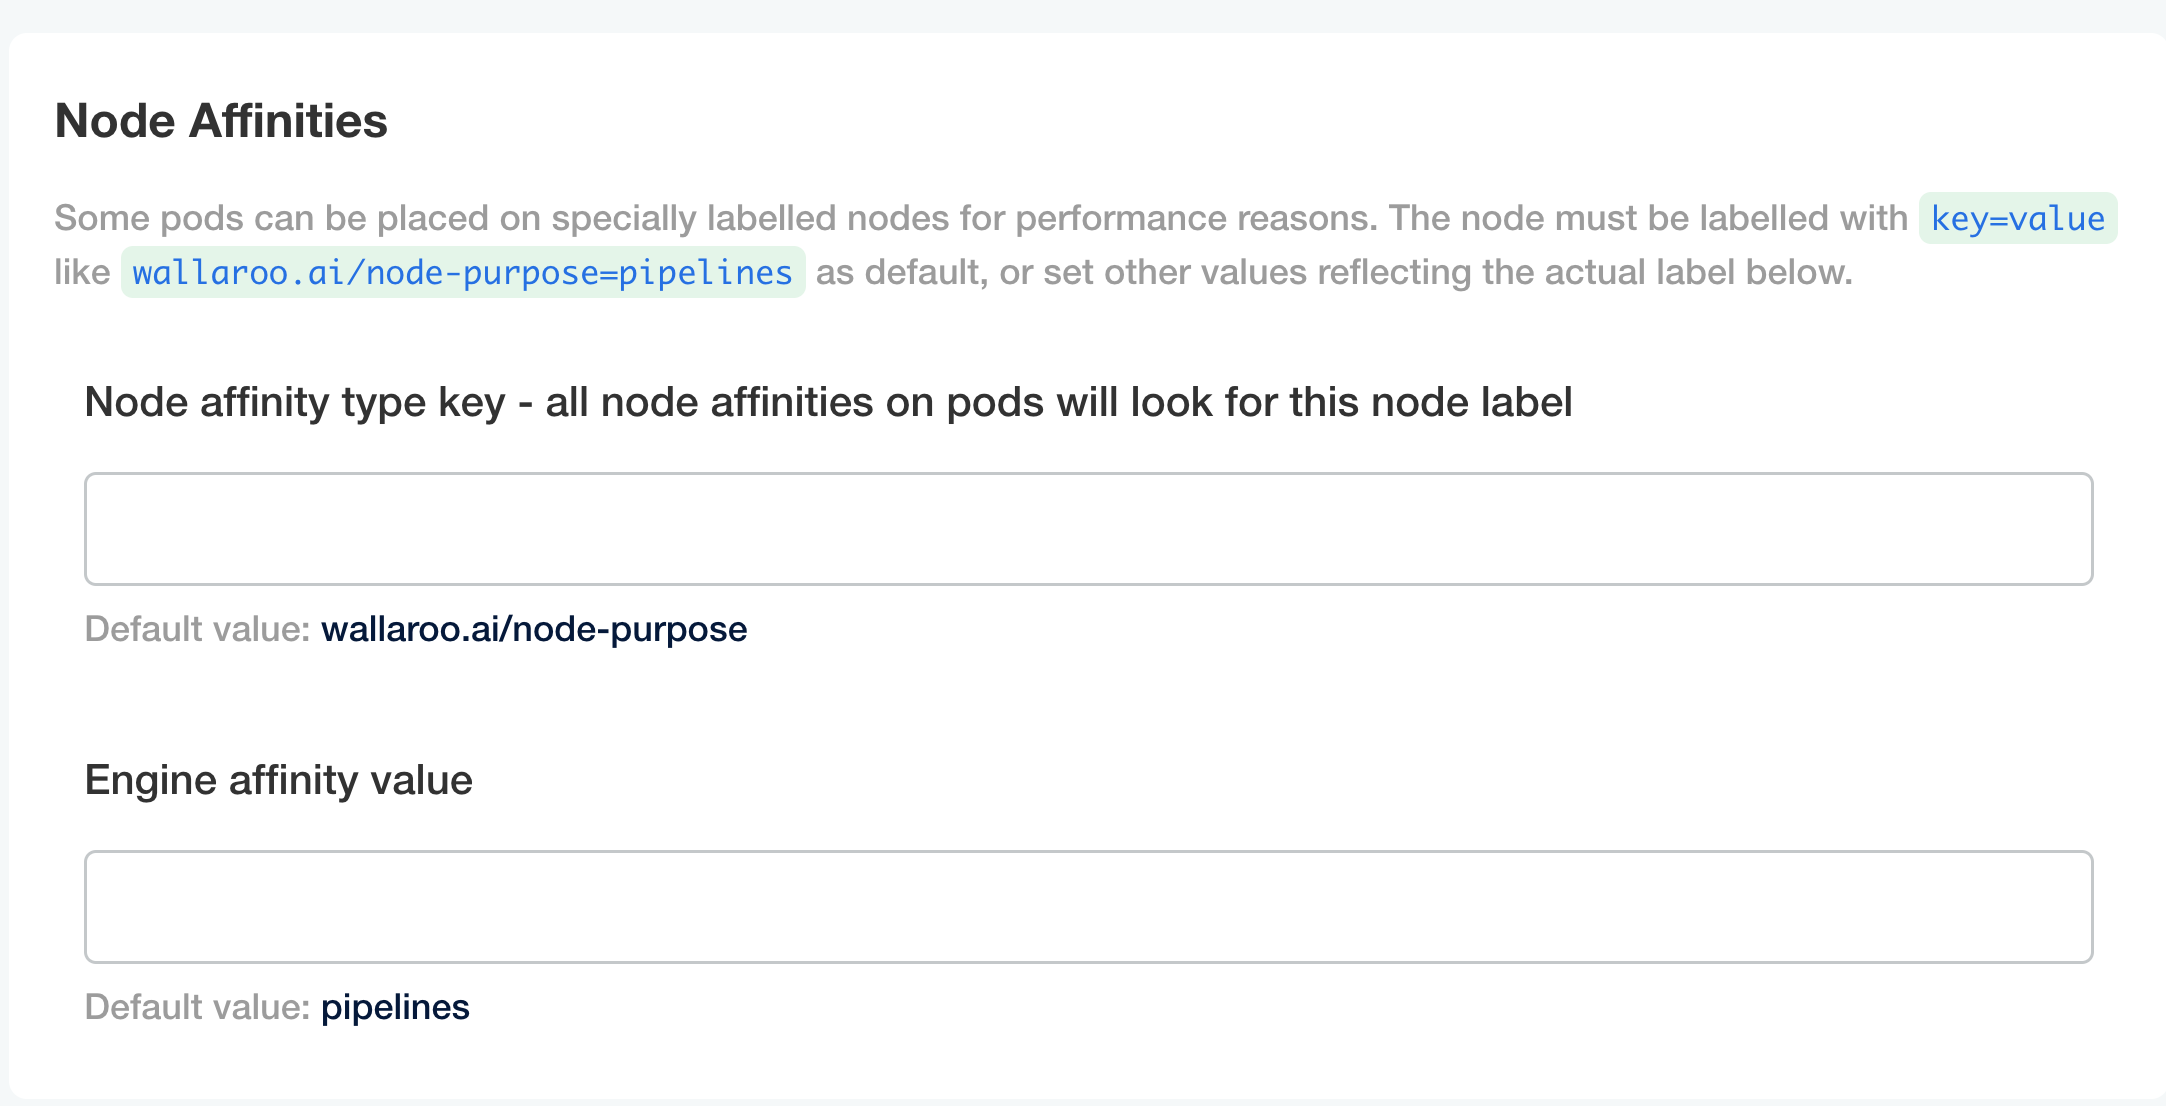
Node Affinities:
Node affinity type key: Verify that the node affinity key matches the label for the nodepools.
Engine affinity value: Set the engine affinity - the affinity used for pipeline deployment - to match the label.
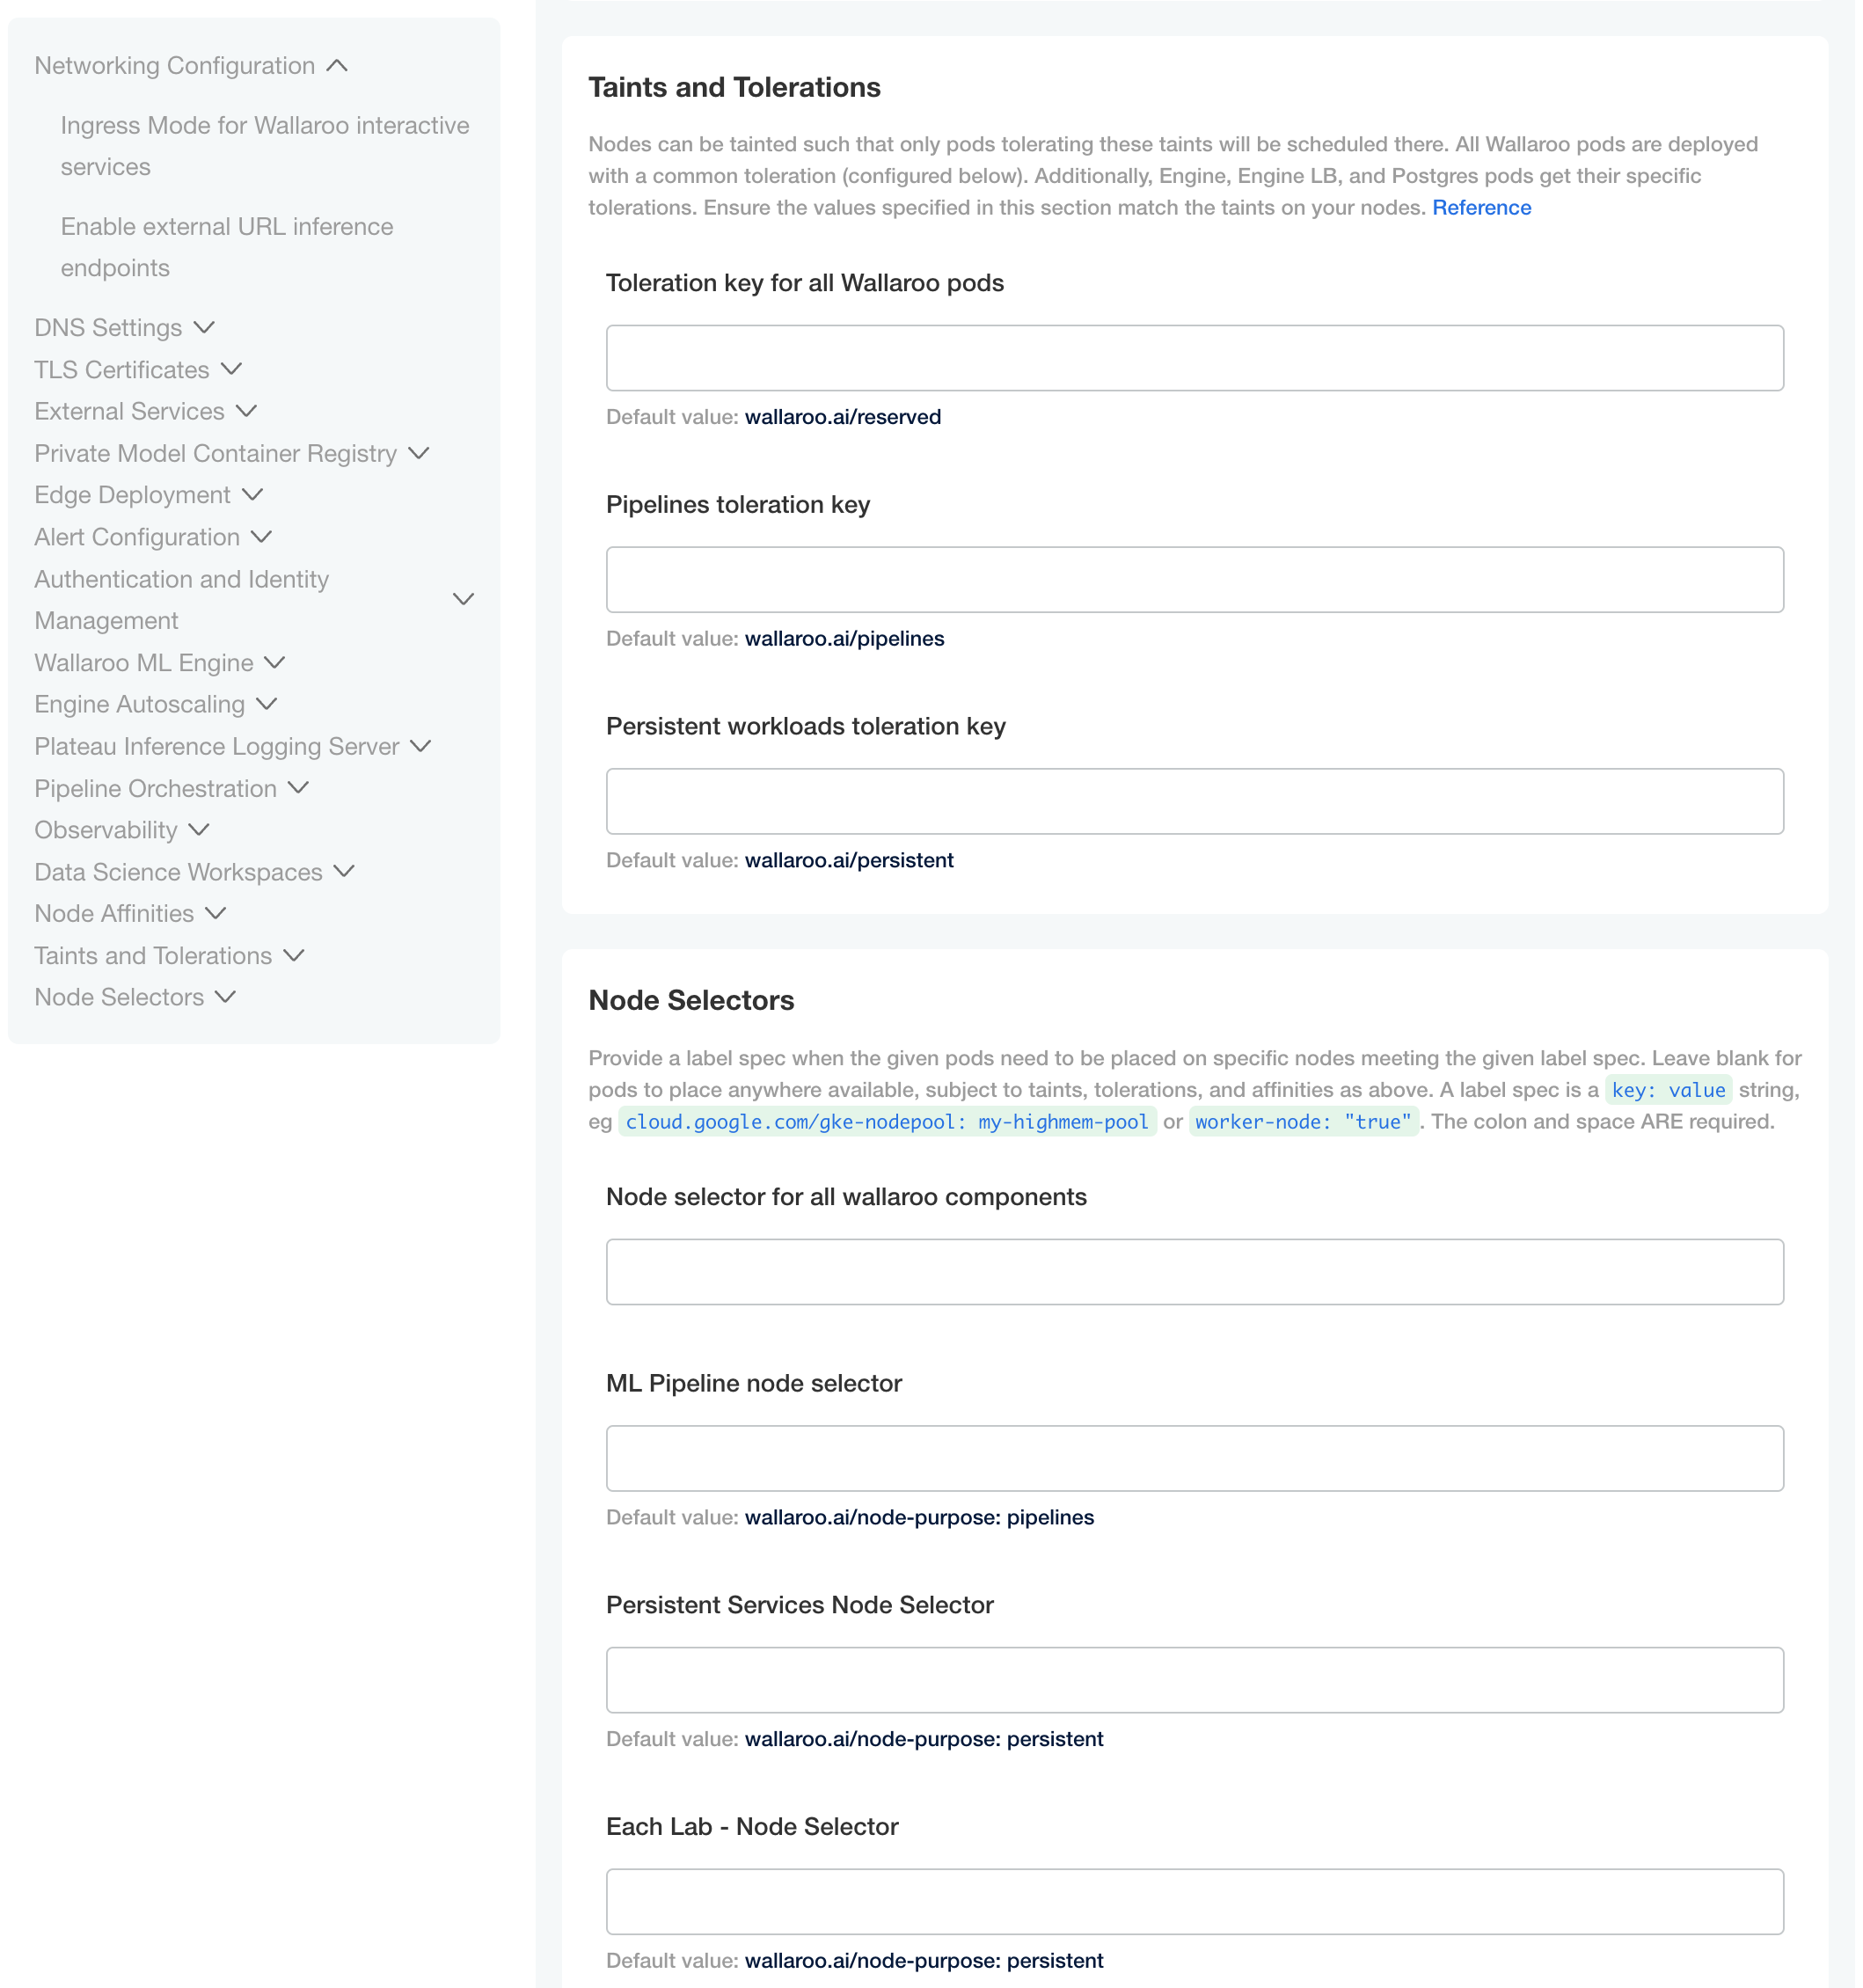
Taints and Tolerations. Set the custom tolerations to match the taints applied to the nodepools, and the node selectors to match the labels used for the nodepools.
Node Selectors: Update the node selector to match the custom nodepools labels for each service.
Helm Based Installation of Wallaroo
Installation Client Helm Requirements
The following software is required for the client with administrative access to the Kubernetes cluster that will host Wallaroo via Helm.
- For Helm installs:
helm: Install Helm- Minimum supported version: Helm 3.11.2
krew: Install Krewkrew preflightandkrew support-bundle. Install with the following commands:kubectl krew install support-bundlekubectl krew install preflight
Pre-Helm Install Connection Steps
Before installing Wallaroo via Helm, two steps must be taken:
The installation steps require the certificate files for generating the Kubernetes secret used in domain name authentication and verification. One method of uploading to the VM is via
scp. The following commands will upload the certificate file set to the variable$TLSCERTand the and private key file set to the variable$TLSKEY. For more information on using DNS settings and certificates, see the Wallaroo DNS Integration Guide.AWS:
scp -i /path/key-pair-name.pem $TLSCERT ubuntu@$IP:~scp -i /path/key-pair-name.pem $TLSKEY ubuntu@$IP:~For more details, see Transfer files to a virtual computer using Secure Copy.
Azure: At this point, if the SSH keys are stored as
~/.ssh/id_rsaand~/.ssh/id_rsa.pub, thescpcommands are the following:scp -i ~/.ssh/id_rsa $TLSCERT $IP:~scp -i ~/.ssh/id_rsa $TLSKEY $IP:~For more details, see Use SCP to move files to and from a VM
GCP:
gcloud compute scp $TLSCERT :~gcloud compute scp $TLSKEY :~For more details, see Transfer files to Linux VMs.
sshinto the VM via the methods described in Connection Options and proceed with the instructions.
The following details how to install Wallaroo via helm.
Wallaroo Provided Data
Members of the Wallaroo support staff will provide the following information:
- Wallaroo Container Registration Login: Commands to login to the Wallaroo container registry.
- Preflight verification command: The commands to verify that the Kubernetes environment meets the requirements for the Wallaroo install.
- Install Wallaroo Command: Instructions on installations into the Kubernetes environment using Helm through the Wallaroo container registry.
The following steps are used with these command and configuration files to install Wallaroo Enterprise via Helm.
Registration Login
The first step in the Wallaroo installation process via Helm is to connect to the Kubernetes environment that will host the Wallaroo Enterprise instance and login to the Wallaroo container registry through the command provided by the Wallaroo support staff. The command will take the following format, replacing $YOURUSERNAME and $YOURPASSWORD with the respective username and password provided.
helm registry login registry.replicated.com --username $YOURUSERNAME --password $YOURPASSWORD
Preflight Verification
IMPORTANT NOTE
The preflight test is not programmatically enforced during installation via Helm and should be performed manually before installation. If the Kubernetes environment does not meet the requirements the Wallaroo installation may fail or perform erratically. Please verify that all preflight test run successfully before proceeding to install Wallaroo.Preflight verification is performed with the following command format. The variables $LICENSE_CHANNEL and $VERSION is supplied by your Wallaroo support representative.
helm template oci://registry.replicated.com/wallaroo/$LICENSE_CHANNEL/wallaroo --version $VERSION | kubectl preflight -
For example, the $LICENSE_CHANNEL=2024-1 of ee and the $VERSION=2024.1.0-5097
helm template oci://registry.replicated.com/wallaroo/2024-1/wallaroo --version 2024.1.0-5097 | kubectl preflight -
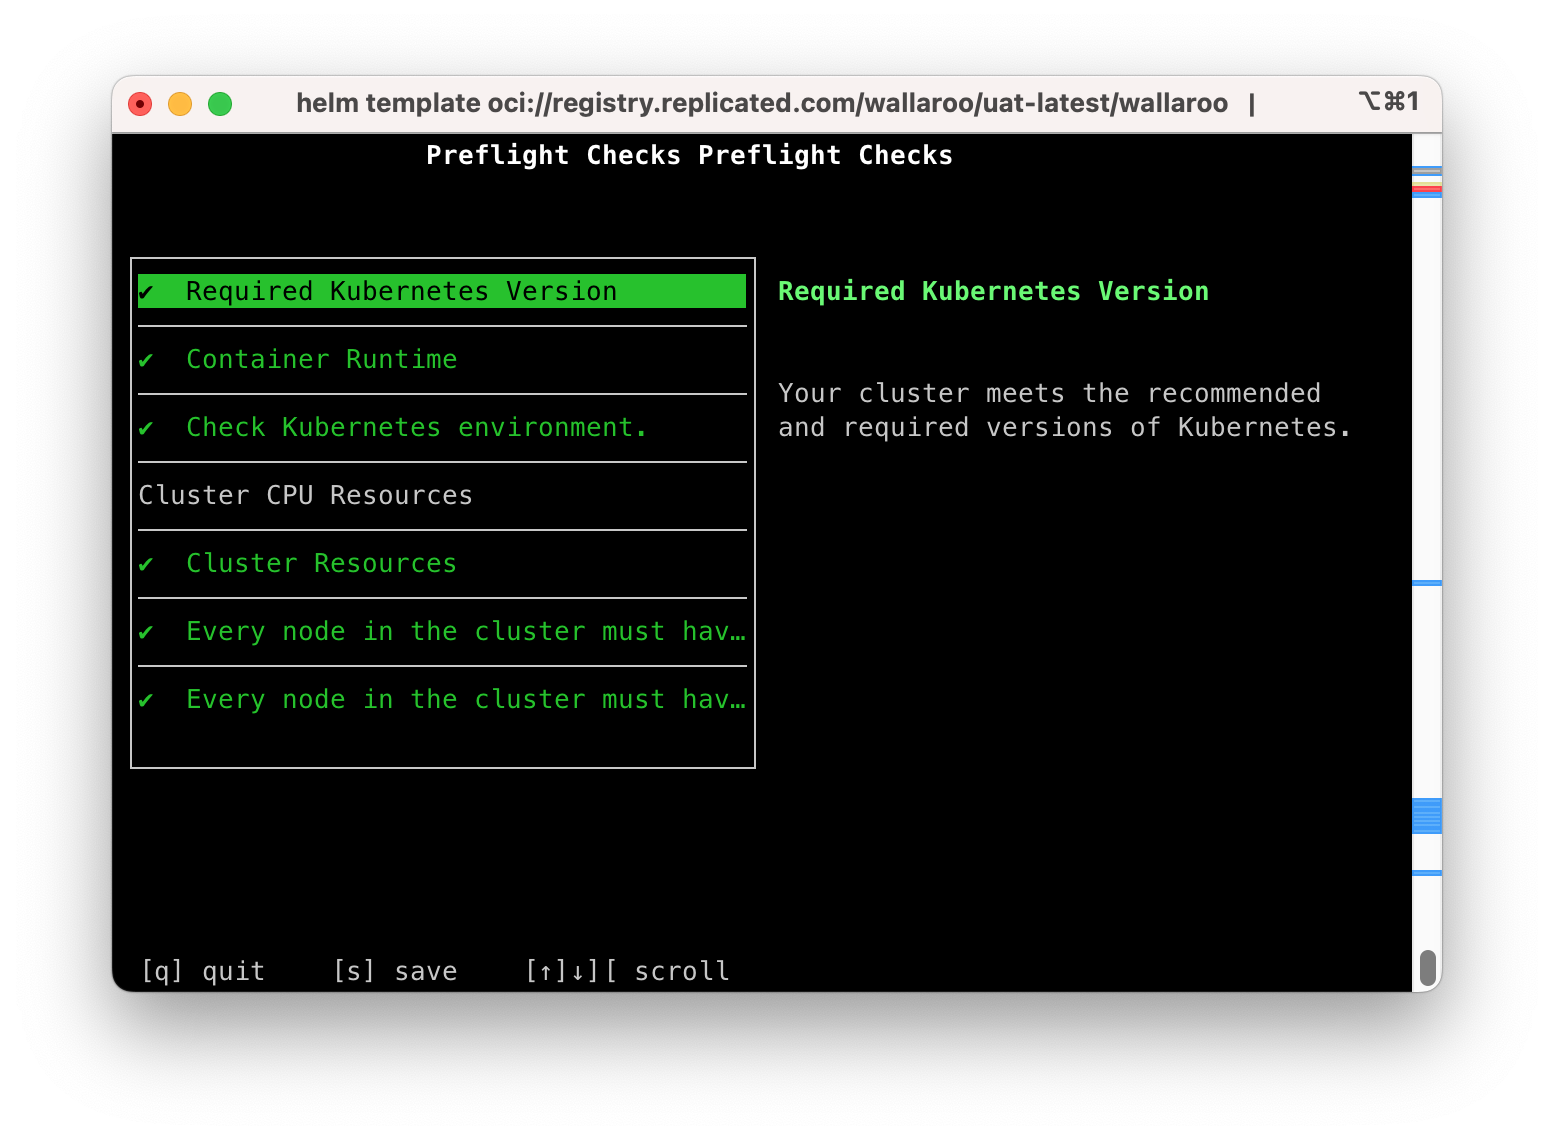
This displays the Preflight Checks report.
The following commands are available:
s: Save the report to a text file as the filepreflight-checks-results-DATETIME.txt. For example:preflight-checks-results-2024-03-19T13_30_41.txt.q: Exit the preflight report.Up ArroworDown Arrow: Scroll through the preflight elements and view the report details.
The following example shows a successful preflight test.
Preflight Checks Preflight Checks

Check PASS
Title: Required Kubernetes Version
Message: Your cluster meets the recommended and required versions of Kubernetes.

------------
Check PASS
Title: Container Runtime
Message: Containerd container runtime was found.

------------
Check PASS
Title: Check Kubernetes environment.
Message: GKE is a supported distribution

------------
Title: Cluster CPU Resources
Message:

------------
Check PASS
Title: Cluster Resources
Message: Cluster resources are satisfactory

------------
Check PASS
Title: Every node in the cluster must have at least 12Gi of memory
Message: All nodes have at least 12 GB of memory capacity

------------
Check PASS
Title: Every node in the cluster must have at least 8 cpus allocatable.
Message: All nodes have at least 8 CPU capacity

------------
Prepare Helm Installation
The following instructions detail how to install Wallaroo Enterprise via Helm for Kubernetes cloud environments such as Microsoft Azure, Amazon Web Service, and Google Cloud Platform.
Helm Network Configuration
apilb.serviceType and edgelb.serviceType settings have the following effects depending on whether they are installed on single node Linux installations, or part of a cloud Kubernetes installation.
| Setting | Single Node Linux | Cloud Kubernetes |
|---|---|---|
| Internal Only Connections | ClusterIP | ClusterIP |
| External Connections | NodePort | LoadBalancer |
Refer to the instructions for environment host for details on IP address allocation and support.
With the preflight checks and prerequisites met, Wallaroo can be installed via Helm through the following process:
Create namespace. By default, the namespace
wallaroois used:kubectl create namespace wallarooSet the new namespace as the current namespace:
kubectl config set-context --current --namespace wallarooSet the TLS certificate secret in the Kubernetes environment:
Create the certificate and private key. It is recommended to name it after the domain name of your Wallaroo instance. For example:
wallaroo.example.com. For production environments, organizations are recommended to use certificates from their certificate authority. Note that the Wallaroo SDK will not connect from an external connection without valid certificates. For more information on using DNS settings and certificates, see the Wallaroo DNS Integration Guide.Create the Kubernetes secret from the certificates created in the previous step, replacing
$TLSCONFIGwith the name of the Kubernetes secret, with the certificate file$TLSCERTand the private key$TLSKEY. Store the secret name for a the step Configure local values file.kubectl create secret tls $TLSCONFIG --cert=$TLSCERT --key=$TLSKEYFor example, if
$TLSCONFIGiscust-cert-secretwith the certificate$TLSCERTisfullchain.pemand key$TLSKEYisprivkey.pem, then the command would be translated askubectl create secret tls cust-cert-secret --cert=fullchain.pem --key=privkey.pem
Default Helm Installation Settings
A default Helm install of Wallaroo contains various default settings. The local values file overwrites values based on the organization needs. The following represents the minimum mandatory values for a Wallaroo installation using certificates and the default LoadBalancer for a cloud Kubernetes cluster. The configuration details below is saved as values.yaml for these examples.
Note the following required settings:
domainPrefixanddomainSuffix: Used to set the DNS settings for the Wallaroo instance. For more information, see the Wallaroo DNS Integration Guide.custTlsSecretName: Specify the Kubernetes secret created in the previous step. External connections through the Wallaroo SDK require valid certificates.apilb: Sets theapilbservice options including the following:serviceType: LoadBalancer: Uses the default LoadBalancer setting for the Kubernetes cloud service the Wallaroo instance is installed into. Replace with the specific service connection settings as required.external_inference_endpoints_enabled: true: This setting is required for performing external SDK inferences to a Wallaroo instance. For more information, see the Wallaroo Model Endpoints Guidekubernetes_distribution: The cloud provider used. Each cloud provider has their own methods of handling storage classes, LoadBalancers (LB), etc. The following values are available; if your selected provider or distribution is not on the list, contact your Wallaroo Support representative for more options.aks: Microsoft Azure Kubernetes Serviceeks: Amazon Elastic Kubernetes Servicegke: Google Kubernetes Engineoke: Oracle Cloud Infrastructure Container Engine for Kuberneteskurl: On premise aka stand alone Linux installations.
ingress_mode: How the Wallaroo instance is reached through the Kubernetes network settings. Options for single node Linux installs of Wallaroo include:embedded(Default) : A direct connection to the host. This option is available for embedded installs on “bare metal” or single node Linux installs.none: Services are local to the Kubernetes cluster.kubectl-port forwardor some other means is required to access them. If all work will be done in-cluster, select this option.
dashboard: The name displayed when users login to the Wallaroo Ops center Dashboard. For example, “My Company” or “Sales Division”, etc.
The following example shows the minimum required options.
This example shows the uncommented keys for the minimum required settings and additional commented optional settings. For full details on helm values for Wallaroo installations, see the Wallaroo Helm Reference Guides.
domainPrefix: "" # optional if using a DNS Prefix
domainSuffix: "wallaroo.example.com"

custTlsSecretName: cust-cert-secret

apilb:
  serviceType: LoadBalancer
  external_inference_endpoints_enabled: true
  ingress_mode: embedded # embedded (default for single node Linux), or none

dashboard:
  clientName: "Wallaroo Helm Example" # Insert the name displayed in the Wallaroo Dashboard

kubernetes_distribution: ""   # Required. One of: aks, eks, gke, oke, or kurl.

# for edge and multicloud model publishing and deployment

# ociRegistry: #Sets the Edge Server registry information.
#   enabled: true #enables the Edge Server registry information.  true enables it, false disables it.
#   registry:  # The registry url. For example: reg.big.corp:3579
#   repository: # The repository within the registry. This may include the cloud account, or the full path where the Wallaroo published pipelines should be kept. For example: account123/wallaroo/pipelines.
#   email: # Optional field to track the email address of the registry credential.
#   username: # The username to the registry. This may vary based on the provider. For example, GCP Artifact Registry with service accounts uses the username _json_key_base64 with the password as a base64 processed token of the credential information.
#   password: #The password or token for the registry service.

# for edge and multicloud deployment observability

# edgelb:
#     serviceType: LoadBalancer
#     enabled: true
#     opscenterHost: mitch4.edge.wallaroocommunity.ninja


# The nodeSelector and tolerations for all components
# This does not apply to nats, fluent-bit, or minio so needs to be applied separately
# nodeSelector:
#   wallaroo.ai/reserved: true

# tolerations:
# - key: "wallaroo.ai/reserved"
#   operator: "Exists"
#   effect: "NoSchedule"

# To change the pipeline taint or nodeSelector,
# best practice is to change engine, enginelb, and engineAux
# together unless they will be in different pools.
# engine:
#   nodeSelector:
#     wallaroo.ai/node-purpose: pipelines
#   tolerations:
#     - key: "wallaroo.ai/pipelines"
#       operator: "Exists"
#       effect: "NoSchedule"

# enginelb:
#   nodeSelector:
#     wallaroo.ai/node-purpose: pipelines
#   tolerations:
#     - key: "wallaroo.ai/pipelines"
#       operator: "Exists"
#       effect: "NoSchedule"

# engineAux:
#   nodeSelector:
#     wallaroo.ai/node-purpose: pipelines
#   tolerations:
#     - key: "wallaroo.ai/pipelines"
#       operator: "Exists"
#       effect: "NoSchedule"

# For each service below, adjust the disk size and resources as required.
# If the nodeSelector or tolerations are changed for one service,
# the other services nodeSelector and tolerations **must** be changed to match
#
#
# plateau:
#   diskSize: 100Gi
#   resources:
#     limits:
#       memory: 4Gi
#       cpu: 1000m
#     requests:
#       memory: 128Mi
#       cpu: 100m
#   nodeSelector:
#     wallaroo.ai/node-purpose: persistent
#   tolerations:
#     - key: "wallaroo.ai/persistent"
#       operator: "Exists"
#       effect: "NoSchedule"

# Jupyter has both hub and lab nodeSelectors and tolerations
# They default to the same persistent pool, but can be assigned to different ones
# jupyter:
#   nodeSelector:                 # Node placement for Hub administrative pods
#     wallaroo.ai/node-purpose: persistent
#   tolerations:
#     - key: "wallaroo.ai/persistent"
#       operator: "Exists"
#       effect: "NoSchedule"
#   labNodeSelector:              # Node placement for Hub-spawned jupyterlab pods
#     wallaroo.ai/node-purpose: persistent
#   labTolerations:
#     - key: "wallaroo.ai/persistent"
#       operator: "Exists"
#       effect: "NoSchedule"
#   memory:
#     limit: "4"                  # Each Lab - memory limit in GB
#     guarantee: "2"              # Each Lab - lemory guarantee in GB
#   cpu:
#     limit: "2.0"                # Each Lab - fractional CPU limit
#     guarantee: "1.0"            # Each Lab - fractional CPU guarantee
#   storage:
#     capacity: "50"              # Each Lab - disk storage capacity in GB

# minio:
#   persistence:
#     size: 25Gi
#   nodeSelector:
#     wallaroo.ai/node-purpose: persistent
#   tolerations:
#   - key: wallaroo.ai/persistent
#     operator: "Exists"
#     effect: "NoSchedule"
#   resources:
#     requests:
#       memory: 1Gi

# postgres:
#   diskSize: 10Gi
#   nodeSelector:
#     wallaroo.ai/node-purpose: persistent
#   tolerations:
#     - key: "wallaroo.ai/persistent"
#       operator: "Exists"
#       effect: "NoSchedule"
#   resources:
#     limits:
#       memory: 2Gi
#       cpu: 500m
#     requests:
#       memory: 512Mi
#       cpu: 100m

# Prometheus has the usual persistent options, but also a retention size
# The the size on disk and time can be configured before removing it.
# prometheus:
#   storageRetentionSizeGb: "10"        # Retain this much data, in GB.
#   storageRetentionTimeDays: "15"     # When to remove old data. In days.
#   nodeSelector:
#     wallaroo.ai/node-purpose: persistent
#   tolerations:
#     - key: "wallaroo.ai/persistent"
#       operator: "Exists"
#       effect: "NoSchedule"
#   resources:
#     limits:
#       memory: 6Gi
#       cpu: 2000m
#     requests:
#       memory: 512Mi
#       cpu: 100m

# nats:
#   podTemplate:
#     merge:
#       spec:
#         nodeSelector:
#           wallaroo.ai/node-purpose: persistent
#         tolerations:
#         - key: "wallaroo.ai/persistent"
#           operator: "Exists"
#           effect: NoSchedule

# wallsvc:
#   nodeSelector:
#     wallaroo.ai/node-purpose: persistent
#   tolerations:
#     - key: "wallaroo.ai/persistent"
#       operator: "Exists"
#       effect: "NoSchedule"
persistentVolume Settings
Wallaroo services that have a persistentVolume have the following default nodeSelector label and tolerations:
nodeSelector- Label:
wallaroo.ai/node-purpose - Value:
persistent
- Label:
tolerations- Key: wallaroo.ai/persistent
- Operator: “Exists”
- Effect: “NoSchedule”
For example:
nodeSelector:
  wallaroo.ai/node-purpose: persistent
tolerations:
  - key: wallaroo.ai/persistent
    operator: "Exists"
    effect: "NoSchedule"
If the nodeSelector or tolerations are changed for any service with a persistentVolume, all other services must be edited to match.
For additional information on taints and tolerations settings, see the Taints and Labels Guide.
Install Wallaroo with Helm
The Wallaroo support representative will provide the installation command for the Helm install that will use the Wallaroo container registry. This assumes that the preflight checks were successful. This command uses the following format:
helm install $RELEASE $REGISTRYURL --version $VERSION--values $LOCALVALUES.yamlWhere:
$RELEASE: The name of the Helm release. By default,wallaroo.$REGISTRYURL: The URl for the Wallaroo container registry service.$VERSION: The version of Wallaroo to install. For this example,2024.1.0-5097.$LOCALVALUES: The .yaml file containing the local values overrides. For this example,values.yaml.
For example, for the registration
wallaroothe command would be:helm install wallaroo oci://registry.replicated.com/wallaroo/2024-1/wallaroo --version 2024.1.0-5097 --values values.yamlIf any required elements are missing from the
values.yamlfile, an error is displayed. For example, leaving out thekubernetes_distributionfield returns the following:Warning - kubernetes_distribution must be set in user provided values.yamlUpon successful installation, notes are published indicating the installed version, where to find documentation, etc.:
NOTES:
.

Welcome to Wallaroo 2024.1.0

1. Deployment Information:
  Name:             2024.1.0
  Release notes:    https://docs.wallaroo.ai/wallaroo-release-notes/wallaroo-release-202401
  Version:          v2024.1.0-5187

2. Accessing Wallaroo
  Documentation:    https://docs.wallaroo.ai
  Dashboard:        https://sample.wallaroocommunity.ninja
  Jupyterhub:       https://sample.jupyter.wallaroocommunity.ninja
  Auth management:  https://sample.keycloak.wallaroocommunity.ninja

3. Useful Commands:

  - Helm tests are available by using: `helm test wallaroo`.

  - External load balancer hostname can be found by using:

      kubectl get svc api-lb-ext -n wallaroo  -o jsonpath='{.status.loadBalancer.ingress[0].hostname}'

  - List Wallaroo namespaces, including pipeline deployments, but not including the main `wallaroo` namespace:

      kubectl get namespaces -l wallaroo-managed=true

  - In order to change any helm values:

      helm upgrade --install wallaroo oci://registry.replicated.com/wallaroo/uat-latest/wallaroo --version v2024.1.0-5187 --values $LOCALVALUES_YAML

 4. Uninstall:

 1. To uninstall/delete the Wallaroo deployment, run:

   kubectl delete ns wallaroo && kubectl delete \
     all,secret,configmap,clusterroles,clusterrolebindings,storageclass,crd \
     --selector app.kubernetes.io/part-of=wallaroo --selector kots.io/app-slug=wallaroo

 2. To delete all pipelines, run:

   kubectl delete ns -l wallaroo-managed=true
.
Verify the Installation: Once the installation is complete, verify the installation with the
helm test $RELEASEcommand. A condensed display usesegrepto show only the test suite and phase status as follows. Replacewallaroowith the name of thehelmrelease used.helm test wallaroo | egrep 'SUITE:|Phase:' TEST SUITE: wallaroo-fluent-bit-test-connection Phase: Succeeded TEST SUITE: nats-test-request-reply Phase: Succeeded TEST SUITE: wallaroo-wallaroo-test-connections-hook Phase: Succeeded TEST SUITE: wallaroo-test-objects-hook Phase: SucceededThe following will show the full
helmtest output with notes.helm test wallaroowhich displays the following:
NAME: wallaroo
LAST DEPLOYED: Fri May 17 14:00:04 2024
NAMESPACE: wallaroo
STATUS: deployed
REVISION: 2
TEST SUITE:     wallaroo-fluent-bit-test-connection
Last Started:   Fri May 17 14:04:48 2024
Last Completed: Fri May 17 14:04:51 2024
Phase:          Succeeded
TEST SUITE:     nats-test-request-reply
Last Started:   Fri May 17 14:04:43 2024
Last Completed: Fri May 17 14:04:48 2024
Phase:          Succeeded
TEST SUITE:     sample-wallaroo-test-connections-hook
Last Started:   Fri May 17 14:04:24 2024
Last Completed: Fri May 17 14:04:31 2024
Phase:          Succeeded
TEST SUITE:     sample-wallaroo-test-objects-hook
Last Started:   Fri May 17 14:04:31 2024
Last Completed: Fri May 17 14:04:43 2024
Phase:          Succeeded
NOTES:
.

Welcome to Wallaroo 2024.1.0

1. Deployment Information:
  Name:             2024.1.0
  Release notes:    https://docs.wallaroo.ai/wallaroo-release-notes/wallaroo-release-202401
  Version:          v2024.1.0-5187

2. Accessing Wallaroo
  Documentation:    https://docs.wallaroo.ai
  Dashboard:        https://sample.wallaroocommunity.ninja
  Jupyterhub:       https://sample.jupyter.wallaroocommunity.ninja
  Auth management:  https://sample.keycloak.wallaroocommunity.ninja

3. Useful Commands:

  - Helm tests are available by using: `helm test wallaroo`.

  - External load balancer hostname can be found by using:

      kubectl get svc api-lb-ext -n wallaroo  -o jsonpath='{.status.loadBalancer.ingress[0].hostname}'

  - List Wallaroo namespaces, including pipeline deployments, but not including the main `wallaroo` namespace:

      kubectl get namespaces -l wallaroo-managed=true

  - In order to change any helm values:

      helm upgrade --install wallaroo oci://registry.replicated.com/wallaroo/2024-1/wallaroo --version 2024.1.0-5097 --values $LOCALVALUES_YAML

 4. Uninstall:

  1. To uninstall/delete the Wallaroo deployment, run:

    kubectl delete ns wallaroo && kubectl delete \
      all,secret,configmap,clusterroles,clusterrolebindings,storageclass,crd \
      --selector app.kubernetes.io/part-of=wallaroo --selector kots.io/app-slug=wallaroo

  2. To delete all pipelines, run:

    kubectl delete ns -l wallaroo-managed=true
.
At this point, the installation is complete and can be accessed through the fully qualified domain names set in the installation process above. Verify that the DNS settings are accurate before attempting to connect to the Wallaroo instance. For more information, see the Wallaroo DNS Integration Guide.
To add the initial users if they were not set up through Helm values, see the Wallaroo Enterprise User Management guide.
Required Installation Configurations
Once installed, the following actions are required settings are required to complete the setup process process.
DNS Services Integration
DNS services integration is required for Wallaroo Enterprise to provide access to the various supporting services that are part of the Wallaroo instance. These include:
- Simplified user authentication and management.
- Centralized services for accessing the Wallaroo Dashboard, Wallaroo SDK and Authentication.
- Collaboration features allowing teams to work together.
- Managed security, auditing and traceability.
The following guide is for standard DNS services.
Once integrated, users can access the following services directly from a URL starting with the suffix domain - this is the domain name where other DNS entries are appended to. For example, if the suffix domain is sales.example.com, then the other services would be referenced by https://api.sales.sample.com, etc.
Note that even when accessing specific Wallaroo services directly that the user must still be authenticated through Wallaroo.
| Service | DNS Entry | Description |
|---|---|---|
| Wallaroo Dashboard | suffix domain | Provides access to a user interface for updating workspaces, pipelines, and models. Also provides access to the integrated JupyterHub service. |
| JupyterHub | jupyterhub | Allows the use of Jupyter Notebooks and access to the Wallaroo SDK. |
| API | api | Provides access to the Wallaroo API. |
| Keycloak | keycloak | Keycloak provides user management to the Wallaroo instance. |
Connections to Wallaroo services are provided as https://service.{suffix domain}. For example, if the domain suffix is wallaroo.example.com then the URLs to access the various Wallaroo services would be:
https://wallaroo.example.comhttps://jupyter.wallaroo.example.comhttps://api.wallaroo.example.comhttps://keycloak.wallaroo.example.com
Prerequisites
- Install Wallaroo Enterprise into a qualified environment. For more details, see the Wallaroo Install Guides and the Wallaroo Enterprise Install Guides.
- Determine whether your organization will use a prefix or not as detailed above.
- Generate or update the the SSL Certificates
- Have access to internal corporate DNS configurations that can be updated. A subdomain for the Wallaroo instance will be created through this process.
- Have the IP address for the Wallaroo instance.
- Install kubectl into the Kubernetes cluster administrative node.
DNS Entries
Create DNS the following entries based on the list above for the Wallaroo instance’s IP address. Select the cloud environment used for DNS services. Note that DNS services are not tied to the specific cloud platform; check with your organizations setup requirements before proceeding.
AWS Setup
The following settings are used with AWS EKE clusters through Route 53. For more information, see Enabling DNS resolution for Amazon EKS cluster endpoints.
Set the following domain names for the Wallaroo instance.
For AWS Clusters:
- Suffix Domain:
Arecord,NS(Name Server) record,SOA(Start Of Authority) record. For example:wallaroo.example.com. - api: CN (CNAME) record referring to the cluster endpoint. For example:
api.wallaroo.example.com. - jupyter: CN (CNAME) record referring to the cluster endpoint. For example:
jupyter.wallaroo.example.com. - keycloak: CN (CNAME) record referring to the cluster endpoint. For example:
keycloak.wallaroo.example.com.
Azure Setup
The following settings are used with Microsoft Azure DNS Records. For more information, see Manage DNS records and record sets by using the Azure portal.
- Suffix Domain:
Arecord,NS(Name Server) record,SOA(Start Of Authority) record. For example:wallaroo.example.com - api: CN (CNAME) record referring to the cluster endpoint. For example:
api.wallaroo.example.com. - jupyter: CN (CNAME) record referring to the cluster endpoint. For example:
jupyter.wallaroo.example.com. - keycloak: CN (CNAME) record referring to the cluster endpoint. For example:
keycloak.wallaroo.example.com.
GCP Setup
The following settings are used with Google Cloud Platform DNS Records. For more information, see GCP Add, modify, and delete records.
- Suffix Domain:
Arecord,NS(Name Server) record,SOA(Start Of Authority) record. For example:wallaroo.example.com - api: CN (CNAME) record referring to the cluster endpoint. For example:
api.wallaroo.example.com. - jupyter: CN (CNAME) record referring to the cluster endpoint. For example:
jupyter.wallaroo.example.com. - keycloak: CN (CNAME) record referring to the cluster endpoint. For example:
keycloak.wallaroo.example.com.
Oracle Setup
The following settings are used with Oracle Cloud Platform DNS Records. For more information, see Configuring DNS Servers for Kubernetes Clusters.
- Suffix Domain:
Arecord,NS(Name Server) record,SOA(Start Of Authority) record. For example:wallaroo.example.com. IMPORTANT NOTE: Oracle OKE clusters have two IP addresses for the load balancer endpoint. Use the public IP address, not the internal 10-net address. - api: CN (CNAME) record referring to the cluster endpoint. For example:
api.wallaroo.example.com. - jupyter: CN (CNAME) record referring to the cluster endpoint. For example:
jupyter.wallaroo.example.com. - keycloak: CN (CNAME) record referring to the cluster endpoint. For example:
keycloak.wallaroo.example.com.
Other DNS Services
Set the following domain names for the Wallaroo instance.
- Suffix Domain:
Arecord,NS(Name Server) record,SOA(Start Of Authority) record. For example:wallaroo.example.com - api: CN (CNAME) record referring to the Suffix Domain. For example:
api.wallaroo.example.com. - jupyter: CN (CNAME) record referring to the Suffix Domain. For example:
jupyter.wallaroo.example.com. - keycloak: CN (CNAME) record referring to the Suffix Domain. For example:
keycloak.wallaroo.example.com.
Edge Observability Enablement
For organizations that deploy Wallaroo pipelines on edge devices as Wallaroo Servers, see the DNS settings from the Edge Deployment Registry Guide.
Setup Users
User management is managed through the Wallaroo Dashboard, via the Platform Admin Dashboard page. See the Wallaroo User Management for full guides on setting up users, identity providers, and other user configuration options.
The following is an abbreviated guide on setting up new Wallaroo users.
IMPORTANT NOTE
At least one user must be created before using Wallaroo.The process includes the following steps:
Obtain the User Admin Credentials
Obtaining the admin User Credentials
The standard Wallaroo installation creates the user admin by default and assigns them a randomly generated password. The admin user credentials are obtained which may be obtained directly from Kubernetes with the following commands, assuming the Wallaroo instance namespace is wallaroo.
Retrieve Keycloak Admin Username
kubectl -n wallaroo \
get secret keycloak-admin-secret \
-o go-template='{{.data.KEYCLOAK_ADMIN_USER | base64decode }}'
Retrieve Keycloak Admin Password
kubectl -n wallaroo \
get secret keycloak-admin-secret \
-o go-template='{{.data.KEYCLOAK_ADMIN_PASSWORD | base64decode }}'
Create a New User with the Admin Role
Creating users is managed through the Platform Admin Dashboard. The following steps are used to create an initial user with the role admin.
- Access the Wallaroo Dashboard through the DNS name set up in the DNS Services Integration step. For example, if the DNS name of the Wallaroo Ops center is
wallaroo.example.com, the Wallaroo Dashboard is available athttps://wallaroo.example.com. - Login with the username
adminand the password retrieved in Obtaining the admin User Credentials. - Select Create Users and enter the following:
- User Email: The email address for the user. This must be in the valid email address format.
- Assign Type: Select Admin.
- Password: Enter the user’s password. This user password be sent to the new user.
- Temporary or Permanent:
- Temporary: The user will be forced to change their login password upon their next login (Recommended).
- Permanent: The user will keep their password.
- Create any additional users as needed. When finished, select the Wallaroo icon drop down and select Logout.
At this point, users can log in to Wallaroo Dashboard with their provided identities. For guides on setting up Single Sign-On (SSO) and other features, see Wallaroo User Management for full guides on setting up users, identity providers, and other user configuration options.