Average Install Time
45 minutes depending on system performance and network connections.Organizations that require Wallaroo be installed into an “air gap” environment - where the Wallaroo instance does not connect to the public Internet - can use these instructions to install Wallaroo into an existing Kubernetes cluster.
This guide assumes knowledge of how to use Kubernetes and work with internal clusters. The following conditions must be completed before starting an air gap installation of Wallaroo:
- A Kubernetes cluster is installed and meets the prerequisites listed below.
- A private container registry is available to the cluster, along with push and read credentials for that registry. This service is required for the air gap installation process to have images pushed and pulled for the installation. For examples on setting up a private container registry service, see the Docker Documentation “Deploy a registry server”. See Example Registry Service Install for an example of installing an unsecure private registry for testing purposes. For more details on setting up a container registry in a cloud environment, see the related documentation for your preferred cloud provider:
- All commands will assume a method of connecting to the cluster remotely (VPN, etc).
If all prerequisites are met, skip directly to Install Instructions
General Time to Completion: 30 minutes.
Before installing Wallaroo version, verify that the following hardware and software requirements are met.
Environment Requirements
Environment Hardware Requirements
The following system requirements are required for the minimum settings for running Wallaroo in a Kubernetes cloud cluster.
- Minimum number of nodes: 4
- Minimum Number of CPU Cores: 8
- Minimum RAM per node: 16 GB
- Minimum Storage: A total of 625 GB of storage will be allocated for the entire cluster based on 5 users with up to four pipelines with five steps per pipeline, with 50 GB allocated per node, including 50 GB specifically for the Jupyter Hub service. Enterprise users who deploy additional pipelines will require an additional 50 GB of storage per lab node deployed.
Wallaroo recommends at least 16 cores total to enable all services. At less than 16 cores, services will have to be disabled to allow basic functionality as detailed in this table.
Note that even when disabling these services, Wallaroo performance may be impacted by the models, pipelines, and data used. The greater the size of the models and steps in a pipeline, the more resources will be required for Wallaroo to operate efficiently. Pipeline resources are set by the pipeline configuration to control how many resources are allocated from the cluster to maintain peak effectiveness for other Wallaroo services. See the following guides for more details.
- Wallaroo SDK Essentials Guide: Pipeline Deployment Configuration
- Wallaroo MLOps API Essentials Guide: Pipeline Management
| Cluster Size | 8 core | 16 core | 32 core | Description | |
| Inference | ✔ | ✔ | ✔ | The Wallaroo inference engine that performs inference requests from deployed pipelines. | |
| Dashboard | ✔ | ✔ | ✔ | The graphics user interface for configuring workspaces, deploying pipelines, tracking metrics, and other uses. | |
| Jupyter HUB/Lab | The JupyterHub service for running Python scripts, JupyterNotebooks, and other related tasks within the Wallaroo instance. | ||||
| Single Lab | ✔ | ✔ | ✔ | ||
| Multiple Labs | ✘ | ✔ | ✔ | ||
| Prometheus | ✔ | ✔ | ✔ | Used for collecting and reporting on metrics. Typical metrics are values such as CPU utilization and memory usage. | |
| Alerting | ✘ | ✔ | ✔ | ||
| Model Validation | ✘ | ✔ | ✔ | ||
| Dashboard Graphs | ✔ | ✔ | ✔ | ||
| Plateau | ✘ | ✔ | ✔ | A Wallaroo developed service for storing inference logs at high speed. This is not a long term service; organizations are encouraged to store logs in long term solutions if required. | |
| Model Insights | ✘ | ✔ | ✔ | ||
| Python API | |||||
| Model Conversion | ✔ | ✔ | ✔ | Converts models into a native runtime for use with the Wallaroo inference engine. |
To install Wallaroo with minimum services, a configuration file will be used as parts of the kots based installation. For full details on the Wallaroo installation process, see the Wallaroo Install Guides.
Enterprise Network Requirements
The following network requirements are required for the minimum settings for running Wallaroo:
For Wallaroo Enterprise users: 200 IP addresses are required to be allocated per cloud environment.
For Wallaroo Community users: 98 IP addresses are required to be allocated per cloud environment.
DNS services integration is required for Wallaroo Enterprise edition. See the DNS Integration Guide for the instructions on configuring Wallaroo Enterprise with your DNS services.
DNS services integration is required to provide access to the various supporting services that are part of the Wallaroo instance. These include:
- Simplified user authentication and management.
- Centralized services for accessing the Wallaroo Dashboard, Wallaroo SDK and Authentication.
- Collaboration features allowing teams to work together.
- Managed security, auditing and traceability.
Environment Software Requirements
The following software or runtimes are required for Wallaroo 2023.4.1. Most are automatically available through the supported cloud providers.
| Software or Runtime | Description | Minimum Supported Version | Preferred Version(s) |
|---|---|---|---|
| Kubernetes | Cluster deployment management | 1.23 | 1.26 |
| containerd | Container Management | 1.7.0 | 1.7.0 |
| kubectl | Kubernetes administrative console application | 1.26 | 1.26 |
Node Selectors
Wallaroo uses different nodes for various services, which can be assigned to a different node pool to contain resources separate from other nodes. The following nodes selectors can be configured:
- ML Engine node selector
- ML Engine Load Balance node selector
- Database Node Selector
- Grafana node selector
- Prometheus node selector
- Each Lab * Node Selector
Install Instructions
The installation is broken into the following major processes:
Download Assets
The Wallaroo delivery team the URL and password to your organization’s License and Air Gap Download page. The following links are provided:
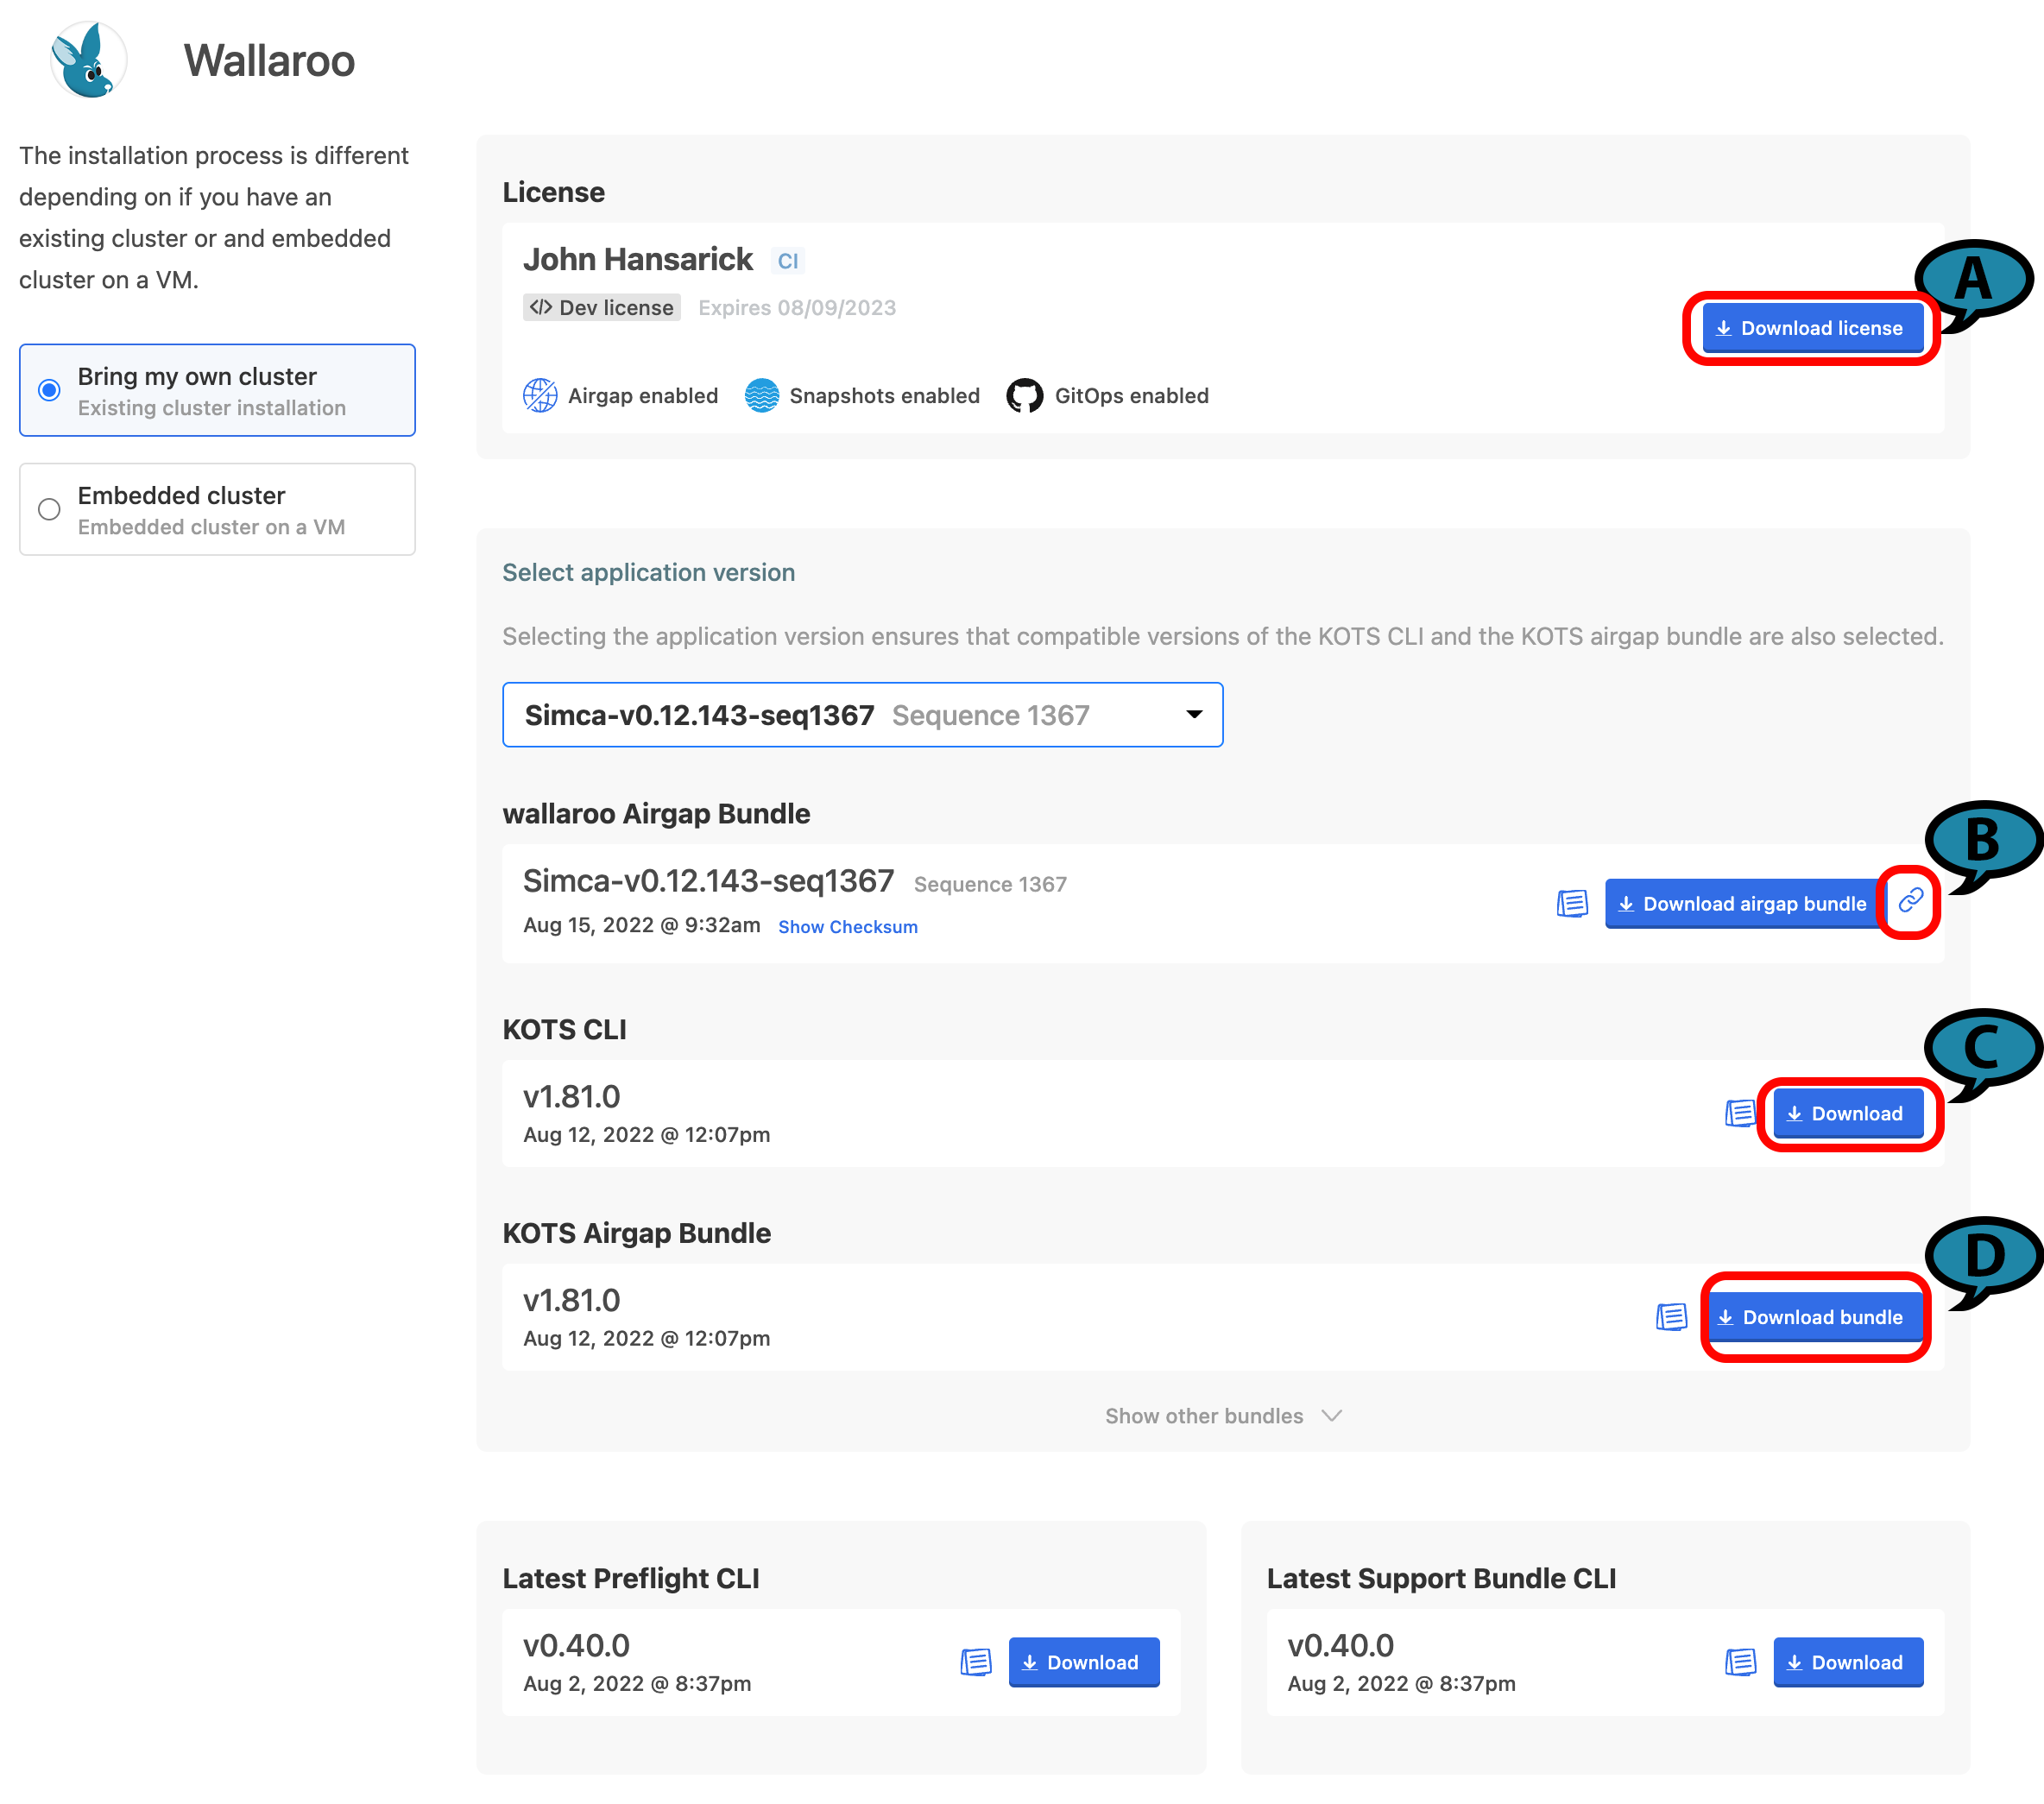
(A) Wallaroo Enterprise License File: The Wallaroo enterprise license file for this account. This is downloaded as a
yamlfile.(B) Wallaroo Airgap Installation File: The air gap installation file that includes the necessary containers for the Wallaroo installation. This is typically about 6 GB in size. By selecting the link icon, the Wallaroo Airgap Installation File URL will be copied to the clipboard that can be used for
curlor similar download commands. This file is typically downloaded aswallaroo.airgap.IMPORTANT NOTE
If the Wallaroo Air Gap Bundle link is not available, contact your Wallaroo support representative.(C) KOTS CLI: The installation files to install
kotsinto the node that manages the Kubernetes cluster. This file is typically downloaded askots_linux_amd64.tar.gz.(D) KOTS Airgap Bundle: A set of files required by the Kubernetes environment to install Wallaroo via the air gap method. This file is typically downloaded as
kotsadm.tar.gz.
Download these files either through the provided License and Airgap Download page, or by copying the links from the page and using the following command line commands into node performing the air gap installation with curl as follows:
Wallaroo Enterprise License File:
curl -LO {Link to Wallaroo Enterprise License File}Airgap Installation File. Note the use of the
-Looption to download the Wallaroo air gap file aswallaroo.airgap, and the use of the single quotes around the Wallaroo Air Gap Installation File URL.curl -Lo wallaroo.airgap '{Wallaroo Airgap Installation File URL}'KOTS CLI
curl -LO {Link to KOTS CLI}KOTS Airgap Bundle
curl -LO {Link to KOTS Airgap Bundle}
Place these files onto the air gap server or node that administrates the Kubernetes cluster. Once these files are on the node, the cluster can be air gapped and the required software installed through the next steps.
Install Kots
Install kots into the node managing the Kubernetes cluster with the following commands:
Extract the archive:
tar zxvf kots_linux_amd64.tar.gz kotsInstall
kotsto the/usr/local/bindirectory. Adjust this directory to match the location of thekubectlcommand.sudo mv kots /usr/local/bin/kubectl-kotsVerify the
kotsinstallation by checking the version. The result should be similar to the following:kubectl kots version Replicated KOTS 1.91.3
Install the Kots Admin Console
This step will Extract the KOTS Admin Console container images and push them into a private registry. Registry credentials provided in this step must have push access. These credentials will not be stored anywhere or reused later.
This requires the following:
- Private Registry Host: The URL of the private registry host used by the Kubernetes cluster.
- Private Registry Port: The port of the private registry used by the Kubernetes cluster (
5000by default). - KOTS Airgap Bundle (default:
kotsadm.tar.gz): Downloaded as part of Download Assets step. - Registry Push Username: The username with push access to the private registry.
- Registry Push Password: The password of the registry user with push access to the private registry.
This command takes the following format:
kubectl kots admin-console push-images {KOTS Airgap Bundle} \
    {Private Registry Host}:{Private Registry Port} \
    --registry-username {Registry Push Username} \
    --registry-password {Registry Push Password}
Adjust the command based on your organizations registry setup.
Install Wallaroo Airgap
This step will install the Wallaroo air gap file into the Kubernetes cluster through the Kots Admin images.
Registry credentials provided in this step only need to have read access, and they will be stored in a Kubernetes secret in the same namespace where Admin Console will be installed. These credentials will be used to pull the images, and will be automatically created as an imagePullSecret on all of the Admin Console pods.
This requires the following:
- Private Registry Host: The URL of the private registry host used by the Kubernetes cluster.
- Private Registry Port: The port of the private registry used by the Kubernetes cluster (
5000by default). - Wallaroo Namespace (default:
wallaroo): The kubernetes namespace used to install the Wallaroo isntance. - Wallaroo Airgap Installation File (default:
wallaroo.airgap): Downloaded as part of Download Assets step. - Wallaroo License File: Downloaded as part of Download Assets step.
- Registry Read Username: The username with read access to the private registry.
- Registry Read Password: The password of the registry user with read access to the private registry.
The command will take the following format. Note that the option --license-file {Wallaroo License File} is required. This will point to the license REQUIRED for an air gap installation.
kubectl kots install wallaroo/ea \
    --kotsadm-registry {Private Registry Host}:{Private Registry Port} \
    --registry-username {Registry Read Username} --registry-password {Registry Read Password} \
    --airgap-bundle {Wallaroo Airgap Installation File} \
    --namespace {Wallaroo Namespace} \
    --license-file {Wallaroo License File}
The following flags can be added to speed up the configuration process:
--shared-password {Wallaroo Admin Dashboard Password}: The password used to access the Wallaroo Admin Dashboard.--config-values config.yaml: Sets up the Wallaroo instance configuration based on the suppliedyamlfile.--no-port-forward: Does not forward port8800for use.--skip-preflights: Skip the standard preflight checks and launch the Wallaroo instance.
For example, the following will install Wallaroo Enterprise into the namespace wallaroo using the provided license file, using the shared password wallaroo and skipping the preflight checks:
kubectl kots install wallaroo/ea \
    --kotsadm-registry private.host:5000 \
    --registry-username xxx --registry-password yyy \
    --airgap-bundle wallaroo.airgap \
    --namespace wallaroo \
    --license-file license.yaml \
    --shared-password wallaroo \
    --skip-preflights
When complete, a link to the Wallaroo Admin Console will be made available unless the option --no-port-forward is selected.
  • Press Ctrl+C to exit
  • Go to http://localhost:8800 to access the Admin Console
Using Ctrl+C will disable the Wallaroo Admin Console, but the Wallaroo instance and services will continue to run in the cluster.
To reenable the Wallaroo Admin Console, use the following command:
kubectl-kots admin-console --namespace {Wallaroo Namespace}
Preflight Checks
Preflight checks will verify that the Wallaroo instance meets the prerequisites. If any fail, check your Kubernetes environment and verify they are in alignment.
Preflight checks will be skipped if Wallaroo was installed with the --skip-preflights option.
Wallaroo Admin Console
If no license file was provided through the command line, it can be provided through the Wallaroo Admin Console on port 8800. To access the Wallaroo Admin Console, some method of port forwarding through the jump box will have to be configured to the air gapped cluster.
Status Checks
While the installer allocates resources and deploys workloads, the status page will show as Missing or Unavailable. If it stays in this state for more than twenty minutes, proceed to troubleshooting or contact Wallaroo technical support.

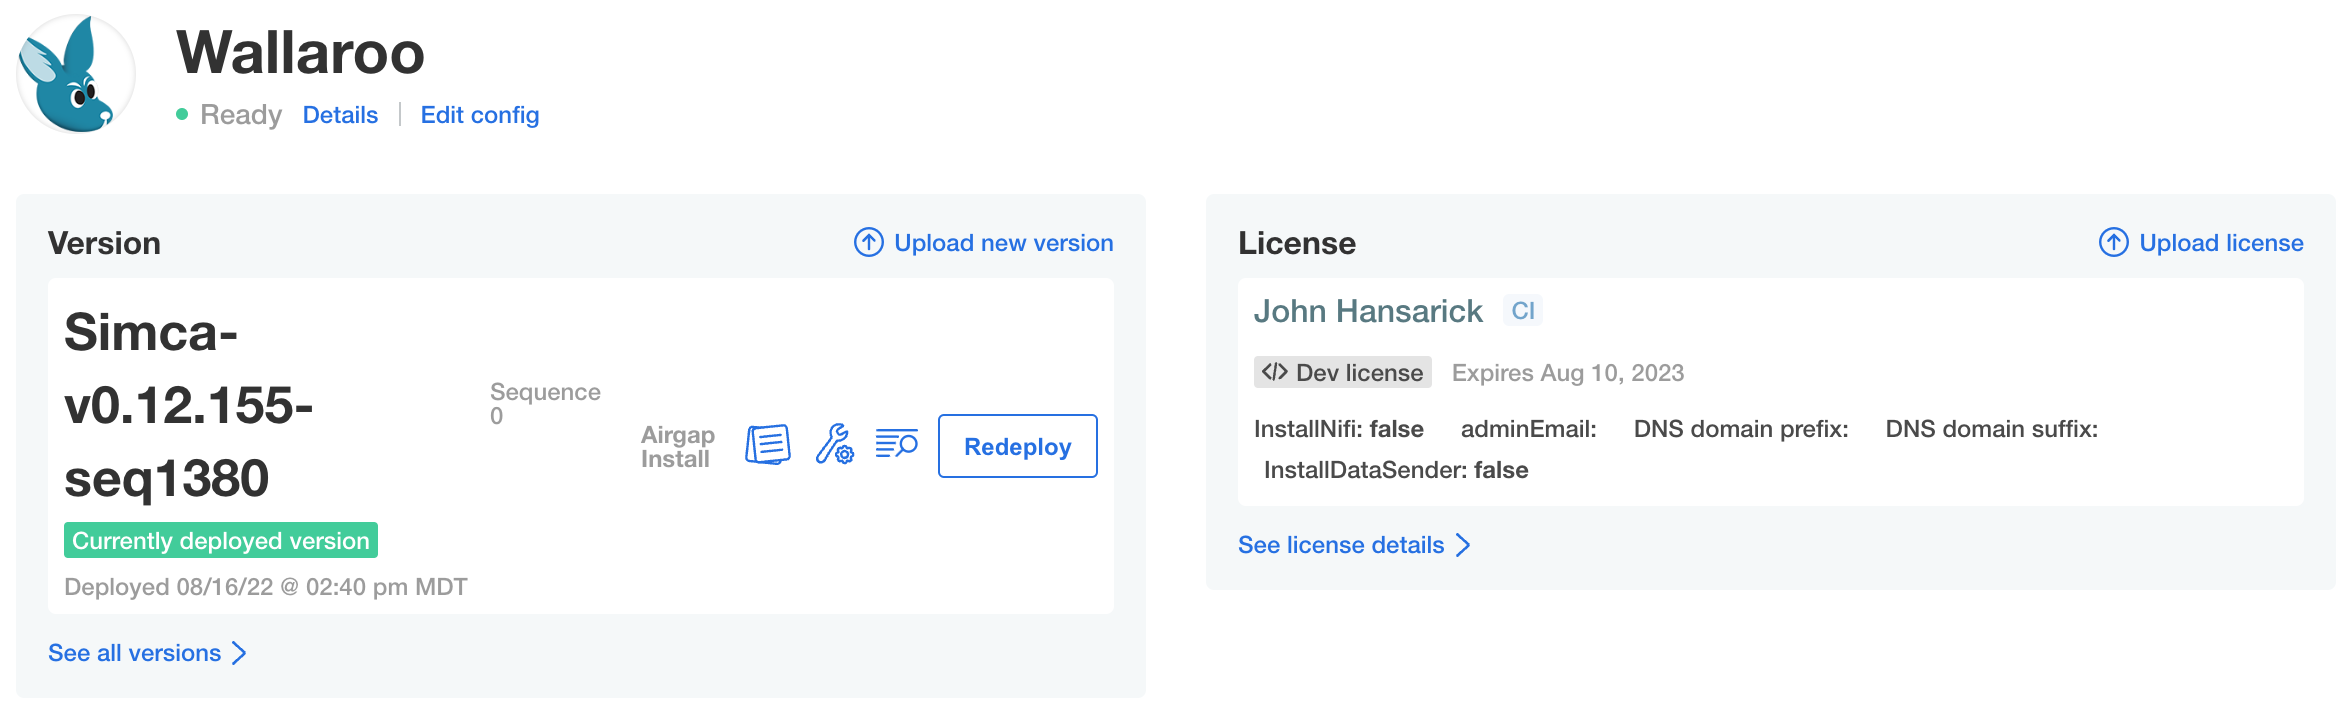
Once the application has become ready, the status indication will turn green and ready Ready.
Troubleshooting
At any time, the administration console can create troubleshooting bundles for Wallaroo technical support to assess product health and help with problems. Support bundles contain logs and configuration files which can be examined before downloading and transmitting to Wallaroo. The console also has a configurable redaction mechanism in cases where sensitive information such as passwords, tokens, or PII (Personally Identifiable Information) need to be removed from logs in the bundle.
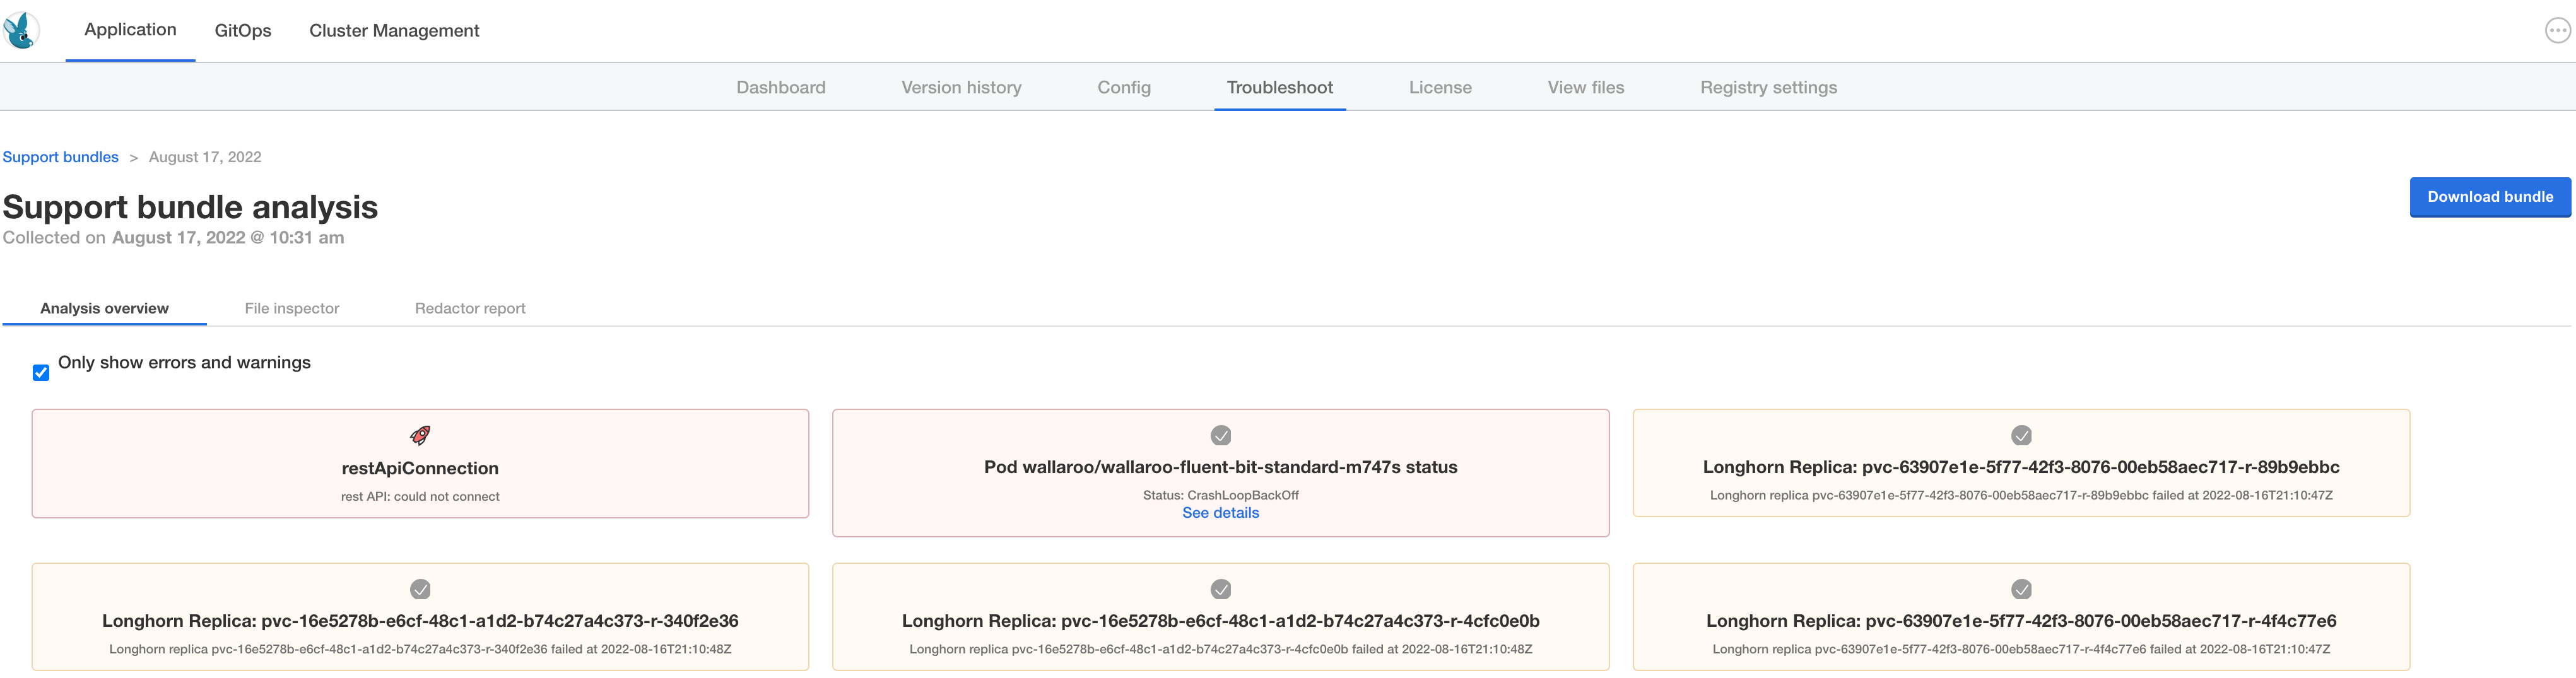
To manage support bundles:
- Log into the administration console.
- Select the Troubleshoot tab.
- Select Analyze Wallaroo.
- Select
Download bundleto save the bundle file as a compressed archive. Depending on your browser settings the file download location can be specified. - Send the file to Wallaroo technical support.
At any time, any existing bundle can be examined and downloaded from the Troubleshoot tab.
Example Registry Service Install
The following example demonstrates how to set up an unsecure local registry service that can be used for testing. This process is not advised for production systems, and it only provided as an example for testing the air gap install process. This example uses an Ubuntu 20.04 instance as the installation environment.
This example assumes that the containerd service is installed and used by the Kubernetes cluster.
Private Container Registry Service Install Process
To install a demo container registry service on an Ubuntu 20.04 instance:
Install the registry service:
sudo apt update
sudo apt install docker-registry jq
Replace the file
/etc/docker/registry/config.ymlwith the following. Note that this configures the service with no security:version: 0.1 log: fields: service: registry storage: cache: blobdescriptor: inmemory filesystem: rootdirectory: /var/lib/docker-registry http: addr: :5000 headers: X-Content-Type-Options: [nosniff] health: storagedriver: enabled: true interval: 10s threshold: 3Update the
containerdservice as follows, replacingYOUR-HOST-HEREwith the hostname of the registry service configured above. Comment out any existingregistryentries and replace with the new insecure registry service:[plugins."io.containerd.grpc.v1.cri".registry] [plugins."io.containerd.grpc.v1.cri".registry.mirrors] [plugins."io.containerd.grpc.v1.cri".registry.mirrors."YOUR-HOST-HERE:5000"] endpoint = ["http://YOUR-HOST-HERE:5000"] [plugins."io.containerd.grpc.v1.cri".registry.configs] [plugins."io.containerd.grpc.v1.cri".registry.configs."YOUR-HOST-HERE:5000".tls] insecure_skip_verify = true # [plugins."io.containerd.grpc.v1.cri".registry] # config_path = "" # [plugins."io.containerd.grpc.v1.cri".registry.auths] # [plugins."io.containerd.grpc.v1.cri".registry.configs] # [plugins."io.containerd.grpc.v1.cri".registry.headers] # [plugins."io.containerd.grpc.v1.cri".registry.mirrors]Restart the registry service and
containerdservice.sudo systemctl restart docker-registry sudo systemctl restart containerd