The following details how to set up Wallaroo Community using GitHub Codespaces. This provides a quick method of setting up Wallaroo Community with just a few commands. You get the free license from the Wallaroo Community Portal site, and the rest of the process is handled by GitHub and Wallaroo.
Prerequisites
- GitHub Account: A GitHub account.
- GitHub Codespaces: Free for individual use for up to 60 hours a month to start withwith simple, pay-as-you-go pricing afterwards. See the GitHub Codespaces Cost Calculator for details on services costs.
- Wallaroo Community License: Available for free from the Wallaroo Community Portal page.
Installation Steps
From the Wallaroo Community Portal page, follow the registration instructions. If a Wallaroo Community license already exists for this account, enter the same name and email address to retrieve the registration link.
Download the Wallaroo Community license. This provides both the Wallaroo Community license in YAML format and the base64 encoded version. Store both in a secure location. The base64 ended version will be used in this process.
From the License Download page:
- Select Download license file. This provides two files: The YAML version of the license file, and an encoded base 64 version of the license file.
- Select Github Codespaces, then select Click to install Wallaroo in your GitHub Codespaces.
From the Create codespace GitHub page for Wallaroo Community, set the following:
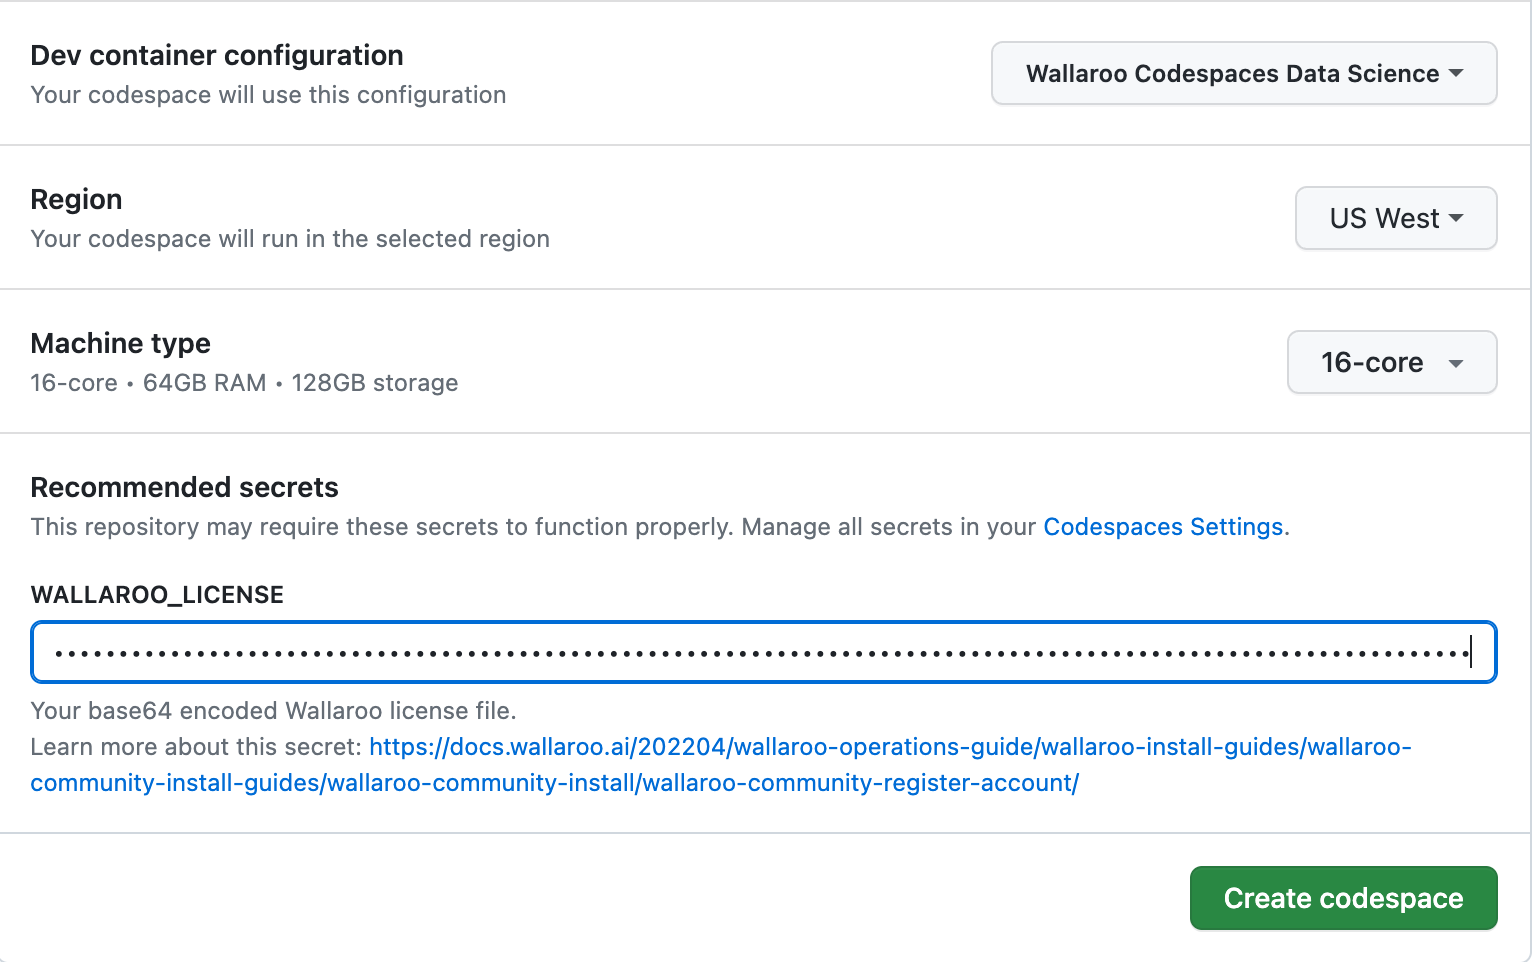
- Dev container configuration: Set to Wallaroo Codespaces Data Science.
- Region: Select the region where the codespace will run. This should be the region geographically closest to the end user.
- Europe West
- Southeast Asia
- US West
- US East
- Machine Type: Set the number of CPUs to use. Leave as 16-cores - anything less the containers will not run.
- Wallaroo Community License: Provide the base64 version of the Wallaroo license here.
When complete, select Create Codespace. Wait until the process is complete - this usually takes about 15 minutes.
To see the installation process in action, use one of the following options:
- Enter either
Control-Shift-PorCommand-Shift-P(for MacOS systems) and select Codespaces: View Creation Log. - Select from the lower left corner Codespaces and then View Creation Log.
Once the entry “Finished configuring codespace” is displayed, the Wallaroo Community installation is complete.
Wallaroo Community First Login
If this is your first login, you will receive an email invitation for the email address connected to this URL with a temporary password. Follow the link provided in the email. If not already logged into GitHub, a prompt will appear for you to login to GitHub to manage the port forwarding required to connect to the Wallaroo Community instance through your browser.
To login to your new Wallaroo instance, enter the email address and temporary password associated with the license. Enter a new password twice to set a new permanent password, and you will be logged into the Wallaroo Community instance.
Subsequent logins will are performed through the same URL.
Stopping and Starting Wallaroo Community
To start and stop the Wallaroo Community codespace:
- To stop the current Wallaroo Community codespace:
- From the Wallaroo Community Codespace page, from the bottom left select Codespaces, then select the action Stop Current Codespace.
- The other option is to press
F1and select Stop Current Codespace.
- To start a Wallaroo Community codespace:
- Access your GitHub Codespaces page from GitHub by selecting your user profile icon in the upper right corner, then selecting My Codespaces.
- From your GitHub Codespaces page, select your Wallaroo Community code space.
- From the menu list on the right side, select Open In…, then Open in Browser to launch the Wallaroo Community Codespace page. This will launch the Wallaroo Community containers and make them available once they are done starting up.
See Setting your timeout period for GitHub Codespaces for information on timeout settings.
Additional GitHub Codespaces Options
Update the Wallaroo Community License
When Wallaroo Community is installed through GitHub Codespaces, the base64 hash of the Wallaroo license used in the installation process is stored in GitHub.
To update this license:
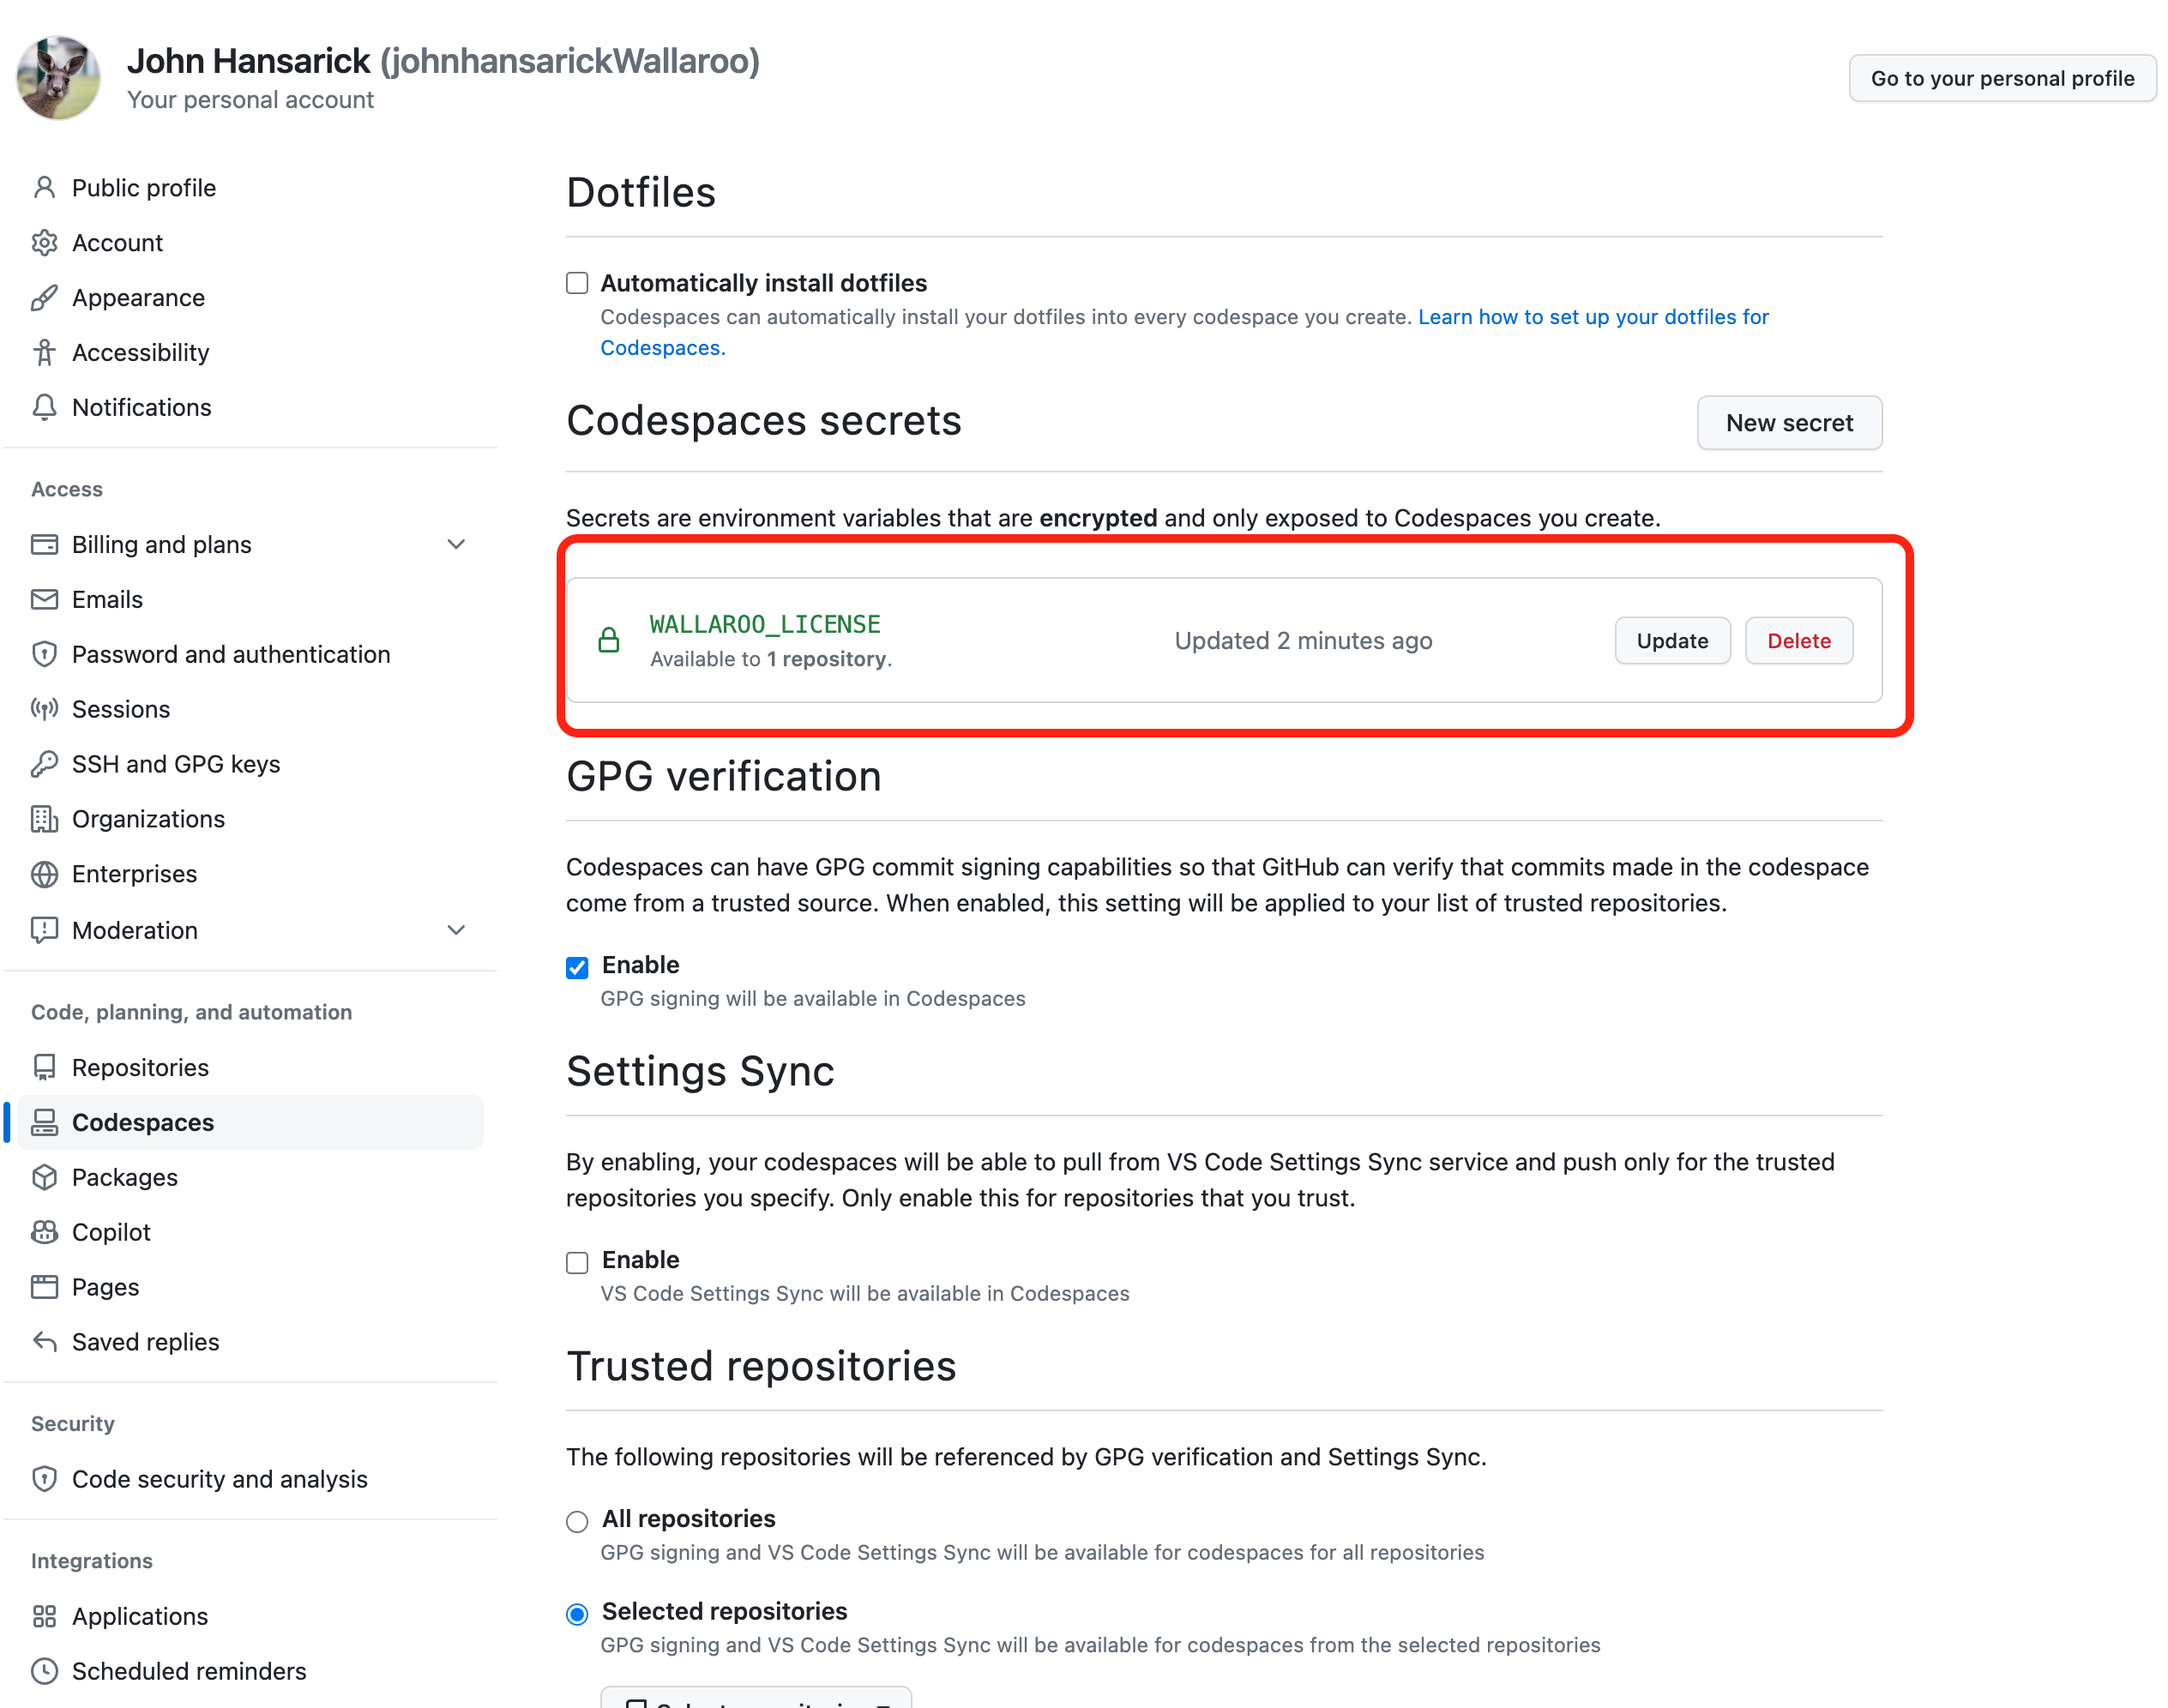
Select your GitHub user profile, then Settings.
Select Codespaces, then Codespaces secrets. The Wallaroo Community license is listed as WALLAROO_LICENSE. Use Update to update the license or Delete to remove if it is no longer needed.
Open Ports for Multiple Users
To provide for multiple users, the following ports must be set from private to public. This step is not required for users who will be the only one accessing Wallaroo Community though their codespace.
- keycloak: Port
8080, used for authentication to the Wallaroo service. - hub: Port
8081, used for the JupyterHub service. - dashboard: Port
8443, used for the Wallaroo Dashboard.
To update the network settings:
- Access the Wallaroo Community codespace settings by entering either
Control-Shift-PorCommand-Shift-P(for MacOS systems) and select View: Toggle Terminal. - Right click keycloak, hub, and dashboard and set Port Visibility to Public.