Wallaroo SDK Standard Install Guide
This tutorial and the assets can be downloaded as part of the Wallaroo Tutorials repository.
Installing the Wallaroo SDK
Organizations that develop machine learning models can deploy models to Wallaroo from their local systems to a Wallaroo instance through the Wallaroo SDK. The following guide is created to assist users with installing the Wallaroo SDK and making a standard connection to a Wallaroo instance.
These instructions are based on the on the Connect to Wallaroo guides.
This tutorial provides the following:
aloha-cnn-lstm.zip: A pre-trained open source model that uses an Aloha CNN LSTM model for classifying Domain names as being either legitimate or being used for nefarious purposes such as malware distribution.- Test Data Files:
data_1k.arrow: 1,000 recordsdata_25k.arrow: 25,000 records
For this example, a virtual python environment will be used. This will set the necessary libraries and specific Python version required.
Prerequisites
The following is required for this tutorial:
- A Wallaroo instance version 2024.4 or later.
- Python 3.10.6 or later installed locally.
- Conda: Used for managing python virtual environments.
- The following Python libraries installed:
General Steps
For our example, we will perform the following:
- Wallaroo SDK Install
- Set up a Python virtual environment through
condawith the libraries that enable the virtual environment for use in a Jupyter Hub environment. - Install the Wallaroo SDK.
- Set up a Python virtual environment through
- Wallaroo SDK from remote JupyterHub Demonstration (Optional): The following steps are an optional exercise to demonstrate using the Wallaroo SDK from a remote connection. The entire tutorial can be found on the Wallaroo Tutorials repository.
- Connect to a remote Wallaroo instance.
- Create a workspace for our work.
- Upload the Aloha model.
- Create a pipeline that can ingest our submitted data, submit it to the model, and export the results
- Run a sample inference through our pipeline by loading a file
- Retrieve the external deployment URL. This sample Wallaroo instance has been configured to create external inference URLs for pipelines. For more information, see the External Inference URL Guide.
- Run a sample inference through our pipeline’s external URL and store the results in a file. This assumes that the External Inference URLs have been enabled for the target Wallaroo instance.
- Undeploy the pipeline and return resources back to the Wallaroo instance’s Kubernetes environment.
Install Wallaroo SDK
Set Up Virtual Python Environment
To set up the Python virtual environment for use of the Wallaroo SDK:
From a terminal shell, create the Python virtual environment with
conda. Replacewallaroosdkwith the name of the virtual environment as required by your organization. Note that Python 3.10 is specified as a requirement for Python libraries used with the Wallaroo SDK. The following will install the latest version of Python 3.10.conda create -n wallaroosdk python=3.10Activate the new environment.
conda activate wallaroosdk(Optional) For organizations who want to use the Wallaroo SDk from within Jupyter and similar environments:
Install the
ipykernellibrary. This allows the JupyterHub notebooks to access the Python virtual environment as a kernel, and it required for the second part of this tutorial.conda install ipykernelInstall the new virtual environment as a python kernel.
ipython kernel install --user --name=wallaroosdk
Install the Wallaroo SDK. This process may take several minutes while the other required Python libraries are added to the virtual environment.
- IMPORTANT NOTE: The version of the Wallaroo SDK should match the Wallaroo instance. For example, this example connects to a Wallaroo Enterprise version
2024.3instance, so the SDK version should bewallaroo==2025.2.2.
pip install wallaroo==2025.2.2- IMPORTANT NOTE: The version of the Wallaroo SDK should match the Wallaroo instance. For example, this example connects to a Wallaroo Enterprise version
For organizations who will be using the Wallaroo SDK with Jupyter or similar services, the conda virtual environment has been installed, it can either be selected as a new Jupyter Notebook kernel, or the Notebook’s kernel can be set to an existing Jupyter notebook.

To use a new Notebook:
- From the main menu, select File->New-Notebook.
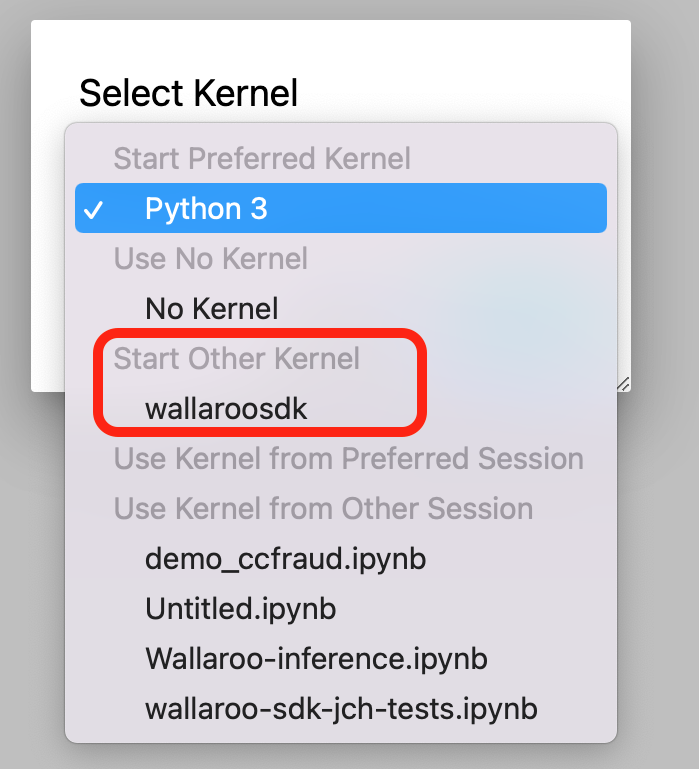
- From the Kernel selection dropbox, select the new virtual environment - in this case, wallaroosdk.
To update an existing Notebook to use the new virtual environment as a kernel:
- From the main menu, select Kernel->Change Kernel.
- Select the new kernel.
Sample Wallaroo Connection
With the Wallaroo Python SDK installed, remote commands and inferences can be performed through the following steps.
Open a Connection to Wallaroo
The first step is to connect to Wallaroo through the Wallaroo client.
This is accomplished using the wallaroo.Client(api_endpoint, auth_endpoint, auth_type command) command that connects to the Wallaroo instance services.
The Client method takes the following parameters:
- api_endpoint (String): The URL to the Wallaroo instance API service.
- auth_endpoint (String): The URL to the Wallaroo instance Keycloak service.
- auth_type command (String): The authorization type. In this case,
SSO.
The URLs are based on the Wallaroo Prefix and Wallaroo Suffix for the Wallaroo instance. For more information, see the DNS Integration Guide. In the example below, replace “YOUR PREFIX” and “YOUR SUFFIX” with the Wallaroo Prefix and Suffix, respectively.
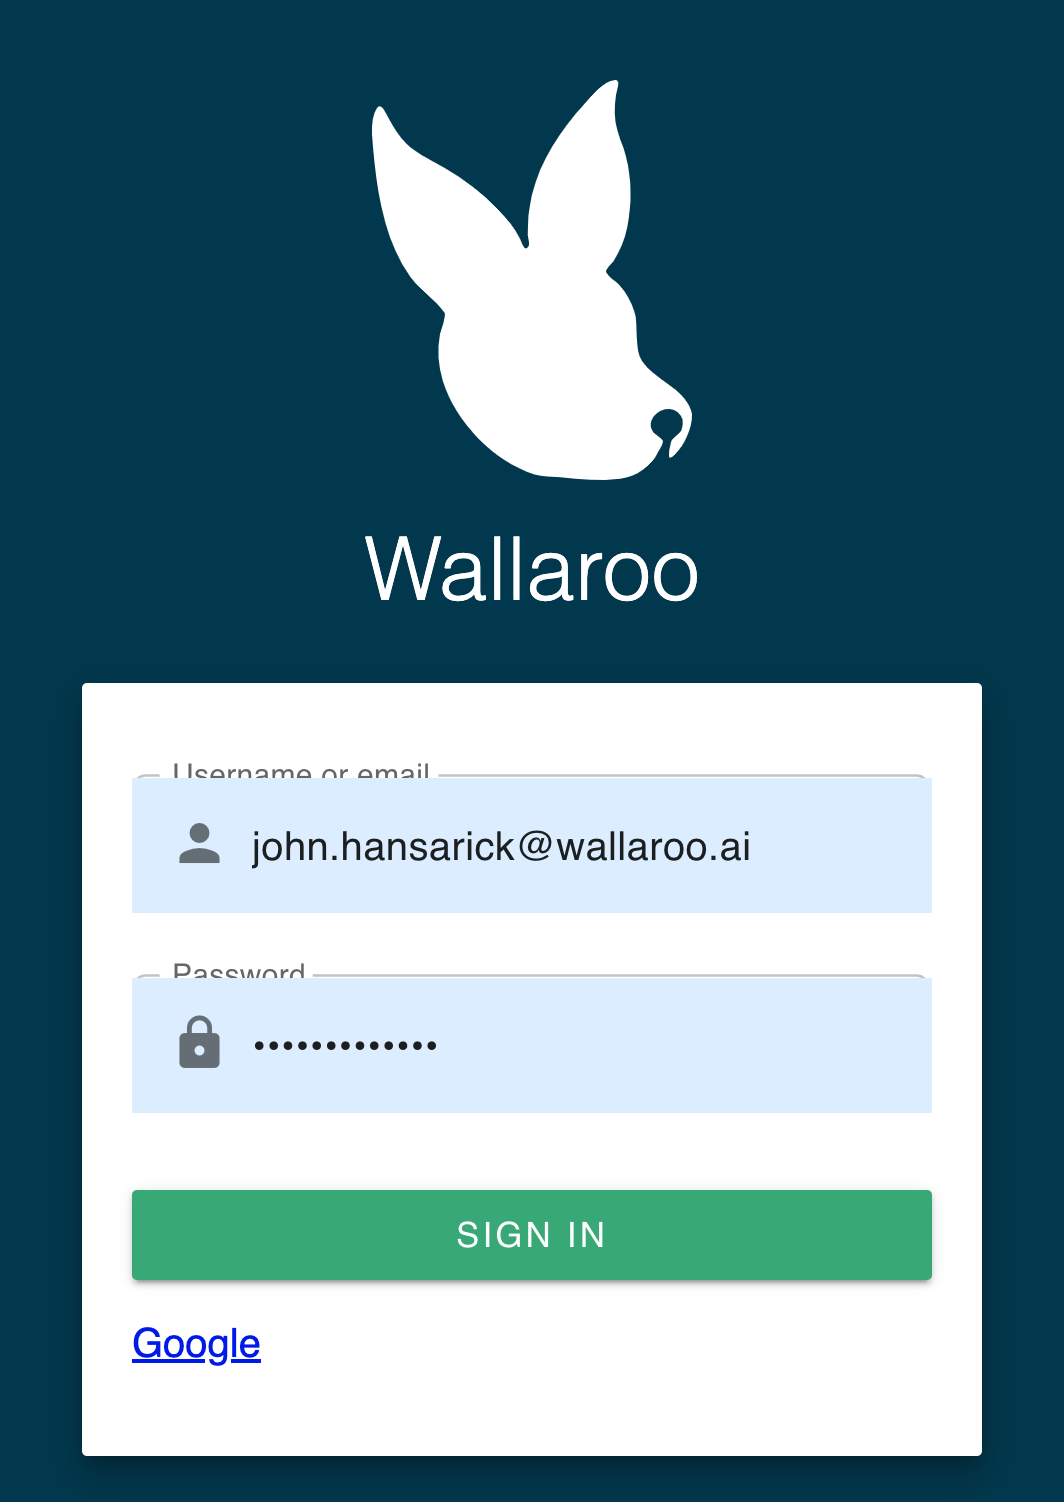
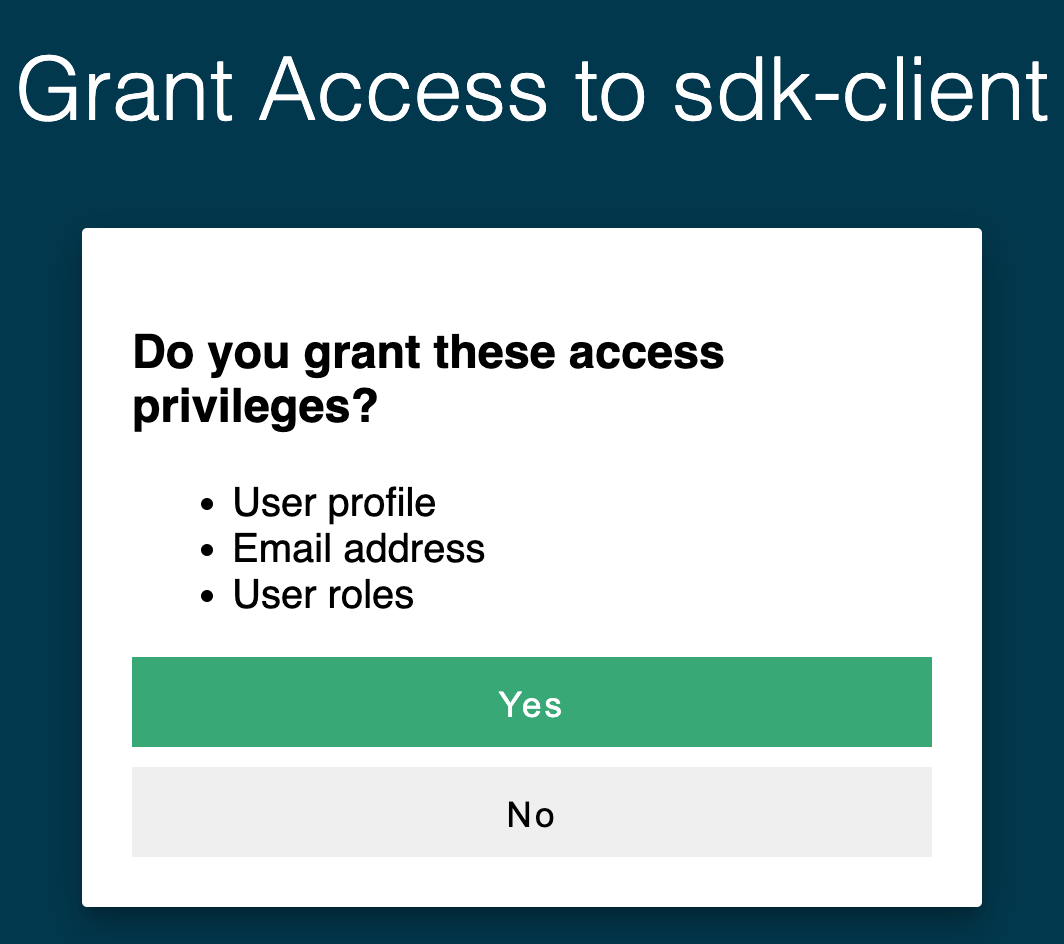
Once run, the wallaroo.Client command provides a URL to grant the SDK permission to your specific Wallaroo environment. When displayed, enter the URL into a browser and confirm permissions. Depending on the configuration of the Wallaroo instance, the user will either be presented with a login request to the Wallaroo instance or be authenticated through a broker such as Google, Github, etc. To use the broker, select it from the list under the username/password login forms. For more information on Wallaroo authentication configurations, see the Wallaroo Authentication Configuration Guides.

Once authenticated, the user will verify adding the device the user is establishing the connection from. Once both steps are complete, then the connection is granted.

The connection is stored in the variable wl for use in all other Wallaroo calls.
import wallaroo
from wallaroo.object import EntityNotFoundError

# to display dataframe tables
from IPython.display import display
# used to display dataframe information without truncating
import pandas as pd
pd.set_option('display.max_colwidth', None)
import pyarrow as pa
wallaroo.__version__
'2024.2.0b0'
Connect to Wallaroo
For this example, a connection through the Wallaroo SDK is used. For more information, see the Wallaroo SDK Essentials Guide: Client Connection.
# Login

wl = wallaroo.Client()
Wallaroo Remote SDK Examples
The following examples can be used by an organization to test using the Wallaroo SDK from a remote location from their Wallaroo instance. These examples show how to create workspaces, deploy pipelines, and perform inferences through the SDK and API.
Create the Workspace
We will create a workspace to work in and call it the sdkworkspace, then set it as current workspace environment. We’ll also create our pipeline in advance as sdkpipeline.
- IMPORTANT NOTE: For this example, the Aloha model is stored in the file
alohacnnlstm.zip. When using tensor based models, the zip file must match the name of the tensor directory. For example, if the tensor directory isalohacnnlstm, then the .zip file must be namedalohacnnlstm.zip.
workspace_name = 'sdkquickworkspace'
pipeline_name = 'sdkquickpipeline'
model_name = 'sdkquickmodel'
model_file_name = './alohacnnlstm.zip'
workspace = wl.get_workspace(name=workspace_name, create_if_not_exist=True)

wl.set_current_workspace(workspace)

pipeline = wl.build_pipeline(pipeline_name)
pipeline
| name | sdkquickpipeline |
|---|---|
| created | 2024-07-19 18:19:37.596118+00:00 |
| last_updated | 2024-07-19 18:19:37.596118+00:00 |
| deployed | (none) |
| workspace_id | 46 |
| workspace_name | sdkquickworkspace |
| arch | None |
| accel | None |
| tags | |
| versions | b942053d-e9af-4ac2-b805-b65dd2a40811 |
| steps | |
| published | False |
We can verify the workspace is created the current default workspace with the get_current_workspace() command.
wl.get_current_workspace()
{'name': 'sdkquickworkspace', 'id': 46, 'archived': False, 'created_by': 'c54f6f84-e10a-474d-b506-38c8b15f5f54', 'created_at': '2024-07-19T18:19:37.411835+00:00', 'models': [], 'pipelines': [{'name': 'sdkquickpipeline', 'create_time': datetime.datetime(2024, 7, 19, 18, 19, 37, 596118, tzinfo=tzutc()), 'definition': '[]'}]}
Upload the Models
Now we will upload our model. Note that for this example we are applying the model from a .ZIP file. The Aloha model is a protobuf file that has been defined for evaluating web pages, and we will configure it to use data in the tensorflow format.
from wallaroo.framework import Framework
model = wl.upload_model(model_name, model_file_name, framework=Framework.TENSORFLOW).configure("tensorflow")
Deploy a Model
Now that we have a model that we want to use we will create a deployment for it.
We will tell the deployment we are using a tensorflow model and give the deployment name and the configuration we want for the deployment.
To do this, we’ll create our pipeline that can ingest the data, pass the data to our Aloha model, and give us a final output. We’ll call our pipeline externalsdkpipeline, then deploy it so it’s ready to receive data. The deployment process usually takes about 45 seconds.
pipeline.add_model_step(model)
| name | sdkquickpipeline |
|---|---|
| created | 2024-07-19 18:19:37.596118+00:00 |
| last_updated | 2024-07-19 18:19:37.596118+00:00 |
| deployed | (none) |
| workspace_id | 46 |
| workspace_name | sdkquickworkspace |
| arch | None |
| accel | None |
| tags | |
| versions | b942053d-e9af-4ac2-b805-b65dd2a40811 |
| steps | |
| published | False |
pipeline
| name | sdkquickpipeline |
|---|---|
| created | 2024-07-19 18:19:37.596118+00:00 |
| last_updated | 2024-07-19 18:19:37.596118+00:00 |
| deployed | (none) |
| workspace_id | 46 |
| workspace_name | sdkquickworkspace |
| arch | None |
| accel | None |
| tags | |
| versions | b942053d-e9af-4ac2-b805-b65dd2a40811 |
| steps | |
| published | False |
pipeline.deploy()
We can verify that the pipeline is running and list what models are associated with it.
pipeline.status()
{'status': 'Running',
 'details': [],
 'engines': [{'ip': '10.28.5.2',
   'name': 'engine-86fcb5b7-wdg2v',
   'status': 'Running',
   'reason': None,
   'details': [],
   'pipeline_statuses': {'pipelines': [{'id': 'sdkquickpipeline',
      'status': 'Running',
      'version': 'c5f1c556-4cf8-4e18-8d4a-b89a3ed9f02d'}]},
   'model_statuses': {'models': [{'name': 'sdkquickmodel',
      'sha': 'd71d9ffc61aaac58c2b1ed70a2db13d1416fb9d3f5b891e5e4e2e97180fe22f8',
      'status': 'Running',
      'version': 'a0f729ba-7748-4cc4-a049-d7fd010f7df7'}]}}],
 'engine_lbs': [{'ip': '10.28.1.28',
   'name': 'engine-lb-6b59985857-t6q5b',
   'status': 'Running',
   'reason': None,
   'details': []}],
 'sidekicks': []}
Inferences
Infer 1 row
Now that the pipeline is deployed and our Aloha model is in place, we’ll perform a smoke test to verify the pipeline is up and running properly. We’ll use the infer_from_file command to load a single encoded URL into the inference engine and print the results back out.
The result should tell us that the tokenized URL is legitimate (0) or fraud (1). This sample data should return close to 1.
## Demonstrate via straight infer

smoke_test = pd.DataFrame.from_records(
    [
    {
        "text_input":[
            0,
            0,
            0,
            0,
            0,
            0,
            0,
            0,
            0,
            0,
            0,
            0,
            0,
            0,
            0,
            0,
            0,
            0,
            0,
            0,
            0,
            0,
            0,
            0,
            0,
            0,
            0,
            0,
            0,
            0,
            0,
            0,
            0,
            0,
            0,
            0,
            0,
            0,
            0,
            0,
            28,
            16,
            32,
            23,
            29,
            32,
            30,
            19,
            26,
            17
        ]
    }
]
)

result = pipeline.infer(smoke_test)
display(result.loc[:, ["time","out.main"]])
| time | out.main | |
|---|---|---|
| 0 | 2024-07-19 18:21:00.168 | [0.997564] |
Infer 1,000 Rows
We can also infer an entire batch as one request either with the Pipeline infer method with multiple rows, or loaded from a file using the Pipeline infer_from_file method. For this example, we will run a batch on 1,000 records using the file data_1k.arrow. This is an Apache Arrow table, which gives the added benefit of speed and lower file size as a binary file rather than a text JSON file.
We’ll infer the 1,000 records, then convert it to a DataFrame and display the first 5 to save space in our Jupyter Notebook.
result = pipeline.infer_from_file('./data/data_1k.arrow')

outputs = result.to_pandas()
display(outputs.head(5).loc[:, ["time","out.main"]])
| time | out.main | |
|---|---|---|
| 0 | 2024-07-19 18:21:01.447 | [0.997564] |
| 1 | 2024-07-19 18:21:01.447 | [0.9885122] |
| 2 | 2024-07-19 18:21:01.447 | [0.9993358] |
| 3 | 2024-07-19 18:21:01.447 | [0.99999857] |
| 4 | 2024-07-19 18:21:01.447 | [0.9984837] |
Batch Inference
Now that our smoke test is successful, let’s really give it some data. We have two inference files we can use:
data_1k.arrow: Contains 10,000 inferencesdata_25k.arrow: Contains 25,000 inferences
We’ll pipe the data-25k.json file through the pipeline deployment URL, and place the results in a file named response.txt. We’ll also display the time this takes. Note that for larger batches of 50,000 inferences or more can be difficult to view in Jupyter Hub because of its size.
When retrieving the pipeline inference URL through an external SDK connection, the External Inference URL will be returned. This URL will function provided that the Enable external URL inference endpoints is enabled. For more information, see the Wallaroo Model Endpoints Guide.
inference_url = pipeline._deployment._url()
inference_url
'https://doc-test.wallarooexample.ai/v1/api/pipelines/infer/sdkquickpipeline-25/sdkquickpipeline'
The API connection details can be retrieved through the Wallaroo client mlops() command. This will display the connection URL, bearer token, and other information. The bearer token is available for one hour before it expires.
For this example, the API connection details will be retrieved, then used to submit an inference request through the external inference URL retrieved earlier.
token = wl.auth.auth_header()["Authorization"]
token
'Bearer eyJhbGciOiJSUzI1NiIsInR5cCIgOiAiSldUIiwia2lkIiA6ICJfOUJ1N1F5dmEyMm5sbUc5cjZWZlhrU3RCLWVydDlrd0tXX2gxeHdKcWIwIn0.eyJleHAiOjE3MjE0MTMzOTIsImlhdCI6MTcyMTQxMzMzMiwianRpIjoiZWNmZWQ1MmItNDJlMi00Yjk1LWEyODctODkyNDI0MzVhOTIxIiwiaXNzIjoiaHR0cHM6Ly9kb2MtdGVzdC53YWxsYXJvb2NvbW11bml0eS5uaW5qYS9hdXRoL3JlYWxtcy9tYXN0ZXIiLCJhdWQiOlsibWFzdGVyLXJlYWxtIiwiYWNjb3VudCJdLCJzdWIiOiJjNTRmNmY4NC1lMTBhLTQ3NGQtYjUwNi0zOGM4YjE1ZjVmNTQiLCJ0eXAiOiJCZWFyZXIiLCJhenAiOiJzZGstY2xpZW50Iiwic2Vzc2lvbl9zdGF0ZSI6Ijc1MzFkZTY1LTc4NTEtNDYwMC04ZjFmLTMwYjdhZjA0N2Q4MSIsImFjciI6IjEiLCJyZWFsbV9hY2Nlc3MiOnsicm9sZXMiOlsiZGVmYXVsdC1yb2xlcy1tYXN0ZXIiLCJvZmZsaW5lX2FjY2VzcyIsInVtYV9hdXRob3JpemF0aW9uIl19LCJyZXNvdXJjZV9hY2Nlc3MiOnsibWFzdGVyLXJlYWxtIjp7InJvbGVzIjpbInZpZXctcmVhbG0iLCJ2aWV3LXVzZXJzIiwicXVlcnktZ3JvdXBzIiwicXVlcnktdXNlcnMiXX0sImFjY291bnQiOnsicm9sZXMiOlsibWFuYWdlLWFjY291bnQiLCJtYW5hZ2UtYWNjb3VudC1saW5rcyIsInZpZXctcHJvZmlsZSJdfX0sInNjb3BlIjoicHJvZmlsZSBvcGVuaWQgZW1haWwiLCJzaWQiOiI3NTMxZGU2NS03ODUxLTQ2MDAtOGYxZi0zMGI3YWYwNDdkODEiLCJlbWFpbF92ZXJpZmllZCI6dHJ1ZSwiaHR0cHM6Ly9oYXN1cmEuaW8vand0L2NsYWltcyI6eyJ4LWhhc3VyYS11c2VyLWlkIjoiYzU0ZjZmODQtZTEwYS00NzRkLWI1MDYtMzhjOGIxNWY1ZjU0IiwieC1oYXN1cmEtdXNlci1lbWFpbCI6ImpvaG4uaGFuc2FyaWNrQHdhbGxhcm9vLmFpIiwieC1oYXN1cmEtZGVmYXVsdC1yb2xlIjoidXNlciIsIngtaGFzdXJhLWFsbG93ZWQtcm9sZXMiOlsidXNlciJdLCJ4LWhhc3VyYS11c2VyLWdyb3VwcyI6Int9In0sInByZWZlcnJlZF91c2VybmFtZSI6ImpvaG4uaGFuc2FyaWNrQHdhbGxhcm9vLmFpIiwiZW1haWwiOiJqb2huLmhhbnNhcmlja0B3YWxsYXJvby5haSJ9.Z2TuoY6betpWRtTqadq5PquY3dW0EMQa0U7ATXATtkszzWQdDLFnmN3gd4uAOHOld4_N8DvIf4nuiwc-JK-cc85_p-thnuN6vvaQkdTkPgjHHddcUOh-0VrEFjCIV32p2LJoJSTakCgvuqbEhYynL26Zocrm9yipPHQ4-Ge2s5oLezSOQXjGF-Oy9jd2M_5Wcu284gsy0gVpCg5KGr51q35oR7vFWiAOj5Ynm97xDBUx723hZNESAC5hUAm-UmsaBrBEe_8eVI3gdiJSLP1zdnXj8lT-zdtK8d6FSC7N5vtcr1vCb6xU2x6QlHphxGcPtMZaFZtckVFmql_r1RibGw'
dataFile="./data/data_25k.arrow"
contentType="application/vnd.apache.arrow.file"
!curl -X POST {inference_url} -H "Authorization: {token}" -H "Content-Type:{contentType}" --data-binary @{dataFile} > curl_response.df
  % Total    % Received % Xferd  Average Speed   Time    Time     Time  Current
                                 Dload  Upload   Total   Spent    Left  Speed
100 26.8M  100 22.0M  100 4874k  2611k   563k  0:00:08  0:00:08 --:--:-- 6355k
cc_data_from_file =  pd.read_json('./curl_response.df', orient="records")
display(cc_data_from_file.head(5).loc[:, ["time","out"]])
| time | out | |
|---|---|---|
| 0 | 1721413336475 | {'banjori': [0.0015195814], 'corebot': [0.9829147500000001], 'cryptolocker': [0.012099549000000001], 'dircrypt': [4.7591115e-05], 'gozi': [2.0289312e-05], 'kraken': [0.00031977256999999996], 'locky': [0.011029262000000001], 'main': [0.997564], 'matsnu': [0.010341609], 'pykspa': [0.008038961], 'qakbot': [0.016155047000000002], 'ramdo': [0.00623623], 'ramnit': [0.0009985747000000001], 'simda': [1.7933434e-26], 'suppobox': [1.388995e-27]} |
| 1 | 1721413336475 | {'banjori': [7.447168e-18], 'corebot': [6.7359245e-08], 'cryptolocker': [0.17081994], 'dircrypt': [1.3220122000000002e-09], 'gozi': [1.2758656999999998e-24], 'kraken': [0.22559547], 'locky': [0.34209849999999997], 'main': [0.99999994], 'matsnu': [0.3080186], 'pykspa': [0.1828217], 'qakbot': [3.8022407999999996e-11], 'ramdo': [0.2062254], 'ramnit': [0.15215829], 'simda': [1.1701982e-30], 'suppobox': [3.1513975e-38]} |
| 2 | 1721413336475 | {'banjori': [2.8598757999999993e-21], 'corebot': [9.302004000000001e-08], 'cryptolocker': [0.044453003000000005], 'dircrypt': [6.163770000000001e-09], 'gozi': [8.3496755e-23], 'kraken': [0.48234475], 'locky': [0.26332903], 'main': [1.0], 'matsnu': [0.29800338], 'pykspa': [0.22361776], 'qakbot': [1.5238921e-06], 'ramdo': [0.32820404000000003], 'ramnit': [0.029332504000000002], 'simda': [1.1995622e-31], 'suppobox': [0.0]} |
| 3 | 1721413336475 | {'banjori': [2.1387130000000002e-15], 'corebot': [3.881756e-10], 'cryptolocker': [0.045599725], 'dircrypt': [1.9090367999999998e-07], 'gozi': [1.3140173e-25], 'kraken': [0.5954264], 'locky': [0.17374137], 'main': [0.9999996999999999], 'matsnu': [0.23151578], 'pykspa': [0.17591679999999998], 'qakbot': [1.0876152e-09], 'ramdo': [0.21832279999999998], 'ramnit': [0.012869265000000001], 'simda': [6.1588803e-28], 'suppobox': [1.4386127e-35]} |
| 4 | 1721413336475 | {'banjori': [9.453379e-15], 'corebot': [7.091178e-10], 'cryptolocker': [0.049815144000000006], 'dircrypt': [5.2914135e-09], 'gozi': [7.4132087e-19], 'kraken': [1.5504633e-13], 'locky': [1.0791851e-15], 'main': [0.9999988999999999], 'matsnu': [1.5003075e-15], 'pykspa': [0.33075709999999997], 'qakbot': [2.62589e-07], 'ramdo': [0.5036279], 'ramnit': [0.020393759], 'simda': [0.0], 'suppobox': [2.3292147999999998e-38]} |
Undeploy Pipeline
When finished with our tests, we will undeploy the pipeline so we have the Kubernetes resources back for other tasks. Note that if the deployment variable is unchanged pipeline.deploy() will restart the inference engine in the same configuration as before.
pipeline.undeploy()
| name | sdkquickpipeline |
|---|---|
| created | 2024-07-19 18:19:37.596118+00:00 |
| last_updated | 2024-07-19 18:19:41.437970+00:00 |
| deployed | False |
| workspace_id | 46 |
| workspace_name | sdkquickworkspace |
| arch | x86 |
| accel | none |
| tags | |
| versions | c5f1c556-4cf8-4e18-8d4a-b89a3ed9f02d, b942053d-e9af-4ac2-b805-b65dd2a40811 |
| steps | sdkquickmodel |
| published | False |