The following guides demonstrate how to install the Wallaroo SDK in different environments. The Wallaroo SDK is installed by default into a Wallaroo instance for use with the JupyterHub service.
The Wallaroo SDK requires Python 3.8.6 and above and is available through the Wallaroo SDK Page.
When using the Wallaroo SDK, it is recommended that the Python modules used are the same as those used in the Wallaroo JupyterHub environments to ensure maximum compatibility. When installing modules in the Wallaroo JupyterHub environments, do not override the following modules or versions, as that may impact how the JupyterHub environments performance.
"appdirs == 1.4.4",
"gql == 3.4.0",
"ipython == 7.24.1",
"matplotlib == 3.5.0",
"numpy == 1.22.3",
"orjson == 3.8.0",
"pandas == 1.3.4",
"pyarrow == 12.0.1",
"PyJWT == 2.4.0",
"python_dateutil == 2.8.2",
"PyYAML == 6.0",
"requests == 2.25.1",
"scipy == 1.8.0",
"seaborn == 0.11.2",
"tenacity == 8.0.1",
# Required by gql?"requests_toolbelt>=0.9.1,<1",
# Required by the autogenerated ML Ops client"httpx >= 0.15.4,<0.24.0",
"attrs >= 21.3.0",
# These are documented as part of the autogenerated ML Ops requirements# "python = ^3.7",# "python-dateutil = ^2.8.0",
Supported Model Versions and Libraries
The following ML Model versions and Python libraries are supported by Wallaroo. When using the Wallaroo autoconversion library or working with a local version of the Wallaroo SDK, use the following versions for maximum compatibility.
The following data types are supported for transporting data to and from Wallaroo in the following run times:
ONNX
TensorFlow
MLFlow
Data Type Conditions
The following conditions apply to data types used in inference requests.
None or Null data types are not submitted. All fields must have submitted values that match their data type. For example, if the schema expects a float value, then some value of type float must be submitted and can not be None or Null. If a schema expects a string value, then some value of type string must be submitted, etc.
datetime data types must be converted to string.
ONNX models support multiple inputs only of the same data type.
Runtime
BFloat16*
Float16
Float32
Float64
ONNX
X
X
TensorFlow
X
X
X
MLFlow
X
X
X
* (Brain Float 16, represented internally as a f32)
Runtime
Int8
Int16
Int32
Int64
ONNX
X
X
X
X
TensorFlow
X
X
X
X
MLFlow
X
X
X
X
Runtime
Uint8
Uint16
Uint32
Uint64
ONNX
X
X
X
X
TensorFlow
X
X
X
X
MLFlow
X
X
X
X
Runtime
Boolean
Utf8 (String)
Complex 64
Complex 128
FixedSizeList*
ONNX
X
Tensor
X
X
X
MLFlow
X
X
X
* Fixed sized lists of any of the previously supported data types.
Organizations that develop machine learning models can deploy models to Wallaroo from AWS Sagemaker to a Wallaroo instance through the Wallaroo SDK. The following guide is created to assist users with installing the Wallaroo SDK and making a standard connection to a Wallaroo instance.
aloha-cnn-lstm.zip: A pre-trained open source model that uses an Aloha CNN LSTM model for classifying Domain names as being either legitimate or being used for nefarious purposes such as malware distribution.
Test Data Files:
data_1k.arrow: 1,000 records
data_25k.arrow: 25,000 records
For this example, a virtual python environment will be used. This will set the necessary libraries and specific Python version required.
Prerequisites
The following is required for this tutorial:
A Wallaroo instance version 2023.1 or later.
A AWS Sagemaker domain with a Notebook Instance.
Python 3.8.6 or later.
The following Python libraries installed:
os
wallaroo: The Wallaroo SDK. Included with the Wallaroo JupyterHub service by default.
polars: Polars for DataFrame with native Apache Arrow support
General Steps
For our example, we will perform the following:
Install Wallaroo SDK
Set up a Python virtual environment through conda with the libraries that enable the virtual environment for use in a Jupyter Hub environment.
Install the Wallaroo SDK.
Wallaroo SDK from remote JupyterHub Demonstration (Optional): The following steps are an optional exercise to demonstrate using the Wallaroo SDK from a remote connection. The entire tutorial can be found on the Wallaroo Tutorials repository.
Connect to a remote Wallaroo instance.
Create a workspace for our work.
Upload the Aloha model.
Create a pipeline that can ingest our submitted data, submit it to the model, and export the results
Run a sample inference through our pipeline by loading a file
Retrieve the external deployment URL. This sample Wallaroo instance has been configured to create external inference URLs for pipelines. For more information, see the External Inference URL Guide.
Run a sample inference through our pipeline’s external URL and store the results in a file. This assumes that the External Inference URLs have been enabled for the target Wallaroo instance.
Undeploy the pipeline and return resources back to the Wallaroo instance’s Kubernetes environment.
Install Wallaroo SDK
Set Up Virtual Python Environment
To set up the Python virtual environment for use of the Wallaroo SDK:
From AWS Sagemaker, select the Notebook instances.
For the list of notebook instances, select Open JupyterLab for the notebook instance to be used.
From the Launcher, select Terminal.
From a terminal shell, create the Python virtual environment with conda. Replace wallaroosdk with the name of the virtual environment as required by your organization. Note that Python 3.8.6 and above is specified as a requirement for Python libraries used with the Wallaroo SDK. The following will install the latest version of Python 3.8.
conda create -n wallaroosdk python=3.8
(Optional) If the shells have not been initialized with conda, use the following to initialize it. The following examples will use the bash shell.
Initialize the bash shell with conda with the command:
conda init bash
Launch the bash shell that has been initialized for conda:
bash
Activate the new environment.
conda activate wallaroosdk
Install the ipykernel library. This allows the JupyterHub notebooks to access the Python virtual environment as a kernel, and it required for the second part of this tutorial.
conda install ipykernel
Install the new virtual environment as a python kernel.
ipython kernel install --user --name=wallaroosdk
Install the Wallaroo SDK. This process may take several minutes while the other required Python libraries are added to the virtual environment.
IMPORTANT NOTE: The version of the Wallaroo SDK should match the Wallaroo instance. For example, this example connects to a Wallaroo Enterprise version 2023.1 instance, so the SDK version should be wallaroo==2023.4.0.
pip install wallaroo==2023.4.1
For organizations who will be using the Wallaroo SDK with Jupyter or similar services, the conda virtual environment has been installed, it can either be selected as a new Jupyter Notebook kernel, or the Notebook’s kernel can be set to an existing Jupyter notebook.
To use a new Notebook:
From the main menu, select File->New-Notebook.
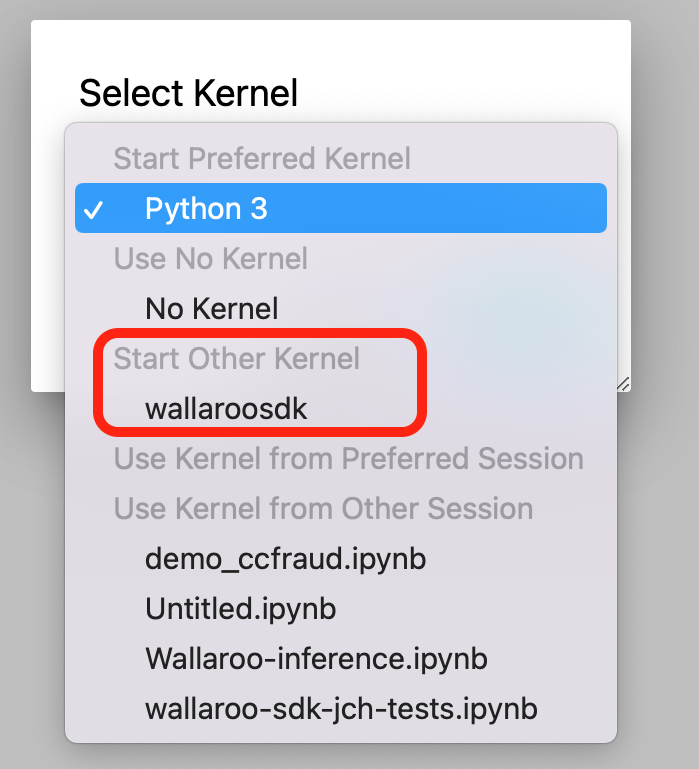
From the Kernel selection dropbox, select the new virtual environment - in this case, wallaroosdk.
To update an existing Notebook to use the new virtual environment as a kernel:
From the main menu, select Kernel->Change Kernel.
Select the new kernel.
Sample Wallaroo Connection
With the Wallaroo Python SDK installed, remote commands and inferences can be performed through the following steps.
Open a Connection to Wallaroo
The first step is to connect to Wallaroo through the Wallaroo client.
This is accomplished using the wallaroo.Client(api_endpoint, auth_endpoint, auth_type command) command that connects to the Wallaroo instance services.
The Client method takes the following parameters:
api_endpoint (String): The URL to the Wallaroo instance API service.
auth_endpoint (String): The URL to the Wallaroo instance Keycloak service.
auth_type command (String): The authorization type. In this case, SSO.
The URLs are based on the Wallaroo Prefix and Wallaroo Suffix for the Wallaroo instance. For more information, see the DNS Integration Guide. In the example below, replace “YOUR PREFIX” and “YOUR SUFFIX” with the Wallaroo Prefix and Suffix, respectively.
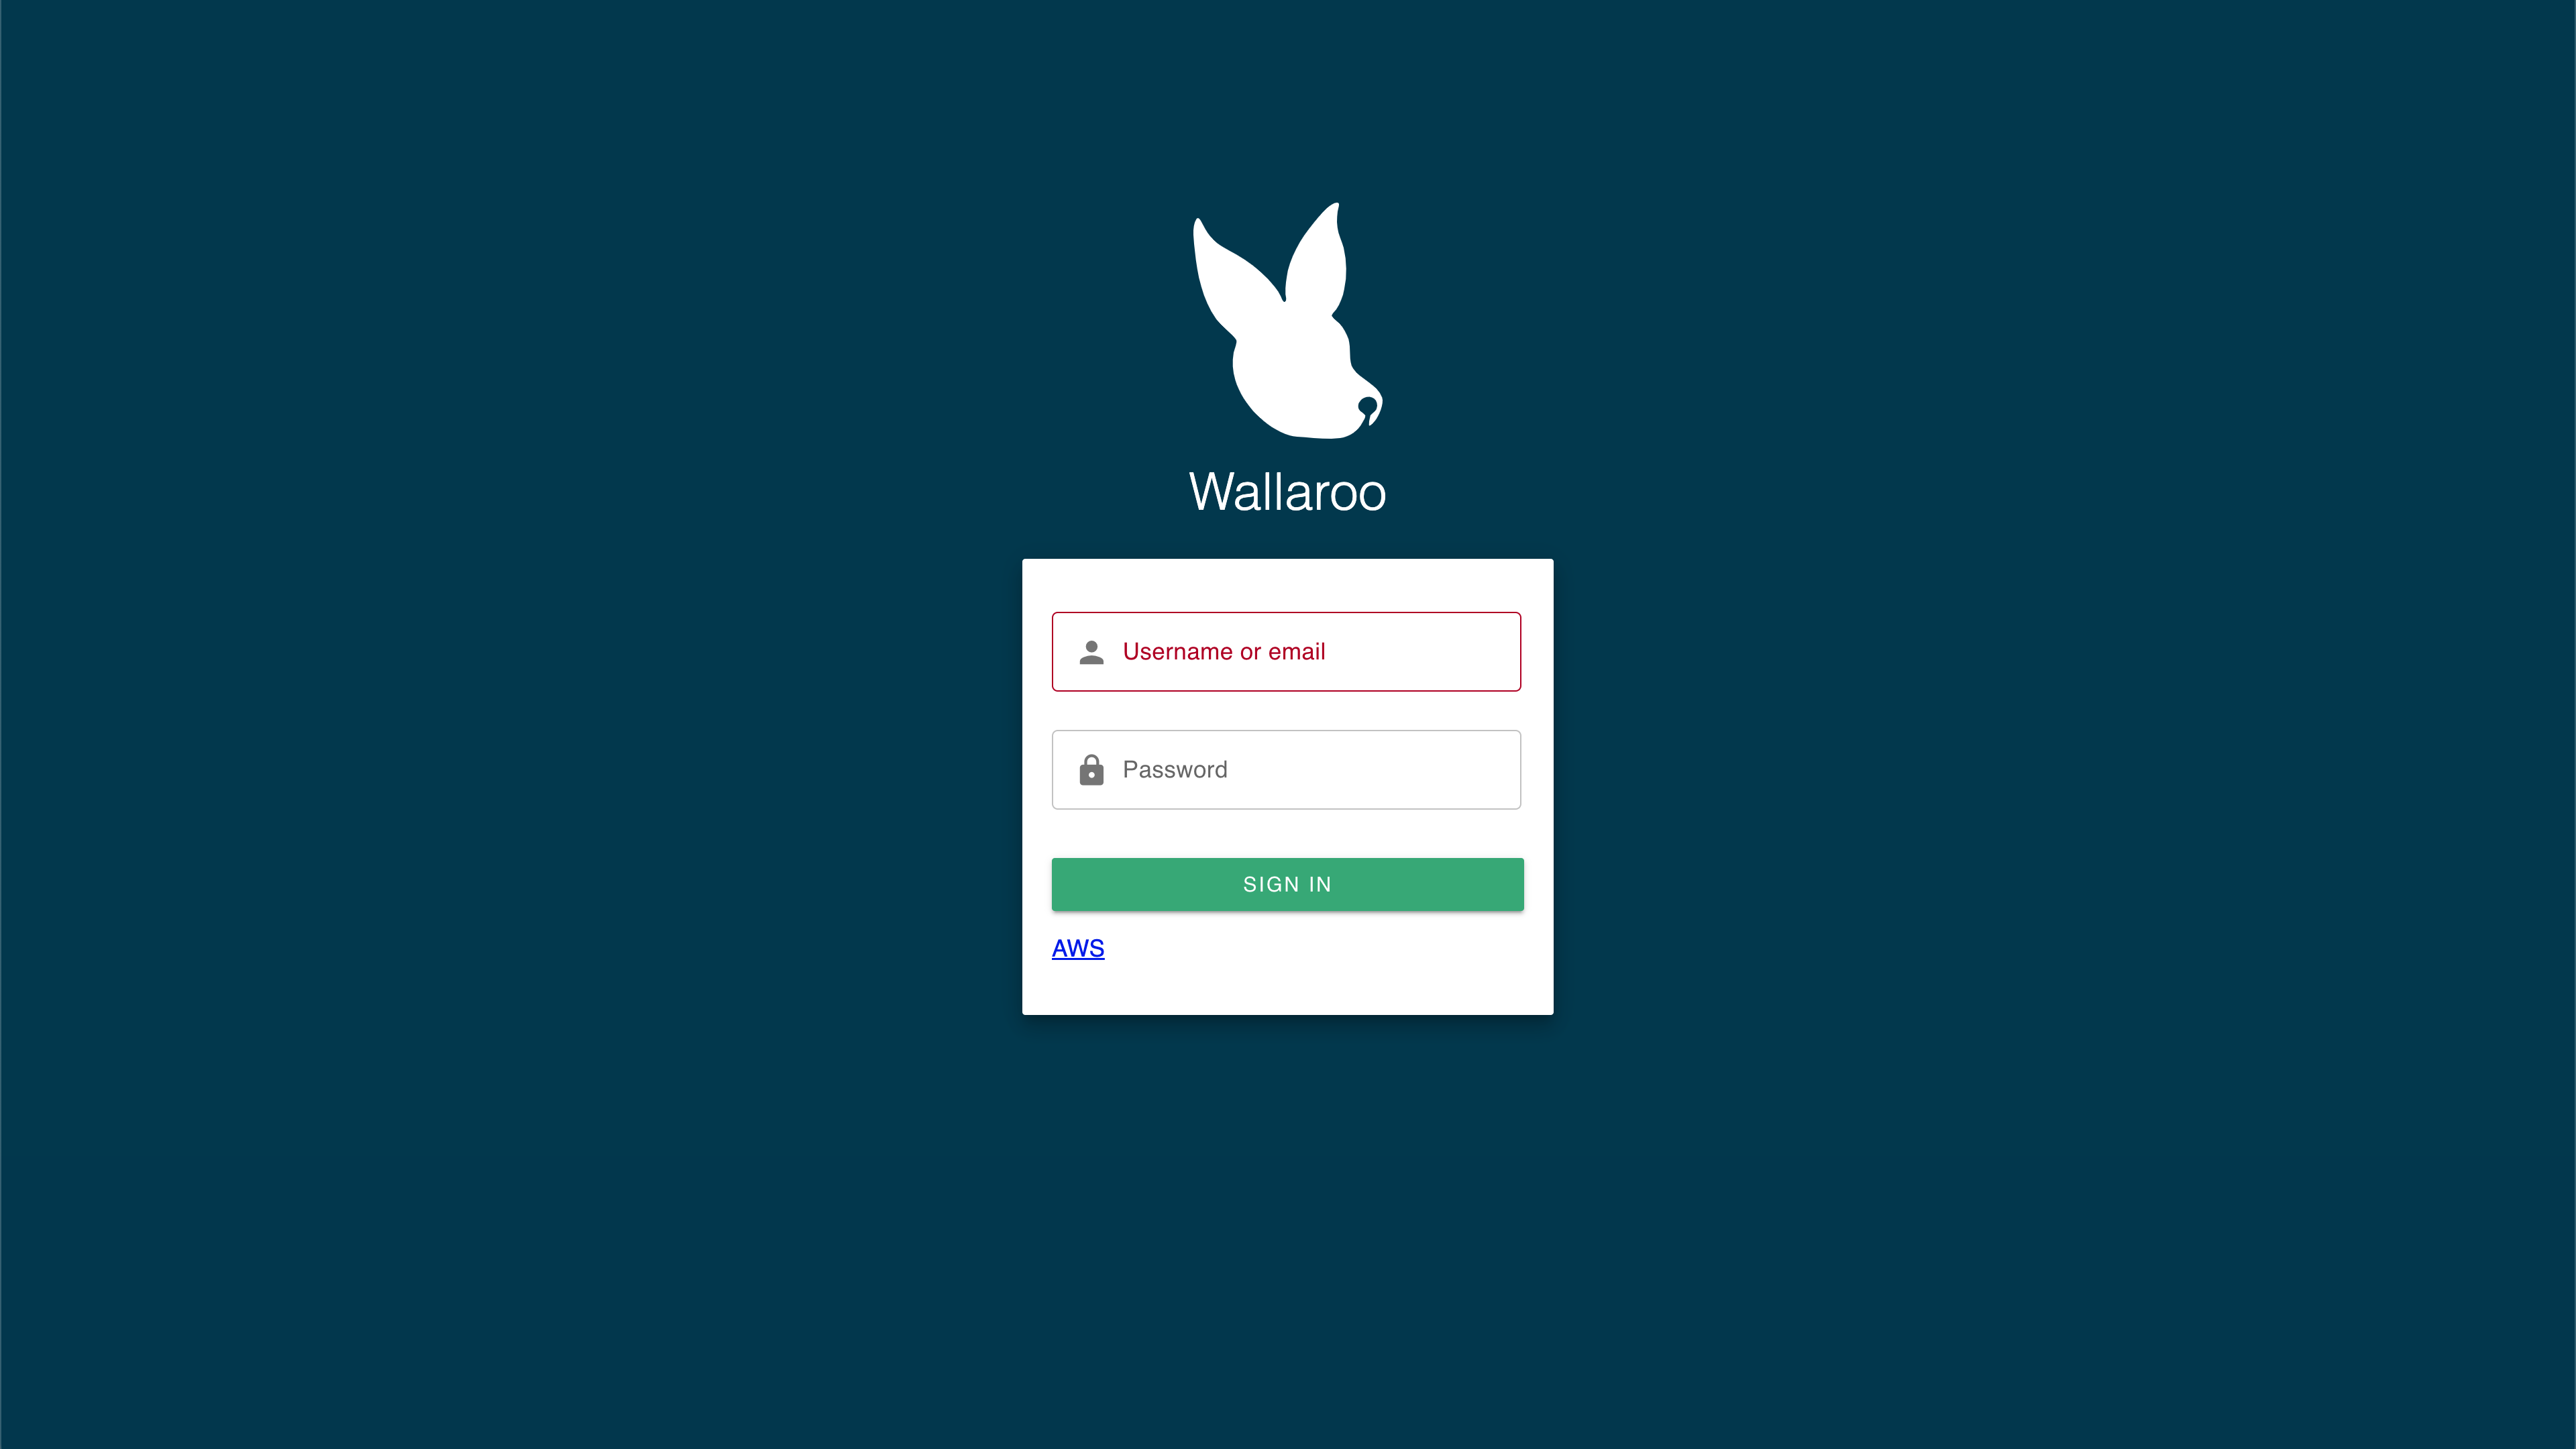
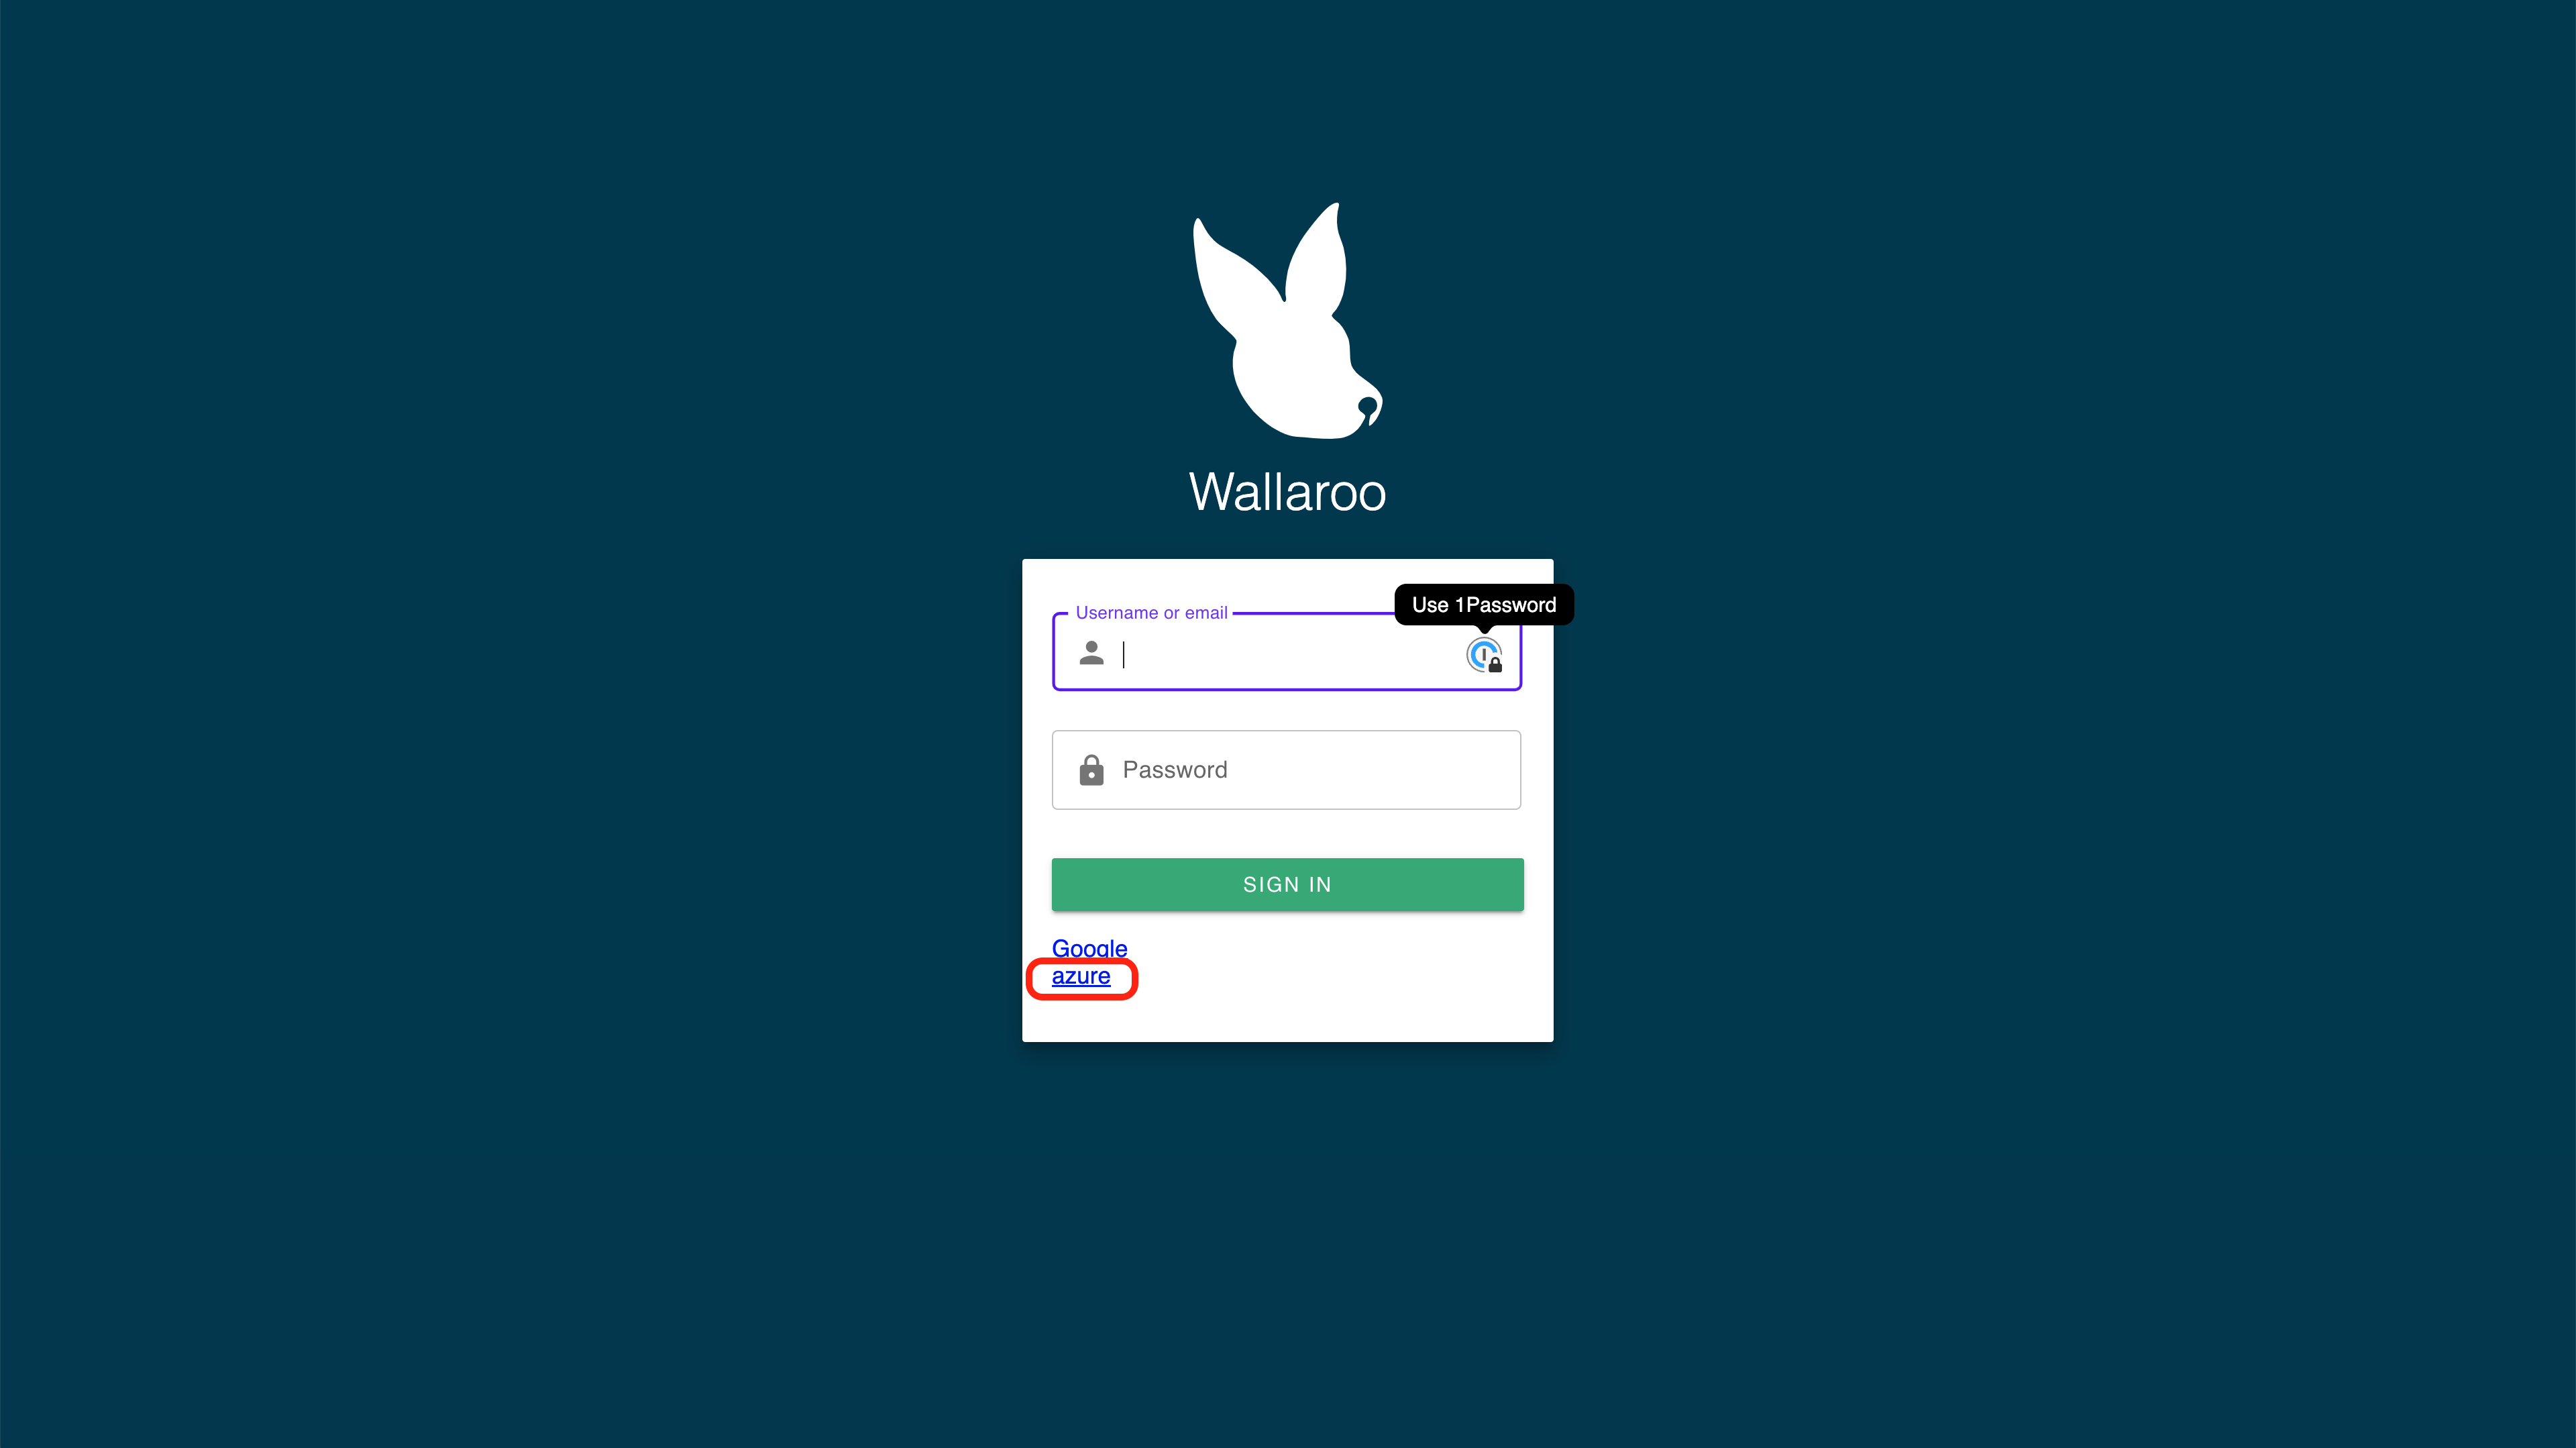
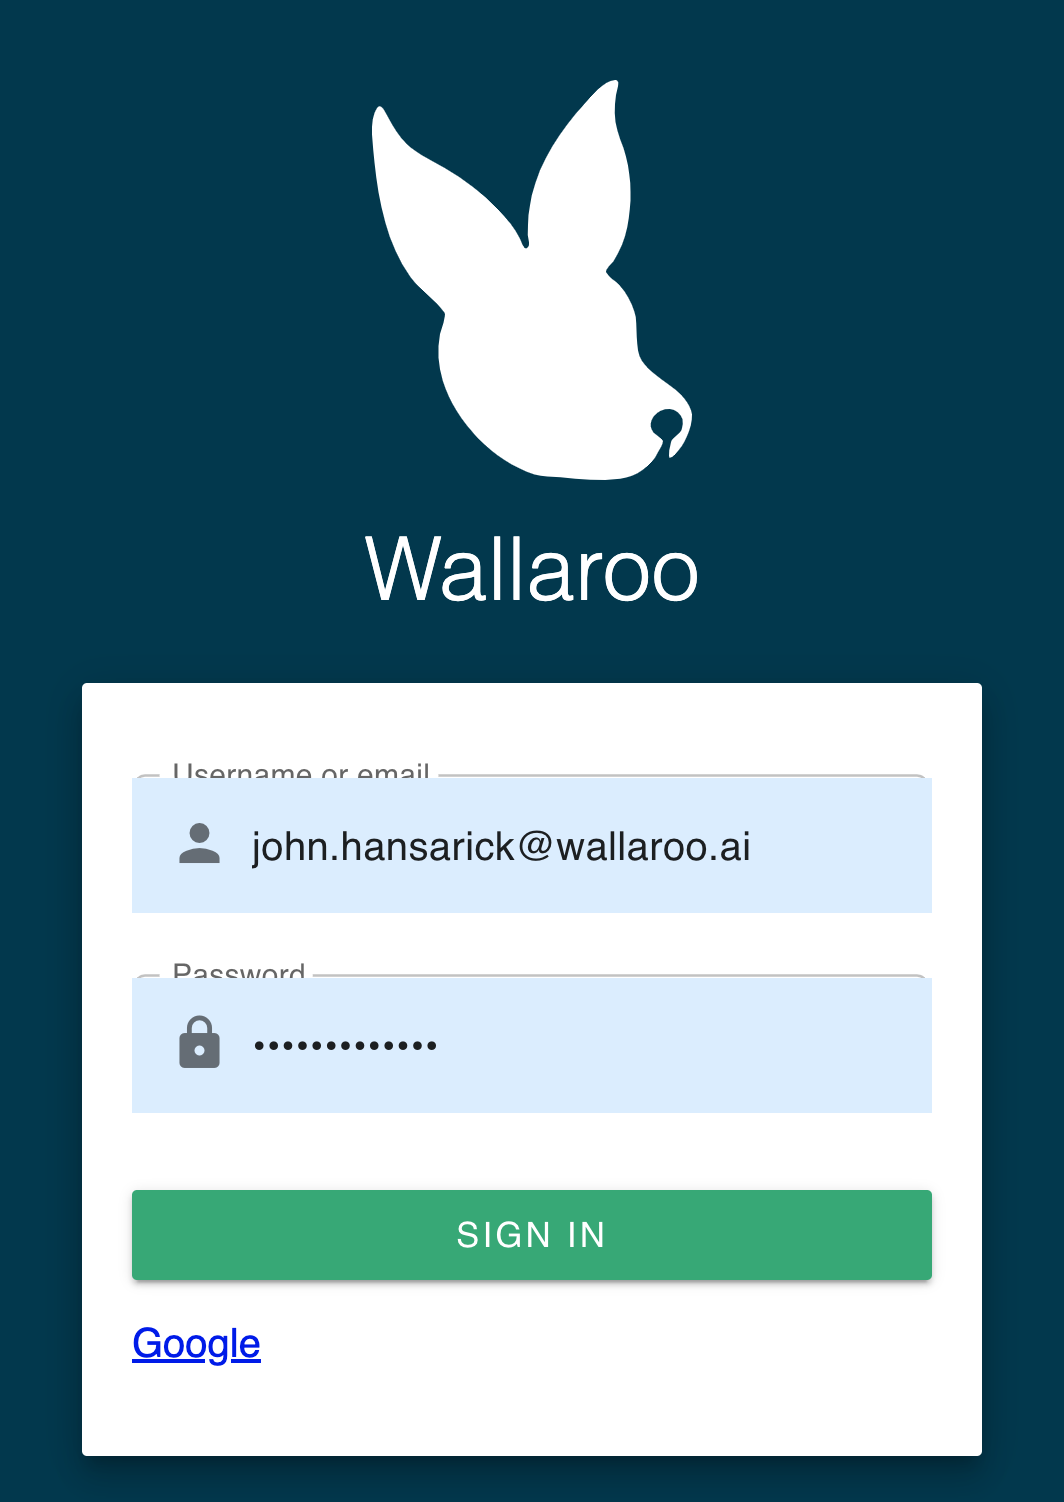
Once run, the wallaroo.Client command provides a URL to grant the SDK permission to your specific Wallaroo environment. When displayed, enter the URL into a browser and confirm permissions. Depending on the configuration of the Wallaroo instance, the user will either be presented with a login request to the Wallaroo instance or be authenticated through a broker such as Google, Github, etc. To use the broker, select it from the list under the username/password login forms. For more information on Wallaroo authentication configurations, see the Wallaroo Authentication Configuration Guides.
Once authenticated, the user will verify adding the device the user is establishing the connection from. Once both steps are complete, then the connection is granted.
The connection is stored in the variable wl for use in all other Wallaroo calls.
importwallaroofromwallaroo.objectimportEntityNotFoundError# to display dataframe tablesfromIPython.displayimportdisplay# used to display dataframe information without truncatingimportpandasaspdpd.set_option('display.max_colwidth', None)
importpyarrowaspa
For wallarooPrefix = "YOUR PREFIX." and wallarooSuffix = "YOUR SUFFIX", enter the prefix and suffix for your Wallaroo instance DNS name. If the prefix instance is blank, then it can be wallarooPrefix = "". Note that the prefix includes the . for proper formatting. For example, if the prefix is empty and the suffix is wallaroo.example.com, then the settings would be:
The following examples can be used by an organization to test using the Wallaroo SDK from a remote location from their Wallaroo instance. These examples show how to create workspaces, deploy pipelines, and perform inferences through the SDK and API.
Create the Workspace
We will create a workspace to work in and call it the sdkworkspace, then set it as current workspace environment. We’ll also create our pipeline in advance as sdkpipeline.
IMPORTANT NOTE: For this example, the Aloha model is stored in the file alohacnnlstm.zip. When using tensor based models, the zip file must match the name of the tensor directory. For example, if the tensor directory is alohacnnlstm, then the .zip file must be named alohacnnlstm.zip.
Now we will upload our model. Note that for this example we are applying the model from a .ZIP file. The Aloha model is a protobuf file that has been defined for evaluating web pages, and we will configure it to use data in the tensorflow format.
Now that we have a model that we want to use we will create a deployment for it.
We will tell the deployment we are using a tensorflow model and give the deployment name and the configuration we want for the deployment.
To do this, we’ll create our pipeline that can ingest the data, pass the data to our Aloha model, and give us a final output. We’ll call our pipeline externalsdkpipeline, then deploy it so it’s ready to receive data. The deployment process usually takes about 45 seconds.
Now that the pipeline is deployed and our Aloha model is in place, we’ll perform a smoke test to verify the pipeline is up and running properly. We’ll use the infer_from_file command to load a single encoded URL into the inference engine and print the results back out.
The result should tell us that the tokenized URL is legitimate (0) or fraud (1). This sample data should return close to 1.
We can also infer an entire batch as one request either with the Pipeline infer method with multiple rows, or loaded from a file using the Pipeline infer_from_file method. For this example, we will run a batch on 1,000 records using the file data_1k.arrow. This is an Apache Arrow table, which gives the added benefit of speed and lower file size as a binary file rather than a text JSON file.
We’ll infer the 1,000 records, then convert it to a DataFrame and display the first 5 to save space in our Jupyter Notebook.
Now that our smoke test is successful, let’s really give it some data. We have two inference files we can use:
data-1k.arrow: Contains 10,000 inferences
data-25k.arrow: Contains 25,000 inferences
These inference inputs are Apache Arrow tables, which Wallaroo can ingest natively. These are binary files, and are faster to transmit because of their smaller size compared to JSON.
We’ll pipe the data-25k.arrow file through the pipeline deployment URL, and place the results in a file named response.df. Note that for larger batches of 1,000 inferences or more can be difficult to view in Juypter Hub because of its size, so we’ll only display the first 5 results of the inference.
When retrieving the pipeline inference URL through an external SDK connection, the External Inference URL will be returned. This URL will function provided that the Enable external URL inference endpoints is enabled. For more information, see the Wallaroo Model Endpoints Guide.
The API connection details can be retrieved through the Wallaroo client mlops() command. This will display the connection URL, bearer token, and other information. The bearer token is available for one hour before it expires.
For this example, the API connection details will be retrieved, then used to submit an inference request through the external inference URL retrieved earlier.
When finished with our tests, we will undeploy the pipeline so we have the Kubernetes resources back for other tasks. Note that if the deployment variable is unchanged pipeline.deploy() will restart the inference engine in the same configuration as before.
Installing the Wallaroo SDK into Azure ML Workspace
Organizations that use Azure ML for model training and development can deploy models to Wallaroo through the Wallaroo SDK. The following guide is created to assist users with installing the Wallaroo SDK, setting up authentication through Azure ML, and making a standard connection to a Wallaroo instance through Azure ML Workspace.
aloha-cnn-lstm.zip: A pre-trained open source model that uses an Aloha CNN LSTM model for classifying Domain names as being either legitimate or being used for nefarious purposes such as malware distribution.
Test Data Files:
data_1k.arrow: 1,000 records
data_25k.arrow: 25,000 records
To use the Wallaroo SDK within Azure ML Workspace, a virtual environment will be used. This will set the necessary libraries and specific Python version required.
Prerequisites
The following is required for this tutorial:
A Wallaroo instance version 2023.1 or later.
Python 3.8.6 or later installed locally
Conda: Used for managing python virtual environments. This is automatically included in Azure ML Workspace.
An Azure ML workspace is created with a compute configured.
The following Python libraries installed:
os
wallaroo: The Wallaroo SDK. Included with the Wallaroo JupyterHub service by default.
polars: Polars for DataFrame with native Apache Arrow support
General Steps
For our example, we will perform the following:
Wallaroo SDK Install
Set up a Python virtual environment through conda with the libraries that enable the virtual environment for use in a Jupyter Hub environment.
Install the Wallaroo SDK.
Wallaroo SDK from remote JupyterHub Demonstration (Optional): The following steps are an optional exercise to demonstrate using the Wallaroo SDK from a remote connection. The entire tutorial can be found on the Wallaroo Tutorials repository).
Connect to a remote Wallaroo instance.
Create a workspace for our work.
Upload the Aloha model.
Create a pipeline that can ingest our submitted data, submit it to the model, and export the results
Run a sample inference through our pipeline by loading a file
Retrieve the external deployment URL. This sample Wallaroo instance has been configured to create external inference URLs for pipelines. For more information, see the External Inference URL Guide.
Run a sample inference through our pipeline’s external URL and store the results in a file. This assumes that the External Inference URLs have been enabled for the target Wallaroo instance.
Undeploy the pipeline and return resources back to the Wallaroo instance’s Kubernetes environment.
Install Wallaroo SDK
Set Up Virtual Python Environment
To set up the virtual environment in Azure ML for using the Wallaroo SDK with Azure ML Workspace:
Select Notebooks.
Create a new folder where the Jupyter Notebooks for Wallaroo will be installed.
From this repository, upload sdk-install-guides/azure-ml-sdk-install.zip, or upload the entire folder sdk-install-guides/azure-ml-sdk-install. This tutorial will assume the .zip file was uploaded.
Select Open Terminal. Navigate to the target directory.
Run unzip azure-ml-sdk-install.zip to unzip the directory, then cd into it with cd azure-ml-sdk-install.
Create the Python virtual environment with conda. Replace wallaroosdk with the name of the virtual environment as required by your organization. Note that Python 3.8.6 and above is specified as a requirement for Python libraries used with the Wallaroo SDK. The following will install the latest version of Python 3.8, which as of this time is 3.8.15.
conda create -n wallaroosdk python=3.8
Activate the new environment.
conda activate wallaroosdk
Install the ipykernel library. This allows the JupyterHub notebooks to access the Python virtual environment as a kernel.
conda install ipykernel
Install the new virtual environment as a python kernel.
ipython kernel install --user --name=wallaroosdk
Install the Wallaroo SDK. This process may take several minutes while the other required Python libraries are added to the virtual environment.
IMPORTANT NOTE: The version of the Wallaroo SDK should match the Wallaroo instance. For example, this example connects to a Wallaroo Enterprise version 2023.1 instance, so the SDK version should be wallaroo==2023.4.0.
pip install wallaroo==2023.4.1
Once the conda virtual environment has been installed, it can either be selected as a new Jupyter Notebook kernel, or the Notebook’s kernel can be set to an existing Jupyter notebook. If a notebook is existing, close it then reopen to select the new Wallaroo SDK environment.
To use a new Notebook:
From the left navigation panel, select +->Notebook.
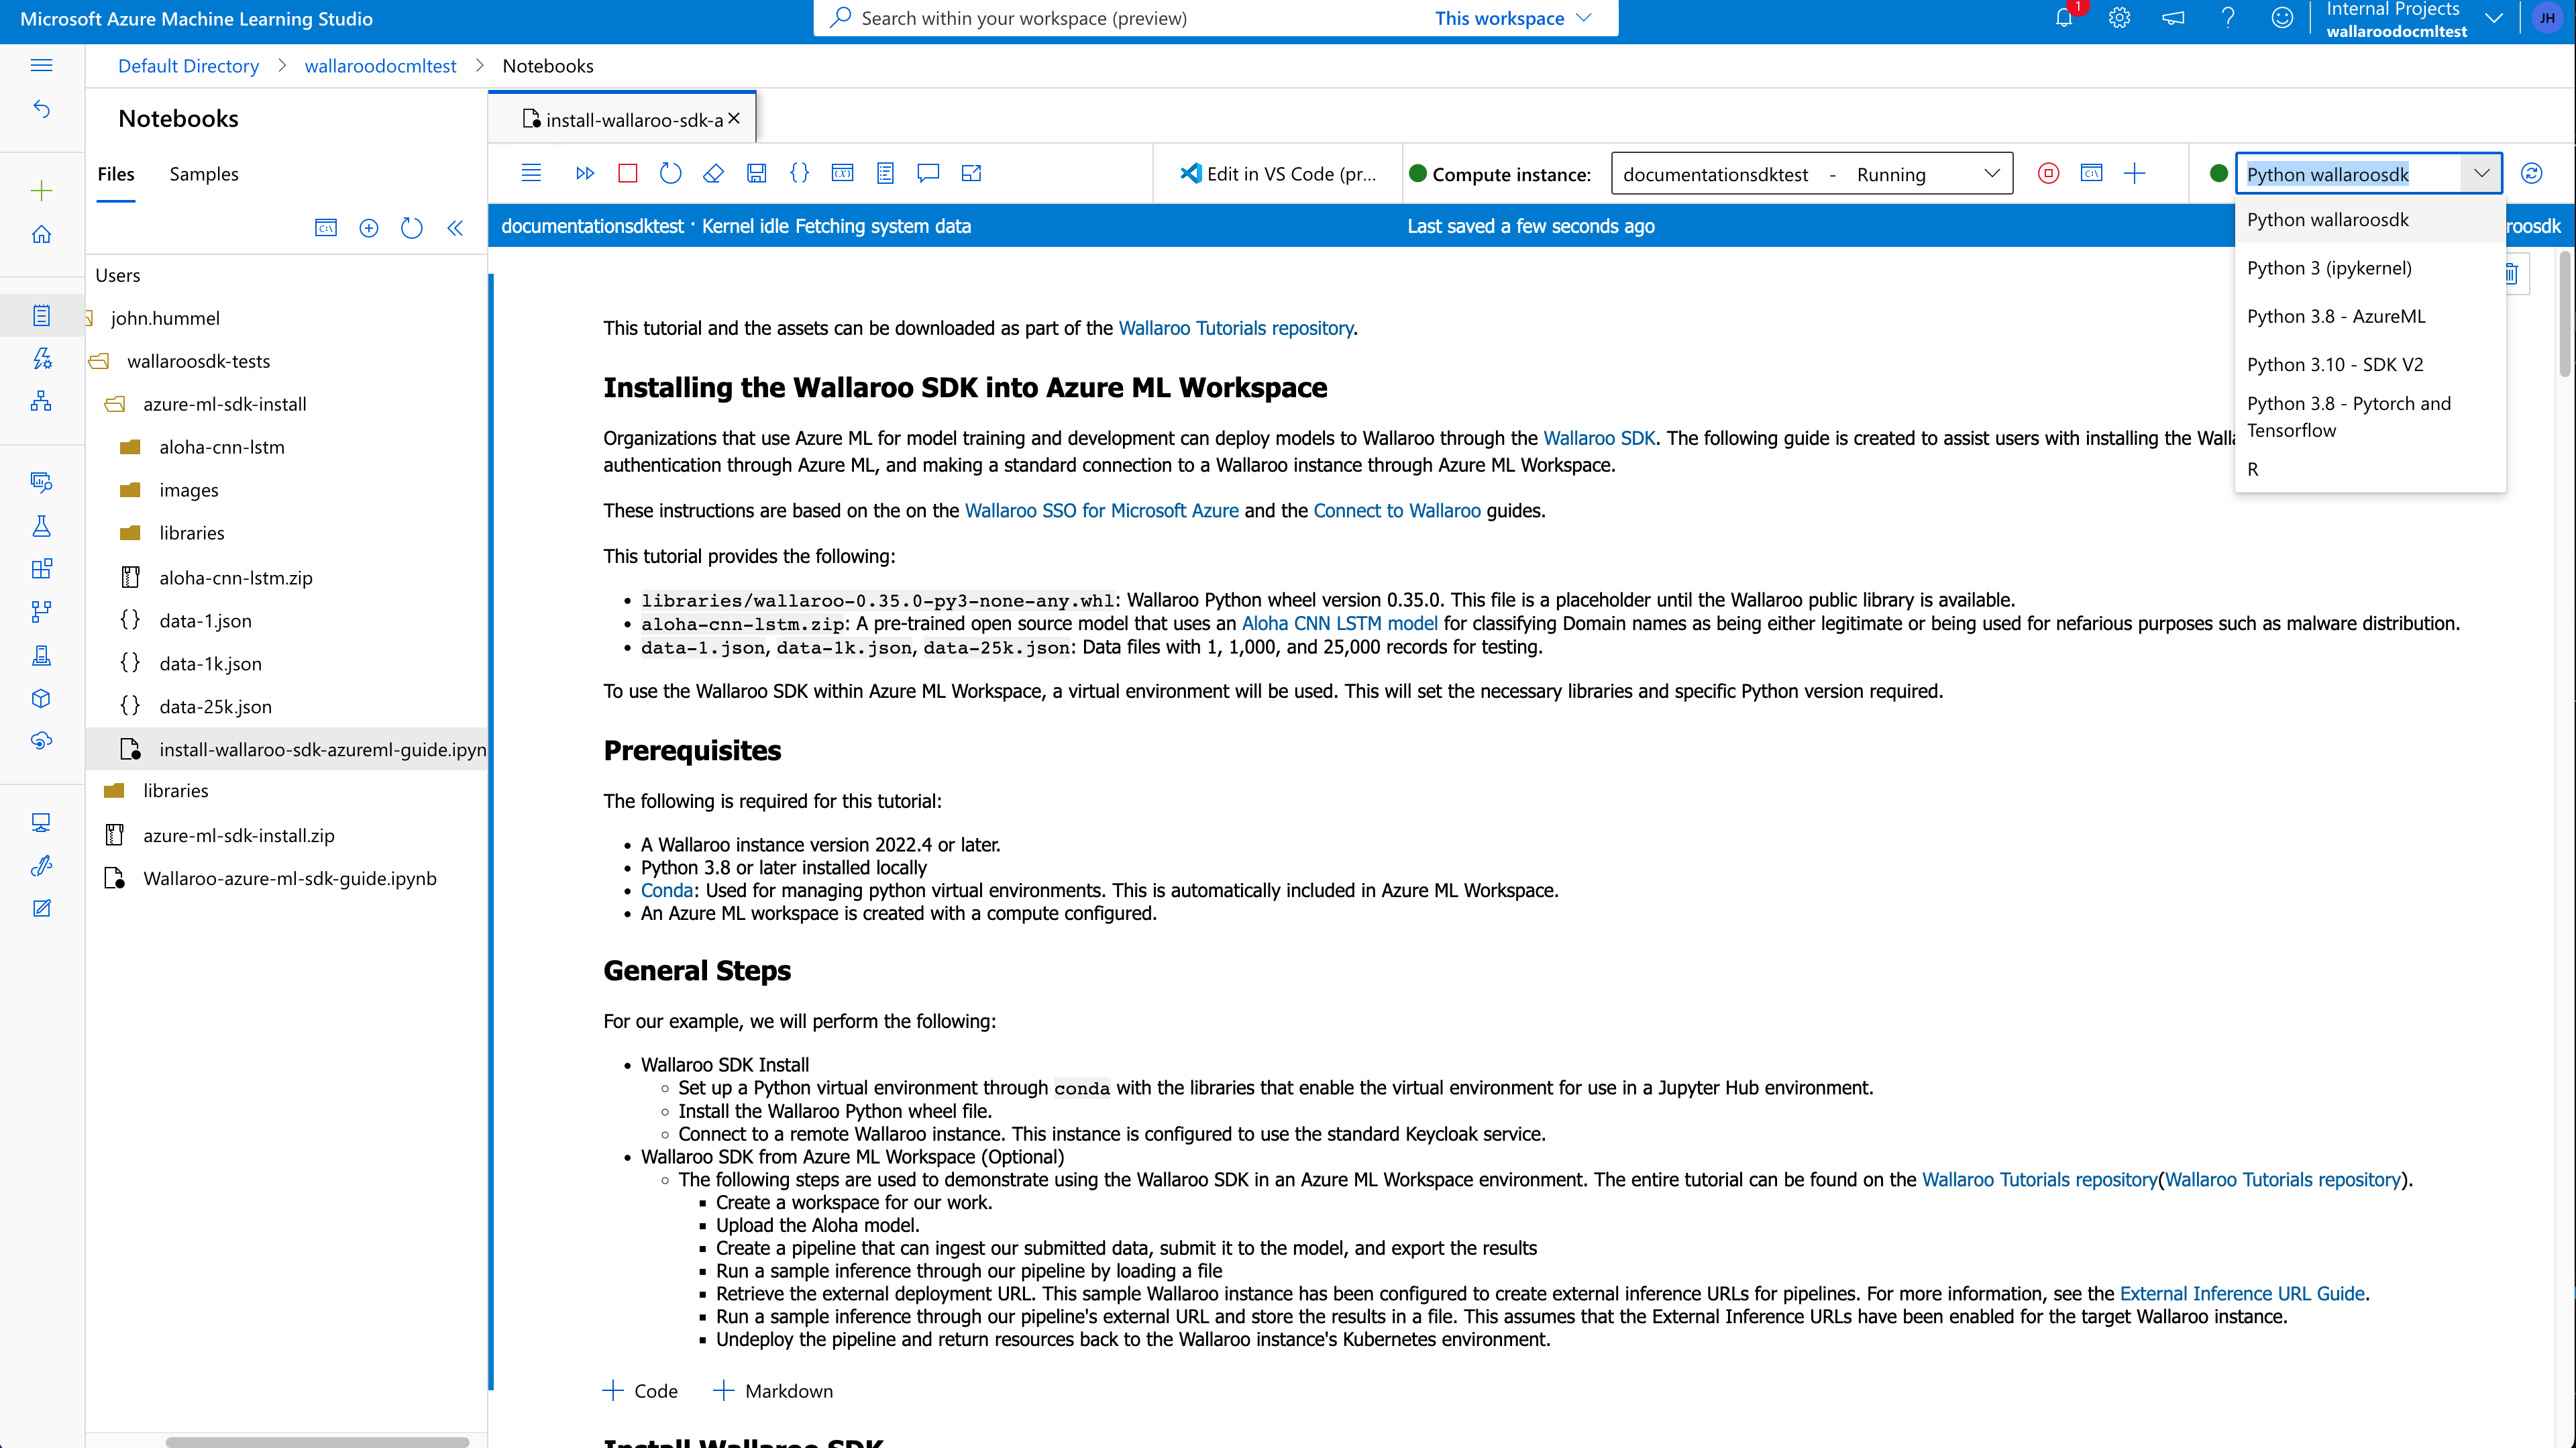
From the Kernel selection dropbox on the upper right side, select the new virtual environment - in this case, wallaroosdk.
To update an existing Notebook to use the new virtual environment as a kernel:
From the main menu, select Kernel->Change Kernel.
Select the new kernel.
Sample Wallaroo Connection
With the Wallaroo Python SDK installed, remote commands and inferences can be performed through the following steps.
Open a Connection to Wallaroo
The first step is to connect to Wallaroo through the Wallaroo client.
This is accomplished using the wallaroo.Client(api_endpoint, auth_endpoint, auth_type command) command that connects to the Wallaroo instance services.
The Client method takes the following parameters:
api_endpoint (String): The URL to the Wallaroo instance API service.
auth_endpoint (String): The URL to the Wallaroo instance Keycloak service.
auth_type command (String): The authorization type. In this case, SSO.
The URLs are based on the Wallaroo Prefix and Wallaroo Suffix for the Wallaroo instance. For more information, see the DNS Integration Guide. In the example below, replace “YOUR PREFIX” and “YOUR SUFFIX” with the Wallaroo Prefix and Suffix, respectively.
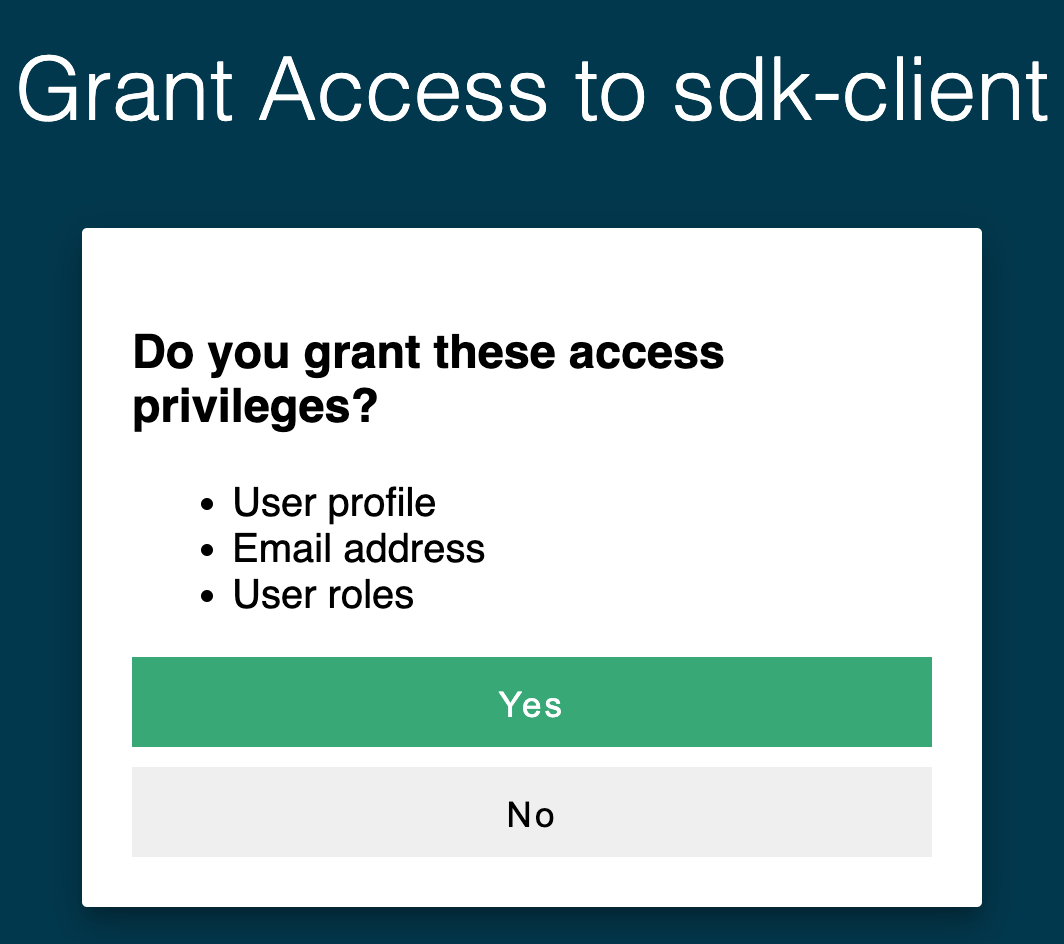
Once run, the wallaroo.Client command provides a URL to grant the SDK permission to your specific Wallaroo environment. When displayed, enter the URL into a browser and confirm permissions. Depending on the configuration of the Wallaroo instance, the user will either be presented with a login request to the Wallaroo instance or be authenticated through a broker such as Google, Github, etc. To use the broker, select it from the list under the username/password login forms. For more information on Wallaroo authentication configurations, see the Wallaroo Authentication Configuration Guides.
Once authenticated, the user will verify adding the device the user is establishing the connection from. Once both steps are complete, then the connection is granted.
The connection is stored in the variable wl for use in all other Wallaroo calls.
importwallaroofromwallaroo.objectimportEntityNotFoundError# to display dataframe tablesfromIPython.displayimportdisplay# used to display dataframe information without truncatingimportpandasaspdpd.set_option('display.max_colwidth', None)
importpyarrowaspa
For wallarooPrefix = "YOUR PREFIX." and wallarooSuffix = "YOUR SUFFIX", enter the prefix and suffix for your Wallaroo instance DNS name. If the prefix instance is blank, then it can be wallarooPrefix = "". Note that the prefix includes the . for proper formatting. For example, if the prefix is empty and the suffix is wallaroo.example.com, then the settings would be:
# SSO login through keycloakwallarooPrefix="YOUR PREFIX"wallarooSuffix="YOUR SUFFIX"wl=wallaroo.Client(api_endpoint=f"https://{wallarooPrefix}api.{wallarooSuffix}",
auth_endpoint=f"https://{wallarooPrefix}keycloak.{wallarooSuffix}",
auth_type="sso")
Create the Workspace
We will create a workspace to work in and call it the azuremlsdkworkspace, then set it as current workspace environment. We’ll also create our pipeline in advance as azuremlsdkpipeline.
IMPORTANT NOTE: For this example, the Aloha model is stored in the file alohacnnlstm.zip. When using tensor based models, the zip file must match the name of the tensor directory. For example, if the tensor directory is alohacnnlstm, then the .zip file must be named alohacnnlstm.zip.
Now we will upload our model. Note that for this example we are applying the model from a .ZIP file. The Aloha model is a protobuf file that has been defined for evaluating web pages, and we will configure it to use data in the tensorflow format.
Now that we have a model that we want to use we will create a deployment for it.
We will tell the deployment we are using a tensorflow model and give the deployment name and the configuration we want for the deployment.
To do this, we’ll create our pipeline that can ingest the data, pass the data to our Aloha model, and give us a final output. We’ll call our pipeline externalsdkpipeline, then deploy it so it’s ready to receive data. The deployment process usually takes about 45 seconds.
Now that the pipeline is deployed and our Aloha model is in place, we’ll perform a smoke test to verify the pipeline is up and running properly. We’ll use the infer_from_file command to load a single encoded URL into the inference engine and print the results back out.
The result should tell us that the tokenized URL is legitimate (0) or fraud (1). This sample data should return close to 1.
We can also infer an entire batch as one request either with the Pipeline infer method with multiple rows, or loaded from a file using the Pipeline infer_from_file method. For this example, we will run a batch on 1,000 records using the file data_1k.arrow. This is an Apache Arrow table, which gives the added benefit of speed and lower file size as a binary file rather than a text JSON file.
We’ll infer the 1,000 records, then convert it to a DataFrame and display the first 5 to save space in our Jupyter Notebook.
Now that our smoke test is successful, let’s really give it some data. We have two inference files we can use:
data-1k.arrow: Contains 10,000 inferences
data-25k.arrow: Contains 25,000 inferences
These inference inputs are Apache Arrow tables, which Wallaroo can ingest natively. These are binary files, and are faster to transmit because of their smaller size compared to JSON.
We’ll pipe the data-25k.arrow file through the pipeline deployment URL, and place the results in a file named response.df. Note that for larger batches of 1,000 inferences or more can be difficult to view in Juypter Hub because of its size, so we’ll only display the first 5 results of the inference.
When retrieving the pipeline inference URL through an external SDK connection, the External Inference URL will be returned. This URL will function provided that the Enable external URL inference endpoints is enabled. For more information, see the Wallaroo Model Endpoints Guide.
The API connection details can be retrieved through the Wallaroo client mlops() command. This will display the connection URL, bearer token, and other information. The bearer token is available for one hour before it expires.
For this example, the API connection details will be retrieved, then used to submit an inference request through the external inference URL retrieved earlier.
  % Total    % Received % Xferd  Average Speed   Time    Time     Time  Current
                                 Dload  Upload   Total   Spent    Left  Speed
100 26.0M  100 21.2M  100 4874k  2346k   525k  0:00:09  0:00:09 --:--:-- 5316k:02 --:--:-- 2251k
When finished with our tests, we will undeploy the pipeline so we have the Kubernetes resources back for other tasks. Note that if the deployment variable is unchanged pipeline.deploy() will restart the inference engine in the same configuration as before.
Organizations that use Azure Databricks for model training and development can deploy models to Wallaroo through the Wallaroo SDK. The following guide is created to assist users with installing the Wallaroo SDK, setting up authentication through Azure Databricks, and making a standard connection to a Wallaroo instance through Azure Databricks Workspace.
ccfraud.onnx: A pretrained model from the Machine Learning Group’s demonstration on Credit Card Fraud detection.
Sample inference test data:
cc_data_1k.arrow: Sample input file with 1,000 records.
cc_data_10k.arrow: Sample input file with 10,000 records.
To use the Wallaroo SDK within Azure Databricks Workspace, a virtual environment will be used. This will set the necessary libraries and specific Python version required.
polars: Polars for DataFrame with native Apache Arrow support
General Steps
For our example, we will perform the following:
Wallaroo SDK Install
Install the Wallaroo SDK into the Azure Databricks cluster.
Install the Wallaroo Python SDK.
Connect to a remote Wallaroo instance. This instance is configured to use the standard Keycloak service.
Wallaroo SDK from Azure Databricks Workspace (Optional)
The following steps are used to demonstrate using the Wallaroo SDK in an Azure Databricks Workspace environment. The entire tutorial can be found on the Wallaroo Tutorials repository.
Create a workspace for our work.
Upload the CCFraud model.
Create a pipeline that can ingest our submitted data, submit it to the model, and export the results
Run a sample inference through our pipeline by loading a file
Undeploy the pipeline and return resources back to the Wallaroo instance’s Kubernetes environment.
Install Wallaroo SDK
Add Wallaroo SDK to Cluster
To install the Wallaroo SDK in a Azure Databricks environment:
From the Azure Databricks dashboard, select Computer, then the cluster to use.
Select Libraries.
Select Install new.
Select PyPI. In the Package field, enter the current version of the Wallaroo SDK. It is recommended to specify the version, which as of this writing is wallaroo==2023.2.0.
Select Install.
Once the Status shows Installed, it will be available in Azure Databricks notebooks and other tools that use the cluster.
Add Tutorial Files
The following instructions can be used to upload this tutorial and it’s files into Databricks. Depending on how your Azure Databricks is configured and your organizations standards, there are multiple ways of uploading files to your Azure Databricks environment. The following example is used for the tutorial and makes it easy to reference data files from within this Notebook. Adjust based on your requirements.
IMPORTANT NOTE: Importing a repo from a Git repository may not convert the included Jupyter Notebooks into the Databricks format. This method
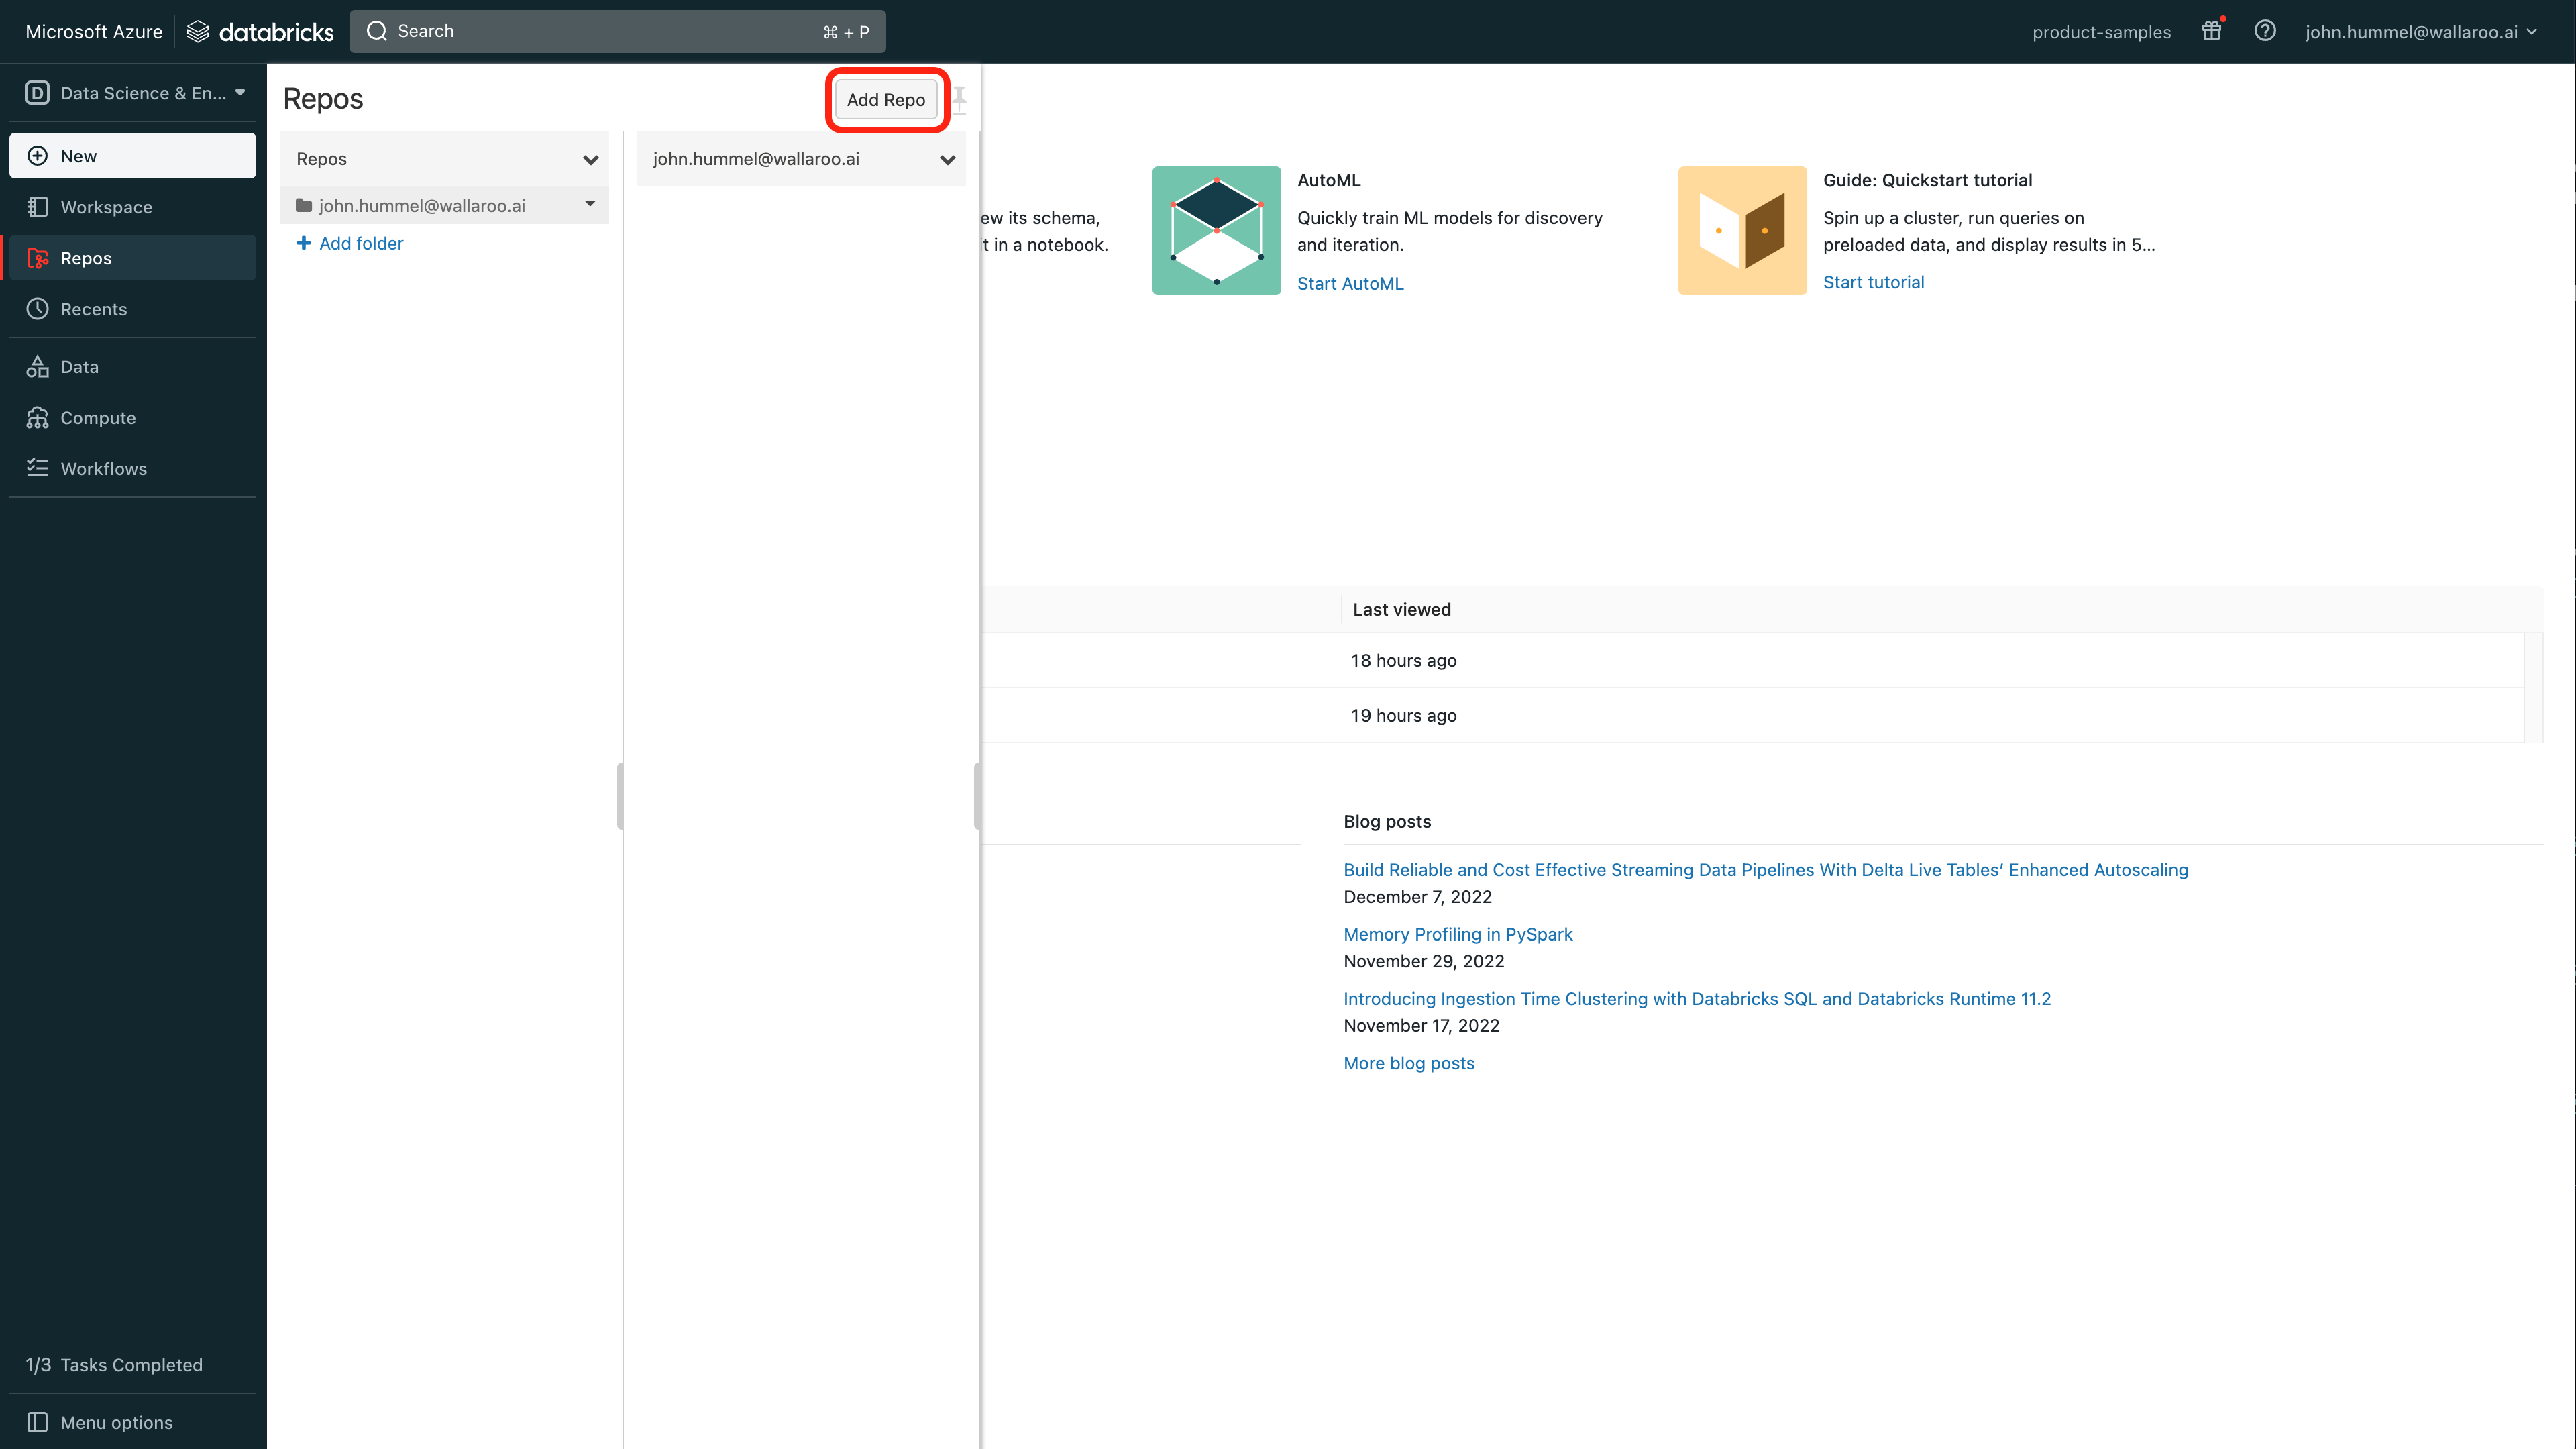
From the Azure Databricks dashboard, select Repos.
Select where to place the repo, then select Add Repo.
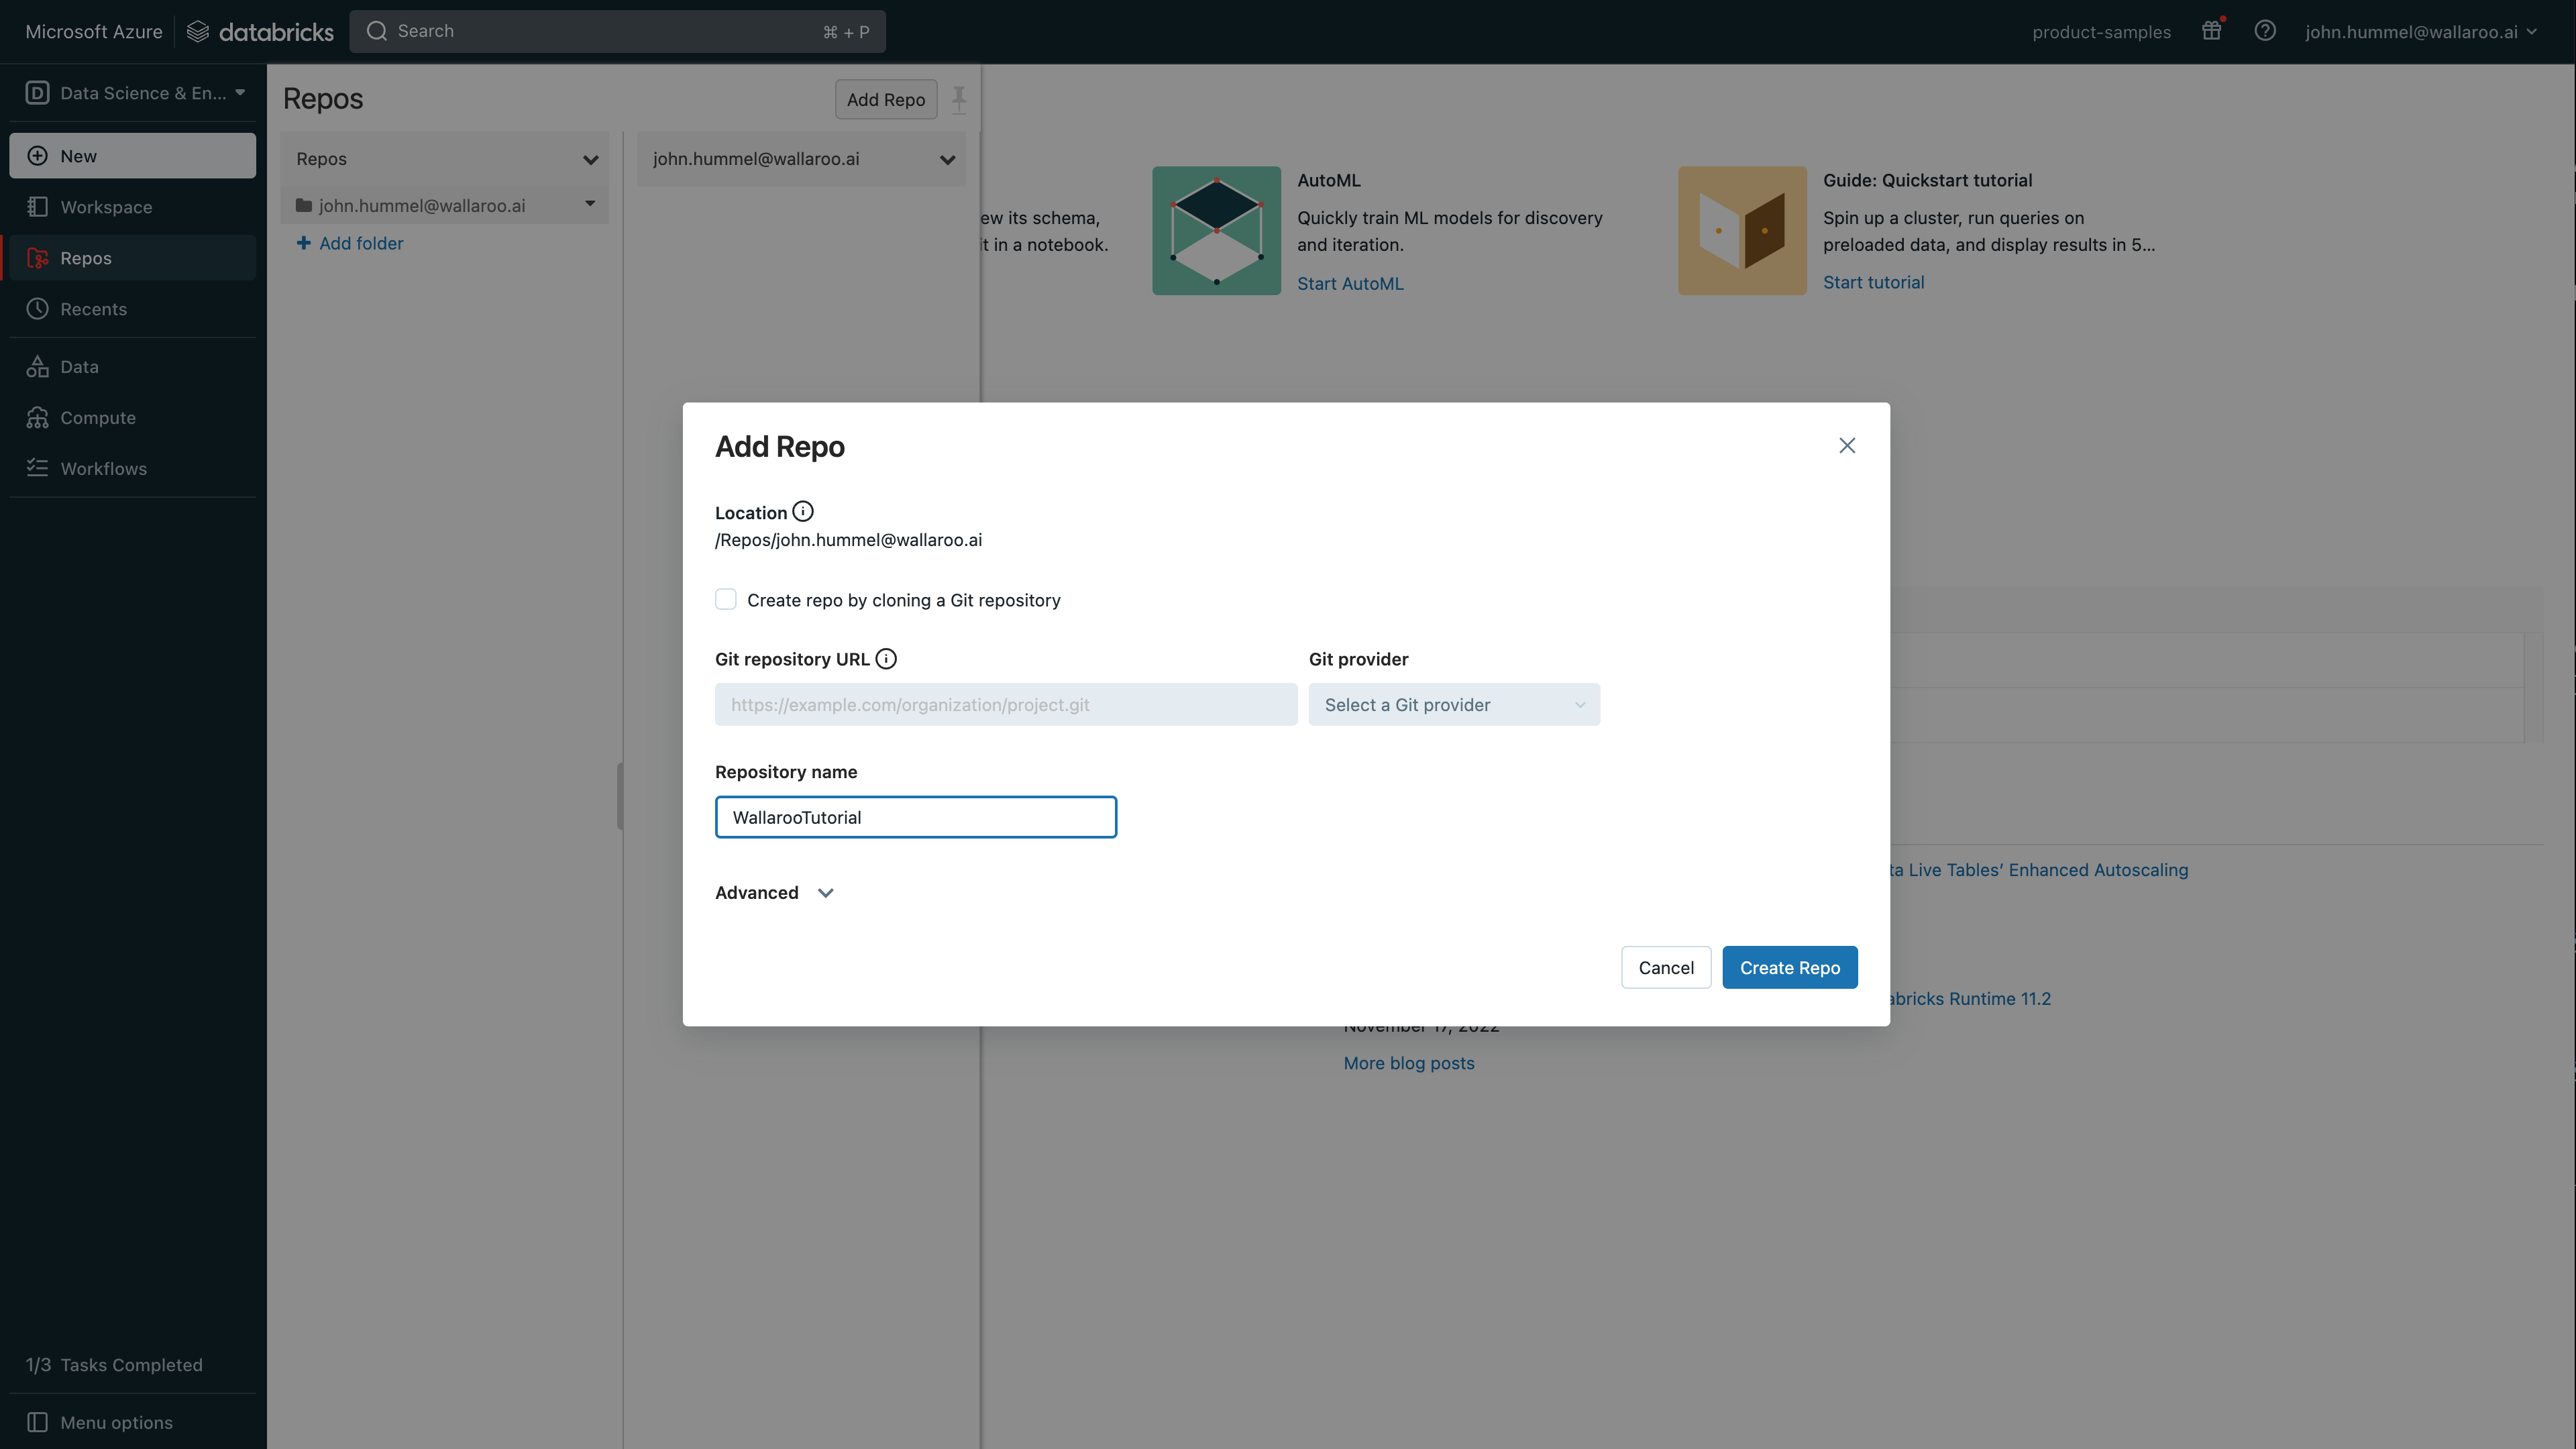
Set the following:
Create repo by cloning a Git repository: Uncheck
Repository name: Set any name based on the Databricks standard (no spaces, etc).
Select Create Repo.
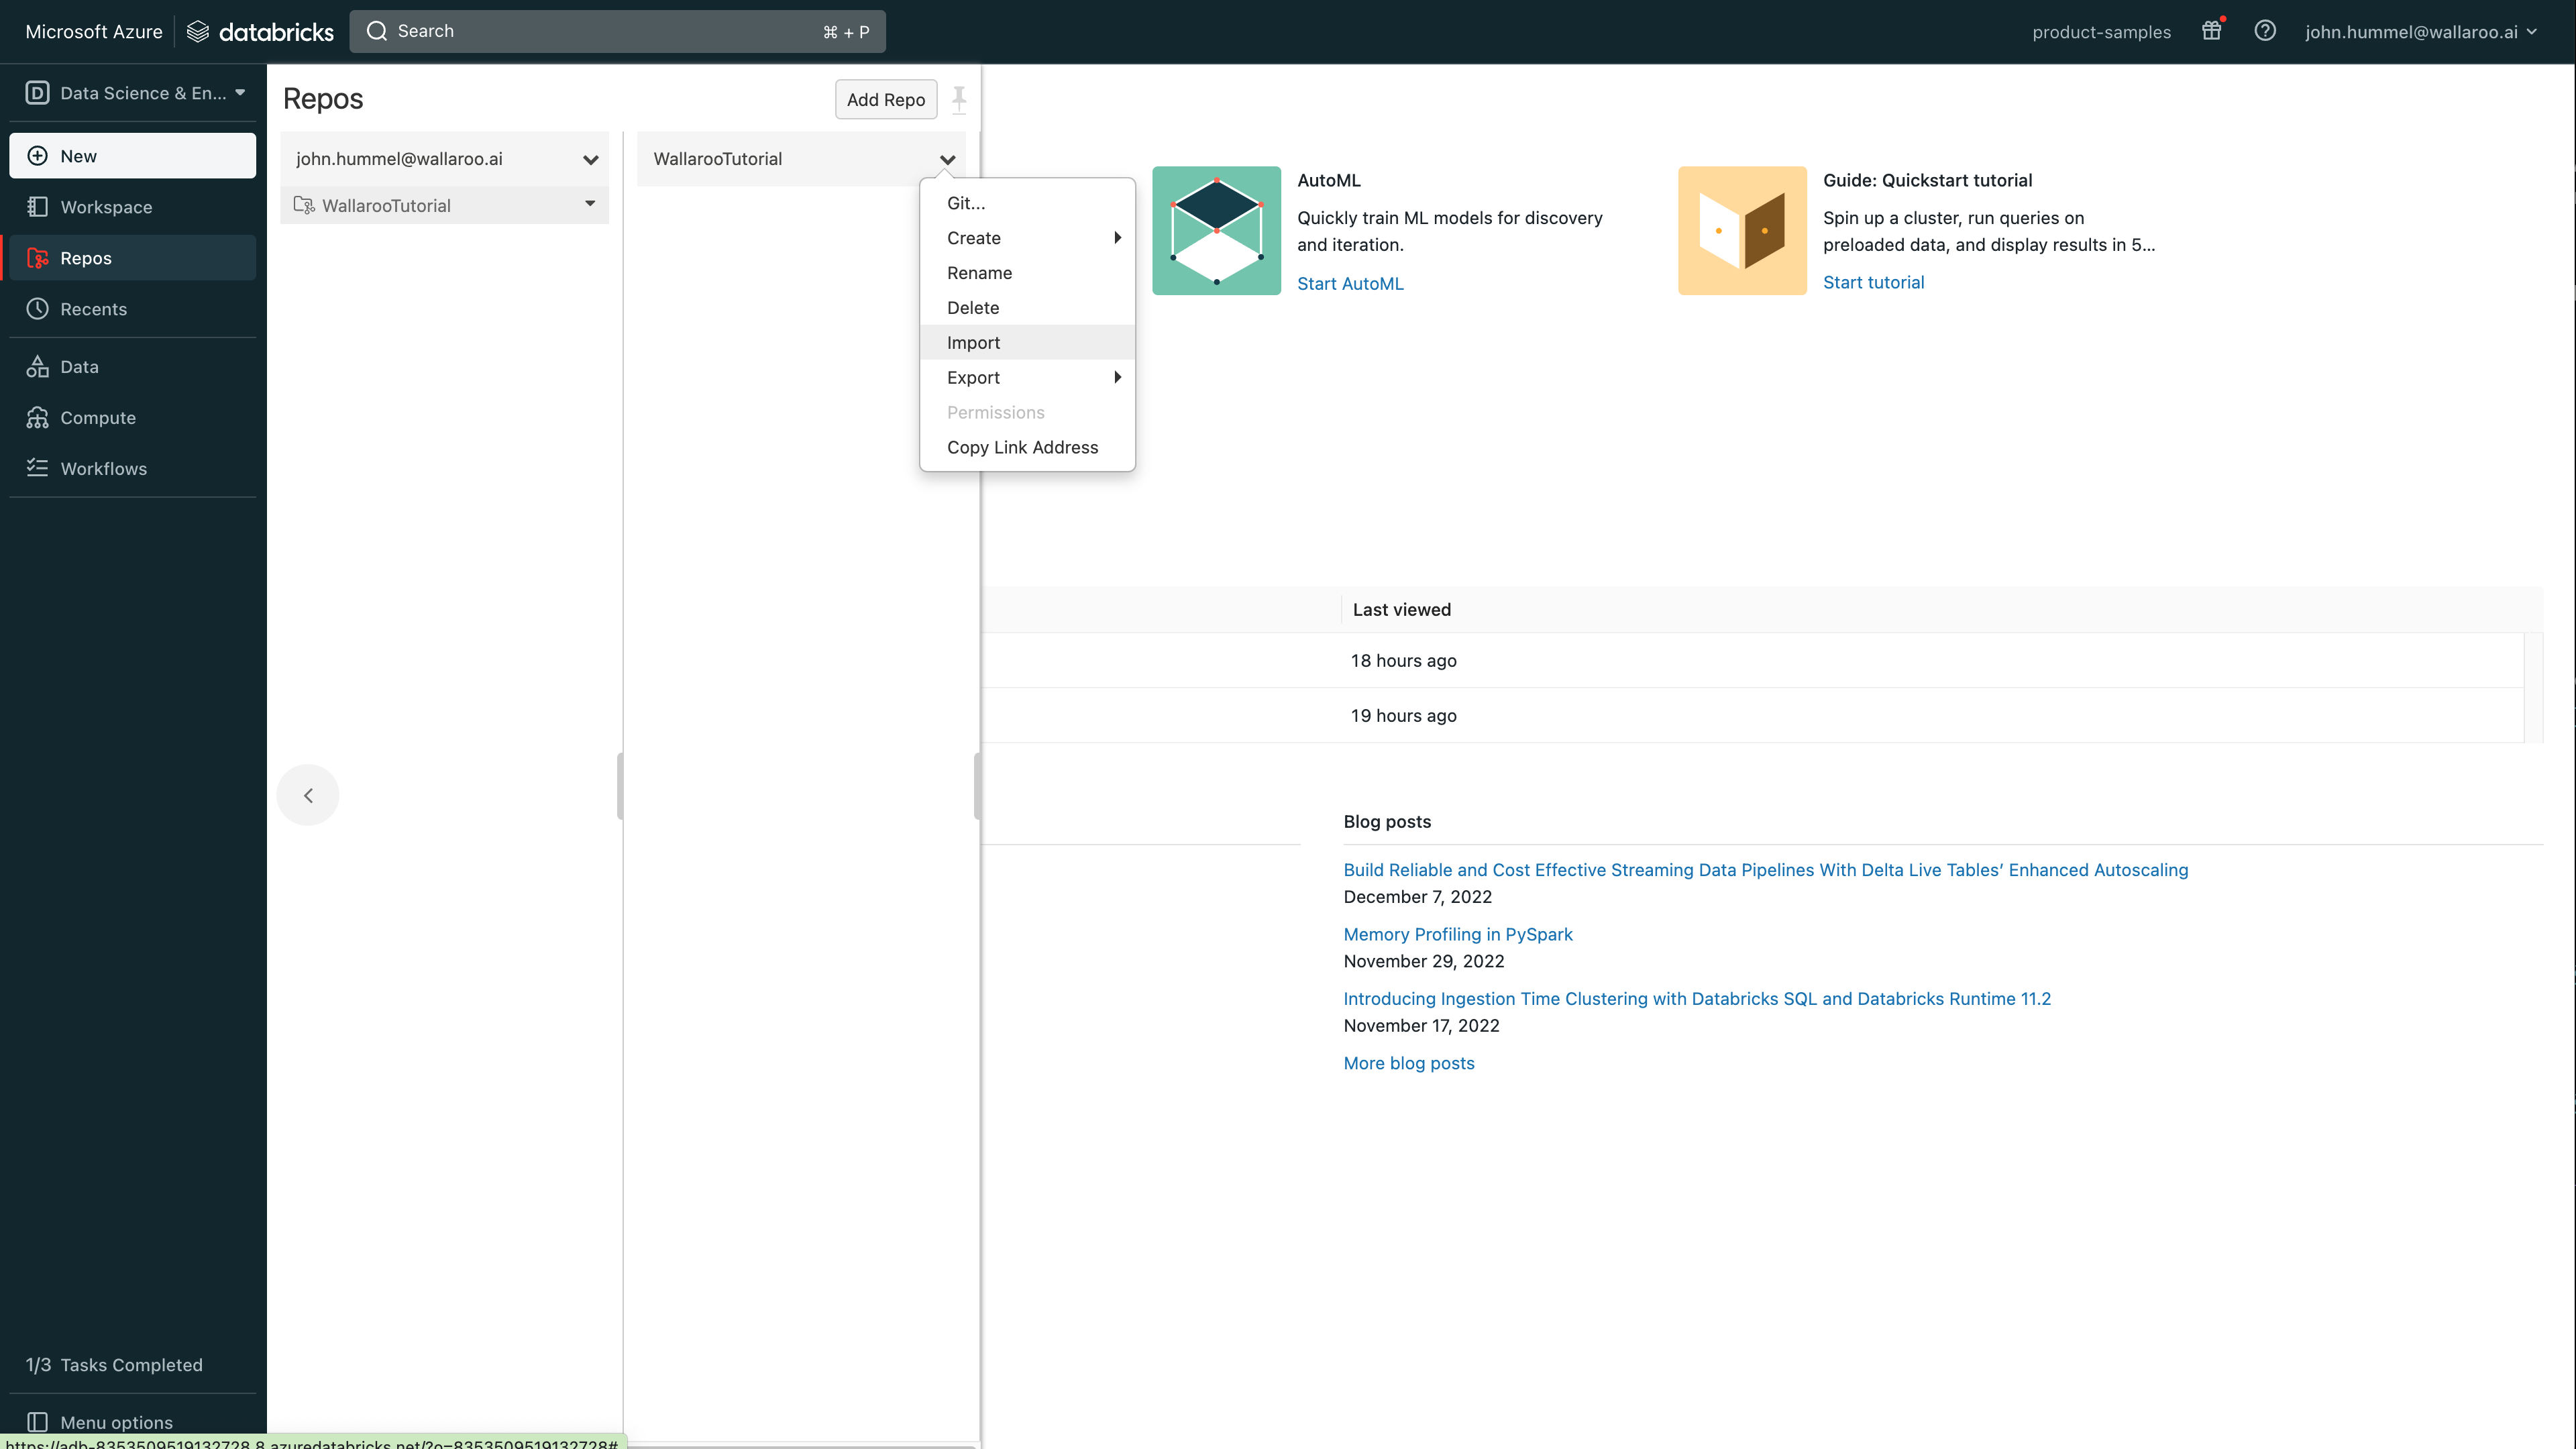
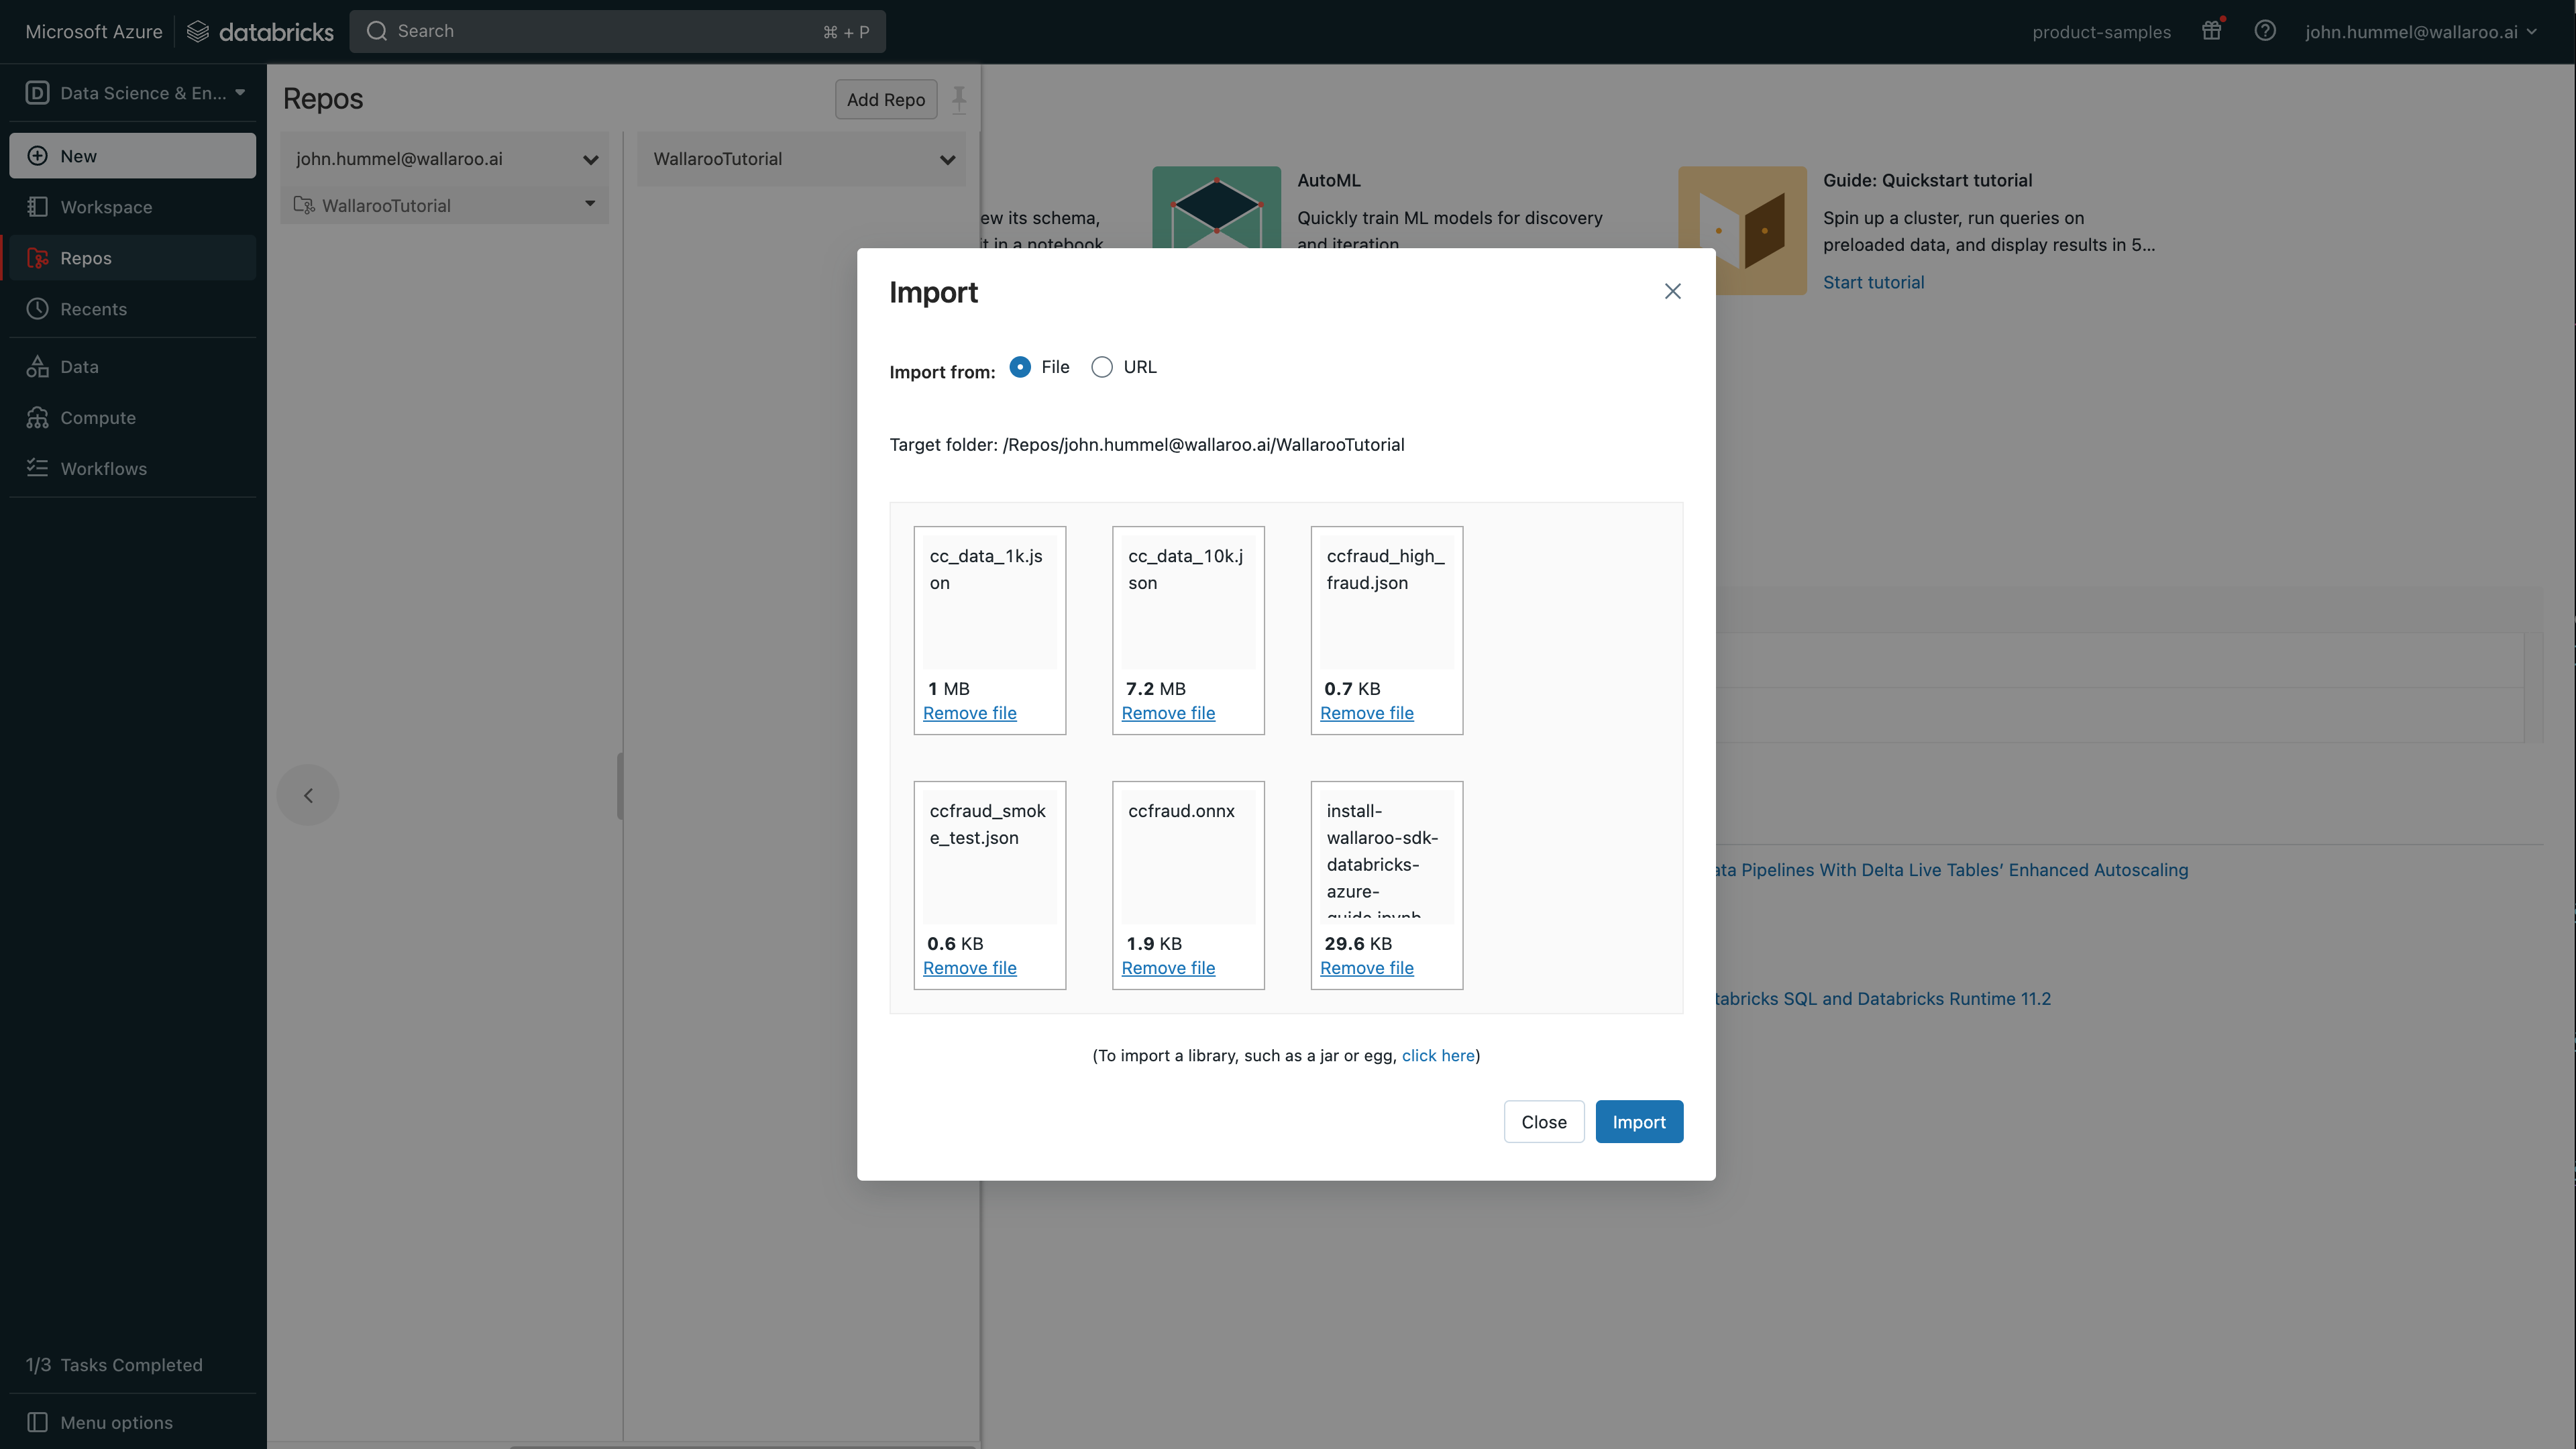
Select the new tutorial, then from the repo menu dropdown, select Import.
Select the files to upload. For this example, the following files are uploaded:
ccfraud.onnx: A pretrained model from the Machine Learning Group’s demonstration on Credit Card Fraud detection.
Sample inference test data:
ccfraud_high_fraud.json: Test input file that returns a high likelihood of credit card fraud.
ccfraud_smoke_test.json: Test input file that returns a low likelihood of credit card fraud.
cc_data_1k.json: Sample input file with 1,000 records.
cc_data_10k.json: Sample input file with 10,000 records.
install-wallaroo-sdk-databricks-azure-guide.ipynb: This notebook.
Select Import.
The Jupyter Notebook can be opened from this new Azure Databricks repository, and relative files it references will be accessible with the exceptions listed below.
Zip files added via the method above are automatically decompressed, so can not be used as model files. For example, tensor based models such as the Wallaroo Aloha Demo. Zip files can be uploaded using DBFS and used through the following process:
To upload model files to Azure Databricks using DBFS:
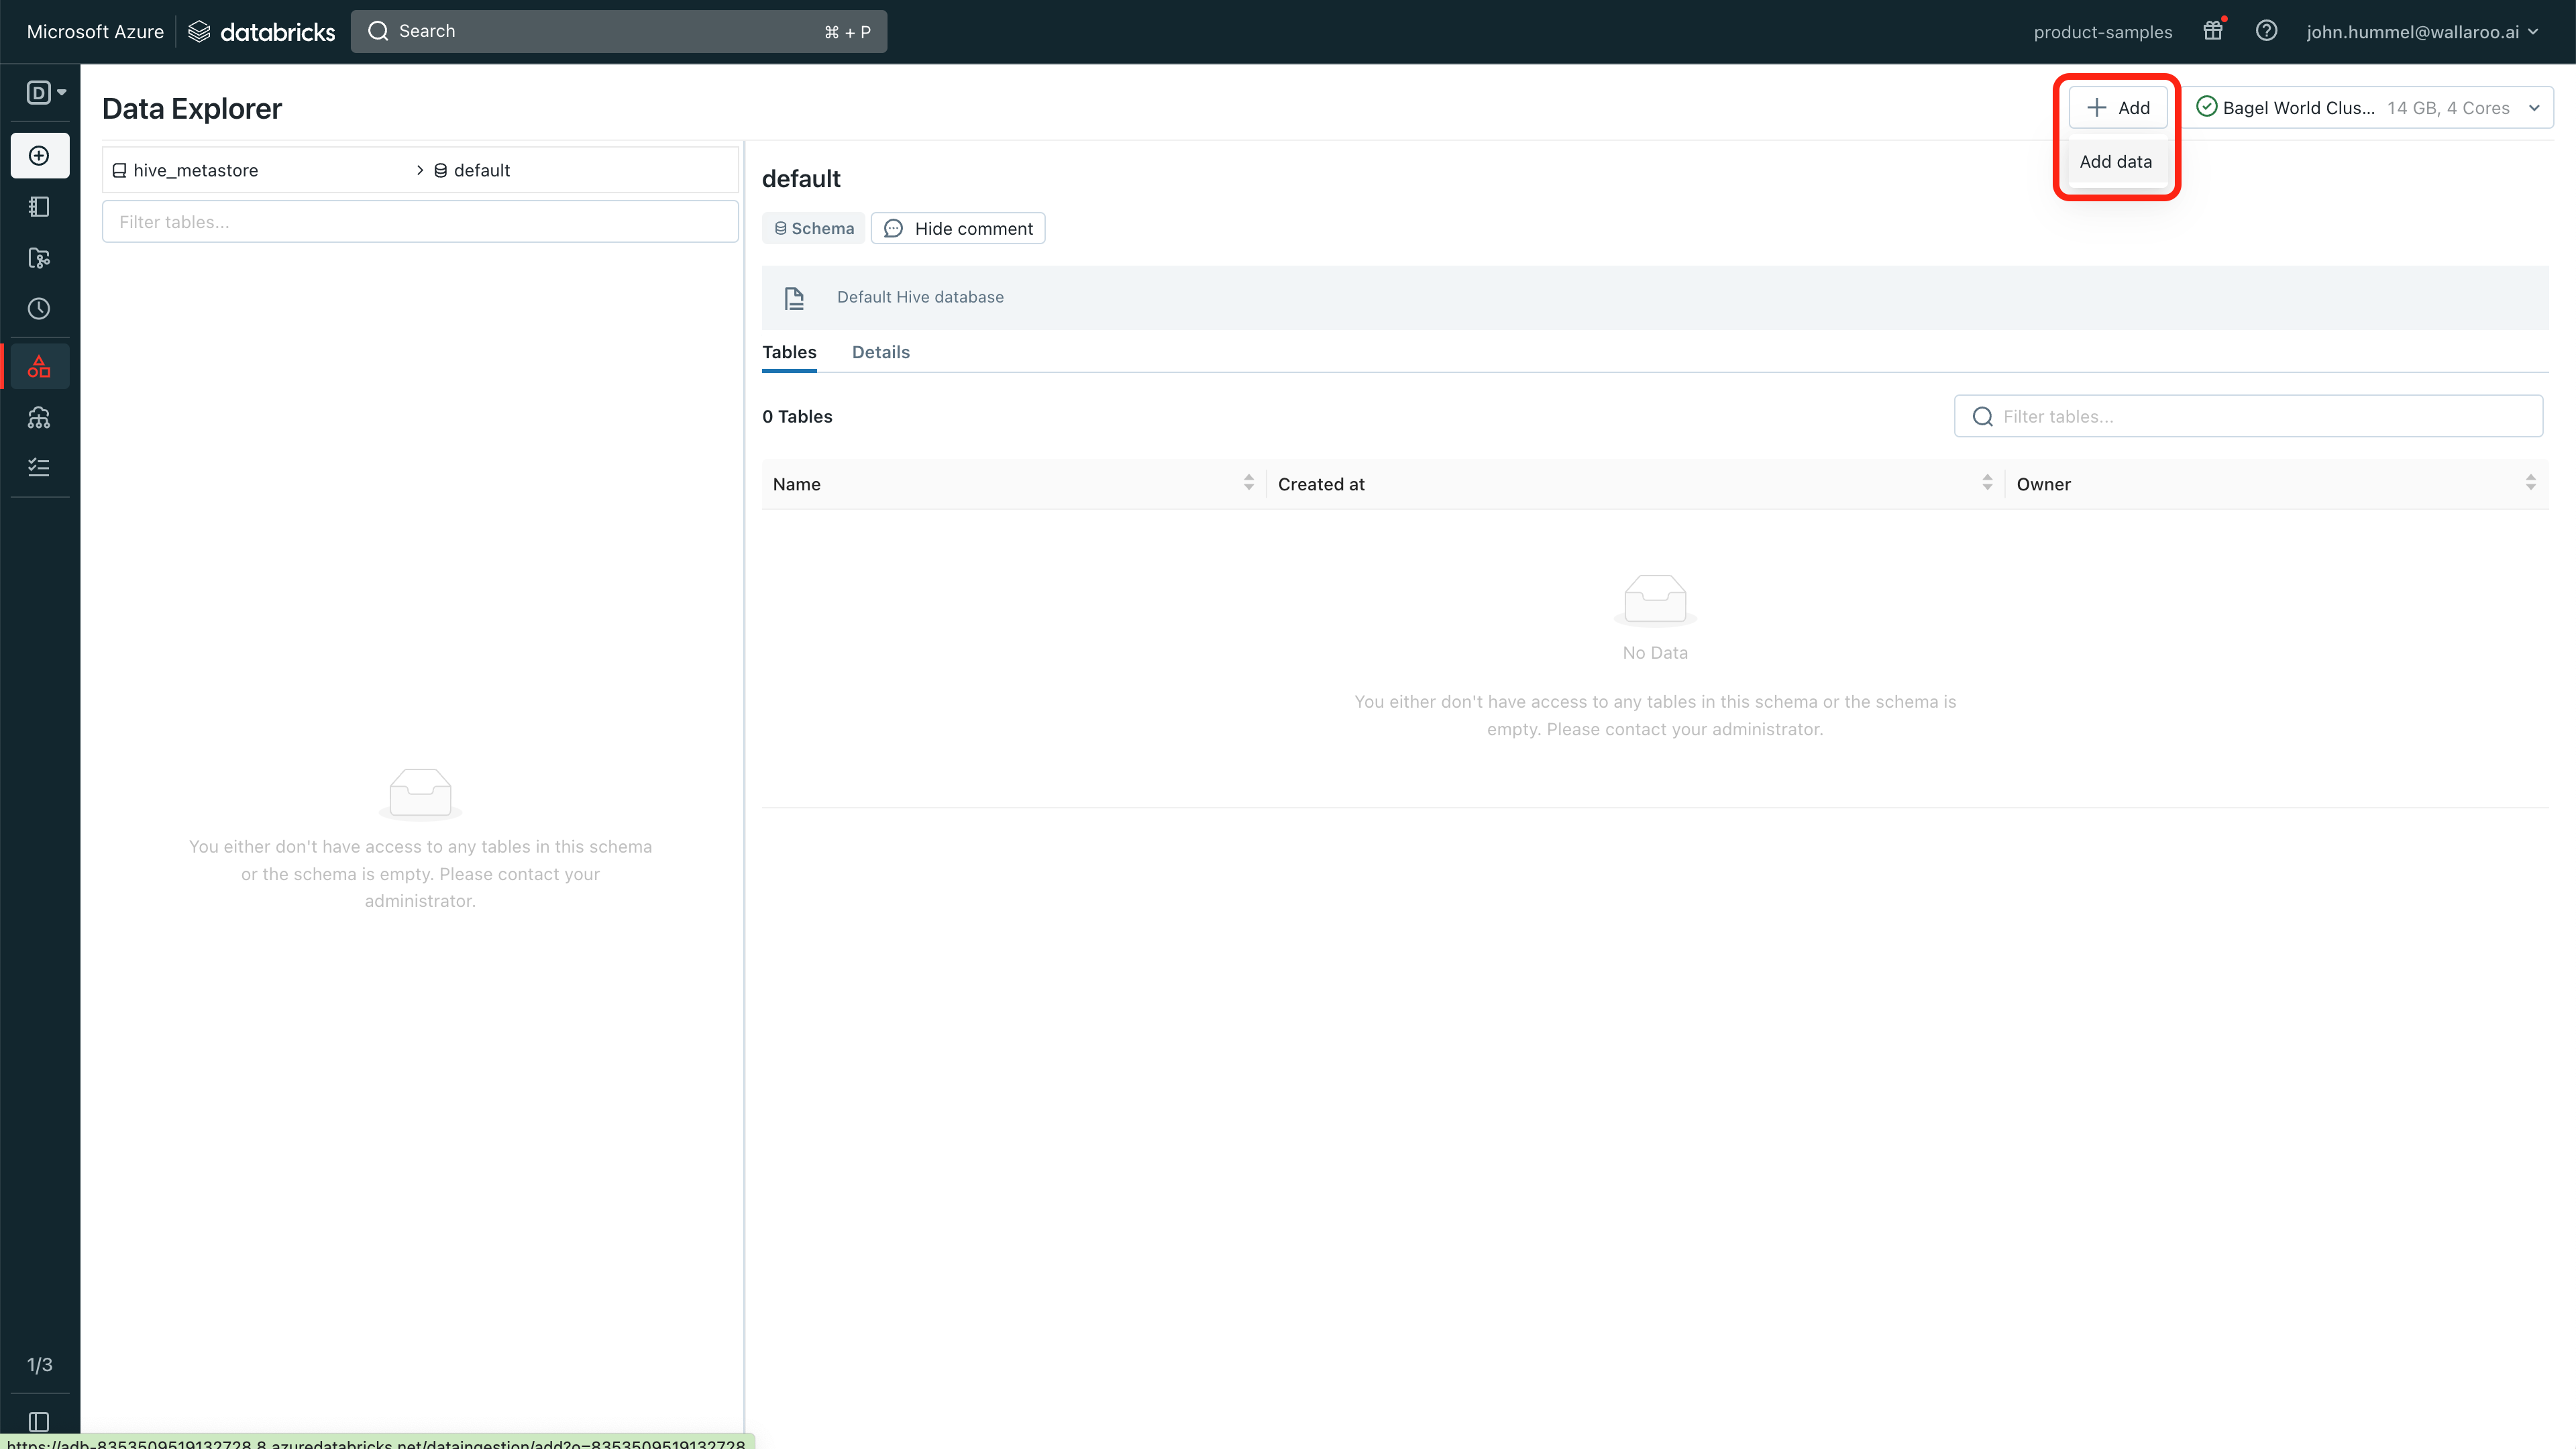
From the Azure Databricks dashboard, select Data.
Select Add->Add data.
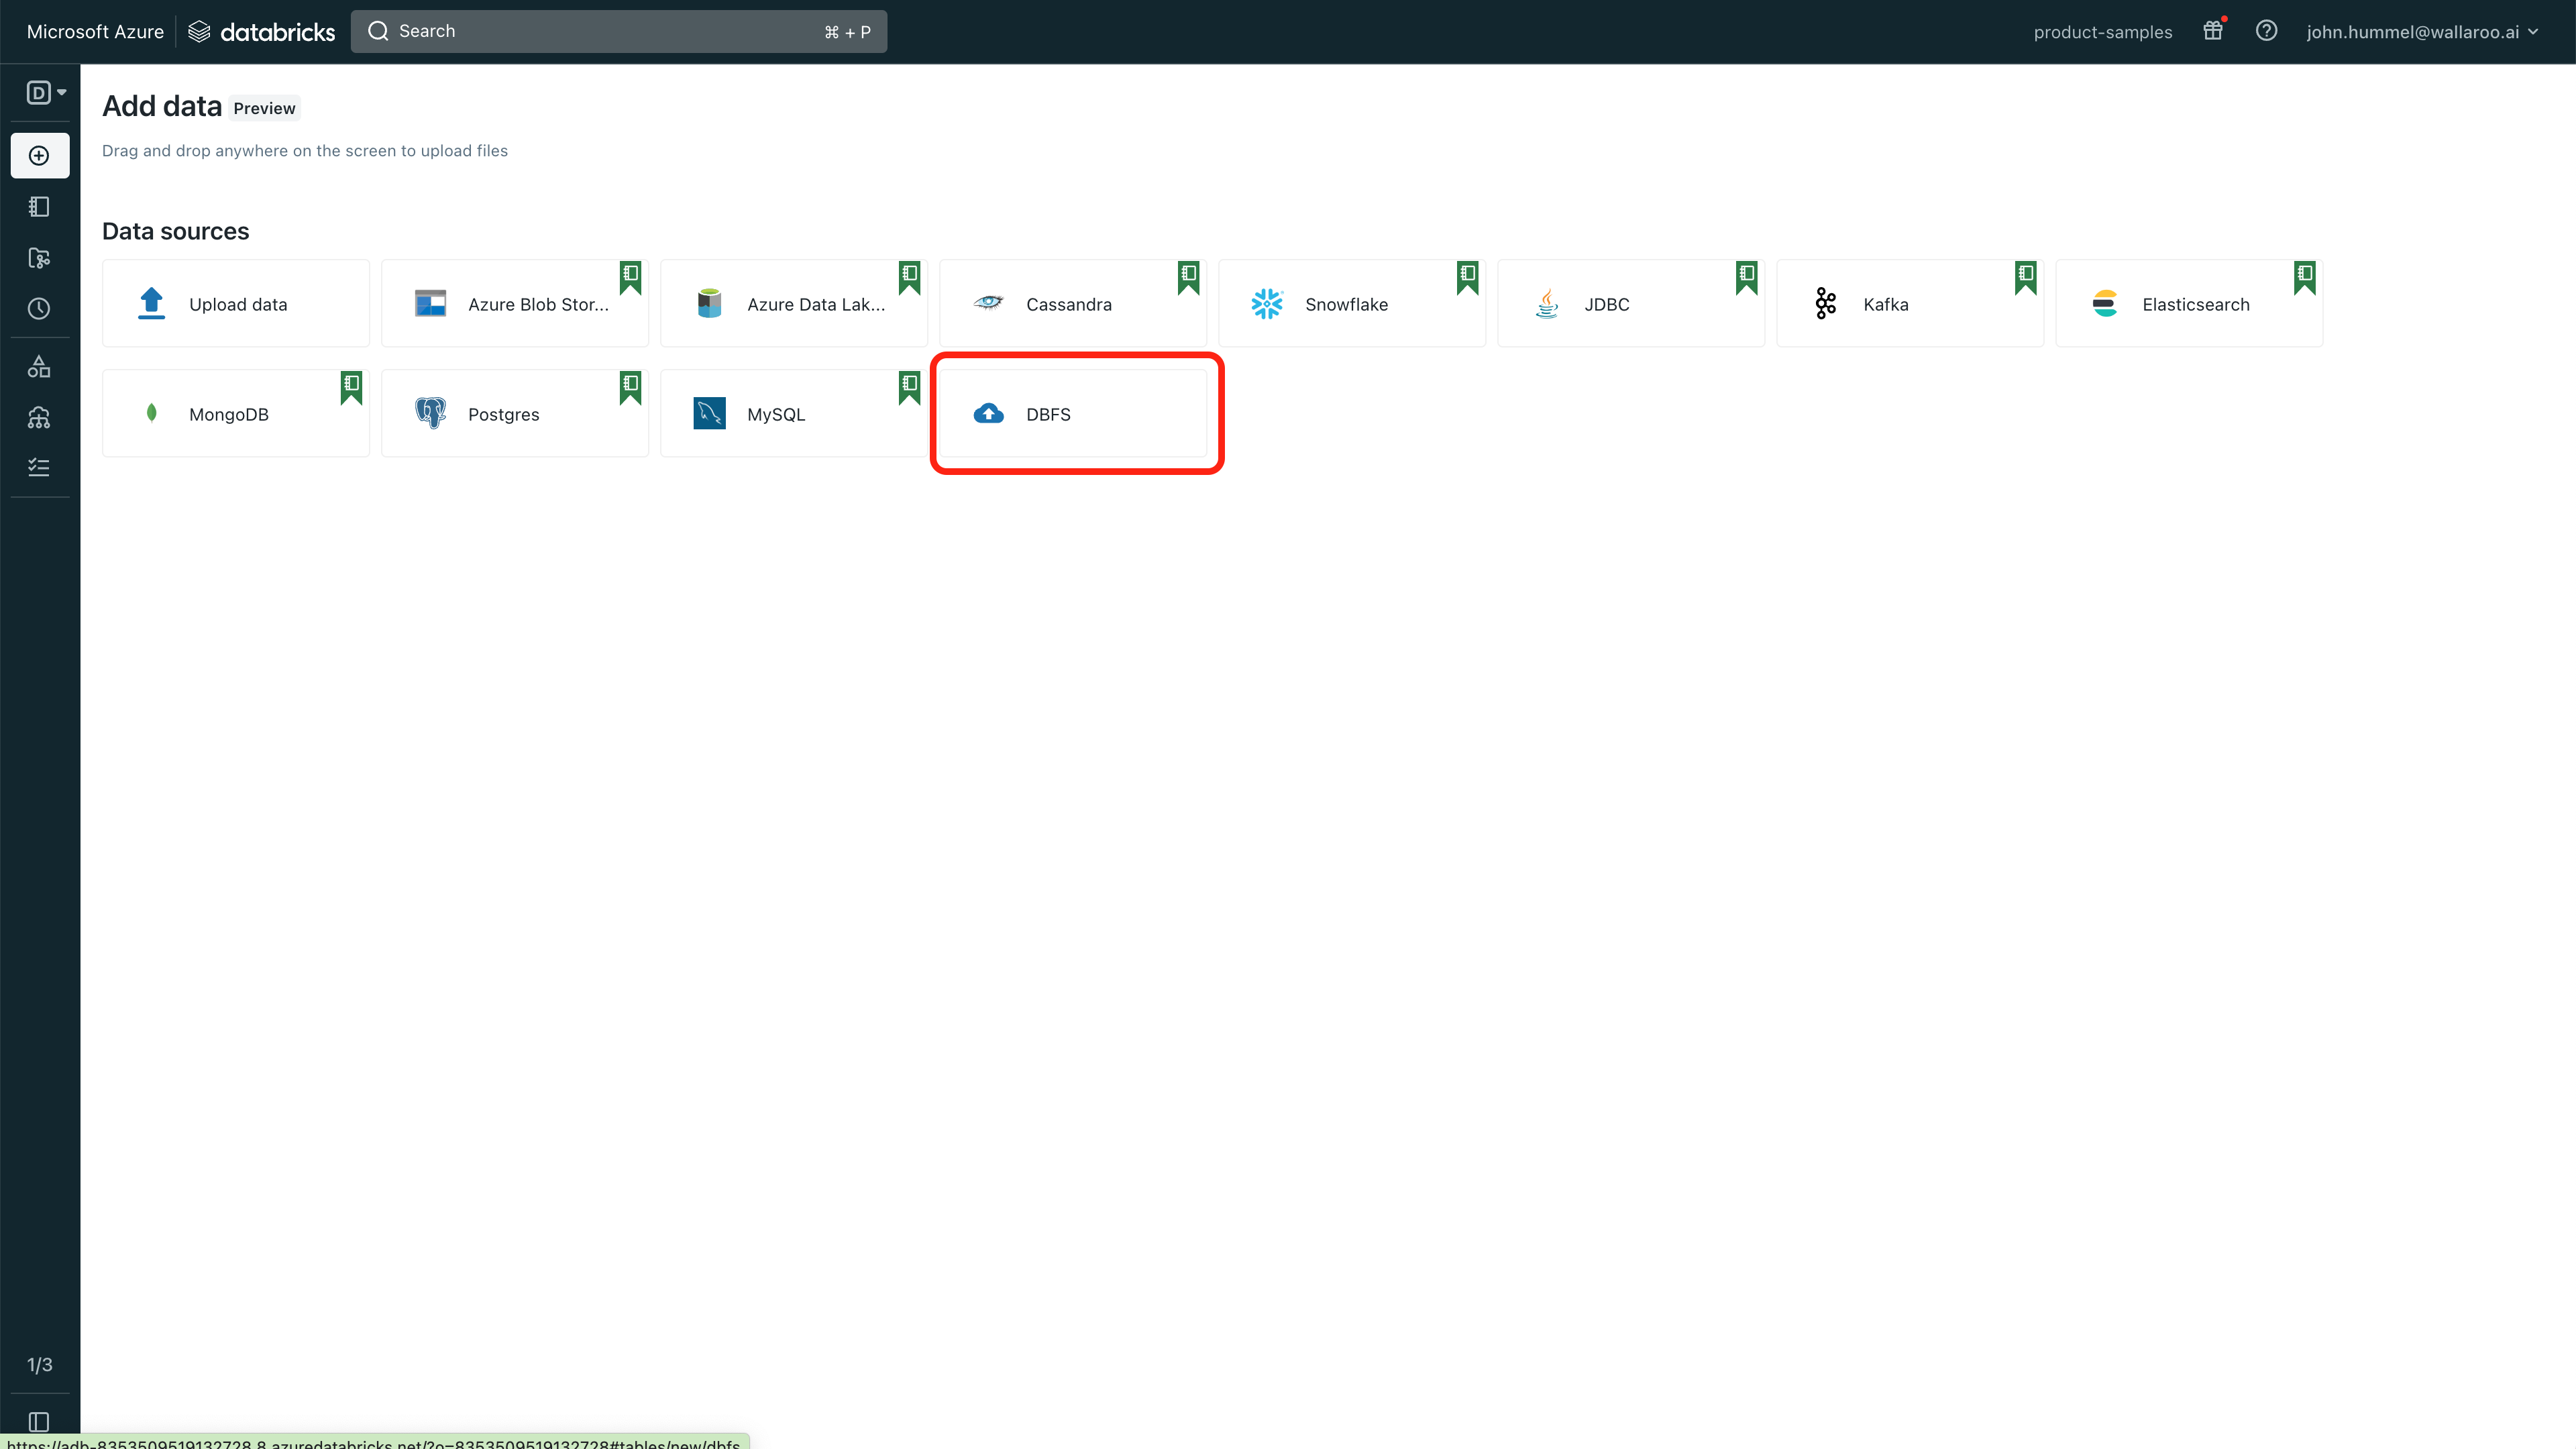
Select DBFS.
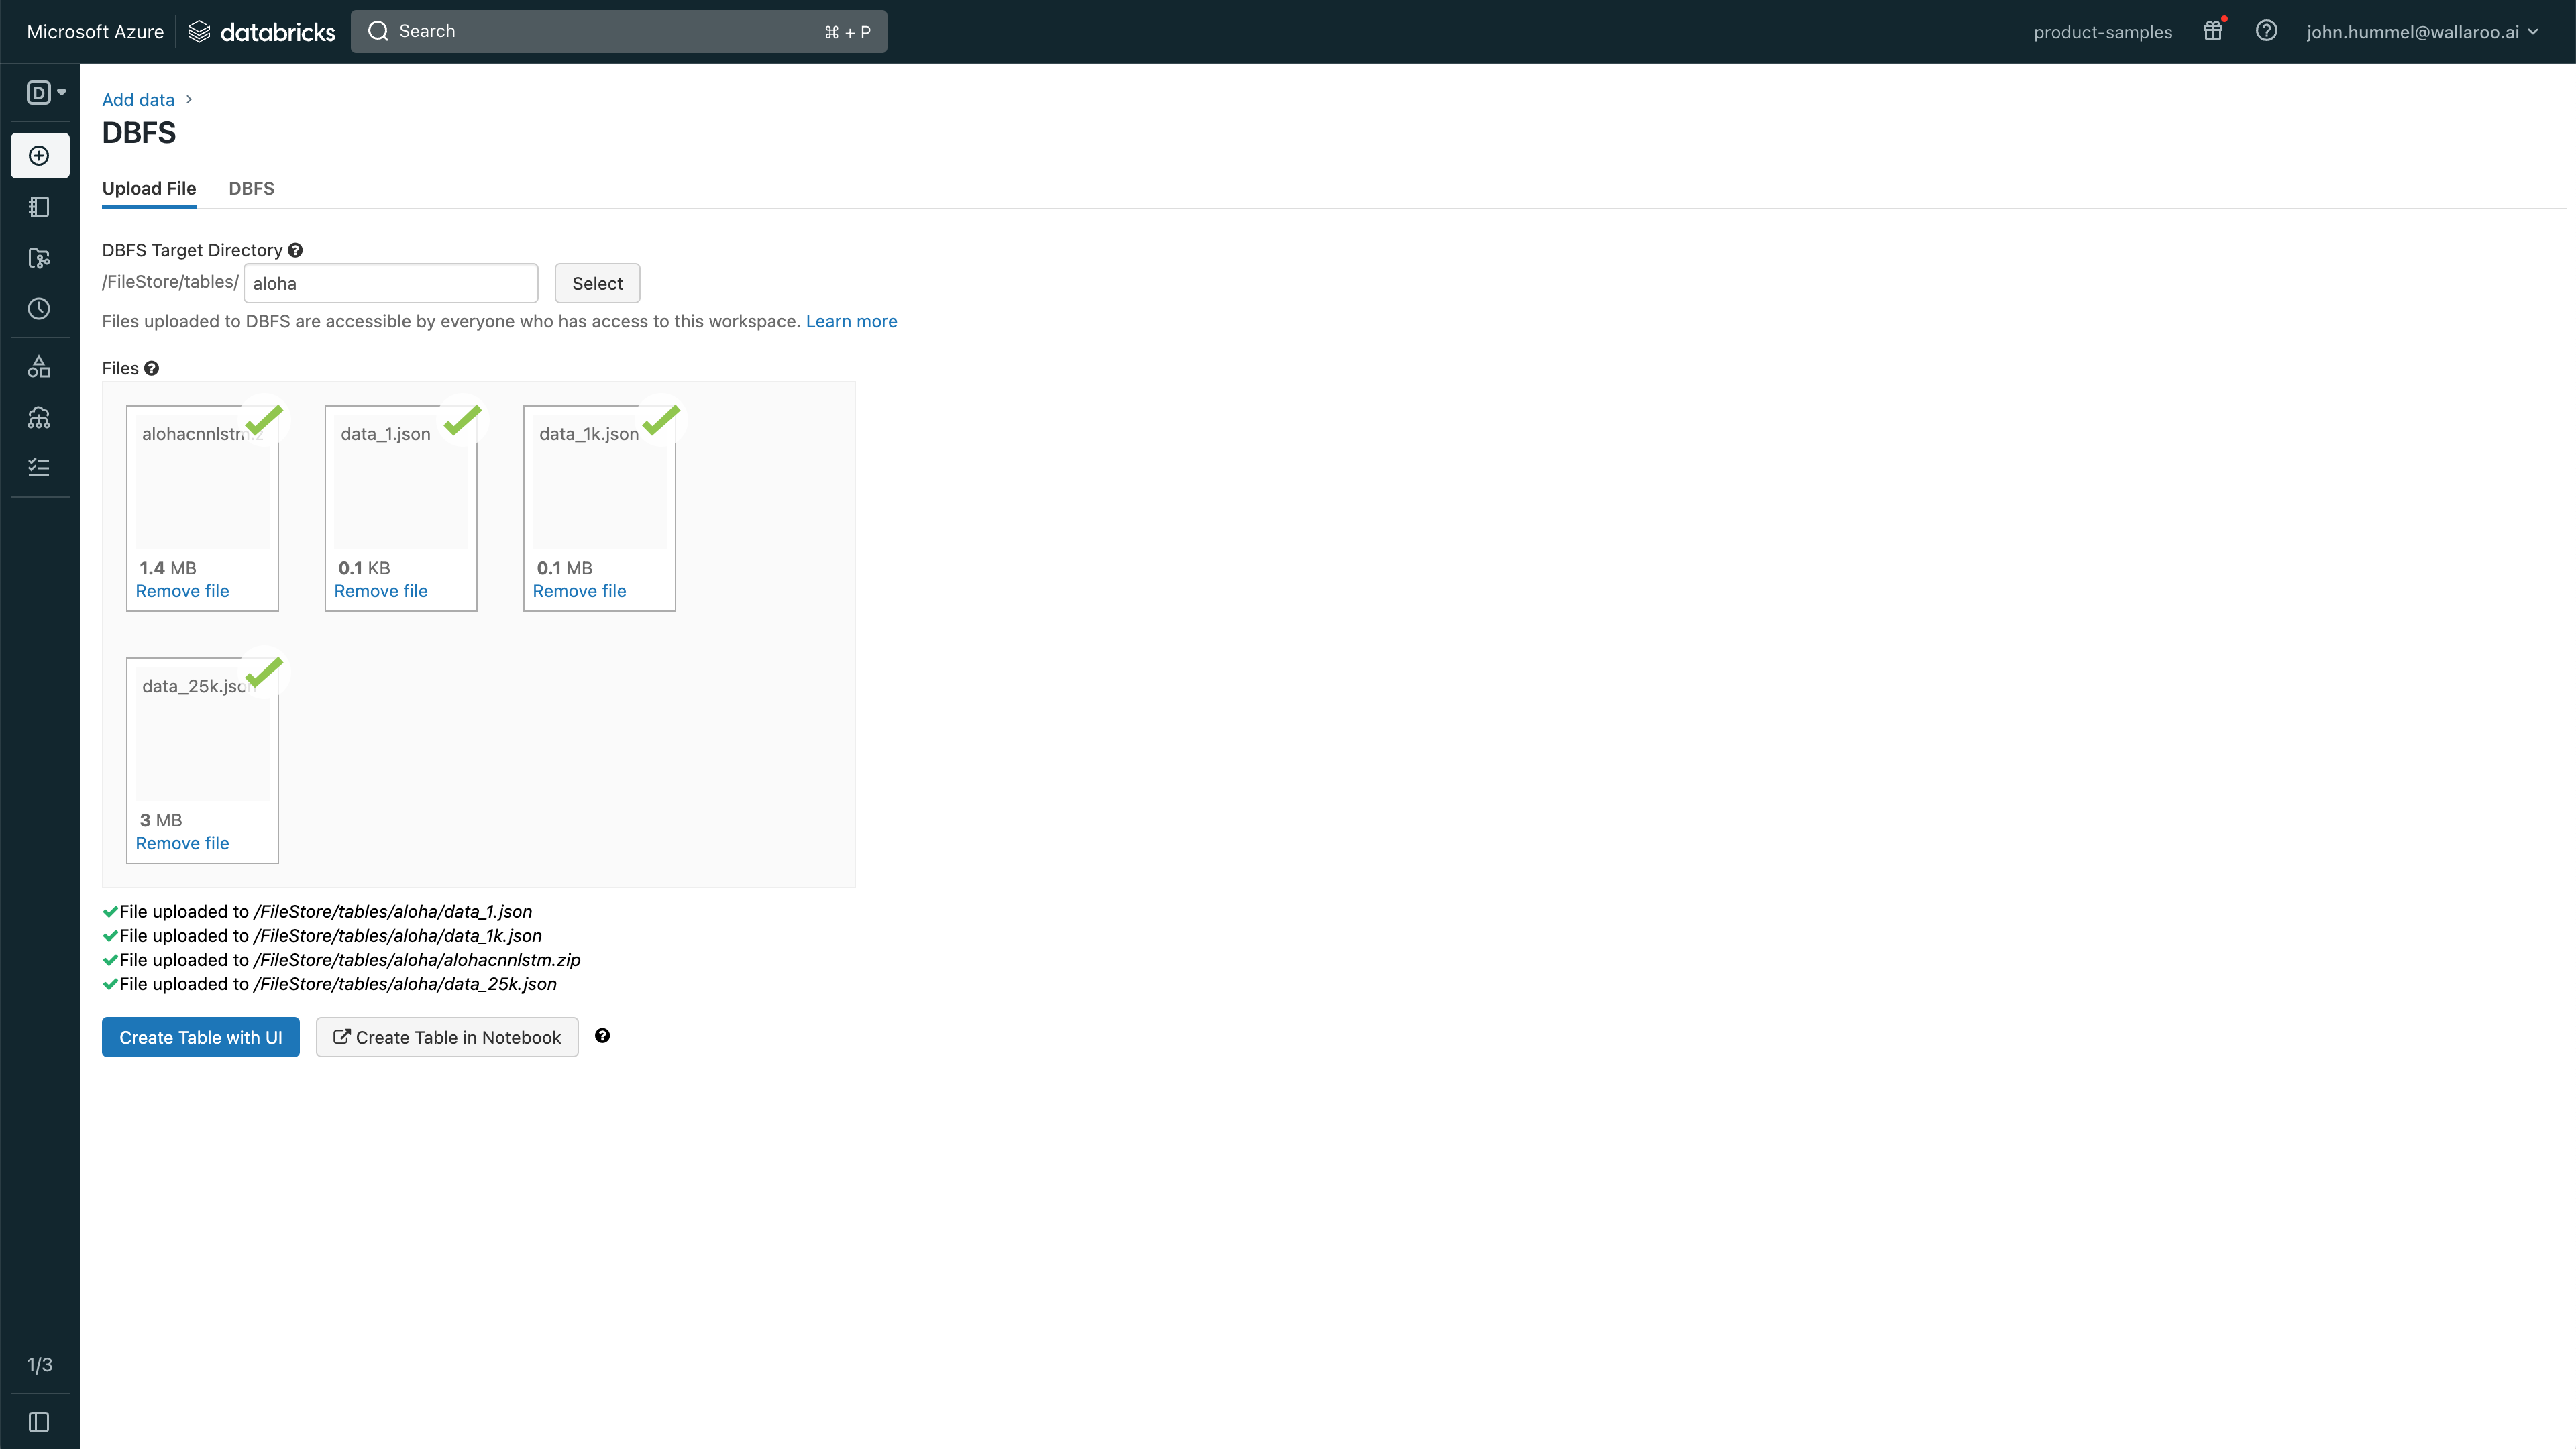
Select Upload File and enter the following:
DBFS Target Directory (Optional): Optional step: Set the directory where the files will be uploaded.
Select the files to upload. Note that each file will be given a location and they can be access with /dbfs/PATH. For example, the file alohacnnlstm.zip uploaded to the directory aloha would be referenced with `/dbfs/FileStore/tables/aloha/alohacnnlstm.zip
Sample Wallaroo Connection
With the Wallaroo Python SDK installed, remote commands and inferences can be performed through the following steps.
Open a Connection to Wallaroo
The first step is to connect to Wallaroo through the Wallaroo client.
This is accomplished using the wallaroo.Client(api_endpoint, auth_endpoint, auth_type command) command that connects to the Wallaroo instance services.
The Client method takes the following parameters:
api_endpoint (String): The URL to the Wallaroo instance API service.
auth_endpoint (String): The URL to the Wallaroo instance Keycloak service.
auth_type command (String): The authorization type. In this case, SSO.
The URLs are based on the Wallaroo Prefix and Wallaroo Suffix for the Wallaroo instance. For more information, see the DNS Integration Guide. In the example below, replace “YOUR PREFIX” and “YOUR SUFFIX” with the Wallaroo Prefix and Suffix, respectively. In the example below, replace “YOUR PREFIX” and “YOUR SUFFIX” with the Wallaroo Prefix and Suffix, respectively.
Once run, the wallaroo.Client command provides a URL to grant the SDK permission to your specific Wallaroo environment. When displayed, enter the URL into a browser and confirm permissions.
Depending on the configuration of the Wallaroo instance, the user will either be presented with a login request to the Wallaroo instance or be authenticated through a broker such as Google, Github, etc. To use the broker, select it from the list under the username/password login forms. For more information on Wallaroo authentication configurations, see the Wallaroo Authentication Configuration Guides.
Once authenticated, the user will verify adding the device the user is establishing the connection from. Once both steps are complete, then the connection is granted.
The connection is stored in the variable wl for use in all other Wallaroo calls.
Replace YOUR PREFIX and YOUR SUFFIX with the DNS prefix and suffix for the Wallaroo instance. For more information, see the DNS Integration Guide.
importwallaroofromwallaroo.objectimportEntityNotFoundError# used to display dataframe information without truncatingfromIPython.displayimportdisplayimportpandasaspdpd.set_option('display.max_colwidth', None)
# For Apache Arrow functionsimportpyarrow
For wallarooPrefix = "YOUR PREFIX." and wallarooSuffix = "YOUR SUFFIX", enter the prefix and suffix for your Wallaroo instance DNS name. If the prefix instance is blank, then it can be wallarooPrefix = "". Note that the prefix includes the . for proper formatting. For example, if the prefix is empty and the suffix is wallaroo.example.com, then the settings would be:
# SSO login through keycloakwallarooPrefix="YOUR PREFIX."wallarooSuffix="YOUR SUFFIX"wl=wallaroo.Client(api_endpoint=f"https://{wallarooPrefix}api.{wallarooSuffix}",
auth_endpoint=f"https://{wallarooPrefix}keycloak.{wallarooSuffix}",
auth_type="sso")
Create the Workspace
We will create a workspace to work in and call it the databricksazuresdkworkspace, then set it as current workspace environment. We’ll also create our pipeline in advance as databricksazuresdkpipeline.
IMPORTANT NOTE: For this example, the CCFraud model is stored in the file ccfraud.onnx and is referenced from a relative link. For platforms such as Databricks, the files may need to be in a universal file format. For those, the example file location below may be:
IMPORTANT NOTE: If using DBFS, use the file path format such as /dbfs/FileStore/shared_uploads/YOURWORKSPACE/file format rather than the dbfs: format.
For this sample, we will add the model configure parameter .configure(tensor_fields=["tensor"]) to match the data input types and override the model’s input parameter.
fromwallaroo.frameworkimportFrameworkmodel= (wl.upload_model(model_name,
model_file_name,
framework=Framework.ONNX)
.configure(tensor_fields=["tensor"])
)
model
Now that we have a model that we want to use we will create a deployment for it.
To do this, we’ll create our pipeline that can ingest the data, pass the data to our CCFraud model, and give us a final output. We’ll call our pipeline databricksazuresdkpipeline, then deploy it so it’s ready to receive data. The deployment process usually takes about 45 seconds.
Now that the pipeline is deployed and our CCfraud model is in place, we’ll perform a smoke test to verify the pipeline is up and running properly. We’ll use the infer_from_file command to load a single transaction and determine if it is flagged for fraud. If it returns correctly, a small value should be returned indicating a low likelihood that the transaction was fraudulent.
Now that our smoke test is successful, let’s really give it some data. We’ll use the cc_data_1k.jarrowson file that contains 1,000 inferences to be performed, then convert that to a DataFrame and display the first 5 rows.
When finished with our tests, we will undeploy the pipeline so we have the Kubernetes resources back for other tasks. Note that if the deployment variable is unchanged pipeline.deploy() will restart the inference engine in the same configuration as before.
Installing the Wallaroo SDK into Google Vertex Workbench
Organizations that use Google Vertex for model training and development can deploy models to Wallaroo through the Wallaroo SDK. The following guide is created to assist users with installing the Wallaroo SDK, setting up authentication through Google Cloud Platform (GCP), and making a standard connection to a Wallaroo instance through Google Workbench.
aloha-cnn-lstm.zip: A pre-trained open source model that uses an Aloha CNN LSTM model for classifying Domain names as being either legitimate or being used for nefarious purposes such as malware distribution.
Test Data Files:
data_1k.arrow: 1,000 records
data_25k.arrow: 25,000 records
To use the Wallaroo SDK within Google Workbench, a virtual environment will be used. This will set the necessary libraries and specific Python version required.
Prerequisites
The following is required for this tutorial:
A Wallaroo instance version 2023.1 or later.
Python 3.8.6 or later installed locally
Conda: Used for managing python virtual environments.
The following Python libraries installed:
os
wallaroo: The Wallaroo SDK. Included with the Wallaroo JupyterHub service by default.
polars: Polars for DataFrame with native Apache Arrow support
General Steps
For our example, we will perform the following:
Wallaroo SDK Install
Set up a Python virtual environment through conda with the libraries that enable the virtual environment for use in a Jupyter Hub environment.
Install the Wallaroo SDK.
Wallaroo SDK from remote JupyterHub Demonstration (Optional): The following steps are an optional exercise to demonstrate using the Wallaroo SDK from a remote connection. The entire tutorial can be found on the Wallaroo Tutorials repository.
Connect to a remote Wallaroo instance.
Create a workspace for our work.
Upload the Aloha model.
Create a pipeline that can ingest our submitted data, submit it to the model, and export the results
Run a sample inference through our pipeline by loading a file
Retrieve the external deployment URL. This sample Wallaroo instance has been configured to create external inference URLs for pipelines. For more information, see the External Inference URL Guide.
Run a sample inference through our pipeline’s external URL and store the results in a file. This assumes that the External Inference URLs have been enabled for the target Wallaroo instance.
Undeploy the pipeline and return resources back to the Wallaroo instance’s Kubernetes environment.
Install Wallaroo SDK
Set Up Virtual Python Environment
To set up the virtual environment in Google Workbench for using the Wallaroo SDK with Google Workbench:
Start a separate terminal by selecting File->New->Terminal.
Create the Python virtual environment with conda. Replace wallaroosdk with the name of the virtual environment as required by your organization. Note that Python 3.8.6 and above is specified as a requirement for Python libraries used with the Wallaroo SDK. The following will install the latest version of Python 3.8, which as of this time is 3.8.15.
conda create -n wallaroosdk python=3.8
Activate the new environment.
conda activate wallaroosdk
Install the ipykernel library. This allows the JupyterHub notebooks to access the Python virtual environment as a kernel.
conda install ipykernel
Install the new virtual environment as a python kernel.
ipython kernel install --user --name=wallaroosdk
Install the Wallaroo SDK. This process may take several minutes while the other required Python libraries are added to the virtual environment.
IMPORTANT NOTE: The version of the Wallaroo SDK should match the Wallaroo instance. For example, this example connects to a Wallaroo Enterprise version 2023.1 instance, so the SDK version should be wallaroo==2023.4.0.
pip install wallaroo==2023.4.1
Once the conda virtual environment has been installed, it can either be selected as a new Jupyter Notebook kernel, or the Notebook’s kernel can be set to an existing Jupyter notebook.
To use a new Notebook:
From the main menu, select File->New-Notebook.
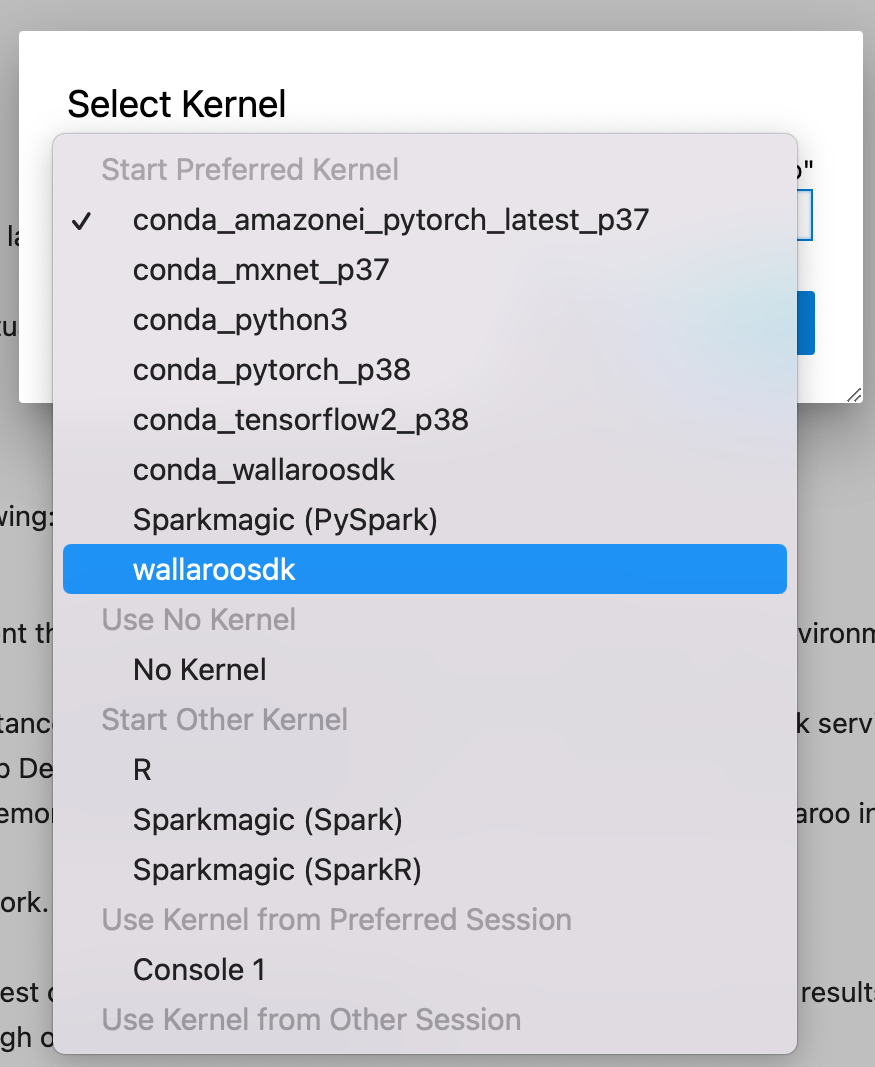
From the Kernel selection dropbox, select the new virtual environment - in this case, wallaroosdk.
To update an existing Notebook to use the new virtual environment as a kernel:
From the main menu, select Kernel->Change Kernel.
Select the new kernel.
Sample Wallaroo Connection
With the Wallaroo Python SDK installed, remote commands and inferences can be performed through the following steps.
Open a Connection to Wallaroo
The first step is to connect to Wallaroo through the Wallaroo client.
This is accomplished using the wallaroo.Client(api_endpoint, auth_endpoint, auth_type command) command that connects to the Wallaroo instance services.
The Client method takes the following parameters:
api_endpoint (String): The URL to the Wallaroo instance API service.
auth_endpoint (String): The URL to the Wallaroo instance Keycloak service.
auth_type command (String): The authorization type. In this case, SSO.
The URLs are based on the Wallaroo Prefix and Wallaroo Suffix for the Wallaroo instance. For more information, see the DNS Integration Guide. In the example below, replace “YOUR PREFIX” and “YOUR SUFFIX” with the Wallaroo Prefix and Suffix, respectively.
Once run, the wallaroo.Client command provides a URL to grant the SDK permission to your specific Wallaroo environment. When displayed, enter the URL into a browser and confirm permissions. Depending on the configuration of the Wallaroo instance, the user will either be presented with a login request to the Wallaroo instance or be authenticated through a broker such as Google, Github, etc. To use the broker, select it from the list under the username/password login forms. For more information on Wallaroo authentication configurations, see the Wallaroo Authentication Configuration Guides.
Once authenticated, the user will verify adding the device the user is establishing the connection from. Once both steps are complete, then the connection is granted.
The connection is stored in the variable wl for use in all other Wallaroo calls.
importwallaroofromwallaroo.objectimportEntityNotFoundError# to display dataframe tablesfromIPython.displayimportdisplay# used to display dataframe information without truncatingimportpandasaspdpd.set_option('display.max_colwidth', None)
importpyarrowaspa
For wallarooPrefix = "YOUR PREFIX." and wallarooSuffix = "YOUR SUFFIX", enter the prefix and suffix for your Wallaroo instance DNS name. If the prefix instance is blank, then it can be wallarooPrefix = "". Note that the prefix includes the . for proper formatting. For example, if the prefix is empty and the suffix is wallaroo.example.com, then the settings would be:
# SSO login through keycloakwallarooPrefix="YOUR PREFIX."wallarooSuffix="YOUR SUFFIX."wl=wallaroo.Client(api_endpoint=f"https://{wallarooPrefix}api.{wallarooSuffix}",
auth_endpoint=f"https://{wallarooPrefix}keycloak.{wallarooSuffix}",
auth_type="sso")
Create the Workspace
We will create a workspace to work in and call it the gcpsdkworkspace, then set it as current workspace environment. We’ll also create our pipeline in advance as gcpsdkpipeline.
IMPORTANT NOTE: For this example, the Aloha model is stored in the file alohacnnlstm.zip. When using tensor based models, the zip file must match the name of the tensor directory. For example, if the tensor directory is alohacnnlstm, then the .zip file must be named alohacnnlstm.zip.
Now we will upload our model. Note that for this example we are applying the model from a .ZIP file. The Aloha model is a protobuf file that has been defined for evaluating web pages, and we will configure it to use data in the tensorflow format.
Now that we have a model that we want to use we will create a deployment for it.
We will tell the deployment we are using a tensorflow model and give the deployment name and the configuration we want for the deployment.
To do this, we’ll create our pipeline that can ingest the data, pass the data to our Aloha model, and give us a final output. We’ll call our pipeline externalsdkpipeline, then deploy it so it’s ready to receive data. The deployment process usually takes about 45 seconds.
Now that the pipeline is deployed and our Aloha model is in place, we’ll perform a smoke test to verify the pipeline is up and running properly. We’ll use the infer_from_file command to load a single encoded URL into the inference engine and print the results back out.
The result should tell us that the tokenized URL is legitimate (0) or fraud (1). This sample data should return close to 1.
We can also infer an entire batch as one request either with the Pipeline infer method with multiple rows, or loaded from a file using the Pipeline infer_from_file method. For this example, we will run a batch on 1,000 records using the file data_1k.arrow. This is an Apache Arrow table, which gives the added benefit of speed and lower file size as a binary file rather than a text JSON file.
We’ll infer the 1,000 records, then convert it to a DataFrame and display the first 5 to save space in our Jupyter Notebook.
Now that our smoke test is successful, let’s really give it some data. We have two inference files we can use:
data-1k.arrow: Contains 10,000 inferences
data-25k.arrow: Contains 25,000 inferences
These inference inputs are Apache Arrow tables, which Wallaroo can ingest natively. These are binary files, and are faster to transmit because of their smaller size compared to JSON.
We’ll pipe the data-25k.arrow file through the pipeline deployment URL, and place the results in a file named response.df. Note that for larger batches of 1,000 inferences or more can be difficult to view in Juypter Hub because of its size, so we’ll only display the first 5 results of the inference.
When retrieving the pipeline inference URL through an external SDK connection, the External Inference URL will be returned. This URL will function provided that the Enable external URL inference endpoints is enabled. For more information, see the Wallaroo Model Endpoints Guide.
The API connection details can be retrieved through the Wallaroo client mlops() command. This will display the connection URL, bearer token, and other information. The bearer token is available for one hour before it expires.
For this example, the API connection details will be retrieved, then used to submit an inference request through the external inference URL retrieved earlier.
  % Total    % Received % Xferd  Average Speed   Time    Time     Time  Current
                                 Dload  Upload   Total   Spent    Left  Speed
100 26.7M  100 21.9M  100 4874k  2574k   557k  0:00:08  0:00:08 --:--:-- 4932k09k   603k  0:00:13  0:00:08  0:00:05 2818k
When finished with our tests, we will undeploy the pipeline so we have the Kubernetes resources back for other tasks. Note that if the deployment variable is unchanged pipeline.deploy() will restart the inference engine in the same configuration as before.
Organizations that develop machine learning models can deploy models to Wallaroo from their local systems to a Wallaroo instance through the Wallaroo SDK. The following guide is created to assist users with installing the Wallaroo SDK and making a standard connection to a Wallaroo instance.
aloha-cnn-lstm.zip: A pre-trained open source model that uses an Aloha CNN LSTM model for classifying Domain names as being either legitimate or being used for nefarious purposes such as malware distribution.
Test Data Files:
data_1k.arrow: 1,000 records
data_25k.arrow: 25,000 records
For this example, a virtual python environment will be used. This will set the necessary libraries and specific Python version required.
Prerequisites
The following is required for this tutorial:
A Wallaroo instance version 2023.1 or later.
Python 3.8.6 or later installed locally.
Conda: Used for managing python virtual environments.
The following Python libraries installed:
os
wallaroo: The Wallaroo SDK. Included with the Wallaroo JupyterHub service by default.
polars: Polars for DataFrame with native Apache Arrow support
General Steps
For our example, we will perform the following:
Wallaroo SDK Install
Set up a Python virtual environment through conda with the libraries that enable the virtual environment for use in a Jupyter Hub environment.
Install the Wallaroo SDK.
Wallaroo SDK from remote JupyterHub Demonstration (Optional): The following steps are an optional exercise to demonstrate using the Wallaroo SDK from a remote connection. The entire tutorial can be found on the Wallaroo Tutorials repository.
Connect to a remote Wallaroo instance.
Create a workspace for our work.
Upload the Aloha model.
Create a pipeline that can ingest our submitted data, submit it to the model, and export the results
Run a sample inference through our pipeline by loading a file
Retrieve the external deployment URL. This sample Wallaroo instance has been configured to create external inference URLs for pipelines. For more information, see the External Inference URL Guide.
Run a sample inference through our pipeline’s external URL and store the results in a file. This assumes that the External Inference URLs have been enabled for the target Wallaroo instance.
Undeploy the pipeline and return resources back to the Wallaroo instance’s Kubernetes environment.
Install Wallaroo SDK
Set Up Virtual Python Environment
To set up the Python virtual environment for use of the Wallaroo SDK:
From a terminal shell, create the Python virtual environment with conda. Replace wallaroosdk with the name of the virtual environment as required by your organization. Note that Python 3.8.6 and above is specified as a requirement for Python libraries used with the Wallaroo SDK. The following will install the latest version of Python 3.8.
conda create -n wallaroosdk python=3.8
Activate the new environment.
conda activate wallaroosdk
(Optional) For organizations who want to use the Wallaroo SDk from within Jupyter and similar environments:
Install the ipykernel library. This allows the JupyterHub notebooks to access the Python virtual environment as a kernel, and it required for the second part of this tutorial.
conda install ipykernel
Install the new virtual environment as a python kernel.
ipython kernel install --user --name=wallaroosdk
Install the Wallaroo SDK. This process may take several minutes while the other required Python libraries are added to the virtual environment.
IMPORTANT NOTE: The version of the Wallaroo SDK should match the Wallaroo instance. For example, this example connects to a Wallaroo Enterprise version 2023.1 instance, so the SDK version should be wallaroo==2023.4.0.
pip install wallaroo==2023.4.1
For organizations who will be using the Wallaroo SDK with Jupyter or similar services, the conda virtual environment has been installed, it can either be selected as a new Jupyter Notebook kernel, or the Notebook’s kernel can be set to an existing Jupyter notebook.
To use a new Notebook:
From the main menu, select File->New-Notebook.
From the Kernel selection dropbox, select the new virtual environment - in this case, wallaroosdk.
To update an existing Notebook to use the new virtual environment as a kernel:
From the main menu, select Kernel->Change Kernel.
Select the new kernel.
Sample Wallaroo Connection
With the Wallaroo Python SDK installed, remote commands and inferences can be performed through the following steps.
Open a Connection to Wallaroo
The first step is to connect to Wallaroo through the Wallaroo client.
This is accomplished using the wallaroo.Client(api_endpoint, auth_endpoint, auth_type command) command that connects to the Wallaroo instance services.
The Client method takes the following parameters:
api_endpoint (String): The URL to the Wallaroo instance API service.
auth_endpoint (String): The URL to the Wallaroo instance Keycloak service.
auth_type command (String): The authorization type. In this case, SSO.
The URLs are based on the Wallaroo Prefix and Wallaroo Suffix for the Wallaroo instance. For more information, see the DNS Integration Guide. In the example below, replace “YOUR PREFIX” and “YOUR SUFFIX” with the Wallaroo Prefix and Suffix, respectively.
Once run, the wallaroo.Client command provides a URL to grant the SDK permission to your specific Wallaroo environment. When displayed, enter the URL into a browser and confirm permissions. Depending on the configuration of the Wallaroo instance, the user will either be presented with a login request to the Wallaroo instance or be authenticated through a broker such as Google, Github, etc. To use the broker, select it from the list under the username/password login forms. For more information on Wallaroo authentication configurations, see the Wallaroo Authentication Configuration Guides.
Once authenticated, the user will verify adding the device the user is establishing the connection from. Once both steps are complete, then the connection is granted.
The connection is stored in the variable wl for use in all other Wallaroo calls.
importwallaroofromwallaroo.objectimportEntityNotFoundError# to display dataframe tablesfromIPython.displayimportdisplay# used to display dataframe information without truncatingimportpandasaspdpd.set_option('display.max_colwidth', None)
importpyarrowaspa
For wallarooPrefix = "YOUR PREFIX." and wallarooSuffix = "YOUR SUFFIX", enter the prefix and suffix for your Wallaroo instance DNS name. If the prefix instance is blank, then it can be wallarooPrefix = "". Note that the prefix includes the . for proper formatting. For example, if the prefix is empty and the suffix is wallaroo.example.com, then the settings would be:
# SSO login through keycloakwallarooPrefix="YOUR PREFIX."wallarooSuffix="YOUR SUFFIX"wl=wallaroo.Client(api_endpoint=f"https://{wallarooPrefix}api.{wallarooSuffix}",
auth_endpoint=f"https://{wallarooPrefix}keycloak.{wallarooSuffix}",
auth_type="sso")
Wallaroo Remote SDK Examples
The following examples can be used by an organization to test using the Wallaroo SDK from a remote location from their Wallaroo instance. These examples show how to create workspaces, deploy pipelines, and perform inferences through the SDK and API.
Create the Workspace
We will create a workspace to work in and call it the sdkworkspace, then set it as current workspace environment. We’ll also create our pipeline in advance as sdkpipeline.
IMPORTANT NOTE: For this example, the Aloha model is stored in the file alohacnnlstm.zip. When using tensor based models, the zip file must match the name of the tensor directory. For example, if the tensor directory is alohacnnlstm, then the .zip file must be named alohacnnlstm.zip.
Now we will upload our model. Note that for this example we are applying the model from a .ZIP file. The Aloha model is a protobuf file that has been defined for evaluating web pages, and we will configure it to use data in the tensorflow format.
Now that we have a model that we want to use we will create a deployment for it.
We will tell the deployment we are using a tensorflow model and give the deployment name and the configuration we want for the deployment.
To do this, we’ll create our pipeline that can ingest the data, pass the data to our Aloha model, and give us a final output. We’ll call our pipeline externalsdkpipeline, then deploy it so it’s ready to receive data. The deployment process usually takes about 45 seconds.
Now that the pipeline is deployed and our Aloha model is in place, we’ll perform a smoke test to verify the pipeline is up and running properly. We’ll use the infer_from_file command to load a single encoded URL into the inference engine and print the results back out.
The result should tell us that the tokenized URL is legitimate (0) or fraud (1). This sample data should return close to 1.
We can also infer an entire batch as one request either with the Pipeline infer method with multiple rows, or loaded from a file using the Pipeline infer_from_file method. For this example, we will run a batch on 1,000 records using the file data_1k.arrow. This is an Apache Arrow table, which gives the added benefit of speed and lower file size as a binary file rather than a text JSON file.
We’ll infer the 1,000 records, then convert it to a DataFrame and display the first 5 to save space in our Jupyter Notebook.
Now that our smoke test is successful, let’s really give it some data. We have two inference files we can use:
data_1k.arrow: Contains 10,000 inferences
data_25k.arrow: Contains 25,000 inferences
We’ll pipe the data-25k.json file through the pipeline deployment URL, and place the results in a file named response.txt. We’ll also display the time this takes. Note that for larger batches of 50,000 inferences or more can be difficult to view in Juypter Hub because of its size.
When retrieving the pipeline inference URL through an external SDK connection, the External Inference URL will be returned. This URL will function provided that the Enable external URL inference endpoints is enabled. For more information, see the Wallaroo Model Endpoints Guide.
The API connection details can be retrieved through the Wallaroo client mlops() command. This will display the connection URL, bearer token, and other information. The bearer token is available for one hour before it expires.
For this example, the API connection details will be retrieved, then used to submit an inference request through the external inference URL retrieved earlier.
  % Total    % Received % Xferd  Average Speed   Time    Time     Time  Current
                                 Dload  Upload   Total   Spent    Left  Speed
100 26.8M  100 22.0M  100 4874k  2381k   514k  0:00:09  0:00:09 --:--:-- 5260k0 4874k      0  2244k  0:00:02  0:00:02 --:--:-- 2247k
When finished with our tests, we will undeploy the pipeline so we have the Kubernetes resources back for other tasks. Note that if the deployment variable is unchanged pipeline.deploy() will restart the inference engine in the same configuration as before.