The following guides detail how to use the Wallaroo SDK. These include detailed instructions on classes, methods, and code examples.
When using the Wallaroo SDK, it is recommended that the Python modules used are the same as those used in the Wallaroo JupyterHub environments to ensure maximum compatibility. When installing modules in the Wallaroo JupyterHub environments, do not override the following modules or versions, as that may impact how the JupyterHub environments performance.
"appdirs == 1.4.4",
"gql == 3.4.0",
"ipython == 7.24.1",
"matplotlib == 3.5.0",
"numpy == 1.22.3",
"orjson == 3.8.0",
"pandas == 1.3.4",
"pyarrow == 12.0.1",
"PyJWT == 2.4.0",
"python_dateutil == 2.8.2",
"PyYAML == 6.0",
"requests == 2.25.1",
"scipy == 1.8.0",
"seaborn == 0.11.2",
"tenacity == 8.0.1",
# Required by gql?"requests_toolbelt>=0.9.1,<1",
# Required by the autogenerated ML Ops client"httpx >= 0.15.4,<0.24.0",
"attrs >= 21.3.0",
# These are documented as part of the autogenerated ML Ops requirements# "python = ^3.7",# "python-dateutil = ^2.8.0",
Model and Framework Support
Supported Models
The following frameworks are supported. Frameworks fall under either Native or Containerized runtimes in the Wallaroo engine. For more details, see the specific framework what runtime a specific model framework runs in.
IMPORTANT NOTE
Verify that the input types match the specified inputs, especially for Containerized Wallaroo Runtimes. For example, if the input is listed as a pyarrow.float32(), submitting a pyarrow.float64() may cause an error.
The supported frameworks include the specific version of the model framework supported by Wallaroo. It is highly recommended to verify that models uploaded to Wallaroo meet the library and version requirements to ensure proper functioning.
For the most recent release of Wallaroo 2023.4.0, the following native runtimes are supported:
If converting another ML Model to ONNX (PyTorch, XGBoost, etc) using the onnxconverter-common library, the supported DEFAULT_OPSET_NUMBER is 17.
Using different versions or settings outside of these specifications may result in inference issues and other unexpected behavior.
ONNX models always run in the Wallaroo Native Runtime space.
Data Schemas
ONNX models deployed to Wallaroo have the following data requirements.
Equal rows constraint: The number of input rows and output rows must match.
All inputs are tensors: The inputs are tensor arrays with the same shape.
Data Type Consistency: Data types within each tensor are of the same type.
Equal Rows Constraint
Inference performed through ONNX models are assumed to be in batch format, where each input row corresponds to an output row. This is reflected in the in fields returned for an inference. In the following example, each input row for an inference is related directly to the inference output.
For models that require ragged tensor or other shapes, see other data formatting options such as Bring Your Own Predict models.
Data Type Consistency
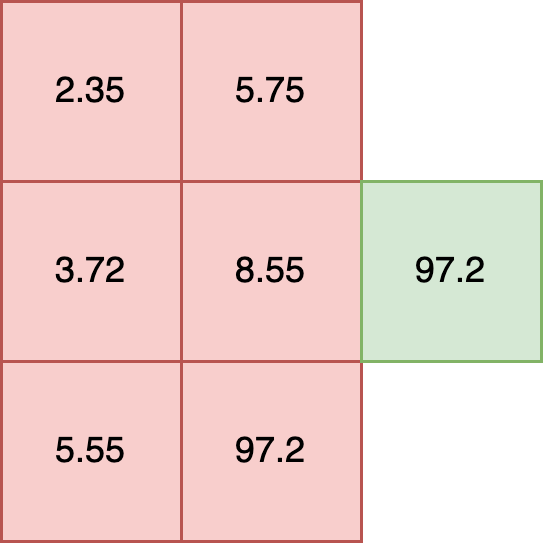
All inputs into an ONNX model must have the same internal data type. For example, the following is valid because all of the data types within each element are float32.
t= [
[2.35, 5.75],
[3.72, 8.55],
[5.55, 97.2]
]
The following is invalid, as it mixes floats and strings in each element:
These requirements are <strong>not</strong> for Tensorflow Keras models, only for non-Keras Tensorflow models in the SavedModel format. For Tensorflow Keras deployment in Wallaroo, see the Tensorflow Keras requirements.
TensorFlow File Format
TensorFlow models are .zip file of the SavedModel format. For example, the Aloha sample TensorFlow model is stored in the directory alohacnnlstm:
Python models uploaded to Wallaroo are executed as a native runtime.
Note that Python models - aka “Python steps” - are standalone python scripts that use the python libraries natively supported by the Wallaroo platform. These are used for either simple model deployment (such as ARIMA Statsmodels), or data formatting such as the postprocessing steps. A Wallaroo Python model will be composed of one Python script that matches the Wallaroo requirements.
This is contrasted with Arbitrary Python models, also known as Bring Your Own Predict (BYOP) allow for custom model deployments with supporting scripts and artifacts. These are used with pre-trained models (PyTorch, Tensorflow, etc) along with whatever supporting artifacts they require. Supporting artifacts can include other Python modules, model files, etc. These are zipped with all scripts, artifacts, and a requirements.txt file that indicates what other Python models need to be imported that are outside of the typical Wallaroo platform.
Python Models Requirements
Python models uploaded to Wallaroo are Python scripts that must include the wallaroo_json method as the entry point for the Wallaroo engine to use it as a Pipeline step.
This method receives the results of the previous Pipeline step, and its return value will be used in the next Pipeline step.
If the Python model is the first step in the pipeline, then it will be receiving the inference request data (for example: a preprocessing step). If it is the last step in the pipeline, then it will be the data returned from the inference request.
In the example below, the Python model is used as a post processing step for another ML model. The Python model expects to receive data from a ML Model who’s output is a DataFrame with the column dense_2. It then extracts the values of that column as a list, selects the first element, and returns a DataFrame with that element as the value of the column output.
In line with other Wallaroo inference results, the outputs of a Python step that returns a pandas DataFrame or Arrow Table will be listed in the out. metadata, with all inference outputs listed as out.{variable 1}, out.{variable 2}, etc. In the example above, this results the output field as the out.output field in the Wallaroo inference result.
During the model upload process, the Wallaroo instance will attempt to convert the model to a Native Wallaroo Runtime. If unsuccessful based , it will create a Wallaroo Containerized Runtime for the model. See the model deployment section for details on how to configure pipeline resources based on the model’s runtime.
Hugging Face Schemas
Input and output schemas for each Hugging Face pipeline are defined below. Note that adding additional inputs not specified below will raise errors, except for the following:
Framework.HUGGING_FACE_IMAGE_TO_TEXT
Framework.HUGGING_FACE_TEXT_CLASSIFICATION
Framework.HUGGING_FACE_SUMMARIZATION
Framework.HUGGING_FACE_TRANSLATION
Additional inputs added to these Hugging Face pipelines will be added as key/pair value arguments to the model’s generate method. If the argument is not required, then the model will default to the values coded in the original Hugging Face model’s source code.
Any parameter that is not part of the required inputs list will be forwarded to the model as a key/pair value to the underlying models generate method. If the additional input is not supported by the model, an error will be returned.
Any parameter that is not part of the required inputs list will be forwarded to the model as a key/pair value to the underlying models generate method. If the additional input is not supported by the model, an error will be returned.
Schemas:
input_schema=pa.schema([
pa.field('inputs', pa.string()),
pa.field('return_text', pa.bool_()),
pa.field('return_tensors', pa.bool_()),
pa.field('clean_up_tokenization_spaces', pa.bool_()),
# pa.field('extra_field', pa.int64()), # every extra field you specify will be forwarded as a key/value pair])
output_schema=pa.schema([
pa.field('summary_text', pa.string()),
])
input_schema=pa.schema([
pa.field('inputs', pa.string()), # requiredpa.field('top_k', pa.int64()), # optionalpa.field('function_to_apply', pa.string()), # optional])
output_schema=pa.schema([
pa.field('label', pa.list_(pa.string(), list_size=2)), # list with a number of items same as top_k, list_size can be skipped but may lead in worse performancepa.field('score', pa.list_(pa.float64(), list_size=2)), # list with a number of items same as top_k, list_size can be skipped but may lead in worse performance])
Any parameter that is not part of the required inputs list will be forwarded to the model as a key/pair value to the underlying models generate method. If the additional input is not supported by the model, an error will be returned.
Schemas:
input_schema=pa.schema([
pa.field('inputs', pa.string()), # requiredpa.field('return_tensors', pa.bool_()), # optionalpa.field('return_text', pa.bool_()), # optionalpa.field('clean_up_tokenization_spaces', pa.bool_()), # optionalpa.field('src_lang', pa.string()), # optionalpa.field('tgt_lang', pa.string()), # optional# pa.field('extra_field', pa.int64()), # every extra field you specify will be forwarded as a key/value pair])
output_schema=pa.schema([
pa.field('translation_text', pa.string()),
])
input_schema=pa.schema([
pa.field('inputs', pa.string()), # requiredpa.field('candidate_labels', pa.list_(pa.string(), list_size=2)), # requiredpa.field('hypothesis_template', pa.string()), # optionalpa.field('multi_label', pa.bool_()), # optional])
output_schema=pa.schema([
pa.field('sequence', pa.string()),
pa.field('scores', pa.list_(pa.float64(), list_size=2)), # same as number of candidate labels, list_size can be skipped by may result in slightly worse performancepa.field('labels', pa.list_(pa.string(), list_size=2)), # same as number of candidate labels, list_size can be skipped by may result in slightly worse performance])
input_schema=pa.schema([
pa.field('images',
pa.list_(
pa.list_(
pa.list_(
pa.int64(),
list_size=3 ),
list_size=640 ),
list_size=480 )),
pa.field('candidate_labels', pa.list_(pa.string(), list_size=3)),
pa.field('threshold', pa.float64()),
# pa.field('top_k', pa.int64()), # we want the model to return exactly the number of predictions, we shouldn't specify this])
output_schema=pa.schema([
pa.field('score', pa.list_(pa.float64())), # variable output, depending on detected objectspa.field('label', pa.list_(pa.string())), # variable output, depending on detected objectspa.field('box',
pa.list_( # dynamic output, i.e. dynamic number of boxes per input image, each sublist contains the 4 box coordinates pa.list_(
pa.int64(),
list_size=4 ),
),
),
])
Any parameter that is not part of the required inputs list will be forwarded to the model as a key/pair value to the underlying models generate method. If the additional input is not supported by the model, an error will be returned.
input_schema=pa.schema([
pa.field('inputs', pa.string()),
pa.field('return_tensors', pa.bool_()), # optionalpa.field('return_text', pa.bool_()), # optionalpa.field('return_full_text', pa.bool_()), # optionalpa.field('clean_up_tokenization_spaces', pa.bool_()), # optionalpa.field('prefix', pa.string()), # optionalpa.field('handle_long_generation', pa.string()), # optional# pa.field('extra_field', pa.int64()), # every extra field you specify will be forwarded as a key/value pair])
output_schema=pa.schema([
pa.field('generated_text', pa.list_(pa.string(), list_size=1))
])
input_schema=pa.schema([
pa.field('inputs', pa.list_(pa.float32())), # required: the audio stored in numpy arrays of shape (num_samples,) and data type `float32`pa.field('return_timestamps', pa.string()) # optional: return start & end times for each predicted chunk])
output_schema=pa.schema([
pa.field('text', pa.string()), # required: the output text corresponding to the audio inputpa.field('chunks', pa.list_(pa.struct([('text', pa.string()), ('timestamp', pa.list_(pa.float32()))]))), # required (if `return_timestamps` is set), start & end times for each predicted chunk])
IMPORTANT NOTE: The PyTorch model must be in TorchScript format. scripting (i.e. torch.jit.script() is always recommended over tracing (i.e. torch.jit.trace()). From the PyTorch documentation: “Scripting preserves dynamic control flow and is valid for inputs of different sizes.” For more details, see TorchScript-based ONNX Exporter: Tracing vs Scripting.
During the model upload process, the Wallaroo instance will attempt to convert the model to a Native Wallaroo Runtime. If unsuccessful based , it will create a Wallaroo Containerized Runtime for the model. See the model deployment section for details on how to configure pipeline resources based on the model’s runtime.
IMPORTANT CONFIGURATION NOTE: For PyTorch input schemas, the floats must be pyarrow.float32() for the PyTorch model to be converted to the Native Wallaroo Runtime during the upload process.
During the model upload process, the Wallaroo instance will attempt to convert the model to a Native Wallaroo Runtime. If unsuccessful based , it will create a Wallaroo Containerized Runtime for the model. See the model deployment section for details on how to configure pipeline resources based on the model’s runtime.
SKLearn Schema Inputs
SKLearn schema follows a different format than other models. To prevent inputs from being out of order, the inputs should be submitted in a single row in the order the model is trained to accept, with all of the data types being the same. For example, the following DataFrame has 4 columns, each column a float.
sepal length (cm)
sepal width (cm)
petal length (cm)
petal width (cm)
0
5.1
3.5
1.4
0.2
1
4.9
3.0
1.4
0.2
For submission to an SKLearn model, the data input schema will be a single array with 4 float values.
When submitting as an inference, the DataFrame is converted to rows with the column data expressed as a single array. The data must be in the same order as the model expects, which is why the data is submitted as a single array rather than JSON labeled columns: this insures that the data is submitted in the exact order as the model is trained to accept.
Original DataFrame:
sepal length (cm)
sepal width (cm)
petal length (cm)
petal width (cm)
0
5.1
3.5
1.4
0.2
1
4.9
3.0
1.4
0.2
Converted DataFrame:
inputs
0
[5.1, 3.5, 1.4, 0.2]
1
[4.9, 3.0, 1.4, 0.2]
SKLearn Schema Outputs
Outputs for SKLearn that are meant to be predictions or probabilities when output by the model are labeled in the output schema for the model when uploaded to Wallaroo. For example, a model that outputs either 1 or 0 as its output would have the output schema as follows:
During the model upload process, the Wallaroo instance will attempt to convert the model to a Native Wallaroo Runtime. If unsuccessful based , it will create a Wallaroo Containerized Runtime for the model. See the model deployment section for details on how to configure pipeline resources based on the model’s runtime.
TensorFlow Keras SavedModel Format
TensorFlow Keras SavedModel models are .zip file of the SavedModel format. For example, the Aloha sample TensorFlow model is stored in the directory alohacnnlstm:
During the model upload process, the Wallaroo instance will attempt to convert the model to a Native Wallaroo Runtime. If unsuccessful based , it will create a Wallaroo Containerized Runtime for the model. See the model deployment section for details on how to configure pipeline resources based on the model’s runtime.
XGBoost Schema Inputs
XGBoost schema follows a different format than other models. To prevent inputs from being out of order, the inputs should be submitted in a single row in the order the model is trained to accept, with all of the data types being the same. If a model is originally trained to accept inputs of different data types, it will need to be retrained to only accept one data type for each column - typically pa.float64() is a good choice.
For example, the following DataFrame has 4 columns, each column a float.
sepal length (cm)
sepal width (cm)
petal length (cm)
petal width (cm)
0
5.1
3.5
1.4
0.2
1
4.9
3.0
1.4
0.2
For submission to an XGBoost model, the data input schema will be a single array with 4 float values.
When submitting as an inference, the DataFrame is converted to rows with the column data expressed as a single array. The data must be in the same order as the model expects, which is why the data is submitted as a single array rather than JSON labeled columns: this insures that the data is submitted in the exact order as the model is trained to accept.
Original DataFrame:
sepal length (cm)
sepal width (cm)
petal length (cm)
petal width (cm)
0
5.1
3.5
1.4
0.2
1
4.9
3.0
1.4
0.2
Converted DataFrame:
inputs
0
[5.1, 3.5, 1.4, 0.2]
1
[4.9, 3.0, 1.4, 0.2]
XGBoost Schema Outputs
Outputs for XGBoost are labeled based on the trained model outputs. For this example, the output is simply a single output listed as output. In the Wallaroo inference result, it is grouped with the metadata out as out.output.
Arbitrary Python models, also known as Bring Your Own Predict (BYOP) allow for custom model deployments with supporting scripts and artifacts. These are used with pre-trained models (PyTorch, Tensorflow, etc) along with whatever supporting artifacts they require. Supporting artifacts can include other Python modules, model files, etc. These are zipped with all scripts, artifacts, and a requirements.txt file that indicates what other Python models need to be imported that are outside of the typical Wallaroo platform.
Contrast this with Wallaroo Python models - aka “Python steps”. These are standalone python scripts that use the python libraries natively supported by the Wallaroo platform. These are used for either simple model deployment (such as ARIMA Statsmodels), or data formatting such as the postprocessing steps. A Wallaroo Python model will be composed of one Python script that matches the Wallaroo requirements.
Arbitrary Python File Requirements
Arbitrary Python (BYOP) models are uploaded to Wallaroo via a ZIP file with the following components:
Artifact
Type
Description
Python scripts aka .py files with classes that extend mac.inference.Inference and mac.inference.creation.InferenceBuilder
Python Script
Extend the classes mac.inference.Inference and mac.inference.creation.InferenceBuilder. These are included with the Wallaroo SDK. Further details are in Arbitrary Python Script Requirements. Note that there is no specified naming requirements for the classes that extend mac.inference.Inference and mac.inference.creation.InferenceBuilder - any qualified class name is sufficient as long as these two classes are extended as defined below.
requirements.txt
Python requirements file
This sets the Python libraries used for the arbitrary python model. These libraries should be targeted for Python 3.8 compliance. These requirements and the versions of libraries should be exactly the same between creating the model and deploying it in Wallaroo. This insures that the script and methods will function exactly the same as during the model creation process.
Other artifacts
Files
Other models, files, and other artifacts used in support of this model.
For example, the if the arbitrary python model will be known as vgg_clustering, the contents may be in the following structure, with vgg_clustering as the storage directory:
Note the inclusion of the custom_inference.py file. This file name is not required - any Python script or scripts that extend the classes listed above are sufficient. This Python script could have been named vgg_custom_model.py or any other name as long as it includes the extension of the classes listed above.
The sample arbitrary python model file is created with the command zip -r vgg_clustering.zip vgg_clustering/.
Wallaroo Arbitrary Python uses the Wallaroo SDK mac module, included in the Wallaroo SDK 2023.2.1 and above. See the Wallaroo SDK Install Guides for instructions on installing the Wallaroo SDK.
Arbitrary Python Script Requirements
The entry point of the arbitrary python model is any python script that extends the following classes. These are included with the Wallaroo SDK. The required methods that must be overridden are specified in each section below.
mac.inference.Inference interface serves model inferences based on submitted input some input. Its purpose is to serve inferences for any supported arbitrary model framework (e.g. scikit, keras etc.).
classDiagram
    class Inference {
        <<Abstract>>
        +model Optional[Any]
        +expected_model_types()* Set
        +predict(input_data: InferenceData)*  InferenceData
        -raise_error_if_model_is_not_assigned() None
        -raise_error_if_model_is_wrong_type() None
    }
mac.inference.creation.InferenceBuilder builds a concrete Inference, i.e. instantiates an Inference object, loads the appropriate model and assigns the model to to the Inference object.
classDiagram
    class InferenceBuilder {
        +create(config InferenceConfig) * Inference
        -inference()* Any
    }
mac.inference.Inference
mac.inference.Inference Objects
Object
Type
Description
model (Required)
[Any]
One or more objects that match the expected_model_types. This can be a ML Model (for inference use), a string (for data conversion), etc. See Arbitrary Python Examples for examples.
mac.inference.Inference Methods
Method
Returns
Description
expected_model_types (Required)
Set
Returns a Set of models expected for the inference as defined by the developer. Typically this is a set of one. Wallaroo checks the expected model types to verify that the model submitted through the InferenceBuilder method matches what this Inference class expects.
The entry point for the Wallaroo inference with the following input and output parameters that are defined when the model is updated.
mac.types.InferenceData: The inputInferenceData is a Dictionary of numpy arrays derived from the input_schema detailed when the model is uploaded, defined in PyArrow.Schema format.
mac.types.InferenceData: The output is a Dictionary of numpy arrays as defined by the output parameters defined in PyArrow.Schema format.
The InferenceDataValidationError exception is raised when the input data does not match mac.types.InferenceData.
raise_error_if_model_is_not_assigned
N/A
Error when a model is not set to Inference.
raise_error_if_model_is_wrong_type
N/A
Error when the model does not match the expected_model_types.
IMPORTANT NOTE
Verify that the inputs and outputs match the InferenceData input and output types: a Dictionary of numpy arrays defined by the input_schema and output_schema parameters when uploading the model to the Wallaroo instance. The following code is an example of a Dictionary of numpy arrays.
preds=self.model.predict(data)
preds=preds.numpy()
rows, _=preds.shapepreds=preds.reshape((rows,))
return {"prediction": preds} # a Dictionary of numpy arrays.
The example, the expected_model_types can be defined for the KMeans model.
InferenceBuilder builds a concrete Inference, i.e. instantiates an Inference object, loads the appropriate model and assigns the model to the Inference.
classDiagram
    class InferenceBuilder {
        +create(config InferenceConfig) * Inference
        -inference()* Any
    }
Each model that is included requires its own InferenceBuilder. InferenceBuilder loads one model, then submits it to the Inference class when created. The Inference class checks this class against its expected_model_types() Set.
Creates an Inference subclass, then assigns a model and attributes. The CustomInferenceConfig is used to retrieve the config.model_path, which is a pathlib.Path object pointing to the folder where the model artifacts are saved. Every artifact loaded must be relative to config.model_path. This is set when the arbitrary python .zip file is uploaded and the environment for running it in Wallaroo is set. For example: loading the artifact vgg_clustering\feature_extractor.h5 would be set with config.model_path \ feature_extractor.h5. The model loaded must match an existing module. For our example, this is from sklearn.cluster import KMeans, and this must match the Inferenceexpected_model_types.
inference
custom Inference instance.
Returns the instantiated custom Inference object created from the create method.
Arbitrary Python Runtime
Arbitrary Python always run in the containerized model runtime.
Wallaroo users can register their trained MLFlow ML Models from a containerized model container registry into their Wallaroo instance and perform inferences with it through a Wallaroo pipeline.
As of this time, Wallaroo only supports MLFlow 1.30.0 containerized models. For information on how to containerize an MLFlow model, see the MLFlow Documentation.
The following data types are supported for transporting data to and from Wallaroo in the following run times:
ONNX
TensorFlow
MLFlow
Data Type Conditions
The following conditions apply to data types used in inference requests.
None or Null data types are not submitted. All fields must have submitted values that match their data type. For example, if the schema expects a float value, then some value of type float must be submitted and can not be None or Null. If a schema expects a string value, then some value of type string must be submitted, etc.
datetime data types must be converted to string.
ONNX models support multiple inputs only of the same data type.
Runtime
BFloat16*
Float16
Float32
Float64
ONNX
X
X
TensorFlow
X
X
X
MLFlow
X
X
X
* (Brain Float 16, represented internally as a f32)
Runtime
Int8
Int16
Int32
Int64
ONNX
X
X
X
X
TensorFlow
X
X
X
X
MLFlow
X
X
X
X
Runtime
Uint8
Uint16
Uint32
Uint64
ONNX
X
X
X
X
TensorFlow
X
X
X
X
MLFlow
X
X
X
X
Runtime
Boolean
Utf8 (String)
Complex 64
Complex 128
FixedSizeList*
ONNX
X
Tensor
X
X
X
MLFlow
X
X
X
* Fixed sized lists of any of the previously supported data types.
How to connect to a Wallaroo instance through the Wallaroo SDK
Users connect to a Wallaroo instance with the Wallaroo Client class. This connection can be made from within the Wallaroo instance, or external from the Wallaroo instance via the Wallaroo SDK.
The following methods are supported in connecting to the Wallaroo instance:
Connect from Within the Wallaroo Instance: Connect within the JupyterHub service or other method within the Kubernetes cluster hosting the Wallaroo instance. This requires confirming the connections with the Wallaroo instance through a browser link.
Connect from Outside the Wallaroo Instance: Connect via the Wallaroo SDK via an external connection to the Kubernetes cluster hosting the Wallaroo instance. This requires confirming the connections with the Wallaroo instance through a browser link.
Automated Connection: Connect to the Wallaroo instance by providing the username and password directly into the request. This bypasses confirming the connections with the Wallaroo instance through a browser link.
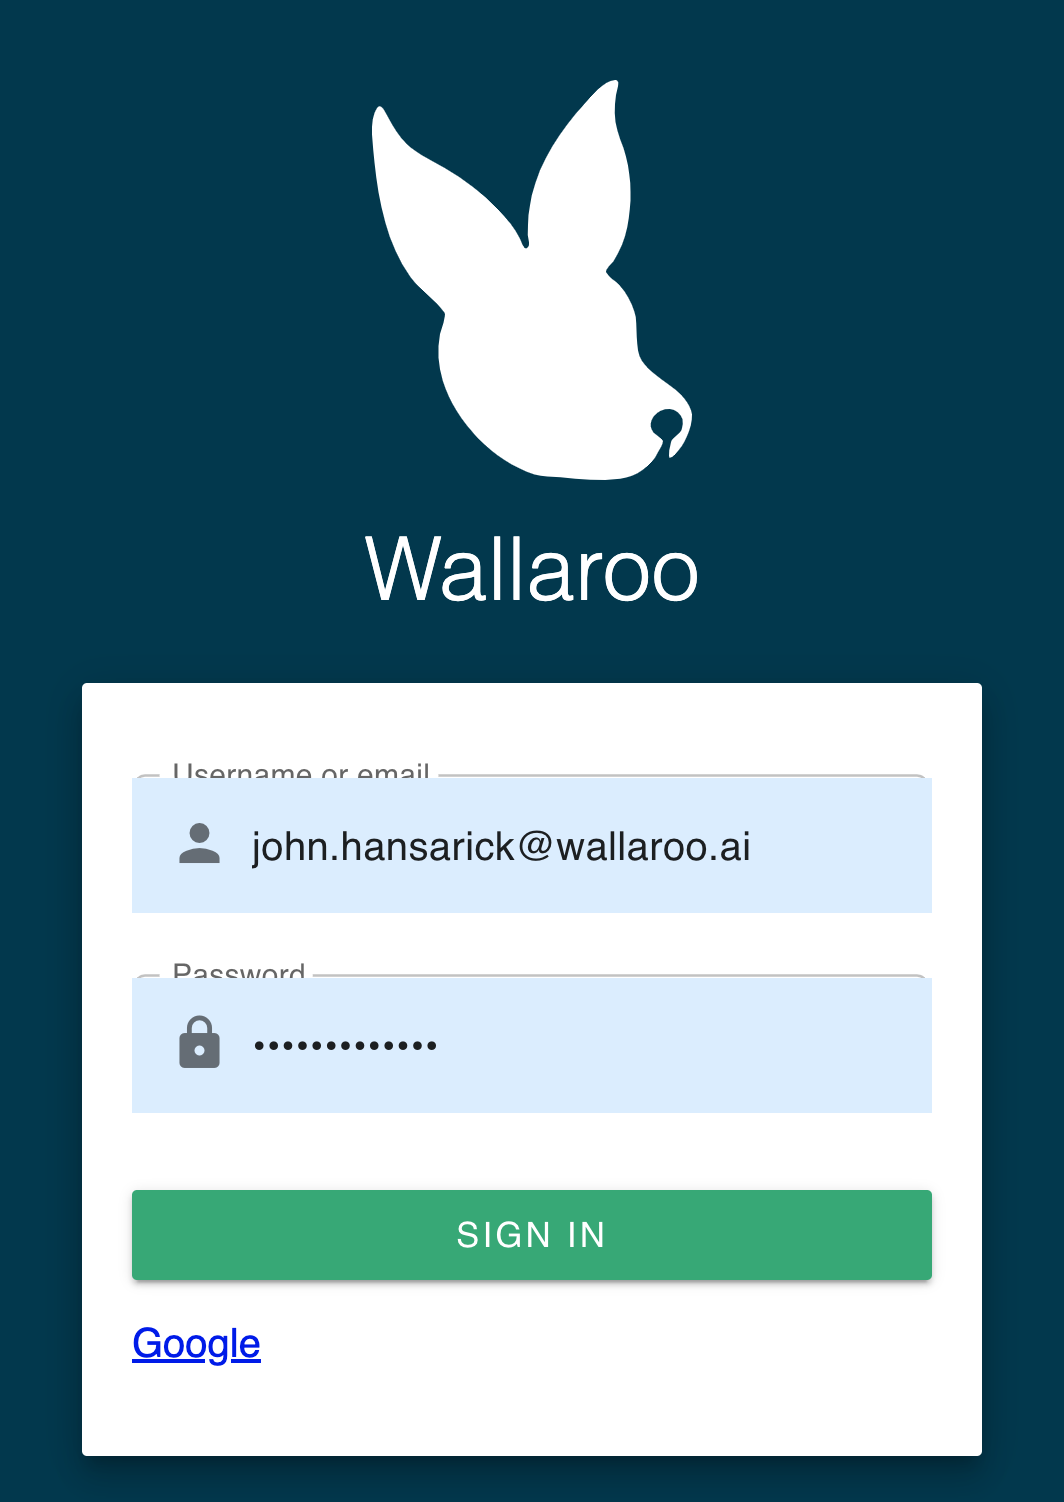
Once run, the wallaroo.Client command provides a URL to grant the SDK permission to your specific Wallaroo environment. When displayed, enter the URL into a browser and confirm permissions. Depending on the configuration of the Wallaroo instance, the user will either be presented with a login request to the Wallaroo instance or be authenticated through a broker such as Google, Github, etc. To use the broker, select it from the list under the username/password login forms. For more information on Wallaroo authentication configurations, see the Wallaroo Authentication Configuration Guides.
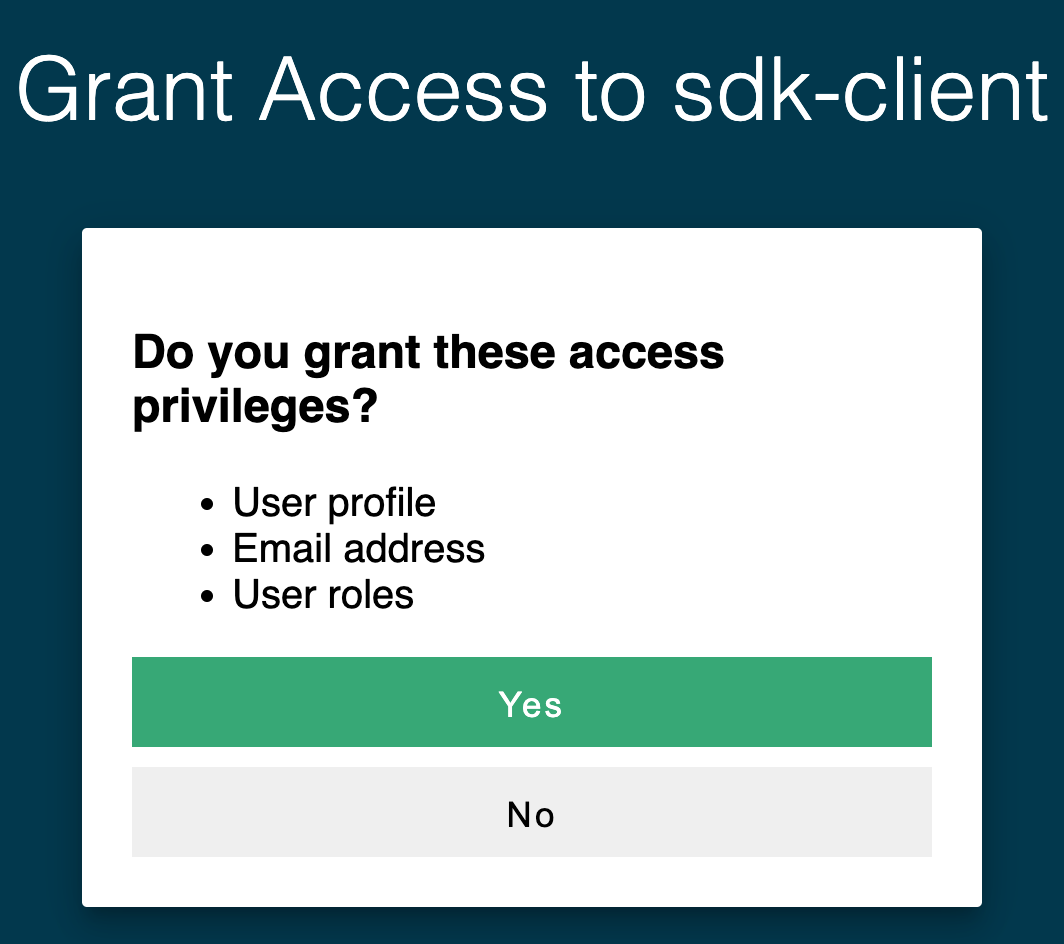
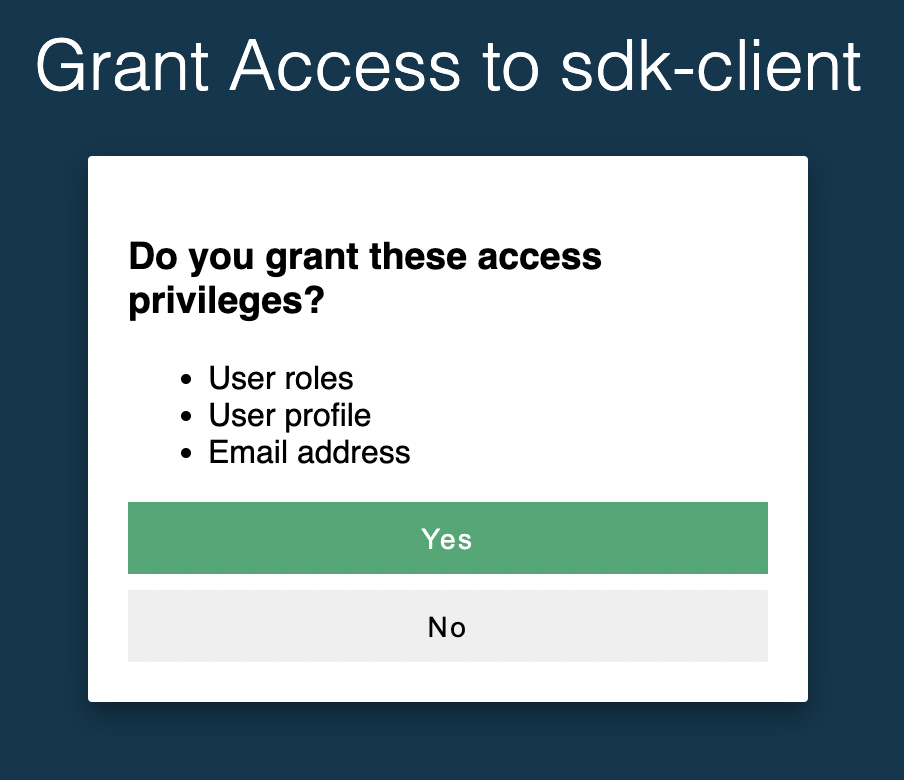
Once authenticated, the user will verify adding the device the user is establishing the connection from. Once both steps are complete, then the connection is granted.
Connect from Within the Wallaroo Instance
Users who connect from within their Wallaroo instance’s Kubernetes environment, such as through the Wallaroo provided JupyterHub service, will be authenticated with the Wallaroo Client() method.
The first step in using Wallaroo is creating a connection. To connect to your Wallaroo environment:
Import the wallaroo library:
importwallaroo
Open a connection to the Wallaroo environment with the wallaroo.Client() command and save it to a variable.
In this example, the Wallaroo connection is saved to the variable wl.
wl=wallaroo.Client()
A verification URL will be displayed. Enter it into your browser and grant access to the SDK client.
Once this is complete, you will be able to continue with your Wallaroo commands.
Connect from Outside the Wallaroo Instance
Users who have installed the Wallaroo SDK from an external location, such as their own JupyterHub service, Google Workbench, or other services can connect via Single-Sign On (SSO). This is accomplished using the wallaroo.Client(api_endpoint, auth_endpoint, auth_type command="sso") command that connects to the Wallaroo instance services. For more information on the DNS names of Wallaroo services, see the DNS Integration Guide.
api_endpoint (String): The URL to the Wallaroo instance API service.
auth_endpoint (String): The URL to the Wallaroo instance Keycloak service.
auth_type command (String): The authorization type. In this case, SSO.
Once run, the wallaroo.Client command provides a URL to grant the SDK permission to your specific Wallaroo environment. When displayed, enter the URL into a browser and confirm permissions. This connection is stored into a variable that can be referenced later.
In this example, a connection will be made to the Wallaroo instance shadowy-unicorn-5555.wallaroo.ai through SSO authentication.
importwallaroofromwallaroo.objectimportEntityNotFoundError# SSO login through keycloakwl=wallaroo.Client(api_endpoint="https://shadowy-unicorn-5555.api.wallaroo.ai",
auth_endpoint="https://shadowy-unicorn-5555.keycloak.wallaroo.ai",
auth_type="sso")
Users can connect either internally or externally without confirming the connection via a browser link using the wallaroo.Client(api_endpoint, auth_endpoint, auth_type="user_password") command for external connections, and wallaroo.Client(auth_type="user_password") with internal connections.
IMPORTANT NOTE
Using the parameter auth_type="user_password" does not require the verification of the connection’s permissions through a browser link. This is useful in automated environments.
IMPORTANT NOTE
Organizations using an identity providermust have both a username and password already stored in the Wallaroo Keycloak service for this method. By default, users who only use identity providers for authentication will not have a password set. See Wallaroo User Management for more information.
The auth_type="user_password" parameter requires either the environment parameter WALLAROO_SDK_CREDENTIALS with the following settings:
In typical installations, the username and email settings will both be the user’s email address.
For example, if the username is steve, the password is hello and the email is steve@ex.co then the ``WALLAROO_SDK_CREDENTIALS` can be set in the following ways:
# Import via fileos.environ["WALLAROO_SDK_CREDENTIALS"] ='creds.json'wl=wallaroo.Client(auth_type="user_password")
The other method:
# Set directlyos.environ["WALLAROO_USER"] ='username@company.com'os.environ["WALLAROO_PASSWORD"] ='password'wl=wallaroo.Client(auth_type="user_password")
For automated connections, using the environment options tied into a specific file with minimum access is recommended.
The following example shows connecting to a remote Wallaroo instance via the auth_type="user_password" parameter with the credentials stored in the creds.json file using the format above:
2 - Wallaroo SDK Essentials Guide: Data Connections Management
How to create and manage Wallaroo Data Connections through the Wallaroo SDK
Wallaroo Data Connections are provided to establish connections to external data stores for requesting or submitting information. They provide a source of truth for data source connection information to enable repeatability and access control within your ecosystem. The actual implementation of data connections are managed through other means, such as Wallaroo Pipeline Orchestrators and Tasks, where the libraries and other tools used for the data connection can be stored.
Wallaroo Data Connections have the following properties:
Available across the Wallaroo Instance: Data Connections are created at the Wallaroo instance level.
Tied to a Wallaroo Workspace: Data Connections, like pipeline and models, are tied to a workspace. This allows organizations to limit data connection access by restricting users to specific workspaces.
Support different types: Data Connections support various types of connections such as ODBC, Kafka, etc.
Create Data Connection
Data Connections are created through the Wallaroo Client create_connection(name, type, details) method.
Parameter
Type
Description
name
string (Required)
The name of the connection. Names must be unique. Attempting to create a connection with the same name as an existing connection will cause an error.
type
string (Required)
The user defined type of connection.
details
Dict (Required)
User defined configuration details for the data connection. These can be {'username':'dataperson', 'password':'datapassword', 'port': 3339}, or {'token':'abcde123==', 'host':'example.com', 'port:1234'}, or other user defined combinations.
The SDK allows the data connections to be fully defined and stored for later use. This allows whatever type of data connection the organization uses to be defined, then applied to a workspace for other Wallaroo users to integrate into their code.
When data connections are displayed via the Wallaroo Client list_connections, the details field is removed to not show sensitive information by default.
The Wallaroo client get_connection(name) method retrieves the connection with the Connection name matching the name parameter.
Parameter
Type
Description
name
string (Required)
The name of the connection.
In the following example, the connection name external_inference_connection will be retrieved and stored into the variable inference_source_connection.
The Wallaroo Client list_connections() method lists all connections for the Wallaroo instance. When data connections are displayed via the Wallaroo Client list_connections, the details field is removed to not show sensitive information by default.
wl.list_connections()
name
connection type
details
created at
houseprice_arrow_table
HTTPFILE
*****
2023-05-04T17:52:32.249322+00:00
Add Data Connection to Workspace
The method Workspace add_connection(connection_name) adds a Data Connection to a workspace, and takes the following parameters.
Parameter
Type
Description
name
string (Required)
The name of the Data Connection
Connection Details
The Connection method details() retrieves a the connection details() as a dict.
The Workspace method remove_connection(connection_name) removes the connection from the workspace, but does not delete the connection from the Wallaroo instance. This method takes the following parameters.
Parameter
Type
Description
name
String (Required)
The name of the connection to be removed from the workspace.
Delete Connection
The Connection method delete_connection() removes the connection from the Wallaroo instance.
Before deleting a connection, it must be removed from all workspaces that it is attached to.
How to create and use Wallaroo Workspaces through the Wallaroo SDK
Workspace Management
Workspaces are used to segment groups of models into separate environments. This allows different users to either manage or have access to each workspace, controlling the models and pipelines assigned to the workspace.
Workspace Naming Requirements
Workspace names map onto Kubernetes objects, and must be DNS compliant. Workspace names must be ASCII alpha-numeric characters or dash (-) only. . and _ are not allowed.
Workspace names are not forced to be unique. You can have 50 workspaces all named my-amazing-workspace, which can cause confusion in determining which workspace to use.
It is recommended that organizations agree on a naming convention and select the workspace to use rather than creating a new one each time.
To create a workspace, use the create_workspace("{WORKSPACE NAME}") command through an established Wallaroo connection and store the workspace settings into a new variable. Once the new workspace is created, the user who created the workspace is assigned as its owner. The following template is an example:
For example, if the connection is stored in the variable wl and the new workspace will be named imdb, then the command to store it in the new_workspace variable would be:
The command list_workspaces() displays the workspaces that are part of the current Wallaroo connection. The following details are returned as an array:
Parameter
Type
Description
Name
String
The name of the workspace. Note that workspace names are not unique.
Created At
DateTime
The date and time the workspace was created.
Users
Array[Users]
A list of all users assigned to this workspace.
Models
Integer
The number of models uploaded to the workspace.
Pipelines
Integer
The number of pipelines in the environment.
For example, for the Wallaroo connection wl the following workspaces are returned:
The current workspace can be set through set_current_workspace for the Wallaroo connection through the following call, and returns the workspace details as a JSON object:
The following example creates the workspace imdb-workspace through the Wallaroo connection stored in the variable wl, then sets it as the current workspace:
To set the current workspace from an established workspace, the easiest method is to use list_workspaces() then set the current workspace as the array value displayed. For example, from the following list_workspaces() command the 3rd workspace element demandcurve-workspace can be assigned as the current workspace:
Users are added to the workspace via their email address through the wallaroo.workspace.Workspace.add_user({email address}) command. The email address must be assigned to a current user in the Wallaroo platform before they can be assigned to the workspace.
For example, the following workspace imdb-workspace has the user steve@ex.co. We will add the user john@ex.co to this workspace:
Removing a user from a workspace is performed through the wallaroo.workspace.Workspace.remove_user({email address}) command, where the {email address} matches a user in the workspace.
In the following example, the user john@ex.co is removed from the workspace imdb-workspace.
To update the owner of workspace, or promote an existing user of a workspace to the owner of workspace, use the wallaroo.workspace.Workspace.add_owner({email address}) command. The email address must be assigned to a current user in the Wallaroo platform before they can be assigned as the owner to the workspace.
The following example shows assigning the user john@ex.co as an owner to the workspace imdb-workspace:
4 - Wallaroo SDK Essentials Guide: Model Uploads and Registrations
How to create and manage Wallaroo Models Uploads through the Wallaroo SDK
Models are uploaded or registered to a Wallaroo workspace depending on the model framework and version.
Wallaroo Engine Runtimes
Pipeline deployment configurations provide two runtimes to run models in the Wallaroo engine:
Native Runtimes: Models that are deployed “as is” with the Wallaroo engine. These are:
ONNX
Python step
Tensorflow 2.9.1 in SavedModel format
Containerized Runtimes: Containerized models such as MLFlow or Arbitrary Python. These are run in the Wallaroo engine in their containerized form.
Non-Native Runtimes: Models that when uploaded are either converted to a native Wallaroo runtime, or are containerized so they can be run in the Wallaroo engine. When uploaded, Wallaroo will attempt to convert it to a native runtime. If it can not be converted, then it will be packed in a Wallaroo containerized model based on its framework type.
Pipeline Deployment Configurations
Pipeline configurations are dependent on whether the model is converted to the Native Runtime space, or Containerized Model Runtime space.
This model will always run in the native runtime space.
Native Runtime Pipeline Deployment Configuration Example
The following configuration allocates 0.25 CPU and 1 Gi RAM to the native runtime models for a pipeline.
The following frameworks are supported. Frameworks fall under either Native or Containerized runtimes in the Wallaroo engine. For more details, see the specific framework what runtime a specific model framework runs in.
IMPORTANT NOTE
Verify that the input types match the specified inputs, especially for Containerized Wallaroo Runtimes. For example, if the input is listed as a pyarrow.float32(), submitting a pyarrow.float64() may cause an error.
The supported frameworks include the specific version of the model framework supported by Wallaroo. It is highly recommended to verify that models uploaded to Wallaroo meet the library and version requirements to ensure proper functioning.
For the most recent release of Wallaroo 2023.4.0, the following native runtimes are supported:
If converting another ML Model to ONNX (PyTorch, XGBoost, etc) using the onnxconverter-common library, the supported DEFAULT_OPSET_NUMBER is 17.
Using different versions or settings outside of these specifications may result in inference issues and other unexpected behavior.
ONNX models always run in the Wallaroo Native Runtime space.
Data Schemas
ONNX models deployed to Wallaroo have the following data requirements.
Equal rows constraint: The number of input rows and output rows must match.
All inputs are tensors: The inputs are tensor arrays with the same shape.
Data Type Consistency: Data types within each tensor are of the same type.
Equal Rows Constraint
Inference performed through ONNX models are assumed to be in batch format, where each input row corresponds to an output row. This is reflected in the in fields returned for an inference. In the following example, each input row for an inference is related directly to the inference output.
For models that require ragged tensor or other shapes, see other data formatting options such as Bring Your Own Predict models.
Data Type Consistency
All inputs into an ONNX model must have the same internal data type. For example, the following is valid because all of the data types within each element are float32.
t= [
[2.35, 5.75],
[3.72, 8.55],
[5.55, 97.2]
]
The following is invalid, as it mixes floats and strings in each element:
These requirements are <strong>not</strong> for Tensorflow Keras models, only for non-Keras Tensorflow models in the SavedModel format. For Tensorflow Keras deployment in Wallaroo, see the Tensorflow Keras requirements.
TensorFlow File Format
TensorFlow models are .zip file of the SavedModel format. For example, the Aloha sample TensorFlow model is stored in the directory alohacnnlstm:
Python models uploaded to Wallaroo are executed as a native runtime.
Note that Python models - aka “Python steps” - are standalone python scripts that use the python libraries natively supported by the Wallaroo platform. These are used for either simple model deployment (such as ARIMA Statsmodels), or data formatting such as the postprocessing steps. A Wallaroo Python model will be composed of one Python script that matches the Wallaroo requirements.
This is contrasted with Arbitrary Python models, also known as Bring Your Own Predict (BYOP) allow for custom model deployments with supporting scripts and artifacts. These are used with pre-trained models (PyTorch, Tensorflow, etc) along with whatever supporting artifacts they require. Supporting artifacts can include other Python modules, model files, etc. These are zipped with all scripts, artifacts, and a requirements.txt file that indicates what other Python models need to be imported that are outside of the typical Wallaroo platform.
Python Models Requirements
Python models uploaded to Wallaroo are Python scripts that must include the wallaroo_json method as the entry point for the Wallaroo engine to use it as a Pipeline step.
This method receives the results of the previous Pipeline step, and its return value will be used in the next Pipeline step.
If the Python model is the first step in the pipeline, then it will be receiving the inference request data (for example: a preprocessing step). If it is the last step in the pipeline, then it will be the data returned from the inference request.
In the example below, the Python model is used as a post processing step for another ML model. The Python model expects to receive data from a ML Model who’s output is a DataFrame with the column dense_2. It then extracts the values of that column as a list, selects the first element, and returns a DataFrame with that element as the value of the column output.
In line with other Wallaroo inference results, the outputs of a Python step that returns a pandas DataFrame or Arrow Table will be listed in the out. metadata, with all inference outputs listed as out.{variable 1}, out.{variable 2}, etc. In the example above, this results the output field as the out.output field in the Wallaroo inference result.
During the model upload process, the Wallaroo instance will attempt to convert the model to a Native Wallaroo Runtime. If unsuccessful based , it will create a Wallaroo Containerized Runtime for the model. See the model deployment section for details on how to configure pipeline resources based on the model’s runtime.
Hugging Face Schemas
Input and output schemas for each Hugging Face pipeline are defined below. Note that adding additional inputs not specified below will raise errors, except for the following:
Framework.HUGGING_FACE_IMAGE_TO_TEXT
Framework.HUGGING_FACE_TEXT_CLASSIFICATION
Framework.HUGGING_FACE_SUMMARIZATION
Framework.HUGGING_FACE_TRANSLATION
Additional inputs added to these Hugging Face pipelines will be added as key/pair value arguments to the model’s generate method. If the argument is not required, then the model will default to the values coded in the original Hugging Face model’s source code.
Any parameter that is not part of the required inputs list will be forwarded to the model as a key/pair value to the underlying models generate method. If the additional input is not supported by the model, an error will be returned.
Any parameter that is not part of the required inputs list will be forwarded to the model as a key/pair value to the underlying models generate method. If the additional input is not supported by the model, an error will be returned.
Schemas:
input_schema=pa.schema([
pa.field('inputs', pa.string()),
pa.field('return_text', pa.bool_()),
pa.field('return_tensors', pa.bool_()),
pa.field('clean_up_tokenization_spaces', pa.bool_()),
# pa.field('extra_field', pa.int64()), # every extra field you specify will be forwarded as a key/value pair])
output_schema=pa.schema([
pa.field('summary_text', pa.string()),
])
input_schema=pa.schema([
pa.field('inputs', pa.string()), # requiredpa.field('top_k', pa.int64()), # optionalpa.field('function_to_apply', pa.string()), # optional])
output_schema=pa.schema([
pa.field('label', pa.list_(pa.string(), list_size=2)), # list with a number of items same as top_k, list_size can be skipped but may lead in worse performancepa.field('score', pa.list_(pa.float64(), list_size=2)), # list with a number of items same as top_k, list_size can be skipped but may lead in worse performance])
Any parameter that is not part of the required inputs list will be forwarded to the model as a key/pair value to the underlying models generate method. If the additional input is not supported by the model, an error will be returned.
Schemas:
input_schema=pa.schema([
pa.field('inputs', pa.string()), # requiredpa.field('return_tensors', pa.bool_()), # optionalpa.field('return_text', pa.bool_()), # optionalpa.field('clean_up_tokenization_spaces', pa.bool_()), # optionalpa.field('src_lang', pa.string()), # optionalpa.field('tgt_lang', pa.string()), # optional# pa.field('extra_field', pa.int64()), # every extra field you specify will be forwarded as a key/value pair])
output_schema=pa.schema([
pa.field('translation_text', pa.string()),
])
input_schema=pa.schema([
pa.field('inputs', pa.string()), # requiredpa.field('candidate_labels', pa.list_(pa.string(), list_size=2)), # requiredpa.field('hypothesis_template', pa.string()), # optionalpa.field('multi_label', pa.bool_()), # optional])
output_schema=pa.schema([
pa.field('sequence', pa.string()),
pa.field('scores', pa.list_(pa.float64(), list_size=2)), # same as number of candidate labels, list_size can be skipped by may result in slightly worse performancepa.field('labels', pa.list_(pa.string(), list_size=2)), # same as number of candidate labels, list_size can be skipped by may result in slightly worse performance])
input_schema=pa.schema([
pa.field('images',
pa.list_(
pa.list_(
pa.list_(
pa.int64(),
list_size=3 ),
list_size=640 ),
list_size=480 )),
pa.field('candidate_labels', pa.list_(pa.string(), list_size=3)),
pa.field('threshold', pa.float64()),
# pa.field('top_k', pa.int64()), # we want the model to return exactly the number of predictions, we shouldn't specify this])
output_schema=pa.schema([
pa.field('score', pa.list_(pa.float64())), # variable output, depending on detected objectspa.field('label', pa.list_(pa.string())), # variable output, depending on detected objectspa.field('box',
pa.list_( # dynamic output, i.e. dynamic number of boxes per input image, each sublist contains the 4 box coordinates pa.list_(
pa.int64(),
list_size=4 ),
),
),
])
Any parameter that is not part of the required inputs list will be forwarded to the model as a key/pair value to the underlying models generate method. If the additional input is not supported by the model, an error will be returned.
input_schema=pa.schema([
pa.field('inputs', pa.string()),
pa.field('return_tensors', pa.bool_()), # optionalpa.field('return_text', pa.bool_()), # optionalpa.field('return_full_text', pa.bool_()), # optionalpa.field('clean_up_tokenization_spaces', pa.bool_()), # optionalpa.field('prefix', pa.string()), # optionalpa.field('handle_long_generation', pa.string()), # optional# pa.field('extra_field', pa.int64()), # every extra field you specify will be forwarded as a key/value pair])
output_schema=pa.schema([
pa.field('generated_text', pa.list_(pa.string(), list_size=1))
])
input_schema=pa.schema([
pa.field('inputs', pa.list_(pa.float32())), # required: the audio stored in numpy arrays of shape (num_samples,) and data type `float32`pa.field('return_timestamps', pa.string()) # optional: return start & end times for each predicted chunk])
output_schema=pa.schema([
pa.field('text', pa.string()), # required: the output text corresponding to the audio inputpa.field('chunks', pa.list_(pa.struct([('text', pa.string()), ('timestamp', pa.list_(pa.float32()))]))), # required (if `return_timestamps` is set), start & end times for each predicted chunk])
IMPORTANT NOTE: The PyTorch model must be in TorchScript format. scripting (i.e. torch.jit.script() is always recommended over tracing (i.e. torch.jit.trace()). From the PyTorch documentation: “Scripting preserves dynamic control flow and is valid for inputs of different sizes.” For more details, see TorchScript-based ONNX Exporter: Tracing vs Scripting.
During the model upload process, the Wallaroo instance will attempt to convert the model to a Native Wallaroo Runtime. If unsuccessful based , it will create a Wallaroo Containerized Runtime for the model. See the model deployment section for details on how to configure pipeline resources based on the model’s runtime.
IMPORTANT CONFIGURATION NOTE: For PyTorch input schemas, the floats must be pyarrow.float32() for the PyTorch model to be converted to the Native Wallaroo Runtime during the upload process.
During the model upload process, the Wallaroo instance will attempt to convert the model to a Native Wallaroo Runtime. If unsuccessful based , it will create a Wallaroo Containerized Runtime for the model. See the model deployment section for details on how to configure pipeline resources based on the model’s runtime.
SKLearn Schema Inputs
SKLearn schema follows a different format than other models. To prevent inputs from being out of order, the inputs should be submitted in a single row in the order the model is trained to accept, with all of the data types being the same. For example, the following DataFrame has 4 columns, each column a float.
sepal length (cm)
sepal width (cm)
petal length (cm)
petal width (cm)
0
5.1
3.5
1.4
0.2
1
4.9
3.0
1.4
0.2
For submission to an SKLearn model, the data input schema will be a single array with 4 float values.
When submitting as an inference, the DataFrame is converted to rows with the column data expressed as a single array. The data must be in the same order as the model expects, which is why the data is submitted as a single array rather than JSON labeled columns: this insures that the data is submitted in the exact order as the model is trained to accept.
Original DataFrame:
sepal length (cm)
sepal width (cm)
petal length (cm)
petal width (cm)
0
5.1
3.5
1.4
0.2
1
4.9
3.0
1.4
0.2
Converted DataFrame:
inputs
0
[5.1, 3.5, 1.4, 0.2]
1
[4.9, 3.0, 1.4, 0.2]
SKLearn Schema Outputs
Outputs for SKLearn that are meant to be predictions or probabilities when output by the model are labeled in the output schema for the model when uploaded to Wallaroo. For example, a model that outputs either 1 or 0 as its output would have the output schema as follows:
During the model upload process, the Wallaroo instance will attempt to convert the model to a Native Wallaroo Runtime. If unsuccessful based , it will create a Wallaroo Containerized Runtime for the model. See the model deployment section for details on how to configure pipeline resources based on the model’s runtime.
TensorFlow Keras SavedModel Format
TensorFlow Keras SavedModel models are .zip file of the SavedModel format. For example, the Aloha sample TensorFlow model is stored in the directory alohacnnlstm:
During the model upload process, the Wallaroo instance will attempt to convert the model to a Native Wallaroo Runtime. If unsuccessful based , it will create a Wallaroo Containerized Runtime for the model. See the model deployment section for details on how to configure pipeline resources based on the model’s runtime.
XGBoost Schema Inputs
XGBoost schema follows a different format than other models. To prevent inputs from being out of order, the inputs should be submitted in a single row in the order the model is trained to accept, with all of the data types being the same. If a model is originally trained to accept inputs of different data types, it will need to be retrained to only accept one data type for each column - typically pa.float64() is a good choice.
For example, the following DataFrame has 4 columns, each column a float.
sepal length (cm)
sepal width (cm)
petal length (cm)
petal width (cm)
0
5.1
3.5
1.4
0.2
1
4.9
3.0
1.4
0.2
For submission to an XGBoost model, the data input schema will be a single array with 4 float values.
When submitting as an inference, the DataFrame is converted to rows with the column data expressed as a single array. The data must be in the same order as the model expects, which is why the data is submitted as a single array rather than JSON labeled columns: this insures that the data is submitted in the exact order as the model is trained to accept.
Original DataFrame:
sepal length (cm)
sepal width (cm)
petal length (cm)
petal width (cm)
0
5.1
3.5
1.4
0.2
1
4.9
3.0
1.4
0.2
Converted DataFrame:
inputs
0
[5.1, 3.5, 1.4, 0.2]
1
[4.9, 3.0, 1.4, 0.2]
XGBoost Schema Outputs
Outputs for XGBoost are labeled based on the trained model outputs. For this example, the output is simply a single output listed as output. In the Wallaroo inference result, it is grouped with the metadata out as out.output.
Arbitrary Python models, also known as Bring Your Own Predict (BYOP) allow for custom model deployments with supporting scripts and artifacts. These are used with pre-trained models (PyTorch, Tensorflow, etc) along with whatever supporting artifacts they require. Supporting artifacts can include other Python modules, model files, etc. These are zipped with all scripts, artifacts, and a requirements.txt file that indicates what other Python models need to be imported that are outside of the typical Wallaroo platform.
Contrast this with Wallaroo Python models - aka “Python steps”. These are standalone python scripts that use the python libraries natively supported by the Wallaroo platform. These are used for either simple model deployment (such as ARIMA Statsmodels), or data formatting such as the postprocessing steps. A Wallaroo Python model will be composed of one Python script that matches the Wallaroo requirements.
Arbitrary Python File Requirements
Arbitrary Python (BYOP) models are uploaded to Wallaroo via a ZIP file with the following components:
Artifact
Type
Description
Python scripts aka .py files with classes that extend mac.inference.Inference and mac.inference.creation.InferenceBuilder
Python Script
Extend the classes mac.inference.Inference and mac.inference.creation.InferenceBuilder. These are included with the Wallaroo SDK. Further details are in Arbitrary Python Script Requirements. Note that there is no specified naming requirements for the classes that extend mac.inference.Inference and mac.inference.creation.InferenceBuilder - any qualified class name is sufficient as long as these two classes are extended as defined below.
requirements.txt
Python requirements file
This sets the Python libraries used for the arbitrary python model. These libraries should be targeted for Python 3.8 compliance. These requirements and the versions of libraries should be exactly the same between creating the model and deploying it in Wallaroo. This insures that the script and methods will function exactly the same as during the model creation process.
Other artifacts
Files
Other models, files, and other artifacts used in support of this model.
For example, the if the arbitrary python model will be known as vgg_clustering, the contents may be in the following structure, with vgg_clustering as the storage directory:
Note the inclusion of the custom_inference.py file. This file name is not required - any Python script or scripts that extend the classes listed above are sufficient. This Python script could have been named vgg_custom_model.py or any other name as long as it includes the extension of the classes listed above.
The sample arbitrary python model file is created with the command zip -r vgg_clustering.zip vgg_clustering/.
Wallaroo Arbitrary Python uses the Wallaroo SDK mac module, included in the Wallaroo SDK 2023.2.1 and above. See the Wallaroo SDK Install Guides for instructions on installing the Wallaroo SDK.
Arbitrary Python Script Requirements
The entry point of the arbitrary python model is any python script that extends the following classes. These are included with the Wallaroo SDK. The required methods that must be overridden are specified in each section below.
mac.inference.Inference interface serves model inferences based on submitted input some input. Its purpose is to serve inferences for any supported arbitrary model framework (e.g. scikit, keras etc.).
classDiagram
    class Inference {
        <<Abstract>>
        +model Optional[Any]
        +expected_model_types()* Set
        +predict(input_data: InferenceData)*  InferenceData
        -raise_error_if_model_is_not_assigned() None
        -raise_error_if_model_is_wrong_type() None
    }
mac.inference.creation.InferenceBuilder builds a concrete Inference, i.e. instantiates an Inference object, loads the appropriate model and assigns the model to to the Inference object.
classDiagram
    class InferenceBuilder {
        +create(config InferenceConfig) * Inference
        -inference()* Any
    }
mac.inference.Inference
mac.inference.Inference Objects
Object
Type
Description
model (Required)
[Any]
One or more objects that match the expected_model_types. This can be a ML Model (for inference use), a string (for data conversion), etc. See Arbitrary Python Examples for examples.
mac.inference.Inference Methods
Method
Returns
Description
expected_model_types (Required)
Set
Returns a Set of models expected for the inference as defined by the developer. Typically this is a set of one. Wallaroo checks the expected model types to verify that the model submitted through the InferenceBuilder method matches what this Inference class expects.
The entry point for the Wallaroo inference with the following input and output parameters that are defined when the model is updated.
mac.types.InferenceData: The inputInferenceData is a Dictionary of numpy arrays derived from the input_schema detailed when the model is uploaded, defined in PyArrow.Schema format.
mac.types.InferenceData: The output is a Dictionary of numpy arrays as defined by the output parameters defined in PyArrow.Schema format.
The InferenceDataValidationError exception is raised when the input data does not match mac.types.InferenceData.
raise_error_if_model_is_not_assigned
N/A
Error when a model is not set to Inference.
raise_error_if_model_is_wrong_type
N/A
Error when the model does not match the expected_model_types.
IMPORTANT NOTE
Verify that the inputs and outputs match the InferenceData input and output types: a Dictionary of numpy arrays defined by the input_schema and output_schema parameters when uploading the model to the Wallaroo instance. The following code is an example of a Dictionary of numpy arrays.
preds=self.model.predict(data)
preds=preds.numpy()
rows, _=preds.shapepreds=preds.reshape((rows,))
return {"prediction": preds} # a Dictionary of numpy arrays.
The example, the expected_model_types can be defined for the KMeans model.
InferenceBuilder builds a concrete Inference, i.e. instantiates an Inference object, loads the appropriate model and assigns the model to the Inference.
classDiagram
    class InferenceBuilder {
        +create(config InferenceConfig) * Inference
        -inference()* Any
    }
Each model that is included requires its own InferenceBuilder. InferenceBuilder loads one model, then submits it to the Inference class when created. The Inference class checks this class against its expected_model_types() Set.
Creates an Inference subclass, then assigns a model and attributes. The CustomInferenceConfig is used to retrieve the config.model_path, which is a pathlib.Path object pointing to the folder where the model artifacts are saved. Every artifact loaded must be relative to config.model_path. This is set when the arbitrary python .zip file is uploaded and the environment for running it in Wallaroo is set. For example: loading the artifact vgg_clustering\feature_extractor.h5 would be set with config.model_path \ feature_extractor.h5. The model loaded must match an existing module. For our example, this is from sklearn.cluster import KMeans, and this must match the Inferenceexpected_model_types.
inference
custom Inference instance.
Returns the instantiated custom Inference object created from the create method.
Arbitrary Python Runtime
Arbitrary Python always run in the containerized model runtime.
Wallaroo users can register their trained MLFlow ML Models from a containerized model container registry into their Wallaroo instance and perform inferences with it through a Wallaroo pipeline.
As of this time, Wallaroo only supports MLFlow 1.30.0 containerized models. For information on how to containerize an MLFlow model, see the MLFlow Documentation.
Model version configurations are updated with the wallaroo.model_version.config and include the following parameters. Most are optional unless specified.
A list of alternate input fields. For example, if the model accepts the input fields ['variable1', 'variable2'], tensor_fields allows those inputs to be overridden to ['square_feet', 'house_age'], or other values as required.
input_schema
pyarrow.lib.Schema
The input schema for the model in pyarrow.lib.Schema format.
output_schema
pyarrow.lib.Schema
The output schema for the model in pyarrow.lib.Schema format.
batch_config
(List[string]) (Optional)
Batch config is either None for multiple-input inferences, or single to accept an inference request with only one row of data.
The following shows examples of using these fields.
Update Tensor Fields and Batch Config for CV Models
The following ONNX CV YoloV8 model is configured to override its default input to image and specify single batch input per inference request.
By default, model’s uploaded to Wallaroo default to the target architecture x86. To set the target architecture to ARM, specify the arch parameter as follows:
4.1 - Wallaroo SDK Essentials Guide: Model Uploads and Registrations: ONNX
How to upload and use ONNX ML Models with Wallaroo
Model Naming Requirements
Model names map onto Kubernetes objects, and must be DNS compliant. The strings for model names must lower case ASCII alpha-numeric characters or dash (-) only. . and _ are not allowed.
For the most recent release of Wallaroo 2023.4.0, the following native runtimes are supported:
If converting another ML Model to ONNX (PyTorch, XGBoost, etc) using the onnxconverter-common library, the supported DEFAULT_OPSET_NUMBER is 17.
Using different versions or settings outside of these specifications may result in inference issues and other unexpected behavior.
ONNX models always run in the Wallaroo Native Runtime space.
Data Schemas
ONNX models deployed to Wallaroo have the following data requirements.
Equal rows constraint: The number of input rows and output rows must match.
All inputs are tensors: The inputs are tensor arrays with the same shape.
Data Type Consistency: Data types within each tensor are of the same type.
Equal Rows Constraint
Inference performed through ONNX models are assumed to be in batch format, where each input row corresponds to an output row. This is reflected in the in fields returned for an inference. In the following example, each input row for an inference is related directly to the inference output.
For models that require ragged tensor or other shapes, see other data formatting options such as Bring Your Own Predict models.
Data Type Consistency
All inputs into an ONNX model must have the same internal data type. For example, the following is valid because all of the data types within each element are float32.
t= [
[2.35, 5.75],
[3.72, 8.55],
[5.55, 97.2]
]
The following is invalid, as it mixes floats and strings in each element:
Open Neural Network eXchange(ONNX) is the default model runtime supported by Wallaroo. ONNX models are uploaded to the current workspace through the Wallaroo Client upload_model(name, path, framework, input_schema, output_schema).configure(options). When uploading a default ML Model that matches the default Wallaroo runtime, the configure(options) can be left empty or the framework onnx specified.
Uploading ONNX Models
ONNX models are uploaded to Wallaroo through the Wallaroo Client upload_model method.
Upload ONNX Model Parameters
The following parameters are required for ONNX models. Note that while some fields are considered as optional for the upload_model method, they are required for proper uploading of a ONNX model to Wallaroo.
For ONNX models, the input_schema and output_schema are not required so are not listed here.
Parameter
Type
Description
name
string (Required)
The name of the model. Model names are unique per workspace. Models that are uploaded with the same name are assigned as a new version of the model.
path
string (Required)
The path to the model file being uploaded.
framework
string (Required)
Set as the Framework.ONNX.
input_schema
pyarrow.lib.Schema (Optional)
The input schema in Apache Arrow schema format.
output_schema
pyarrow.lib.Schema (Optional)
The output schema in Apache Arrow schema format.
convert_wait
bool (Optional) (Default: True)
Not required for native runtimes.
True: Waits in the script for the model conversion completion.
False: Proceeds with the script without waiting for the model conversion process to display complete.
arch
wallaroo.engine_config.Architecture
The architecture the model is deployed to. If a model is intended for deployment to an ARM architecture, it must be specified during this step. Values include: X86 (Default): x86 based architectures. ARM: ARM based architectures.
Model Config Options
Model version configurations are updated with the wallaroo.model_version.config and include the following parameters. Most are optional unless specified.
A list of alternate input fields. For example, if the model accepts the input fields ['variable1', 'variable2'], tensor_fields allows those inputs to be overridden to ['square_feet', 'house_age'], or other values as required.
input_schema
pyarrow.lib.Schema
The input schema for the model in pyarrow.lib.Schema format.
output_schema
pyarrow.lib.Schema
The output schema for the model in pyarrow.lib.Schema format.
batch_config
(List[string]) (Optional)
Batch config is either None for multiple-input inferences, or single to accept an inference request with only one row of data.
ONNX Model Inputs
By default, inferencing in Wallaroo uses the same input fields as the ONNX model. This is overwritten with the wallaroo.model.configure(tensor_fields=List[String]) method to change the model input fields to match the tensor_field List.
IMPORTANT NOTE: The tensor_field length must match the ONNX model’s input field’s list.
The following displays the input fields for ONNX models. Replace onnx_file_model_name with the path to the ONNX model file.
When converting from one ML model type to an ONNX ML model, the input and output fields should be specified so users anticipate the exact field names used in their code. This prevents conversion naming formats from creating unintended names, and sets consistent field names that can be relied upon in future code updates.
The following example shows naming the input and output names when converting from a PyTorch model to an ONNX model. Note that the input fields are set to data, and the output fields are set to output_names = ["bounding-box", "classification","confidence"].
4.2 - Wallaroo SDK Essentials Guide: Model Uploads and Registrations: Arbitrary Python
How to upload and use Containerized MLFlow with Wallaroo
Arbitrary Python or BYOP (Bring Your Own Predict) allows organizations to use Python scripts and supporting libraries as it’s own model. Similar to using a Python step, arbitrary python is an even more robust and flexible tool for working with ML Models in Wallaroo pipelines.
Arbitrary Python models, also known as Bring Your Own Predict (BYOP) allow for custom model deployments with supporting scripts and artifacts. These are used with pre-trained models (PyTorch, Tensorflow, etc) along with whatever supporting artifacts they require. Supporting artifacts can include other Python modules, model files, etc. These are zipped with all scripts, artifacts, and a requirements.txt file that indicates what other Python models need to be imported that are outside of the typical Wallaroo platform.
Contrast this with Wallaroo Python models - aka “Python steps”. These are standalone python scripts that use the python libraries natively supported by the Wallaroo platform. These are used for either simple model deployment (such as ARIMA Statsmodels), or data formatting such as the postprocessing steps. A Wallaroo Python model will be composed of one Python script that matches the Wallaroo requirements.
Arbitrary Python File Requirements
Arbitrary Python (BYOP) models are uploaded to Wallaroo via a ZIP file with the following components:
Artifact
Type
Description
Python scripts aka .py files with classes that extend mac.inference.Inference and mac.inference.creation.InferenceBuilder
Python Script
Extend the classes mac.inference.Inference and mac.inference.creation.InferenceBuilder. These are included with the Wallaroo SDK. Further details are in Arbitrary Python Script Requirements. Note that there is no specified naming requirements for the classes that extend mac.inference.Inference and mac.inference.creation.InferenceBuilder - any qualified class name is sufficient as long as these two classes are extended as defined below.
requirements.txt
Python requirements file
This sets the Python libraries used for the arbitrary python model. These libraries should be targeted for Python 3.8 compliance. These requirements and the versions of libraries should be exactly the same between creating the model and deploying it in Wallaroo. This insures that the script and methods will function exactly the same as during the model creation process.
Other artifacts
Files
Other models, files, and other artifacts used in support of this model.
For example, the if the arbitrary python model will be known as vgg_clustering, the contents may be in the following structure, with vgg_clustering as the storage directory:
Note the inclusion of the custom_inference.py file. This file name is not required - any Python script or scripts that extend the classes listed above are sufficient. This Python script could have been named vgg_custom_model.py or any other name as long as it includes the extension of the classes listed above.
The sample arbitrary python model file is created with the command zip -r vgg_clustering.zip vgg_clustering/.
Wallaroo Arbitrary Python uses the Wallaroo SDK mac module, included in the Wallaroo SDK 2023.2.1 and above. See the Wallaroo SDK Install Guides for instructions on installing the Wallaroo SDK.
Arbitrary Python Script Requirements
The entry point of the arbitrary python model is any python script that extends the following classes. These are included with the Wallaroo SDK. The required methods that must be overridden are specified in each section below.
mac.inference.Inference interface serves model inferences based on submitted input some input. Its purpose is to serve inferences for any supported arbitrary model framework (e.g. scikit, keras etc.).
classDiagram
    class Inference {
        <<Abstract>>
        +model Optional[Any]
        +expected_model_types()* Set
        +predict(input_data: InferenceData)*  InferenceData
        -raise_error_if_model_is_not_assigned() None
        -raise_error_if_model_is_wrong_type() None
    }
mac.inference.creation.InferenceBuilder builds a concrete Inference, i.e. instantiates an Inference object, loads the appropriate model and assigns the model to to the Inference object.
classDiagram
    class InferenceBuilder {
        +create(config InferenceConfig) * Inference
        -inference()* Any
    }
mac.inference.Inference
mac.inference.Inference Objects
Object
Type
Description
model (Required)
[Any]
One or more objects that match the expected_model_types. This can be a ML Model (for inference use), a string (for data conversion), etc. See Arbitrary Python Examples for examples.
mac.inference.Inference Methods
Method
Returns
Description
expected_model_types (Required)
Set
Returns a Set of models expected for the inference as defined by the developer. Typically this is a set of one. Wallaroo checks the expected model types to verify that the model submitted through the InferenceBuilder method matches what this Inference class expects.
The entry point for the Wallaroo inference with the following input and output parameters that are defined when the model is updated.
mac.types.InferenceData: The inputInferenceData is a Dictionary of numpy arrays derived from the input_schema detailed when the model is uploaded, defined in PyArrow.Schema format.
mac.types.InferenceData: The output is a Dictionary of numpy arrays as defined by the output parameters defined in PyArrow.Schema format.
The InferenceDataValidationError exception is raised when the input data does not match mac.types.InferenceData.
raise_error_if_model_is_not_assigned
N/A
Error when a model is not set to Inference.
raise_error_if_model_is_wrong_type
N/A
Error when the model does not match the expected_model_types.
IMPORTANT NOTE
Verify that the inputs and outputs match the InferenceData input and output types: a Dictionary of numpy arrays defined by the input_schema and output_schema parameters when uploading the model to the Wallaroo instance. The following code is an example of a Dictionary of numpy arrays.
preds=self.model.predict(data)
preds=preds.numpy()
rows, _=preds.shapepreds=preds.reshape((rows,))
return {"prediction": preds} # a Dictionary of numpy arrays.
The example, the expected_model_types can be defined for the KMeans model.
InferenceBuilder builds a concrete Inference, i.e. instantiates an Inference object, loads the appropriate model and assigns the model to the Inference.
classDiagram
    class InferenceBuilder {
        +create(config InferenceConfig) * Inference
        -inference()* Any
    }
Each model that is included requires its own InferenceBuilder. InferenceBuilder loads one model, then submits it to the Inference class when created. The Inference class checks this class against its expected_model_types() Set.
Creates an Inference subclass, then assigns a model and attributes. The CustomInferenceConfig is used to retrieve the config.model_path, which is a pathlib.Path object pointing to the folder where the model artifacts are saved. Every artifact loaded must be relative to config.model_path. This is set when the arbitrary python .zip file is uploaded and the environment for running it in Wallaroo is set. For example: loading the artifact vgg_clustering\feature_extractor.h5 would be set with config.model_path \ feature_extractor.h5. The model loaded must match an existing module. For our example, this is from sklearn.cluster import KMeans, and this must match the Inferenceexpected_model_types.
inference
custom Inference instance.
Returns the instantiated custom Inference object created from the create method.
Arbitrary Python Runtime
Arbitrary Python always run in the containerized model runtime.
Upload Arbitrary Python Model
Arbitrary Python models are uploaded to Wallaroo through the Wallaroo Client upload_model method.
Upload Arbitrary Python Model Parameters
The following parameters are required for Arbitrary Python models. Note that while some fields are considered as optional for the upload_model method, they are required for proper uploading of a Arbitrary Python model to Wallaroo.
Parameter
Type
Description
name
string (Required)
The name of the model. Model names are unique per workspace. Models that are uploaded with the same name are assigned as a new version of the model.
path
string (Required)
The path to the model file being uploaded.
framework
string (Required)
Set as Framework.CUSTOM.
input_schema
pyarrow.lib.Schema (Required)
The input schema in Apache Arrow schema format.
output_schema
pyarrow.lib.Schema (Required)
The output schema in Apache Arrow schema format.
convert_wait
bool (Optional) (Default: True)
True: Waits in the script for the model conversion completion.
False: Proceeds with the script without waiting for the model conversion process to display complete.
arch
wallaroo.engine_config.Architecture
The architecture the model is deployed to. If a model is intended for deployment to an ARM architecture, it must be specified during this step. Values include: X86 (Default): x86 based architectures. ARM: ARM based architectures.
Once the upload process starts, the model is containerized by the Wallaroo instance. This process may take up to 10 minutes.
Model Config Options
Model version configurations are updated with the wallaroo.model_version.config and include the following parameters. Most are optional unless specified.
A list of alternate input fields. For example, if the model accepts the input fields ['variable1', 'variable2'], tensor_fields allows those inputs to be overridden to ['square_feet', 'house_age'], or other values as required.
input_schema
pyarrow.lib.Schema
The input schema for the model in pyarrow.lib.Schema format.
output_schema
pyarrow.lib.Schema
The output schema for the model in pyarrow.lib.Schema format.
batch_config
(List[string]) (Optional)
Batch config is either None for multiple-input inferences, or single to accept an inference request with only one row of data.
Upload Arbitrary Python Model Return
The following is returned with a successful model upload and conversion.
Field
Type
Description
name
string
The name of the model.
version
string
The model version as a unique UUID.
file_name
string
The file name of the model as stored in Wallaroo.
image_path
string
The image used to deploy the model in the Wallaroo engine.
last_update_time
DateTime
When the model was last updated.
Arbitrary Python Examples
The following are examples of use cases for BYOP models.
Upload Arbitrary Python Model Example
The following example is of uploading a Arbitrary Python VGG16 Clustering ML Model to a Wallaroo instance.
Arbitrary Python Script Example
The following is an example script that fulfills the requirements for a Wallaroo Arbitrary Python Model, and would be saved as custom_inference.py.
"""This module features an example implementation of a custom Inference and its
corresponding InferenceBuilder."""importpathlibimportpicklefromtypingimportAny, Setimporttensorflowastffrommac.config.inferenceimportCustomInferenceConfigfrommac.inferenceimportInferencefrommac.inference.creationimportInferenceBuilderfrommac.typesimportInferenceDatafromsklearn.clusterimportKMeansclassImageClustering(Inference):
"""Inference class for image clustering, that uses
a pre-trained VGG16 model on cifar10 as a feature extractor
and performs clustering on a trained KMeans model.
Attributes:
- feature_extractor: The embedding model we will use
as a feature extractor (i.e. a trained VGG16).
- expected_model_types: A set of model instance types that are expected by this inference.
- model: The model on which the inference is calculated.
"""def__init__(self, feature_extractor: tf.keras.Model):
self.feature_extractor=feature_extractorsuper().__init__()
@propertydefexpected_model_types(self) ->Set[Any]:
return {KMeans}
@Inference.model.setter# type: ignoredefmodel(self, model) ->None:
"""Sets the model on which the inference is calculated.
:param model: A model instance on which the inference is calculated.
:raises TypeError: If the model is not an instance of expected_model_types
(i.e. KMeans).
"""self._raise_error_if_model_is_wrong_type(model) # this will make sure an error will be raised if the model is of wrong typeself._model=modeldef_predict(self, input_data: InferenceData) ->InferenceData:
"""Calculates the inference on the given input data.
This is the core function that each subclass needs to implement
in order to calculate the inference.
:param input_data: The input data on which the inference is calculated.
It is of type InferenceData, meaning it comes as a dictionary of numpy
arrays.
:raises InferenceDataValidationError: If the input data is not valid.
Ideally, every subclass should raise this error if the input data is not valid.
:return: The output of the model, that is a dictionary of numpy arrays.
"""# input_data maps to the input_schema we have defined# with PyArrow, coming as a dictionary of numpy arraysinputs=input_data["images"]
# Forward inputs to the modelsembeddings=self.feature_extractor(inputs)
predictions=self.model.predict(embeddings.numpy())
# Return predictions as dictionary of numpy arraysreturn {"predictions": predictions}
classImageClusteringBuilder(InferenceBuilder):
"""InferenceBuilder subclass for ImageClustering, that loads
a pre-trained VGG16 model on cifar10 as a feature extractor
and a trained KMeans model, and creates an ImageClustering object."""@propertydefinference(self) ->ImageClustering:
returnImageClusteringdefcreate(self, config: CustomInferenceConfig) ->ImageClustering:
"""Creates an Inference subclass and assigns a model and additionally
needed attributes to it.
:param config: Custom inference configuration. In particular, we're
interested in `config.model_path` that is a pathlib.Path object
pointing to the folder where the model artifacts are saved.
Every artifact we need to load from this folder has to be
relative to `config.model_path`.
:return: A custom Inference instance.
"""feature_extractor=self._load_feature_extractor(
config.model_path/"feature_extractor.h5" )
inference=self.inference(feature_extractor)
model=self._load_model(config.model_path/"kmeans.pkl")
inference.model=modelreturninferencedef_load_feature_extractor(
self, file_path: pathlib.Path ) ->tf.keras.Model:
returntf.keras.models.load_model(file_path)
def_load_model(self, file_path: pathlib.Path) ->KMeans:
withopen(file_path.as_posix(), "rb") asfp:
model=pickle.load(fp)
returnmodel
The following is the requirements.txt file that would be included in the arbitrary python ZIP file. It is highly recommended to use the same requirements.txt file for setting the libraries and versions used to create the model in the arbitrary python ZIP file.
tensorflow==2.8.0scikit-learn==1.2.2
Upload Arbitrary Python Example
The following example demonstrates uploading the arbitrary python model as vgg_clustering.zip with the following input and output schemas defined.
The following example uses the following requirements field to add additional libraries for image conversion. In this example, there is no ML Model that is part of the BYOP model. The ImageResize class extends the mac.inference.Inference to perform the data conversion.
tensorflow==2.8.0
pillow>=10.0.0
The following code accepts data from either a pandas DataFrame or Apache arrow table where the data is in the data column, and reformats that data to be in the image column.
"""This module features an example implementation of a custom Inference and its
corresponding InferenceBuilder."""importpathlibimportpicklefromtypingimportAny, Setimportbase64importnumpyasnpfromPILimportImageimportloggingfrommac.config.inferenceimportCustomInferenceConfigfrommac.inferenceimportInferencefrommac.inference.creationimportInferenceBuilderfrommac.typesimportInferenceDataclassImageResize(Inference):
"""Inference class for image resizing.
"""def__init__(self):
self.model="conversion-sample"super().__init__()
@propertydefexpected_model_types(self) ->Set[Any]:
return {str}
@Inference.model.setter# type: ignoredefmodel(self, model) ->None:
# Hazard: this has to be here because the ABC has the getterself._model="conversion-sample"def_predict(self, input_data: InferenceData) ->InferenceData:
# input_data maps to the input_schema we have defined# with PyArrow, coming as a dictionary of numpy arraysimg=input_data["data"]
logging.debug(f"In Python {type(img)}")
res= {"image": img} # sets the `image` field to the incoming data's ['data'] field.logging.debug(f"Returning results")
returnresclassImageResizeBuilder(InferenceBuilder):
"""InferenceBuilder subclass for ImageResize."""@propertydefinference(self) ->ImageResize:
returnImageResizedefcreate(self, config: CustomInferenceConfig) ->ImageResize:
"""Creates an Inference subclass and assigns a model and additionally
needed attributes to it.
:param config: Custom inference configuration. In particular, we're
interested in `config.model_path` that is a pathlib.Path object
pointing to the folder where the model artifacts are saved.
Every artifact we need to load from this folder has to be
relative to `config.model_path`.
:return: A custom Inference instance.
"""x=self.inference()
x.model="conversion-sample"returnx
The BYOP model is uploaded to Wallaroo using framework=wallaroo.framework.Framework.CUSTOM as a parameter in the model_upload() function and added to a pipeline as a pipeline step. Here the BYOP model formats the data before submitting to the actual computer vision model.
# for the BYOP data reshaper modelinput_schema=pa.schema([pa.field("data", pa.list_(pa.float32(), list_size=921600))])
output_schema=pa.schema([pa.field("image", pa.list_(pa.float32(), list_size=921600))])
resize=wl.upload_model("resize", "./resize-arrow.zip", framework=wallaroo.framework.Framework.CUSTOM,
input_schema=input_schema, output_schema=output_schema, convert_wait=True)
# for the CV modelinput_schema=pa.schema([pa.field("data", pa.list_(pa.float32(), list_size=921600))])
output_schema=pa.schema([pa.field("image", pa.list_(pa.float32(), list_size=921600))])
model=wl.upload_model('mobilenet', "./model/mobilenet.pt.onnx",
framework=wallaroo.framework.Framework.ONNX# set the engine configdc=wallaroo.DeploymentConfigBuilder() \
.cpus(4)\
.memory("4Gi")\
.build()
pipeline=wl.build_pipeline('resize-pipeline')
pipeline.add_model_step(resize)
pipeline.add_model_step(model)
# deploy the pipelinepipeline.deploy(deployment_config=dc)
The settings for a pipeline configuration are dependent on whether the model is converted to the Native Runtime space, or Containerized Model Runtime space during the model upload process. The method wallaroo.model_config.runtime() displays which runtime the uploaded model was converted to.
Wallaroo Native Runtime models typically use the following settings for pipeline resource allocation. See See Native Runtime Configuration Methods for complete options.
The number of replicas of the Wallaroo Native pipeline resources to allocate. Each replica has the same number of cpus, ram, etc. For example: DeploymentConfigBuilder.replica_count(2)
Auto-allocated replicas
wallaroo.deployment_config.DeploymentConfigBuilder.replica_autoscale_min_max(maximum: int, minimum: int = 0)
Replicas that will auto-allocate more replicas to the pipeline from 0 to the set maximum as more inference requests are made.
Number of GPU’s to deploy; GPUs can only be deployed in whole increments. If used, must be paired with the deployment_label pipeline configuration option.
Required if gpus are set and must match the GPU nodepool label.
The following example shows deploying a Native Wallaroo Runtime model with the pipeline configuration of one replica, half a cpu and 1 Gi of RAM.
Note that for native runtime models, total pipeline resources are shared by all the native runtime models for each replica.
model.config().runtime()
'onnx'# add the model as a pipeline steppipeline.add_model_step(model)
# DeploymentConfigBuilder is used to create the pipeline's deployment configuration objectfromwallaroo.deployment_configimportDeploymentConfigBuilder# deploy using native runtime deploymentdeployment_config_native=DeploymentConfigBuilder() \
.replica_count(1) \
.cpus(0.5) \
.memory('1Gi') \
.build()
# deploy the pipeline with the pipeline configurationpipeline.deploy(deployment_config=deployment_config_native)
Wallaroo Containerized Runtime Deployment
Wallaroo Containerized Runtime models typically use the following settings for pipeline resource allocation. See See Containerized Runtime Configuration Methods for complete options.
Containerized Runtime models resources are allocated with the sidekick name, with the containerized model specified for resources.
Number of GPU’s to deploy; GPUs can only be deployed in whole increments. If used, must be paired with the deployment_label pipeline configuration option.
Required if gpus are set and must match the GPU nodepool label.
The following example shows deploying a Containerized Wallaroo Runtime model with the pipeline configuration of one replica, half a cpu and 1 Gi of RAM.
Note that for containerized models, each containerized model’s resources are set independently of each other and duplicated for each pipeline replica, and are considered separate from the native runtime models.
model_native.config().runtime()
'onnx'model_containerized.config().runtime()
'flight'# add the models as a pipeline stepspipeline.add_model_step(model_native)
pipeline.add_model_step(model_containerized)
# DeploymentConfigBuilder is used to create the pipeline's deployment configuration objectfromwallaroo.deployment_configimportDeploymentConfigBuilder# deploy using containerized runtime deploymentdeployment_config_containerized=DeploymentConfigBuilder() \
.replica_count(1) \
.cpus(0.5) \ # shared by the native runtime models.memory('1Gi') \ # shared by the native runtime models.sidekick_cpus(model_containerized, 0.5) \ # 0.5 cpu allocated solely for the containerized model.sidekick_memory(model_containerized, '1Gi') \ #1 Gi allocated solely for the containerized model.build()
# deploy the pipeline with the pipeline configurationpipeline.deploy(deployment_config=deployment_config_containerized)
Pipeline Deployment Timeouts
Pipeline deployments typically take 45 seconds for Wallaroo Native Runtimes, and 90 seconds for Wallaroo Containerized Runtimes.
If Wallaroo Pipeline deployment times out from a very large or complex ML model being deployed, the timeout is extended from with the wallaroo.Client.Client(request_timeout:int) setting, where request_timeout is in integer seconds. Wallaroo Native Runtime deployments are scaled at 1x the request_timeout setting. Wallaroo Containerized Runtimes are scaled at 2x the request_timeout setting.
The following example shows extending the request_timeout to 2 minutes.
Wallaroo users can register their trained MLFlow ML Models from a containerized model container registry into their Wallaroo instance and perform inferences with it through a Wallaroo pipeline.
As of this time, Wallaroo only supports MLFlow 1.30.0 containerized models. For information on how to containerize an MLFlow model, see the MLFlow Documentation.
Model names map onto Kubernetes objects, and must be DNS compliant. The strings for model names must lower case ASCII alpha-numeric characters or dash (-) only. . and _ are not allowed.
Register a Containerized MLFlow Model
Containerized MLFlow models are not uploaded, but registered from a container registry service. This is performed through the Wallaroo Client .register_model_image(name, image).configure(options) method. For the options, the following must be defined:
runtime: Set as mlflow.
input_schema: The input schema from the Apache Arrow pyarrow.lib.Schema format.
output_schema: The output schema from the Apache Arrow pyarrow.lib.Schema format.
The settings for a pipeline configuration are dependent on whether the model is converted to the Native Runtime space, or Containerized Model Runtime space during the model upload process. The method wallaroo.model_config.runtime() displays which runtime the uploaded model was converted to.
Wallaroo Native Runtime models typically use the following settings for pipeline resource allocation. See See Native Runtime Configuration Methods for complete options.
The number of replicas of the Wallaroo Native pipeline resources to allocate. Each replica has the same number of cpus, ram, etc. For example: DeploymentConfigBuilder.replica_count(2)
Auto-allocated replicas
wallaroo.deployment_config.DeploymentConfigBuilder.replica_autoscale_min_max(maximum: int, minimum: int = 0)
Replicas that will auto-allocate more replicas to the pipeline from 0 to the set maximum as more inference requests are made.
Number of GPU’s to deploy; GPUs can only be deployed in whole increments. If used, must be paired with the deployment_label pipeline configuration option.
Required if gpus are set and must match the GPU nodepool label.
The following example shows deploying a Native Wallaroo Runtime model with the pipeline configuration of one replica, half a cpu and 1 Gi of RAM.
Note that for native runtime models, total pipeline resources are shared by all the native runtime models for each replica.
model.config().runtime()
'onnx'# add the model as a pipeline steppipeline.add_model_step(model)
# DeploymentConfigBuilder is used to create the pipeline's deployment configuration objectfromwallaroo.deployment_configimportDeploymentConfigBuilder# deploy using native runtime deploymentdeployment_config_native=DeploymentConfigBuilder() \
.replica_count(1) \
.cpus(0.5) \
.memory('1Gi') \
.build()
# deploy the pipeline with the pipeline configurationpipeline.deploy(deployment_config=deployment_config_native)
Wallaroo Containerized Runtime Deployment
Wallaroo Containerized Runtime models typically use the following settings for pipeline resource allocation. See See Containerized Runtime Configuration Methods for complete options.
Containerized Runtime models resources are allocated with the sidekick name, with the containerized model specified for resources.
Number of GPU’s to deploy; GPUs can only be deployed in whole increments. If used, must be paired with the deployment_label pipeline configuration option.
Required if gpus are set and must match the GPU nodepool label.
The following example shows deploying a Containerized Wallaroo Runtime model with the pipeline configuration of one replica, half a cpu and 1 Gi of RAM.
Note that for containerized models, each containerized model’s resources are set independently of each other and duplicated for each pipeline replica, and are considered separate from the native runtime models.
model_native.config().runtime()
'onnx'model_containerized.config().runtime()
'flight'# add the models as a pipeline stepspipeline.add_model_step(model_native)
pipeline.add_model_step(model_containerized)
# DeploymentConfigBuilder is used to create the pipeline's deployment configuration objectfromwallaroo.deployment_configimportDeploymentConfigBuilder# deploy using containerized runtime deploymentdeployment_config_containerized=DeploymentConfigBuilder() \
.replica_count(1) \
.cpus(0.5) \ # shared by the native runtime models.memory('1Gi') \ # shared by the native runtime models.sidekick_cpus(model_containerized, 0.5) \ # 0.5 cpu allocated solely for the containerized model.sidekick_memory(model_containerized, '1Gi') \ #1 Gi allocated solely for the containerized model.build()
# deploy the pipeline with the pipeline configurationpipeline.deploy(deployment_config=deployment_config_containerized)
Pipeline Deployment Timeouts
Pipeline deployments typically take 45 seconds for Wallaroo Native Runtimes, and 90 seconds for Wallaroo Containerized Runtimes.
If Wallaroo Pipeline deployment times out from a very large or complex ML model being deployed, the timeout is extended from with the wallaroo.Client.Client(request_timeout:int) setting, where request_timeout is in integer seconds. Wallaroo Native Runtime deployments are scaled at 1x the request_timeout setting. Wallaroo Containerized Runtimes are scaled at 2x the request_timeout setting.
The following example shows extending the request_timeout to 2 minutes.
4.4 - Wallaroo SDK Essentials Guide: Model Uploads and Registrations: Model Registry Services
How to upload and use Registry ML Models with Wallaroo
Wallaroo users can register their trained machine learning models from a model registry into their Wallaroo instance and perform inferences with it through a Wallaroo pipeline.
This guide details how to add ML Models from a model registry service into a Wallaroo instance.
Artifact Requirements
Models are uploaded to the Wallaroo instance as the specific artifact - the “file” or other data that represents the file itself. This must comply with the Wallaroo model requirements framework and version or it will not be deployed. Note that for models that fall outside of the supported model types, they can be registered to a Wallaroo workspace as MLFlow 1.30.0 containerized models.
Supported Models
The following frameworks are supported. Frameworks fall under either Native or Containerized runtimes in the Wallaroo engine. For more details, see the specific framework what runtime a specific model framework runs in.
IMPORTANT NOTE
Verify that the input types match the specified inputs, especially for Containerized Wallaroo Runtimes. For example, if the input is listed as a pyarrow.float32(), submitting a pyarrow.float64() may cause an error.
The supported frameworks include the specific version of the model framework supported by Wallaroo. It is highly recommended to verify that models uploaded to Wallaroo meet the library and version requirements to ensure proper functioning.
For the most recent release of Wallaroo 2023.4.0, the following native runtimes are supported:
If converting another ML Model to ONNX (PyTorch, XGBoost, etc) using the onnxconverter-common library, the supported DEFAULT_OPSET_NUMBER is 17.
Using different versions or settings outside of these specifications may result in inference issues and other unexpected behavior.
ONNX models always run in the Wallaroo Native Runtime space.
Data Schemas
ONNX models deployed to Wallaroo have the following data requirements.
Equal rows constraint: The number of input rows and output rows must match.
All inputs are tensors: The inputs are tensor arrays with the same shape.
Data Type Consistency: Data types within each tensor are of the same type.
Equal Rows Constraint
Inference performed through ONNX models are assumed to be in batch format, where each input row corresponds to an output row. This is reflected in the in fields returned for an inference. In the following example, each input row for an inference is related directly to the inference output.
For models that require ragged tensor or other shapes, see other data formatting options such as Bring Your Own Predict models.
Data Type Consistency
All inputs into an ONNX model must have the same internal data type. For example, the following is valid because all of the data types within each element are float32.
t= [
[2.35, 5.75],
[3.72, 8.55],
[5.55, 97.2]
]
The following is invalid, as it mixes floats and strings in each element:
These requirements are <strong>not</strong> for Tensorflow Keras models, only for non-Keras Tensorflow models in the SavedModel format. For Tensorflow Keras deployment in Wallaroo, see the Tensorflow Keras requirements.
TensorFlow File Format
TensorFlow models are .zip file of the SavedModel format. For example, the Aloha sample TensorFlow model is stored in the directory alohacnnlstm:
Python models uploaded to Wallaroo are executed as a native runtime.
Note that Python models - aka “Python steps” - are standalone python scripts that use the python libraries natively supported by the Wallaroo platform. These are used for either simple model deployment (such as ARIMA Statsmodels), or data formatting such as the postprocessing steps. A Wallaroo Python model will be composed of one Python script that matches the Wallaroo requirements.
This is contrasted with Arbitrary Python models, also known as Bring Your Own Predict (BYOP) allow for custom model deployments with supporting scripts and artifacts. These are used with pre-trained models (PyTorch, Tensorflow, etc) along with whatever supporting artifacts they require. Supporting artifacts can include other Python modules, model files, etc. These are zipped with all scripts, artifacts, and a requirements.txt file that indicates what other Python models need to be imported that are outside of the typical Wallaroo platform.
Python Models Requirements
Python models uploaded to Wallaroo are Python scripts that must include the wallaroo_json method as the entry point for the Wallaroo engine to use it as a Pipeline step.
This method receives the results of the previous Pipeline step, and its return value will be used in the next Pipeline step.
If the Python model is the first step in the pipeline, then it will be receiving the inference request data (for example: a preprocessing step). If it is the last step in the pipeline, then it will be the data returned from the inference request.
In the example below, the Python model is used as a post processing step for another ML model. The Python model expects to receive data from a ML Model who’s output is a DataFrame with the column dense_2. It then extracts the values of that column as a list, selects the first element, and returns a DataFrame with that element as the value of the column output.
In line with other Wallaroo inference results, the outputs of a Python step that returns a pandas DataFrame or Arrow Table will be listed in the out. metadata, with all inference outputs listed as out.{variable 1}, out.{variable 2}, etc. In the example above, this results the output field as the out.output field in the Wallaroo inference result.
During the model upload process, the Wallaroo instance will attempt to convert the model to a Native Wallaroo Runtime. If unsuccessful based , it will create a Wallaroo Containerized Runtime for the model. See the model deployment section for details on how to configure pipeline resources based on the model’s runtime.
Hugging Face Schemas
Input and output schemas for each Hugging Face pipeline are defined below. Note that adding additional inputs not specified below will raise errors, except for the following:
Framework.HUGGING_FACE_IMAGE_TO_TEXT
Framework.HUGGING_FACE_TEXT_CLASSIFICATION
Framework.HUGGING_FACE_SUMMARIZATION
Framework.HUGGING_FACE_TRANSLATION
Additional inputs added to these Hugging Face pipelines will be added as key/pair value arguments to the model’s generate method. If the argument is not required, then the model will default to the values coded in the original Hugging Face model’s source code.
Any parameter that is not part of the required inputs list will be forwarded to the model as a key/pair value to the underlying models generate method. If the additional input is not supported by the model, an error will be returned.
Any parameter that is not part of the required inputs list will be forwarded to the model as a key/pair value to the underlying models generate method. If the additional input is not supported by the model, an error will be returned.
Schemas:
input_schema=pa.schema([
pa.field('inputs', pa.string()),
pa.field('return_text', pa.bool_()),
pa.field('return_tensors', pa.bool_()),
pa.field('clean_up_tokenization_spaces', pa.bool_()),
# pa.field('extra_field', pa.int64()), # every extra field you specify will be forwarded as a key/value pair])
output_schema=pa.schema([
pa.field('summary_text', pa.string()),
])
input_schema=pa.schema([
pa.field('inputs', pa.string()), # requiredpa.field('top_k', pa.int64()), # optionalpa.field('function_to_apply', pa.string()), # optional])
output_schema=pa.schema([
pa.field('label', pa.list_(pa.string(), list_size=2)), # list with a number of items same as top_k, list_size can be skipped but may lead in worse performancepa.field('score', pa.list_(pa.float64(), list_size=2)), # list with a number of items same as top_k, list_size can be skipped but may lead in worse performance])
Any parameter that is not part of the required inputs list will be forwarded to the model as a key/pair value to the underlying models generate method. If the additional input is not supported by the model, an error will be returned.
Schemas:
input_schema=pa.schema([
pa.field('inputs', pa.string()), # requiredpa.field('return_tensors', pa.bool_()), # optionalpa.field('return_text', pa.bool_()), # optionalpa.field('clean_up_tokenization_spaces', pa.bool_()), # optionalpa.field('src_lang', pa.string()), # optionalpa.field('tgt_lang', pa.string()), # optional# pa.field('extra_field', pa.int64()), # every extra field you specify will be forwarded as a key/value pair])
output_schema=pa.schema([
pa.field('translation_text', pa.string()),
])
input_schema=pa.schema([
pa.field('inputs', pa.string()), # requiredpa.field('candidate_labels', pa.list_(pa.string(), list_size=2)), # requiredpa.field('hypothesis_template', pa.string()), # optionalpa.field('multi_label', pa.bool_()), # optional])
output_schema=pa.schema([
pa.field('sequence', pa.string()),
pa.field('scores', pa.list_(pa.float64(), list_size=2)), # same as number of candidate labels, list_size can be skipped by may result in slightly worse performancepa.field('labels', pa.list_(pa.string(), list_size=2)), # same as number of candidate labels, list_size can be skipped by may result in slightly worse performance])
input_schema=pa.schema([
pa.field('images',
pa.list_(
pa.list_(
pa.list_(
pa.int64(),
list_size=3 ),
list_size=640 ),
list_size=480 )),
pa.field('candidate_labels', pa.list_(pa.string(), list_size=3)),
pa.field('threshold', pa.float64()),
# pa.field('top_k', pa.int64()), # we want the model to return exactly the number of predictions, we shouldn't specify this])
output_schema=pa.schema([
pa.field('score', pa.list_(pa.float64())), # variable output, depending on detected objectspa.field('label', pa.list_(pa.string())), # variable output, depending on detected objectspa.field('box',
pa.list_( # dynamic output, i.e. dynamic number of boxes per input image, each sublist contains the 4 box coordinates pa.list_(
pa.int64(),
list_size=4 ),
),
),
])
Any parameter that is not part of the required inputs list will be forwarded to the model as a key/pair value to the underlying models generate method. If the additional input is not supported by the model, an error will be returned.
input_schema=pa.schema([
pa.field('inputs', pa.string()),
pa.field('return_tensors', pa.bool_()), # optionalpa.field('return_text', pa.bool_()), # optionalpa.field('return_full_text', pa.bool_()), # optionalpa.field('clean_up_tokenization_spaces', pa.bool_()), # optionalpa.field('prefix', pa.string()), # optionalpa.field('handle_long_generation', pa.string()), # optional# pa.field('extra_field', pa.int64()), # every extra field you specify will be forwarded as a key/value pair])
output_schema=pa.schema([
pa.field('generated_text', pa.list_(pa.string(), list_size=1))
])
input_schema=pa.schema([
pa.field('inputs', pa.list_(pa.float32())), # required: the audio stored in numpy arrays of shape (num_samples,) and data type `float32`pa.field('return_timestamps', pa.string()) # optional: return start & end times for each predicted chunk])
output_schema=pa.schema([
pa.field('text', pa.string()), # required: the output text corresponding to the audio inputpa.field('chunks', pa.list_(pa.struct([('text', pa.string()), ('timestamp', pa.list_(pa.float32()))]))), # required (if `return_timestamps` is set), start & end times for each predicted chunk])
IMPORTANT NOTE: The PyTorch model must be in TorchScript format. scripting (i.e. torch.jit.script() is always recommended over tracing (i.e. torch.jit.trace()). From the PyTorch documentation: “Scripting preserves dynamic control flow and is valid for inputs of different sizes.” For more details, see TorchScript-based ONNX Exporter: Tracing vs Scripting.
During the model upload process, the Wallaroo instance will attempt to convert the model to a Native Wallaroo Runtime. If unsuccessful based , it will create a Wallaroo Containerized Runtime for the model. See the model deployment section for details on how to configure pipeline resources based on the model’s runtime.
IMPORTANT CONFIGURATION NOTE: For PyTorch input schemas, the floats must be pyarrow.float32() for the PyTorch model to be converted to the Native Wallaroo Runtime during the upload process.
During the model upload process, the Wallaroo instance will attempt to convert the model to a Native Wallaroo Runtime. If unsuccessful based , it will create a Wallaroo Containerized Runtime for the model. See the model deployment section for details on how to configure pipeline resources based on the model’s runtime.
SKLearn Schema Inputs
SKLearn schema follows a different format than other models. To prevent inputs from being out of order, the inputs should be submitted in a single row in the order the model is trained to accept, with all of the data types being the same. For example, the following DataFrame has 4 columns, each column a float.
sepal length (cm)
sepal width (cm)
petal length (cm)
petal width (cm)
0
5.1
3.5
1.4
0.2
1
4.9
3.0
1.4
0.2
For submission to an SKLearn model, the data input schema will be a single array with 4 float values.
When submitting as an inference, the DataFrame is converted to rows with the column data expressed as a single array. The data must be in the same order as the model expects, which is why the data is submitted as a single array rather than JSON labeled columns: this insures that the data is submitted in the exact order as the model is trained to accept.
Original DataFrame:
sepal length (cm)
sepal width (cm)
petal length (cm)
petal width (cm)
0
5.1
3.5
1.4
0.2
1
4.9
3.0
1.4
0.2
Converted DataFrame:
inputs
0
[5.1, 3.5, 1.4, 0.2]
1
[4.9, 3.0, 1.4, 0.2]
SKLearn Schema Outputs
Outputs for SKLearn that are meant to be predictions or probabilities when output by the model are labeled in the output schema for the model when uploaded to Wallaroo. For example, a model that outputs either 1 or 0 as its output would have the output schema as follows:
During the model upload process, the Wallaroo instance will attempt to convert the model to a Native Wallaroo Runtime. If unsuccessful based , it will create a Wallaroo Containerized Runtime for the model. See the model deployment section for details on how to configure pipeline resources based on the model’s runtime.
TensorFlow Keras SavedModel Format
TensorFlow Keras SavedModel models are .zip file of the SavedModel format. For example, the Aloha sample TensorFlow model is stored in the directory alohacnnlstm:
During the model upload process, the Wallaroo instance will attempt to convert the model to a Native Wallaroo Runtime. If unsuccessful based , it will create a Wallaroo Containerized Runtime for the model. See the model deployment section for details on how to configure pipeline resources based on the model’s runtime.
XGBoost Schema Inputs
XGBoost schema follows a different format than other models. To prevent inputs from being out of order, the inputs should be submitted in a single row in the order the model is trained to accept, with all of the data types being the same. If a model is originally trained to accept inputs of different data types, it will need to be retrained to only accept one data type for each column - typically pa.float64() is a good choice.
For example, the following DataFrame has 4 columns, each column a float.
sepal length (cm)
sepal width (cm)
petal length (cm)
petal width (cm)
0
5.1
3.5
1.4
0.2
1
4.9
3.0
1.4
0.2
For submission to an XGBoost model, the data input schema will be a single array with 4 float values.
When submitting as an inference, the DataFrame is converted to rows with the column data expressed as a single array. The data must be in the same order as the model expects, which is why the data is submitted as a single array rather than JSON labeled columns: this insures that the data is submitted in the exact order as the model is trained to accept.
Original DataFrame:
sepal length (cm)
sepal width (cm)
petal length (cm)
petal width (cm)
0
5.1
3.5
1.4
0.2
1
4.9
3.0
1.4
0.2
Converted DataFrame:
inputs
0
[5.1, 3.5, 1.4, 0.2]
1
[4.9, 3.0, 1.4, 0.2]
XGBoost Schema Outputs
Outputs for XGBoost are labeled based on the trained model outputs. For this example, the output is simply a single output listed as output. In the Wallaroo inference result, it is grouped with the metadata out as out.output.
Arbitrary Python models, also known as Bring Your Own Predict (BYOP) allow for custom model deployments with supporting scripts and artifacts. These are used with pre-trained models (PyTorch, Tensorflow, etc) along with whatever supporting artifacts they require. Supporting artifacts can include other Python modules, model files, etc. These are zipped with all scripts, artifacts, and a requirements.txt file that indicates what other Python models need to be imported that are outside of the typical Wallaroo platform.
Contrast this with Wallaroo Python models - aka “Python steps”. These are standalone python scripts that use the python libraries natively supported by the Wallaroo platform. These are used for either simple model deployment (such as ARIMA Statsmodels), or data formatting such as the postprocessing steps. A Wallaroo Python model will be composed of one Python script that matches the Wallaroo requirements.
Arbitrary Python File Requirements
Arbitrary Python (BYOP) models are uploaded to Wallaroo via a ZIP file with the following components:
Artifact
Type
Description
Python scripts aka .py files with classes that extend mac.inference.Inference and mac.inference.creation.InferenceBuilder
Python Script
Extend the classes mac.inference.Inference and mac.inference.creation.InferenceBuilder. These are included with the Wallaroo SDK. Further details are in Arbitrary Python Script Requirements. Note that there is no specified naming requirements for the classes that extend mac.inference.Inference and mac.inference.creation.InferenceBuilder - any qualified class name is sufficient as long as these two classes are extended as defined below.
requirements.txt
Python requirements file
This sets the Python libraries used for the arbitrary python model. These libraries should be targeted for Python 3.8 compliance. These requirements and the versions of libraries should be exactly the same between creating the model and deploying it in Wallaroo. This insures that the script and methods will function exactly the same as during the model creation process.
Other artifacts
Files
Other models, files, and other artifacts used in support of this model.
For example, the if the arbitrary python model will be known as vgg_clustering, the contents may be in the following structure, with vgg_clustering as the storage directory:
Note the inclusion of the custom_inference.py file. This file name is not required - any Python script or scripts that extend the classes listed above are sufficient. This Python script could have been named vgg_custom_model.py or any other name as long as it includes the extension of the classes listed above.
The sample arbitrary python model file is created with the command zip -r vgg_clustering.zip vgg_clustering/.
Wallaroo Arbitrary Python uses the Wallaroo SDK mac module, included in the Wallaroo SDK 2023.2.1 and above. See the Wallaroo SDK Install Guides for instructions on installing the Wallaroo SDK.
Arbitrary Python Script Requirements
The entry point of the arbitrary python model is any python script that extends the following classes. These are included with the Wallaroo SDK. The required methods that must be overridden are specified in each section below.
mac.inference.Inference interface serves model inferences based on submitted input some input. Its purpose is to serve inferences for any supported arbitrary model framework (e.g. scikit, keras etc.).
classDiagram
    class Inference {
        <<Abstract>>
        +model Optional[Any]
        +expected_model_types()* Set
        +predict(input_data: InferenceData)*  InferenceData
        -raise_error_if_model_is_not_assigned() None
        -raise_error_if_model_is_wrong_type() None
    }
mac.inference.creation.InferenceBuilder builds a concrete Inference, i.e. instantiates an Inference object, loads the appropriate model and assigns the model to to the Inference object.
classDiagram
    class InferenceBuilder {
        +create(config InferenceConfig) * Inference
        -inference()* Any
    }
mac.inference.Inference
mac.inference.Inference Objects
Object
Type
Description
model (Required)
[Any]
One or more objects that match the expected_model_types. This can be a ML Model (for inference use), a string (for data conversion), etc. See Arbitrary Python Examples for examples.
mac.inference.Inference Methods
Method
Returns
Description
expected_model_types (Required)
Set
Returns a Set of models expected for the inference as defined by the developer. Typically this is a set of one. Wallaroo checks the expected model types to verify that the model submitted through the InferenceBuilder method matches what this Inference class expects.
The entry point for the Wallaroo inference with the following input and output parameters that are defined when the model is updated.
mac.types.InferenceData: The inputInferenceData is a Dictionary of numpy arrays derived from the input_schema detailed when the model is uploaded, defined in PyArrow.Schema format.
mac.types.InferenceData: The output is a Dictionary of numpy arrays as defined by the output parameters defined in PyArrow.Schema format.
The InferenceDataValidationError exception is raised when the input data does not match mac.types.InferenceData.
raise_error_if_model_is_not_assigned
N/A
Error when a model is not set to Inference.
raise_error_if_model_is_wrong_type
N/A
Error when the model does not match the expected_model_types.
IMPORTANT NOTE
Verify that the inputs and outputs match the InferenceData input and output types: a Dictionary of numpy arrays defined by the input_schema and output_schema parameters when uploading the model to the Wallaroo instance. The following code is an example of a Dictionary of numpy arrays.
preds=self.model.predict(data)
preds=preds.numpy()
rows, _=preds.shapepreds=preds.reshape((rows,))
return {"prediction": preds} # a Dictionary of numpy arrays.
The example, the expected_model_types can be defined for the KMeans model.
InferenceBuilder builds a concrete Inference, i.e. instantiates an Inference object, loads the appropriate model and assigns the model to the Inference.
classDiagram
    class InferenceBuilder {
        +create(config InferenceConfig) * Inference
        -inference()* Any
    }
Each model that is included requires its own InferenceBuilder. InferenceBuilder loads one model, then submits it to the Inference class when created. The Inference class checks this class against its expected_model_types() Set.
Creates an Inference subclass, then assigns a model and attributes. The CustomInferenceConfig is used to retrieve the config.model_path, which is a pathlib.Path object pointing to the folder where the model artifacts are saved. Every artifact loaded must be relative to config.model_path. This is set when the arbitrary python .zip file is uploaded and the environment for running it in Wallaroo is set. For example: loading the artifact vgg_clustering\feature_extractor.h5 would be set with config.model_path \ feature_extractor.h5. The model loaded must match an existing module. For our example, this is from sklearn.cluster import KMeans, and this must match the Inferenceexpected_model_types.
inference
custom Inference instance.
Returns the instantiated custom Inference object created from the create method.
Arbitrary Python Runtime
Arbitrary Python always run in the containerized model runtime.
Wallaroo users can register their trained MLFlow ML Models from a containerized model container registry into their Wallaroo instance and perform inferences with it through a Wallaroo pipeline.
As of this time, Wallaroo only supports MLFlow 1.30.0 containerized models. For information on how to containerize an MLFlow model, see the MLFlow Documentation.
The following steps create an Access Token used to authenticate to an Azure Databricks Model Registry.
Log into the Azure Databricks workspace.
From the upper right corner access the User Settings.
From the Access tokens, select Generate new token.
Specify any token description and lifetime. Once complete, select Generate.
Copy the token and store in a secure place. Once the Generate New Token module is closed, the token will not be retrievable.
The MLflow Model Registry provides a method of setting up a model registry service. Full details can be found at the MLflow Registry Quick Start Guide.
A generic MLFlow model registry requires no token.
Wallaroo Registry Operations
Connect Model Registry to Wallaroo: This details the link and connection information to a existing MLFlow registry service. Note that this does not create a MLFlow registry service, but adds the connection and credentials to Wallaroo to allow that MLFlow registry service to be used by other entities in the Wallaroo instance.
Add a Registry to a Workspace: Add the created Wallaroo Model Registry so make it available to other workspace members.
Remove a Registry from a Workspace: Remove the link between a Wallaroo Model Registry and a Wallaroo workspace.
Connect Model Registry to Wallaroo
MLFlow Registry connection information is added to a Wallaroo instance through the Wallaroo.Client.create_model_registry method.
Connect Model Registry to Wallaroo Parameters
Parameter
Type
Description
name
string (Required)
The name of the MLFlow Registry service.
token
string (Required)
The authentication token used to authenticate to the MLFlow Registry.
url
string (Required)
The URL of the MLFlow registry service.
Connect Model Registry to Wallaroo Return
The following is returned when a MLFlow Registry is successfully created.
Field
Type
Description
Name
string
The name of the MLFlow Registry service.
URL
string
The URL for connecting to the service.
Workspaces
List[string]
The name of all workspaces this registry was added to.
Created At
DateTime
When the registry was added to the Wallaroo instance.
Updated At
DateTime
When the registry was last updated.
Note that the token is not displayed for security reasons.
Connect Model Registry to Wallaroo Example
The following example creates a Wallaroo MLFlow Registry with the name ExampleNotebook stored in a sample Azure DataBricks environment.
Registries are assigned to a Wallaroo workspace with the Wallaroo.registry.add_registry_to_workspace method. This allows members of the workspace to access the registry connection. A registry can be associated with one or more workspaces.
Add Registry to Workspace Parameters
Parameter
Type
Description
name
string (Required)
The numerical identifier of the workspace.
Add Registry to Workspace Returns
The following is returned when a MLFlow Registry is successfully added to a workspace.
Field
Type
Description
Name
string
The name of the MLFlow Registry service.
URL
string
The URL for connecting to the service.
Workspaces
List[string]
The name of all workspaces this registry was added to.
Created At
DateTime
When the registry was added to the Wallaroo instance.
List Registries in a Workspace: List the available registries in the current workspace.
List Models: List Models in a Registry
Upload Model: Upload a version of a ML Model from the Registry to a Wallaroo workspace.
List Model Versions: List the versions of a particular model.
Remove Registry from Workspace: Remove a specific Registry configuration from a specific workspace.
List Registries in a Workspace
Registries associated with a workspace are listed with the Wallaroo.Client.list_model_registries() method. This lists all registries associated with the current workspace.
List Registries in a Workspace Parameters
None
List Registries in a Workspace Returns
A List of Registries with the following fields.
Field
Type
Description
Name
string
The name of the MLFlow Registry service.
URL
string
The URL for connecting to the service.
Created At
DateTime
When the registry was added to the Wallaroo instance.
Model details are retrieved by assigning a MLFlow Registry Model to an object with the Wallaroo.Registry.list_models(), then specifying the element in the list to save it to a Registered Model object.
The following will return the most recent model added to the MLFlow Registry service.
The user account that is tied to the registry service for this model.
Versions
int
The number of versions for the model, starting at 0.
Created At
DateTime
When the registry was added to the Wallaroo instance.
Updated At
DateTime
When the registry was last updated.
List Model Versions of Registered Model
MLFlow registries can contain multiple versions of a ML Model. These are listed and are listed with the Registered Model versions attribute. The versions are listed in reverse order of insertion, with the most recent model version in position 0.
List Model Versions of Registered Model Parameters
None
List Model Versions of Registered Model Returns
A List of the Registered Model Versions with the following fields.
Field
Type
Description
Name
string
The name of the model.
Version
int
The version number. The higher numbers are the most recent.
Description
string
The registered model’s description from the MLFlow Registry service.
List Model Versions of Registered Model Example
The following will return the most recent model added to the MLFlow Registry service and list its versions.
Models uploaded to the Wallaroo workspace are uploaded from a MLFlow Registry with the Wallaroo.Registry.upload method.
Upload a Model from a Registry Parameters
Parameter
Type
Description
name
string (Required)
The name to assign the model once uploaded. Model names are unique within a workspace. Models assigned the same name as an existing model will be uploaded as a new model version.
path
string (Required)
The full path to the model artifact in the registry.
The settings for a pipeline configuration are dependent on whether the model is converted to the Native Runtime space, or Containerized Model Runtime space during the model upload process. The method wallaroo.model_config.runtime() displays which runtime the uploaded model was converted to.
Wallaroo Native Runtime models typically use the following settings for pipeline resource allocation. See See Native Runtime Configuration Methods for complete options.
The number of replicas of the Wallaroo Native pipeline resources to allocate. Each replica has the same number of cpus, ram, etc. For example: DeploymentConfigBuilder.replica_count(2)
Auto-allocated replicas
wallaroo.deployment_config.DeploymentConfigBuilder.replica_autoscale_min_max(maximum: int, minimum: int = 0)
Replicas that will auto-allocate more replicas to the pipeline from 0 to the set maximum as more inference requests are made.
Number of GPU’s to deploy; GPUs can only be deployed in whole increments. If used, must be paired with the deployment_label pipeline configuration option.
Required if gpus are set and must match the GPU nodepool label.
The following example shows deploying a Native Wallaroo Runtime model with the pipeline configuration of one replica, half a cpu and 1 Gi of RAM.
Note that for native runtime models, total pipeline resources are shared by all the native runtime models for each replica.
model.config().runtime()
'onnx'# add the model as a pipeline steppipeline.add_model_step(model)
# DeploymentConfigBuilder is used to create the pipeline's deployment configuration objectfromwallaroo.deployment_configimportDeploymentConfigBuilder# deploy using native runtime deploymentdeployment_config_native=DeploymentConfigBuilder() \
.replica_count(1) \
.cpus(0.5) \
.memory('1Gi') \
.build()
# deploy the pipeline with the pipeline configurationpipeline.deploy(deployment_config=deployment_config_native)
Wallaroo Containerized Runtime Deployment
Wallaroo Containerized Runtime models typically use the following settings for pipeline resource allocation. See See Containerized Runtime Configuration Methods for complete options.
Containerized Runtime models resources are allocated with the sidekick name, with the containerized model specified for resources.
Number of GPU’s to deploy; GPUs can only be deployed in whole increments. If used, must be paired with the deployment_label pipeline configuration option.
Required if gpus are set and must match the GPU nodepool label.
The following example shows deploying a Containerized Wallaroo Runtime model with the pipeline configuration of one replica, half a cpu and 1 Gi of RAM.
Note that for containerized models, each containerized model’s resources are set independently of each other and duplicated for each pipeline replica, and are considered separate from the native runtime models.
model_native.config().runtime()
'onnx'model_containerized.config().runtime()
'flight'# add the models as a pipeline stepspipeline.add_model_step(model_native)
pipeline.add_model_step(model_containerized)
# DeploymentConfigBuilder is used to create the pipeline's deployment configuration objectfromwallaroo.deployment_configimportDeploymentConfigBuilder# deploy using containerized runtime deploymentdeployment_config_containerized=DeploymentConfigBuilder() \
.replica_count(1) \
.cpus(0.5) \ # shared by the native runtime models.memory('1Gi') \ # shared by the native runtime models.sidekick_cpus(model_containerized, 0.5) \ # 0.5 cpu allocated solely for the containerized model.sidekick_memory(model_containerized, '1Gi') \ #1 Gi allocated solely for the containerized model.build()
# deploy the pipeline with the pipeline configurationpipeline.deploy(deployment_config=deployment_config_containerized)
Pipeline Deployment Timeouts
Pipeline deployments typically take 45 seconds for Wallaroo Native Runtimes, and 90 seconds for Wallaroo Containerized Runtimes.
If Wallaroo Pipeline deployment times out from a very large or complex ML model being deployed, the timeout is extended from with the wallaroo.Client.Client(request_timeout:int) setting, where request_timeout is in integer seconds. Wallaroo Native Runtime deployments are scaled at 1x the request_timeout setting. Wallaroo Containerized Runtimes are scaled at 2x the request_timeout setting.
The following example shows extending the request_timeout to 2 minutes.
4.5 - Wallaroo SDK Essentials Guide: Model Uploads and Registrations: Python Models
How to upload and use Python Models as Wallaroo Pipeline Steps
Model Naming Requirements
Model names map onto Kubernetes objects, and must be DNS compliant. The strings for model names must lower case ASCII alpha-numeric characters or dash (-) only. . and _ are not allowed.
Python scripts are uploaded to Wallaroo and and treated like an ML Models in Pipeline steps. These will be referred to as Python steps.
Python steps can include:
Preprocessing steps to prepare the data received to be handed to ML Model deployed as another Pipeline step.
Postprocessing steps to take data output by a ML Model as part of a Pipeline step, and prepare the data to be received by some other data store or entity.
A model contained within a Python script.
In all of these, the requirements for uploading a Python step as a ML Model in Wallaroo are the same.
Python models uploaded to Wallaroo are executed as a native runtime.
Note that Python models - aka “Python steps” - are standalone python scripts that use the python libraries natively supported by the Wallaroo platform. These are used for either simple model deployment (such as ARIMA Statsmodels), or data formatting such as the postprocessing steps. A Wallaroo Python model will be composed of one Python script that matches the Wallaroo requirements.
This is contrasted with Arbitrary Python models, also known as Bring Your Own Predict (BYOP) allow for custom model deployments with supporting scripts and artifacts. These are used with pre-trained models (PyTorch, Tensorflow, etc) along with whatever supporting artifacts they require. Supporting artifacts can include other Python modules, model files, etc. These are zipped with all scripts, artifacts, and a requirements.txt file that indicates what other Python models need to be imported that are outside of the typical Wallaroo platform.
Python Models Requirements
Python models uploaded to Wallaroo are Python scripts that must include the wallaroo_json method as the entry point for the Wallaroo engine to use it as a Pipeline step.
This method receives the results of the previous Pipeline step, and its return value will be used in the next Pipeline step.
If the Python model is the first step in the pipeline, then it will be receiving the inference request data (for example: a preprocessing step). If it is the last step in the pipeline, then it will be the data returned from the inference request.
In the example below, the Python model is used as a post processing step for another ML model. The Python model expects to receive data from a ML Model who’s output is a DataFrame with the column dense_2. It then extracts the values of that column as a list, selects the first element, and returns a DataFrame with that element as the value of the column output.
In line with other Wallaroo inference results, the outputs of a Python step that returns a pandas DataFrame or Arrow Table will be listed in the out. metadata, with all inference outputs listed as out.{variable 1}, out.{variable 2}, etc. In the example above, this results the output field as the out.output field in the Wallaroo inference result.
time
in.tensor
out.output
check_failures
0
2023-06-20 20:23:28.395
[0.6878518042, 0.1760734021, -0.869514083, 0.3..
[12.886651039123535]
0
Upload Python Models
Python step models are uploaded to Wallaroo through the Wallaroo Client upload_model(name, path, framework).configure(options).
Upload Python Model Parameters
Parameter
Type
Description
name
string (Required)
The name of the model. Model names are unique per workspace. Models that are uploaded with the same name are assigned as a new version of the model.
path
string (Required)
The path to the model file being uploaded.
framework
string (Required)
Set as the Framework.Python.
input_schema
pyarrow.lib.Schema (Required)
The input schema in Apache Arrow schema format.
output_schema
pyarrow.lib.Schema (Required)
The output schema in Apache Arrow schema format.
convert_wait
bool (Optional) (Default: True)
Not required for native runtimes.
True: Waits in the script for the model conversion completion.
False: Proceeds with the script without waiting for the model conversion process to display complete.
arch
wallaroo.engine_config.Architecture
The architecture the model is deployed to. If a model is intended for deployment to an ARM architecture, it must be specified during this step. Values include: X86 (Default): x86 based architectures. ARM: ARM based architectures.
Model Config Options
Model version configurations are updated with the wallaroo.model_version.config and include the following parameters. Most are optional unless specified.
For Python models, the .configure(input_schema, output_schema) parameters are required.
A list of alternate input fields. For example, if the model accepts the input fields ['variable1', 'variable2'], tensor_fields allows those inputs to be overridden to ['square_feet', 'house_age'], or other values as required.
input_schema
pyarrow.lib.Schema (Required)
The input schema for the model in pyarrow.lib.Schema format.
output_schema
pyarrow.lib.Schema (Required)
The output schema for the model in pyarrow.lib.Schema format.
batch_config
(List[string]) (Optional)
Batch config is either None for multiple-input inferences, or single to accept an inference request with only one row of data.
Upload Python Models Example
The following example is of uploading a Python step ML Model to a Wallaroo instance.
4.6 - Wallaroo SDK Essentials Guide: Model Uploads and Registrations: PyTorch
How to upload and use PyTorch ML Models with Wallaroo
Model Naming Requirements
Model names map onto Kubernetes objects, and must be DNS compliant. The strings for model names must lower case ASCII alpha-numeric characters or dash (-) only. . and _ are not allowed.
Wallaroo supports PyTorch models by containerizing the model and running as an image.
IMPORTANT NOTE: The PyTorch model must be in TorchScript format. scripting (i.e. torch.jit.script() is always recommended over tracing (i.e. torch.jit.trace()). From the PyTorch documentation: “Scripting preserves dynamic control flow and is valid for inputs of different sizes.” For more details, see TorchScript-based ONNX Exporter: Tracing vs Scripting.
During the model upload process, the Wallaroo instance will attempt to convert the model to a Native Wallaroo Runtime. If unsuccessful based , it will create a Wallaroo Containerized Runtime for the model. See the model deployment section for details on how to configure pipeline resources based on the model’s runtime.
IMPORTANT CONFIGURATION NOTE: For PyTorch input schemas, the floats must be pyarrow.float32() for the PyTorch model to be converted to the Native Wallaroo Runtime during the upload process.
Uploading PyTorch Models
PyTorch models are uploaded to Wallaroo through the Wallaroo Client upload_model method.
Upload PyTorch Model Parameters
The following parameters are required for PyTorch models. Note that while some fields are considered as optional for the upload_model method, they are required for proper uploading of a PyTorch model to Wallaroo.
Parameter
Type
Description
name
string (Required)
The name of the model. Model names are unique per workspace. Models that are uploaded with the same name are assigned as a new version of the model.
path
string (Required)
The path to the model file being uploaded.
framework
string (Required)
Set as the Framework.PyTorch.
input_schema
pyarrow.lib.Schema (Required)
The input schema in Apache Arrow schema format. Note that float values must be pyarrow.float32() for the Pytorch model to be converted to a Wallaroo Native Runtime during model upload.
output_schema
pyarrow.lib.Schema (Required)
The output schema in Apache Arrow schema format. Note that float values must be pyarrow.float32() for the Pytorch model to be converted to a Wallaroo Native Runtime during model upload.
convert_wait
bool (Optional) (Default: True)
True: Waits in the script for the model conversion completion.
False: Proceeds with the script without waiting for the model conversion process to display complete.
arch
wallaroo.engine_config.Architecture
The architecture the model is deployed to. If a model is intended for deployment to an ARM architecture, it must be specified during this step. Values include: X86 (Default): x86 based architectures. ARM: ARM based architectures.
Once the upload process starts, the model is containerized by the Wallaroo instance. This process may take up to 10 minutes depending on the size and complexity of the model.
Model Config Options
Model version configurations are updated with the wallaroo.model_version.config and include the following parameters. Most are optional unless specified.
A list of alternate input fields. For example, if the model accepts the input fields ['variable1', 'variable2'], tensor_fields allows those inputs to be overridden to ['square_feet', 'house_age'], or other values as required.
input_schema
pyarrow.lib.Schema
The input schema for the model in pyarrow.lib.Schema format.
output_schema
pyarrow.lib.Schema
The output schema for the model in pyarrow.lib.Schema format.
batch_config
(List[string]) (Optional)
Batch config is either None for multiple-input inferences, or single to accept an inference request with only one row of data.
Upload PyTorch Model Return
The following is returned with a successful model upload and conversion.
Field
Type
Description
name
string
The name of the model.
version
string
The model version as a unique UUID.
file_name
string
The file name of the model as stored in Wallaroo.
image_path
string
The image used to deploy the model in the Wallaroo engine.
last_update_time
DateTime
When the model was last updated.
Upload PyTorch Model Example
The following example is of uploading a PyTorch ML Model to a Wallaroo instance.
The settings for a pipeline configuration are dependent on whether the model is converted to the Native Runtime space, or Containerized Model Runtime space during the model upload process. The method wallaroo.model_config.runtime() displays which runtime the uploaded model was converted to.
Wallaroo Native Runtime models typically use the following settings for pipeline resource allocation. See See Native Runtime Configuration Methods for complete options.
The number of replicas of the Wallaroo Native pipeline resources to allocate. Each replica has the same number of cpus, ram, etc. For example: DeploymentConfigBuilder.replica_count(2)
Auto-allocated replicas
wallaroo.deployment_config.DeploymentConfigBuilder.replica_autoscale_min_max(maximum: int, minimum: int = 0)
Replicas that will auto-allocate more replicas to the pipeline from 0 to the set maximum as more inference requests are made.
Number of GPU’s to deploy; GPUs can only be deployed in whole increments. If used, must be paired with the deployment_label pipeline configuration option.
Required if gpus are set and must match the GPU nodepool label.
The following example shows deploying a Native Wallaroo Runtime model with the pipeline configuration of one replica, half a cpu and 1 Gi of RAM.
Note that for native runtime models, total pipeline resources are shared by all the native runtime models for each replica.
model.config().runtime()
'onnx'# add the model as a pipeline steppipeline.add_model_step(model)
# DeploymentConfigBuilder is used to create the pipeline's deployment configuration objectfromwallaroo.deployment_configimportDeploymentConfigBuilder# deploy using native runtime deploymentdeployment_config_native=DeploymentConfigBuilder() \
.replica_count(1) \
.cpus(0.5) \
.memory('1Gi') \
.build()
# deploy the pipeline with the pipeline configurationpipeline.deploy(deployment_config=deployment_config_native)
Wallaroo Containerized Runtime Deployment
Wallaroo Containerized Runtime models typically use the following settings for pipeline resource allocation. See See Containerized Runtime Configuration Methods for complete options.
Containerized Runtime models resources are allocated with the sidekick name, with the containerized model specified for resources.
Number of GPU’s to deploy; GPUs can only be deployed in whole increments. If used, must be paired with the deployment_label pipeline configuration option.
Required if gpus are set and must match the GPU nodepool label.
The following example shows deploying a Containerized Wallaroo Runtime model with the pipeline configuration of one replica, half a cpu and 1 Gi of RAM.
Note that for containerized models, each containerized model’s resources are set independently of each other and duplicated for each pipeline replica, and are considered separate from the native runtime models.
model_native.config().runtime()
'onnx'model_containerized.config().runtime()
'flight'# add the models as a pipeline stepspipeline.add_model_step(model_native)
pipeline.add_model_step(model_containerized)
# DeploymentConfigBuilder is used to create the pipeline's deployment configuration objectfromwallaroo.deployment_configimportDeploymentConfigBuilder# deploy using containerized runtime deploymentdeployment_config_containerized=DeploymentConfigBuilder() \
.replica_count(1) \
.cpus(0.5) \ # shared by the native runtime models.memory('1Gi') \ # shared by the native runtime models.sidekick_cpus(model_containerized, 0.5) \ # 0.5 cpu allocated solely for the containerized model.sidekick_memory(model_containerized, '1Gi') \ #1 Gi allocated solely for the containerized model.build()
# deploy the pipeline with the pipeline configurationpipeline.deploy(deployment_config=deployment_config_containerized)
Pipeline Deployment Timeouts
Pipeline deployments typically take 45 seconds for Wallaroo Native Runtimes, and 90 seconds for Wallaroo Containerized Runtimes.
If Wallaroo Pipeline deployment times out from a very large or complex ML model being deployed, the timeout is extended from with the wallaroo.Client.Client(request_timeout:int) setting, where request_timeout is in integer seconds. Wallaroo Native Runtime deployments are scaled at 1x the request_timeout setting. Wallaroo Containerized Runtimes are scaled at 2x the request_timeout setting.
The following example shows extending the request_timeout to 2 minutes.
4.7 - Wallaroo SDK Essentials Guide: Model Uploads and Registrations: SKLearn
How to upload and use SKLearn ML Models with Wallaroo
Model Naming Requirements
Model names map onto Kubernetes objects, and must be DNS compliant. The strings for model names must lower case ASCII alpha-numeric characters or dash (-) only. . and _ are not allowed.
Wallaroo supports SKLearn models by containerizing the model and running as an image.
During the model upload process, the Wallaroo instance will attempt to convert the model to a Native Wallaroo Runtime. If unsuccessful based , it will create a Wallaroo Containerized Runtime for the model. See the model deployment section for details on how to configure pipeline resources based on the model’s runtime.
SKLearn Schema Inputs
SKLearn schema follows a different format than other models. To prevent inputs from being out of order, the inputs should be submitted in a single row in the order the model is trained to accept, with all of the data types being the same. For example, the following DataFrame has 4 columns, each column a float.
sepal length (cm)
sepal width (cm)
petal length (cm)
petal width (cm)
0
5.1
3.5
1.4
0.2
1
4.9
3.0
1.4
0.2
For submission to an SKLearn model, the data input schema will be a single array with 4 float values.
When submitting as an inference, the DataFrame is converted to rows with the column data expressed as a single array. The data must be in the same order as the model expects, which is why the data is submitted as a single array rather than JSON labeled columns: this insures that the data is submitted in the exact order as the model is trained to accept.
Original DataFrame:
sepal length (cm)
sepal width (cm)
petal length (cm)
petal width (cm)
0
5.1
3.5
1.4
0.2
1
4.9
3.0
1.4
0.2
Converted DataFrame:
inputs
0
[5.1, 3.5, 1.4, 0.2]
1
[4.9, 3.0, 1.4, 0.2]
SKLearn Schema Outputs
Outputs for SKLearn that are meant to be predictions or probabilities when output by the model are labeled in the output schema for the model when uploaded to Wallaroo. For example, a model that outputs either 1 or 0 as its output would have the output schema as follows:
When used in Wallaroo, the inference result is contained in the out metadata as out.predictions.
pipeline.infer(dataframe)
time
in.inputs
out.predictions
check_failures
0
2023-07-05 15:11:29.776
[5.1, 3.5, 1.4, 0.2]
0
0
1
2023-07-05 15:11:29.776
[4.9, 3.0, 1.4, 0.2]
0
0
Uploading SKLearn Models
SKLearn models are uploaded to Wallaroo through the Wallaroo Client upload_model method.
Upload SKLearn Model Parameters
The following parameters are required for SKLearn models. Note that while some fields are considered as optional for the upload_model method, they are required for proper uploading of a SKLearn model to Wallaroo.
Parameter
Type
Description
name
string (Required)
The name of the model. Model names are unique per workspace. Models that are uploaded with the same name are assigned as a new version of the model.
path
string (Required)
The path to the model file being uploaded.
framework
string (Required)
Set as the Framework.SKLEARN.
input_schema
pyarrow.lib.Schema (Required)
The input schema in Apache Arrow schema format.
output_schema
pyarrow.lib.Schema (Required)
The output schema in Apache Arrow schema format.
convert_wait
bool (Optional) (Default: True)
True: Waits in the script for the model conversion completion.
False: Proceeds with the script without waiting for the model conversion process to display complete.
arch
wallaroo.engine_config.Architecture
The architecture the model is deployed to. If a model is intended for deployment to an ARM architecture, it must be specified during this step. Values include: X86 (Default): x86 based architectures. ARM: ARM based architectures.
Once the upload process starts, the model is containerized by the Wallaroo instance. This process may take up to 10 minutes.
Model Config Options
Model version configurations are updated with the wallaroo.model_version.config and include the following parameters. Most are optional unless specified.
A list of alternate input fields. For example, if the model accepts the input fields ['variable1', 'variable2'], tensor_fields allows those inputs to be overridden to ['square_feet', 'house_age'], or other values as required.
input_schema
pyarrow.lib.Schema
The input schema for the model in pyarrow.lib.Schema format.
output_schema
pyarrow.lib.Schema
The output schema for the model in pyarrow.lib.Schema format.
batch_config
(List[string]) (Optional)
Batch config is either None for multiple-input inferences, or single to accept an inference request with only one row of data.
Upload SKLearn Model Return
The following is returned with a successful model upload and conversion.
Field
Type
Description
name
string
The name of the model.
version
string
The model version as a unique UUID.
file_name
string
The file name of the model as stored in Wallaroo.
image_path
string
The image used to deploy the model in the Wallaroo engine.
last_update_time
DateTime
When the model was last updated.
Upload SKLearn Model Example
The following example is of uploading a pickled SKLearn ML Model to a Wallaroo instance.
The settings for a pipeline configuration are dependent on whether the model is converted to the Native Runtime space, or Containerized Model Runtime space during the model upload process. The method wallaroo.model_config.runtime() displays which runtime the uploaded model was converted to.
Wallaroo Native Runtime models typically use the following settings for pipeline resource allocation. See See Native Runtime Configuration Methods for complete options.
The number of replicas of the Wallaroo Native pipeline resources to allocate. Each replica has the same number of cpus, ram, etc. For example: DeploymentConfigBuilder.replica_count(2)
Auto-allocated replicas
wallaroo.deployment_config.DeploymentConfigBuilder.replica_autoscale_min_max(maximum: int, minimum: int = 0)
Replicas that will auto-allocate more replicas to the pipeline from 0 to the set maximum as more inference requests are made.
Number of GPU’s to deploy; GPUs can only be deployed in whole increments. If used, must be paired with the deployment_label pipeline configuration option.
Required if gpus are set and must match the GPU nodepool label.
The following example shows deploying a Native Wallaroo Runtime model with the pipeline configuration of one replica, half a cpu and 1 Gi of RAM.
Note that for native runtime models, total pipeline resources are shared by all the native runtime models for each replica.
model.config().runtime()
'onnx'# add the model as a pipeline steppipeline.add_model_step(model)
# DeploymentConfigBuilder is used to create the pipeline's deployment configuration objectfromwallaroo.deployment_configimportDeploymentConfigBuilder# deploy using native runtime deploymentdeployment_config_native=DeploymentConfigBuilder() \
.replica_count(1) \
.cpus(0.5) \
.memory('1Gi') \
.build()
# deploy the pipeline with the pipeline configurationpipeline.deploy(deployment_config=deployment_config_native)
Wallaroo Containerized Runtime Deployment
Wallaroo Containerized Runtime models typically use the following settings for pipeline resource allocation. See See Containerized Runtime Configuration Methods for complete options.
Containerized Runtime models resources are allocated with the sidekick name, with the containerized model specified for resources.
Number of GPU’s to deploy; GPUs can only be deployed in whole increments. If used, must be paired with the deployment_label pipeline configuration option.
Required if gpus are set and must match the GPU nodepool label.
The following example shows deploying a Containerized Wallaroo Runtime model with the pipeline configuration of one replica, half a cpu and 1 Gi of RAM.
Note that for containerized models, each containerized model’s resources are set independently of each other and duplicated for each pipeline replica, and are considered separate from the native runtime models.
model_native.config().runtime()
'onnx'model_containerized.config().runtime()
'flight'# add the models as a pipeline stepspipeline.add_model_step(model_native)
pipeline.add_model_step(model_containerized)
# DeploymentConfigBuilder is used to create the pipeline's deployment configuration objectfromwallaroo.deployment_configimportDeploymentConfigBuilder# deploy using containerized runtime deploymentdeployment_config_containerized=DeploymentConfigBuilder() \
.replica_count(1) \
.cpus(0.5) \ # shared by the native runtime models.memory('1Gi') \ # shared by the native runtime models.sidekick_cpus(model_containerized, 0.5) \ # 0.5 cpu allocated solely for the containerized model.sidekick_memory(model_containerized, '1Gi') \ #1 Gi allocated solely for the containerized model.build()
# deploy the pipeline with the pipeline configurationpipeline.deploy(deployment_config=deployment_config_containerized)
Pipeline Deployment Timeouts
Pipeline deployments typically take 45 seconds for Wallaroo Native Runtimes, and 90 seconds for Wallaroo Containerized Runtimes.
If Wallaroo Pipeline deployment times out from a very large or complex ML model being deployed, the timeout is extended from with the wallaroo.Client.Client(request_timeout:int) setting, where request_timeout is in integer seconds. Wallaroo Native Runtime deployments are scaled at 1x the request_timeout setting. Wallaroo Containerized Runtimes are scaled at 2x the request_timeout setting.
The following example shows extending the request_timeout to 2 minutes.
4.8 - Wallaroo SDK Essentials Guide: Model Uploads and Registrations: Hugging Face
How to upload and use Hugging Face ML Models with Wallaroo
Model Naming Requirements
Model names map onto Kubernetes objects, and must be DNS compliant. The strings for model names must lower case ASCII alpha-numeric characters or dash (-) only. . and _ are not allowed.
Wallaroo supports Hugging Face models by containerizing the model and running as an image.
During the model upload process, the Wallaroo instance will attempt to convert the model to a Native Wallaroo Runtime. If unsuccessful based , it will create a Wallaroo Containerized Runtime for the model. See the model deployment section for details on how to configure pipeline resources based on the model’s runtime.
Hugging Face Schemas
Input and output schemas for each Hugging Face pipeline are defined below. Note that adding additional inputs not specified below will raise errors, except for the following:
Framework.HUGGING_FACE_IMAGE_TO_TEXT
Framework.HUGGING_FACE_TEXT_CLASSIFICATION
Framework.HUGGING_FACE_SUMMARIZATION
Framework.HUGGING_FACE_TRANSLATION
Additional inputs added to these Hugging Face pipelines will be added as key/pair value arguments to the model’s generate method. If the argument is not required, then the model will default to the values coded in the original Hugging Face model’s source code.
Any parameter that is not part of the required inputs list will be forwarded to the model as a key/pair value to the underlying models generate method. If the additional input is not supported by the model, an error will be returned.
Any parameter that is not part of the required inputs list will be forwarded to the model as a key/pair value to the underlying models generate method. If the additional input is not supported by the model, an error will be returned.
Schemas:
input_schema=pa.schema([
pa.field('inputs', pa.string()),
pa.field('return_text', pa.bool_()),
pa.field('return_tensors', pa.bool_()),
pa.field('clean_up_tokenization_spaces', pa.bool_()),
# pa.field('extra_field', pa.int64()), # every extra field you specify will be forwarded as a key/value pair])
output_schema=pa.schema([
pa.field('summary_text', pa.string()),
])
input_schema=pa.schema([
pa.field('inputs', pa.string()), # requiredpa.field('top_k', pa.int64()), # optionalpa.field('function_to_apply', pa.string()), # optional])
output_schema=pa.schema([
pa.field('label', pa.list_(pa.string(), list_size=2)), # list with a number of items same as top_k, list_size can be skipped but may lead in worse performancepa.field('score', pa.list_(pa.float64(), list_size=2)), # list with a number of items same as top_k, list_size can be skipped but may lead in worse performance])
Any parameter that is not part of the required inputs list will be forwarded to the model as a key/pair value to the underlying models generate method. If the additional input is not supported by the model, an error will be returned.
Schemas:
input_schema=pa.schema([
pa.field('inputs', pa.string()), # requiredpa.field('return_tensors', pa.bool_()), # optionalpa.field('return_text', pa.bool_()), # optionalpa.field('clean_up_tokenization_spaces', pa.bool_()), # optionalpa.field('src_lang', pa.string()), # optionalpa.field('tgt_lang', pa.string()), # optional# pa.field('extra_field', pa.int64()), # every extra field you specify will be forwarded as a key/value pair])
output_schema=pa.schema([
pa.field('translation_text', pa.string()),
])
input_schema=pa.schema([
pa.field('inputs', pa.string()), # requiredpa.field('candidate_labels', pa.list_(pa.string(), list_size=2)), # requiredpa.field('hypothesis_template', pa.string()), # optionalpa.field('multi_label', pa.bool_()), # optional])
output_schema=pa.schema([
pa.field('sequence', pa.string()),
pa.field('scores', pa.list_(pa.float64(), list_size=2)), # same as number of candidate labels, list_size can be skipped by may result in slightly worse performancepa.field('labels', pa.list_(pa.string(), list_size=2)), # same as number of candidate labels, list_size can be skipped by may result in slightly worse performance])
input_schema=pa.schema([
pa.field('images',
pa.list_(
pa.list_(
pa.list_(
pa.int64(),
list_size=3 ),
list_size=640 ),
list_size=480 )),
pa.field('candidate_labels', pa.list_(pa.string(), list_size=3)),
pa.field('threshold', pa.float64()),
# pa.field('top_k', pa.int64()), # we want the model to return exactly the number of predictions, we shouldn't specify this])
output_schema=pa.schema([
pa.field('score', pa.list_(pa.float64())), # variable output, depending on detected objectspa.field('label', pa.list_(pa.string())), # variable output, depending on detected objectspa.field('box',
pa.list_( # dynamic output, i.e. dynamic number of boxes per input image, each sublist contains the 4 box coordinates pa.list_(
pa.int64(),
list_size=4 ),
),
),
])
Any parameter that is not part of the required inputs list will be forwarded to the model as a key/pair value to the underlying models generate method. If the additional input is not supported by the model, an error will be returned.
input_schema=pa.schema([
pa.field('inputs', pa.string()),
pa.field('return_tensors', pa.bool_()), # optionalpa.field('return_text', pa.bool_()), # optionalpa.field('return_full_text', pa.bool_()), # optionalpa.field('clean_up_tokenization_spaces', pa.bool_()), # optionalpa.field('prefix', pa.string()), # optionalpa.field('handle_long_generation', pa.string()), # optional# pa.field('extra_field', pa.int64()), # every extra field you specify will be forwarded as a key/value pair])
output_schema=pa.schema([
pa.field('generated_text', pa.list_(pa.string(), list_size=1))
])
input_schema=pa.schema([
pa.field('inputs', pa.list_(pa.float32())), # required: the audio stored in numpy arrays of shape (num_samples,) and data type `float32`pa.field('return_timestamps', pa.string()) # optional: return start & end times for each predicted chunk])
output_schema=pa.schema([
pa.field('text', pa.string()), # required: the output text corresponding to the audio inputpa.field('chunks', pa.list_(pa.struct([('text', pa.string()), ('timestamp', pa.list_(pa.float32()))]))), # required (if `return_timestamps` is set), start & end times for each predicted chunk])
Uploading Hugging Face Models
Hugging Face models are uploaded to Wallaroo through the Wallaroo Client upload_model method.
Upload Hugging Face Model Parameters
The following parameters are required for Hugging Face models. Note that while some fields are considered as optional for the upload_model method, they are required for proper uploading of a Hugging Face model to Wallaroo.
Parameter
Type
Description
name
string (Required)
The name of the model. Model names are unique per workspace. Models that are uploaded with the same name are assigned as a new version of the model.
path
string (Required)
The path to the model file being uploaded.
framework
string (Required)
Set as the framework - see the list above for all supported Hugging Face frameworks.
input_schema
pyarrow.lib.Schema (Required)
The input schema in Apache Arrow schema format.
output_schema
pyarrow.lib.Schema (Required)
The output schema in Apache Arrow schema format.
convert_wait
bool (Optional) (Default: True)
True: Waits in the script for the model conversion completion.
False: Proceeds with the script without waiting for the model conversion process to display complete.
arch
wallaroo.engine_config.Architecture
The architecture the model is deployed to. If a model is intended for deployment to an ARM architecture, it must be specified during this step. Values include: X86 (Default): x86 based architectures. ARM: ARM based architectures.
Once the upload process starts, the model is containerized by the Wallaroo instance. This process may take up to 10 minutes.
Model Config Options
Model version configurations are updated with the wallaroo.model_version.config and include the following parameters. Most are optional unless specified.
A list of alternate input fields. For example, if the model accepts the input fields ['variable1', 'variable2'], tensor_fields allows those inputs to be overridden to ['square_feet', 'house_age'], or other values as required.
input_schema
pyarrow.lib.Schema
The input schema for the model in pyarrow.lib.Schema format.
output_schema
pyarrow.lib.Schema
The output schema for the model in pyarrow.lib.Schema format.
batch_config
(List[string]) (Optional)
Batch config is either None for multiple-input inferences, or single to accept an inference request with only one row of data.
Upload Hugging Face Model Return
The following is returned with a successful model upload and conversion.
Field
Type
Description
name
string
The name of the model.
version
string
The model version as a unique UUID.
file_name
string
The file name of the model as stored in Wallaroo.
image_path
string
The image used to deploy the model in the Wallaroo engine.
last_update_time
DateTime
When the model was last updated.
Upload Hugging Face Model Example
The following example is of uploading a Hugging Face Zero Shot Classification ML Model to a Wallaroo instance.
input_schema=pa.schema([
pa.field('inputs', pa.string()), # requiredpa.field('candidate_labels', pa.list_(pa.string(), list_size=2)), # requiredpa.field('hypothesis_template', pa.string()), # optionalpa.field('multi_label', pa.bool_()), # optional])
output_schema=pa.schema([
pa.field('sequence', pa.string()),
pa.field('scores', pa.list_(pa.float64(), list_size=2)), # same as number of candidate labels, list_size can be skipped by may result in slightly worse performancepa.field('labels', pa.list_(pa.string(), list_size=2)), # same as number of candidate labels, list_size can be skipped by may result in slightly worse performance])
model=wl.upload_model("hf-zero-shot-classification",
"./models/model-auto-conversion_hugging-face_dummy-pipelines_zero-shot-classification-pipeline.zip",
framework=Framework.HUGGING_FACE_ZERO_SHOT_CLASSIFICATION,
input_schema=input_schema,
output_schema=output_schema,
convert_wait=True)
Waitingformodelloading-thiswilltakeupto10.0min.Modelispendingloadingtoacontainerruntime..Modelisattemptingloadingtoacontainerruntime................................................successfulReady
The settings for a pipeline configuration are dependent on whether the model is converted to the Native Runtime space, or Containerized Model Runtime space during the model upload process. The method wallaroo.model_config.runtime() displays which runtime the uploaded model was converted to.
Wallaroo Native Runtime models typically use the following settings for pipeline resource allocation. See See Native Runtime Configuration Methods for complete options.
The number of replicas of the Wallaroo Native pipeline resources to allocate. Each replica has the same number of cpus, ram, etc. For example: DeploymentConfigBuilder.replica_count(2)
Auto-allocated replicas
wallaroo.deployment_config.DeploymentConfigBuilder.replica_autoscale_min_max(maximum: int, minimum: int = 0)
Replicas that will auto-allocate more replicas to the pipeline from 0 to the set maximum as more inference requests are made.
Number of GPU’s to deploy; GPUs can only be deployed in whole increments. If used, must be paired with the deployment_label pipeline configuration option.
Required if gpus are set and must match the GPU nodepool label.
The following example shows deploying a Native Wallaroo Runtime model with the pipeline configuration of one replica, half a cpu and 1 Gi of RAM.
Note that for native runtime models, total pipeline resources are shared by all the native runtime models for each replica.
model.config().runtime()
'onnx'# add the model as a pipeline steppipeline.add_model_step(model)
# DeploymentConfigBuilder is used to create the pipeline's deployment configuration objectfromwallaroo.deployment_configimportDeploymentConfigBuilder# deploy using native runtime deploymentdeployment_config_native=DeploymentConfigBuilder() \
.replica_count(1) \
.cpus(0.5) \
.memory('1Gi') \
.build()
# deploy the pipeline with the pipeline configurationpipeline.deploy(deployment_config=deployment_config_native)
Wallaroo Containerized Runtime Deployment
Wallaroo Containerized Runtime models typically use the following settings for pipeline resource allocation. See See Containerized Runtime Configuration Methods for complete options.
Containerized Runtime models resources are allocated with the sidekick name, with the containerized model specified for resources.
Number of GPU’s to deploy; GPUs can only be deployed in whole increments. If used, must be paired with the deployment_label pipeline configuration option.
Required if gpus are set and must match the GPU nodepool label.
The following example shows deploying a Containerized Wallaroo Runtime model with the pipeline configuration of one replica, half a cpu and 1 Gi of RAM.
Note that for containerized models, each containerized model’s resources are set independently of each other and duplicated for each pipeline replica, and are considered separate from the native runtime models.
model_native.config().runtime()
'onnx'model_containerized.config().runtime()
'flight'# add the models as a pipeline stepspipeline.add_model_step(model_native)
pipeline.add_model_step(model_containerized)
# DeploymentConfigBuilder is used to create the pipeline's deployment configuration objectfromwallaroo.deployment_configimportDeploymentConfigBuilder# deploy using containerized runtime deploymentdeployment_config_containerized=DeploymentConfigBuilder() \
.replica_count(1) \
.cpus(0.5) \ # shared by the native runtime models.memory('1Gi') \ # shared by the native runtime models.sidekick_cpus(model_containerized, 0.5) \ # 0.5 cpu allocated solely for the containerized model.sidekick_memory(model_containerized, '1Gi') \ #1 Gi allocated solely for the containerized model.build()
# deploy the pipeline with the pipeline configurationpipeline.deploy(deployment_config=deployment_config_containerized)
Pipeline Deployment Timeouts
Pipeline deployments typically take 45 seconds for Wallaroo Native Runtimes, and 90 seconds for Wallaroo Containerized Runtimes.
If Wallaroo Pipeline deployment times out from a very large or complex ML model being deployed, the timeout is extended from with the wallaroo.Client.Client(request_timeout:int) setting, where request_timeout is in integer seconds. Wallaroo Native Runtime deployments are scaled at 1x the request_timeout setting. Wallaroo Containerized Runtimes are scaled at 2x the request_timeout setting.
The following example shows extending the request_timeout to 2 minutes.
4.9 - Wallaroo SDK Essentials Guide: Model Uploads and Registrations: TensorFlow
How to upload and use TensorFlow ML Models with Wallaroo
Model Naming Requirements
Model names map onto Kubernetes objects, and must be DNS compliant. The strings for model names must lower case ASCII alpha-numeric characters or dash (-) only. . and _ are not allowed.
Wallaroo supports TensorFlow models by containerizing the model and running as an image.
These requirements are not for Tensorflow Keras models, only for non-Keras Tensorflow models in the SavedModel format. For Tensorflow Keras deployment in Wallaroo, see the Tensorflow Keras requirements.
TensorFlow File Format
TensorFlow models are .zip file of the SavedModel format. For example, the Aloha sample TensorFlow model is stored in the directory alohacnnlstm:
TensorFlow models are uploaded to Wallaroo through the Wallaroo Client upload_model method.
Upload TensorFlow Model Parameters
The following parameters are required for TensorFlow models. Tensorflow models are native runtimes in Wallaroo, so the input_schema and output_schema parameters are optional.
Parameter
Type
Description
name
string (Required)
The name of the model. Model names are unique per workspace. Models that are uploaded with the same name are assigned as a new version of the model.
path
string (Required)
The path to the model file being uploaded.
framework
string (Required)
Set as the Framework.TENSORFLOW.
input_schema
pyarrow.lib.Schema (Optional)
The input schema in Apache Arrow schema format.
output_schema
pyarrow.lib.Schema (Optional)
The output schema in Apache Arrow schema format.
convert_wait
bool (Optional) (Default: True)
Not required for native runtimes.
True: Waits in the script for the model conversion completion.
False: Proceeds with the script without waiting for the model conversion process to display complete.
arch
wallaroo.engine_config.Architecture
The architecture the model is deployed to. If a model is intended for deployment to an ARM architecture, it must be specified during this step. Values include: X86 (Default): x86 based architectures. ARM: ARM based architectures.
Once the upload process starts, the model is containerized by the Wallaroo instance. This process may take up to 10 minutes.
Model Config Options
Model version configurations are updated with the wallaroo.model_version.config and include the following parameters. Most are optional unless specified.
A list of alternate input fields. For example, if the model accepts the input fields ['variable1', 'variable2'], tensor_fields allows those inputs to be overridden to ['square_feet', 'house_age'], or other values as required.
input_schema
pyarrow.lib.Schema
The input schema for the model in pyarrow.lib.Schema format.
output_schema
pyarrow.lib.Schema
The output schema for the model in pyarrow.lib.Schema format.
batch_config
(List[string]) (Optional)
Batch config is either None for multiple-input inferences, or single to accept an inference request with only one row of data.
Upload TensorFlow Model Return
For example, the following example is of uploading a TensorFlow ML Model to a Wallaroo instance.
Pipeline deployments typically take 45 seconds for Wallaroo Native Runtimes, and 90 seconds for Wallaroo Containerized Runtimes.
If Wallaroo Pipeline deployment times out from a very large or complex ML model being deployed, the timeout is extended from with the wallaroo.Client.Client(request_timeout:int) setting, where request_timeout is in integer seconds. Wallaroo Native Runtime deployments are scaled at 1x the request_timeout setting. Wallaroo Containerized Runtimes are scaled at 2x the request_timeout setting.
The following example shows extending the request_timeout to 2 minutes.
4.10 - Wallaroo SDK Essentials Guide: Model Uploads and Registrations: TensorFlow Keras
How to upload and use TensorFlow Keras ML Models with Wallaroo
Model Naming Requirements
Model names map onto Kubernetes objects, and must be DNS compliant. The strings for model names must lower case ASCII alpha-numeric characters or dash (-) only. . and _ are not allowed.
Wallaroo supports TensorFlow/Keras models by containerizing the model and running as an image.
During the model upload process, the Wallaroo instance will attempt to convert the model to a Native Wallaroo Runtime. If unsuccessful based , it will create a Wallaroo Containerized Runtime for the model. See the model deployment section for details on how to configure pipeline resources based on the model’s runtime.
TensorFlow Keras SavedModel Format
TensorFlow Keras SavedModel models are .zip file of the SavedModel format. For example, the Aloha sample TensorFlow model is stored in the directory alohacnnlstm:
Wallaroo supports the H5 for Tensorflow Keras models.
Uploading TensorFlow Models
TensorFlow Keras models are uploaded to Wallaroo through the Wallaroo Client upload_model method.
Upload TensorFlow Model Parameters
The following parameters are required for TensorFlow keras models. Note that while some fields are considered as optional for the upload_model method, they are required for proper uploading of a TensorFlow Keras model to Wallaroo.
Parameter
Type
Description
name
string (Required)
The name of the model. Model names are unique per workspace. Models that are uploaded with the same name are assigned as a new version of the model.
path
string (Required)
The path to the model file being uploaded.
framework
string (Required)
Set as the Framework.KERAS.
input_schema
pyarrow.lib.Schema (Required)
The input schema in Apache Arrow schema format.
output_schema
pyarrow.lib.Schema (Required)
The output schema in Apache Arrow schema format.
convert_wait
bool (Optional) (Default: True)
True: Waits in the script for the model conversion completion.
False: Proceeds with the script without waiting for the model conversion process to display complete.
arch
wallaroo.engine_config.Architecture
The architecture the model is deployed to. If a model is intended for deployment to an ARM architecture, it must be specified during this step. Values include: X86 (Default): x86 based architectures. ARM: ARM based architectures.
Once the upload process starts, the model is containerized by the Wallaroo instance. This process may take up to 10 minutes.
Model Config Options
Model version configurations are updated with the wallaroo.model_version.config and include the following parameters. Most are optional unless specified.
A list of alternate input fields. For example, if the model accepts the input fields ['variable1', 'variable2'], tensor_fields allows those inputs to be overridden to ['square_feet', 'house_age'], or other values as required.
input_schema
pyarrow.lib.Schema
The input schema for the model in pyarrow.lib.Schema format.
output_schema
pyarrow.lib.Schema
The output schema for the model in pyarrow.lib.Schema format.
batch_config
(List[string]) (Optional)
Batch config is either None for multiple-input inferences, or single to accept an inference request with only one row of data.
Upload TensorFlow Model Return
For example, the following example is of uploading a PyTorch ML Model to a Wallaroo instance.
The settings for a pipeline configuration are dependent on whether the model is converted to the Native Runtime space, or Containerized Model Runtime space during the model upload process. The method wallaroo.model_config.runtime() displays which runtime the uploaded model was converted to.
Wallaroo Native Runtime models typically use the following settings for pipeline resource allocation. See See Native Runtime Configuration Methods for complete options.
The number of replicas of the Wallaroo Native pipeline resources to allocate. Each replica has the same number of cpus, ram, etc. For example: DeploymentConfigBuilder.replica_count(2)
Auto-allocated replicas
wallaroo.deployment_config.DeploymentConfigBuilder.replica_autoscale_min_max(maximum: int, minimum: int = 0)
Replicas that will auto-allocate more replicas to the pipeline from 0 to the set maximum as more inference requests are made.
Number of GPU’s to deploy; GPUs can only be deployed in whole increments. If used, must be paired with the deployment_label pipeline configuration option.
Required if gpus are set and must match the GPU nodepool label.
The following example shows deploying a Native Wallaroo Runtime model with the pipeline configuration of one replica, half a cpu and 1 Gi of RAM.
Note that for native runtime models, total pipeline resources are shared by all the native runtime models for each replica.
model.config().runtime()
'onnx'# add the model as a pipeline steppipeline.add_model_step(model)
# DeploymentConfigBuilder is used to create the pipeline's deployment configuration objectfromwallaroo.deployment_configimportDeploymentConfigBuilder# deploy using native runtime deploymentdeployment_config_native=DeploymentConfigBuilder() \
.replica_count(1) \
.cpus(0.5) \
.memory('1Gi') \
.build()
# deploy the pipeline with the pipeline configurationpipeline.deploy(deployment_config=deployment_config_native)
Wallaroo Containerized Runtime Deployment
Wallaroo Containerized Runtime models typically use the following settings for pipeline resource allocation. See See Containerized Runtime Configuration Methods for complete options.
Containerized Runtime models resources are allocated with the sidekick name, with the containerized model specified for resources.
Number of GPU’s to deploy; GPUs can only be deployed in whole increments. If used, must be paired with the deployment_label pipeline configuration option.
Required if gpus are set and must match the GPU nodepool label.
The following example shows deploying a Containerized Wallaroo Runtime model with the pipeline configuration of one replica, half a cpu and 1 Gi of RAM.
Note that for containerized models, each containerized model’s resources are set independently of each other and duplicated for each pipeline replica, and are considered separate from the native runtime models.
model_native.config().runtime()
'onnx'model_containerized.config().runtime()
'flight'# add the models as a pipeline stepspipeline.add_model_step(model_native)
pipeline.add_model_step(model_containerized)
# DeploymentConfigBuilder is used to create the pipeline's deployment configuration objectfromwallaroo.deployment_configimportDeploymentConfigBuilder# deploy using containerized runtime deploymentdeployment_config_containerized=DeploymentConfigBuilder() \
.replica_count(1) \
.cpus(0.5) \ # shared by the native runtime models.memory('1Gi') \ # shared by the native runtime models.sidekick_cpus(model_containerized, 0.5) \ # 0.5 cpu allocated solely for the containerized model.sidekick_memory(model_containerized, '1Gi') \ #1 Gi allocated solely for the containerized model.build()
# deploy the pipeline with the pipeline configurationpipeline.deploy(deployment_config=deployment_config_containerized)
Pipeline Deployment Timeouts
Pipeline deployments typically take 45 seconds for Wallaroo Native Runtimes, and 90 seconds for Wallaroo Containerized Runtimes.
If Wallaroo Pipeline deployment times out from a very large or complex ML model being deployed, the timeout is extended from with the wallaroo.Client.Client(request_timeout:int) setting, where request_timeout is in integer seconds. Wallaroo Native Runtime deployments are scaled at 1x the request_timeout setting. Wallaroo Containerized Runtimes are scaled at 2x the request_timeout setting.
The following example shows extending the request_timeout to 2 minutes.
4.11 - Wallaroo SDK Essentials Guide: Model Uploads and Registrations: XGBoost
How to upload and use XGBoost ML Models with Wallaroo
Model Naming Requirements
Model names map onto Kubernetes objects, and must be DNS compliant. The strings for model names must lower case ASCII alpha-numeric characters or dash (-) only. . and _ are not allowed.
Wallaroo supports XGBoost models by containerizing the model and running as an image.
During the model upload process, the Wallaroo instance will attempt to convert the model to a Native Wallaroo Runtime. If unsuccessful based , it will create a Wallaroo Containerized Runtime for the model. See the model deployment section for details on how to configure pipeline resources based on the model’s runtime.
XGBoost Schema Inputs
XGBoost schema follows a different format than other models. To prevent inputs from being out of order, the inputs should be submitted in a single row in the order the model is trained to accept, with all of the data types being the same. If a model is originally trained to accept inputs of different data types, it will need to be retrained to only accept one data type for each column - typically pa.float64() is a good choice.
For example, the following DataFrame has 4 columns, each column a float.
sepal length (cm)
sepal width (cm)
petal length (cm)
petal width (cm)
0
5.1
3.5
1.4
0.2
1
4.9
3.0
1.4
0.2
For submission to an XGBoost model, the data input schema will be a single array with 4 float values.
When submitting as an inference, the DataFrame is converted to rows with the column data expressed as a single array. The data must be in the same order as the model expects, which is why the data is submitted as a single array rather than JSON labeled columns: this insures that the data is submitted in the exact order as the model is trained to accept.
Original DataFrame:
sepal length (cm)
sepal width (cm)
petal length (cm)
petal width (cm)
0
5.1
3.5
1.4
0.2
1
4.9
3.0
1.4
0.2
Converted DataFrame:
inputs
0
[5.1, 3.5, 1.4, 0.2]
1
[4.9, 3.0, 1.4, 0.2]
XGBoost Schema Outputs
Outputs for XGBoost are labeled based on the trained model outputs. For this example, the output is simply a single output listed as output. In the Wallaroo inference result, it is grouped with the metadata out as out.output.
XGBoost models are uploaded to Wallaroo through the Wallaroo Client upload_model method.
Upload XGBoost Model Parameters
The following parameters are required for XGBoost models. Note that while some fields are considered as optional for the upload_model method, they are required for proper uploading of a XGBoost model to Wallaroo.
Parameter
Type
Description
name
string (Required)
The name of the model. Model names are unique per workspace. Models that are uploaded with the same name are assigned as a new version of the model.
path
string (Required)
The path to the model file being uploaded.
framework
string (Required)
Set as the Framework.XGBOOST.
input_schema
pyarrow.lib.Schema (Required)
The input schema in Apache Arrow schema format.
output_schema
pyarrow.lib.Schema (Required)
The output schema in Apache Arrow schema format.
convert_wait
bool (Optional) (Default: True)
True: Waits in the script for the model conversion completion.
False: Proceeds with the script without waiting for the model conversion process to display complete.
Once the upload process starts, the model is containerized by the Wallaroo instance. This process may take up to 10 minutes.
Model Config Options
Model version configurations are updated with the wallaroo.model_version.config and include the following parameters. Most are optional unless specified.
A list of alternate input fields. For example, if the model accepts the input fields ['variable1', 'variable2'], tensor_fields allows those inputs to be overridden to ['square_feet', 'house_age'], or other values as required.
input_schema
pyarrow.lib.Schema
The input schema for the model in pyarrow.lib.Schema format.
output_schema
pyarrow.lib.Schema
The output schema for the model in pyarrow.lib.Schema format.
batch_config
(List[string]) (Optional)
Batch config is either None for multiple-input inferences, or single to accept an inference request with only one row of data.
Upload XGBoost Model Return
The following is returned with a successful model upload and conversion.
Field
Type
Description
name
string
The name of the model.
version
string
The model version as a unique UUID.
file_name
string
The file name of the model as stored in Wallaroo.
image_path
string
The image used to deploy the model in the Wallaroo engine.
last_update_time
DateTime
When the model was last updated.
Upload XGBoost Model Example
The following example is of uploading a PyTorch ML Model to a Wallaroo instance.
The settings for a pipeline configuration are dependent on whether the model is converted to the Native Runtime space, or Containerized Model Runtime space during the model upload process. The method wallaroo.model_config.runtime() displays which runtime the uploaded model was converted to.
Wallaroo Native Runtime models typically use the following settings for pipeline resource allocation. See See Native Runtime Configuration Methods for complete options.
The number of replicas of the Wallaroo Native pipeline resources to allocate. Each replica has the same number of cpus, ram, etc. For example: DeploymentConfigBuilder.replica_count(2)
Auto-allocated replicas
wallaroo.deployment_config.DeploymentConfigBuilder.replica_autoscale_min_max(maximum: int, minimum: int = 0)
Replicas that will auto-allocate more replicas to the pipeline from 0 to the set maximum as more inference requests are made.
Number of GPU’s to deploy; GPUs can only be deployed in whole increments. If used, must be paired with the deployment_label pipeline configuration option.
Required if gpus are set and must match the GPU nodepool label.
The following example shows deploying a Native Wallaroo Runtime model with the pipeline configuration of one replica, half a cpu and 1 Gi of RAM.
Note that for native runtime models, total pipeline resources are shared by all the native runtime models for each replica.
model.config().runtime()
'onnx'# add the model as a pipeline steppipeline.add_model_step(model)
# DeploymentConfigBuilder is used to create the pipeline's deployment configuration objectfromwallaroo.deployment_configimportDeploymentConfigBuilder# deploy using native runtime deploymentdeployment_config_native=DeploymentConfigBuilder() \
.replica_count(1) \
.cpus(0.5) \
.memory('1Gi') \
.build()
# deploy the pipeline with the pipeline configurationpipeline.deploy(deployment_config=deployment_config_native)
Wallaroo Containerized Runtime Deployment
Wallaroo Containerized Runtime models typically use the following settings for pipeline resource allocation. See See Containerized Runtime Configuration Methods for complete options.
Containerized Runtime models resources are allocated with the sidekick name, with the containerized model specified for resources.
Number of GPU’s to deploy; GPUs can only be deployed in whole increments. If used, must be paired with the deployment_label pipeline configuration option.
Required if gpus are set and must match the GPU nodepool label.
The following example shows deploying a Containerized Wallaroo Runtime model with the pipeline configuration of one replica, half a cpu and 1 Gi of RAM.
Note that for containerized models, each containerized model’s resources are set independently of each other and duplicated for each pipeline replica, and are considered separate from the native runtime models.
model_native.config().runtime()
'onnx'model_containerized.config().runtime()
'flight'# add the models as a pipeline stepspipeline.add_model_step(model_native)
pipeline.add_model_step(model_containerized)
# DeploymentConfigBuilder is used to create the pipeline's deployment configuration objectfromwallaroo.deployment_configimportDeploymentConfigBuilder# deploy using containerized runtime deploymentdeployment_config_containerized=DeploymentConfigBuilder() \
.replica_count(1) \
.cpus(0.5) \ # shared by the native runtime models.memory('1Gi') \ # shared by the native runtime models.sidekick_cpus(model_containerized, 0.5) \ # 0.5 cpu allocated solely for the containerized model.sidekick_memory(model_containerized, '1Gi') \ #1 Gi allocated solely for the containerized model.build()
# deploy the pipeline with the pipeline configurationpipeline.deploy(deployment_config=deployment_config_containerized)
Pipeline Deployment Timeouts
Pipeline deployments typically take 45 seconds for Wallaroo Native Runtimes, and 90 seconds for Wallaroo Containerized Runtimes.
If Wallaroo Pipeline deployment times out from a very large or complex ML model being deployed, the timeout is extended from with the wallaroo.Client.Client(request_timeout:int) setting, where request_timeout is in integer seconds. Wallaroo Native Runtime deployments are scaled at 1x the request_timeout setting. Wallaroo Containerized Runtimes are scaled at 2x the request_timeout setting.
The following example shows extending the request_timeout to 2 minutes.
The get_user_by_email({email}) command finds the user who’s email address matches the submitted {email} field. If no email address matches then the return will be null.
For example, the user steve with the email address steve@ex.co returns the following:
To remove a user’s access to the Wallaroo instance, use the Wallaroo Client deactivate_user("{User Email Address}) method, replacing the {User Email Address} with the email address of the user to deactivate.
To activate a user, use the Wallaroo Client active_user("{User Email Address}) method, replacing the {User Email Address} with the email address of the user to activate.
This feature impacts Wallaroo Community’s license count. Wallaroo Community only allows a total of 5 users per Wallaroo Community instance. Deactivated users does not count to this total - this allows organizations to add users, then activate/deactivate them as needed to stay under the total number of licensed users count.
Wallaroo Enterprise has no limits on the number of users who can be added or active in a Wallaroo instance.
In this example, the user testuser@wallaroo.ai will be deactivated then reactivated.
When a new user logs in for the first time, they get an error when uploading a model or issues when they attempt to log in. How do I correct that?
When a new registered user attempts to upload a model, they may see the following error:
TransportQueryError:
{'extensions':
{'path':
'$.selectionSet.insert_workspace_one.args.object[0]', 'code': 'not-supported' },
'message':
'cannot proceed to insert array relations since insert to table "workspace" affects zero rows'
Or if they log into the Wallaroo Dashboard, they may see a Page not found error.
This is caused when a user has been registered without an appropriate email address. See the user guides here on inviting a user, or the Wallaroo Enterprise User Management on how to log into the Keycloak service and update users. Verify that the username and email address are both the same, and they are valid confirmed email addresses for the user.
6 - Wallaroo SDK Essentials Guide: Pipelines
The classes and methods for managing Wallaroo pipelines and configurations.
wallaroo.pipeline.add_validations takes the following parameters.
Field
Type
Description
{validation name}
Python variable
The name of the validation. This must match Python variable naming conventions. The {validation name} may not be count. Any validations submitted with the name count are ignored and an warning returned. Other validations part of the add_validations request are added to the pipeline.
{expression}
Polars Expression
The expression to validate the inference input or output data against. Must be in polars version 1.8.5 polars.Expr format. Expressions are typically set in the format below.
Expressions are typically in the following format.
Validation Section
Description
Example
Data to Evaluate
The data to evaluate from either an inference input or output.
polars.col(in/out.{column_name}).list.get({index}) Retrieve the data from the input or output at the column name at the list index.
Condition
The expression to perform on the data. If it returns True, then an anomaly is detected.
< 0.90 If the data is less than 0.90, return True.
Add Validations Method Successful Returns
N/A: Nothing is returned on a successful add_validations request.
Add Validations Method Warning Returns
If any validations violate a warning condition, a warning is returned. Warning conditions include the following.
Warning
Cause
Result
count is not allowed.
A validation named count was included in the add_validations request. count is a reserved name.
All other validations other than count are added to the pipeline.
Validation Examples
Common Data Selection Expressions
The following sample expressions demonstrate different methods of selecting which model input or output data to validate.
polars.col(in|out.{column_name}).list.get(index): Returns the index of a specific field. For example, pl.col("out.dense_1") returns from the inference the output the field dense_1, and list.get(0) returns the first value in that list. Most output values from a Wallaroo inference result are a List of at least length 1, making this a common validation expression.
polars.col(in.price_ranges).list.max(): Returns from the inference request the input field price_ranges the maximum value from a list of values.
polars.col(out.price_ranges).mean() returns the mean for all values from the output field price_ranges.
For example, to the following validation fraud detects values for the output of an inference request for the field dense_1 that are greater than 0.9, indicating a transaction has a high likelihood of fraud:
For the input provided, the minimum_sales validation would return True, indicating an anomaly.
time
out.predicted_sales
anomaly.count
anomaly.minimum_sales
0
2023-10-31 16:57:13.771
[1527]
1
True
Detecting Output Anomalies
The following validation detects an anomaly from a output.
fraud: Detects when an inference output for the field dense_1 at index 0 is greater than 0.9, indicating fraud.
# create the pipelinesample_pipeline=wallaroo.client.build_pipeline("sample-pipeline")
# add a model stepsample_pipeline.add_model_step(ccfraud_model)
# add validations to the pipelinesample_pipeline.add_validations(
fraud=pl.col("out.dense_1").list.get(0) >0.9 )
sample_pipeline.deploy()
sample_pipeline.infer_from_file("dev_high_fraud.json")
time
in.tensor
out.dense_1
anomaly.count
anomaly.fraud
0
2024-02-02 16:05:42.152
[1.0678324729, 18.1555563975, -1.6589551058, 5...
[0.981199]
1
True
Multiple Validations
The following demonstrates multiple validations added to a pipeline at once and their results from inference requests. Two validations that track the same output field and index are applied to a pipeline:
fraud: Detects an anomaly when the inference output field dense_1 at index 0 value is greater than 0.9.
too_low: Detects an anomaly when the inference output field dense_1 at the index 0 value is lower than 0.05.
The following example tracks two validations for a model that takes the previous week’s sales and projects the next week’s average sales with the field predicted_sales.
minimum_sales=pl.col("in.sales_count").list.min() < 500: The input field sales_count with a range of values has any minimum value under 500.
average_sales_too_low=pl.col("out.predicted_sales").list.get(0) < 500: The output field predicted_sales is less than 500.
The following inputs return the following values. Note how the anomaly.count value changes by the number of validations that detect an anomaly.
Input 1:
In this example, one day had sales under 500, which triggers the minimum_sales validation to return True. The predicted sales are above 500, causing the average_sales_too_low validation to return False.
week
site_id
sales_count
0
[28]
[site0001]
[1357, 1247, 350, 1437, 952, 757, 1831]
Output 1:
time
out.predicted_sales
anomaly.count
anomaly.minimum_sales
anomaly.average_sales_too_low
0
2023-10-31 16:57:13.771
[1527]
1
True
False
Input 2:
In this example, multiple days have sales under 500, which triggers the minimum_sales validation to return True. The predicted average sales for the next week are above 500, causing the average_sales_too_low validation to return True.
week
site_id
sales_count
0
[29]
[site0001]
[497, 617, 350, 200, 150, 400, 110]
Output 2:
time
out.predicted_sales
anomaly.count
anomaly.minimum_sales
anomaly.average_sales_too_low
0
2023-10-31 16:57:13.771
[325]
2
True
True
Input 3:
In this example, no sales day figures are below 500, which triggers the minimum_sales validation to return False. The predicted sales for the next week is below 500, causing the average_sales_too_low validation to return True.
week
site_id
sales_count
0
[30]
[site0001]
[617, 525, 513, 517, 622, 757, 508]
Output 3:
time
out.predicted_sales
anomaly.count
anomaly.minimum_sales
anomaly.average_sales_too_low
0
2023-10-31 16:57:13.771
[497]
1
False
True
Compound Validations
The following combines multiple field checks into a single validation. For this, we will check for values of out.dense_1 that are between 0.05 and 0.9.
How to create and manage Wallaroo Pipelines through the Wallaroo SDK
Pipelines are the method of taking submitting data and processing that data through the models. Each pipeline can have one or more steps that submit the data from the previous step to the next one. Information can be submitted to a pipeline as a file, or through the pipeline’s URL.
Pipeline names map onto Kubernetes objects, and must be DNS compliant. Pipeline names must be ASCII alpha-numeric characters or dash (-) only. . and _ are not allowed.
Create a Pipeline
New pipelines are created in the current workspace.
NOTICE
Pipeline names are not forced to be unique. You can have 50 pipelines all named my-pipeline, which can cause confusion in determining which workspace to use.
It is recommended that organizations agree on a naming convention and select pipeline to use rather than creating a new one each time.
To create a new pipeline, use the Wallaroo Client build_pipeline("{Pipeline Name}") command.
The following example creates a new pipeline imdb-pipeline through a Wallaroo Client connection wl:
imdb_pipeline=wl.build_pipeline("imdb-pipeline")
imdb_pipeline.status()
{'status': 'Pipeline imdb-pipeline is not deployed'}
List All Pipelines
The Wallaroo Client method list_pipelines() lists all pipelines in a Wallaroo Instance.
List All Pipelines Parameters
N/A
List All Pipelines Returns
The following fields are returned from the list_pipeline method.
Field
Type
Description
name
String
The assigned name of the pipeline.
created
DateTime
The date and time the pipeline was created.
last_updated
DateTime
The date and time the pipeline was updated.
deployed
Bool
Whether the pipeline is currently deployed or not.
Rather than creating a new pipeline each time, an existing pipeline can be selected by using the list_pipelines() command and assigning one of the array members to a variable.
The following example sets the pipeline ccfraud-pipeline to the variable current_pipeline:
Once a pipeline has been created, or during its creation process, a pipeline step can be added. The pipeline step refers to the model that will perform an inference off of the data submitted to it. Each time a step is added, it is added to the pipeline’s models array.
Pipeline steps are not saved until the pipeline is deployed. Until then, pipeline steps are stored in local memory as a potential pipeline configuration until the pipeline is deployed.
Add a Step to a Pipeline
A pipeline step is added through the pipeline add_model_step({Model}) command.
In the following example, two models uploaded to the workspace are added as pipeline step:
Pipeline steps can be replaced while a pipeline is deployed. This allows organizations to have pipelines deployed in a production environment and hot-swap out models for new versions without impacting performance or inferencing downtime.
The following parameters are used for replacing a pipeline step:
Parameter
Default Value
Purpose
index
null
The pipeline step to be replaced. Pipeline steps follow array numbering, where the first step is 0, etc.
model
null
The new model to be used in the pipeline step.
In the following example, a deployed pipeline will have the initial model step replaced with a new one. A status of the pipeline will be displayed after deployment and after the pipeline swap to show the model has been replaced from ccfraudoriginal to ccfraudreplacement, each with their own versions.
A Pipeline Step can be more than models - they can also be pre processing and post processing steps. For example, this preprocessing step uses the following code:
importnumpyimportpandasimportjson# add interaction terms for the modeldefactual_preprocess(pdata):
pd=pdata.copy()
# convert boolean cust_known to 0/1pd.cust_known=numpy.where(pd.cust_known, 1, 0)
# interact UnitPrice and cust_knownpd['UnitPriceXcust_known'] =pd.UnitPrice*pd.cust_knownreturnpd.loc[:, ['UnitPrice', 'cust_known', 'UnitPriceXcust_known']]
# If the data is a json string, call this wrapper instead# Expected input:# a dictionary with fields 'colnames', 'data'# test that the code works heredefwallaroo_json(data):
obj=json.loads(data)
pdata=pandas.DataFrame(obj['query'],
columns=obj['colnames'])
pprocessed=actual_preprocess(pdata)
# return a dictionary, with the fields the model expectreturn {
'tensor_fields': ['model_input'],
'model_input': pprocessed.to_numpy().tolist()
}
It is added as a Python module by uploading it as a model:
# load the preprocess modulemodule_pre=wl.upload_model("preprocess", "./preprocess.py").configure('python')
And then added to the pipeline as a step:
# now make a pipelinedemandcurve_pipeline= (wl.build_pipeline("demand-curve-pipeline")
.add_model_step(module_pre)
.add_model_step(demand_curve_model)
.add_model_step(module_post))
Remove a Pipeline Step
To remove a step from the pipeline, use the Pipeline remove_step(index) command, where the index is the array index for the pipeline’s steps.
In the following example the pipeline imdb_pipeline will have the step with the model smodel-o removed.
The Pipeline clear() method removes all pipeline steps from a pipeline. Note that pipeline steps are not saved until the pipeline is deployed.
Pipeline Versions
Each time the pipeline steps are updated and the pipeline is either deployed or a pipeline version is manually created, a new pipeline version is created. This each Pipeline version includes the following:
Field
Type
Description
name
String
The assigned name of the pipeline.
version
String
The UUID version identifier.
creation_time
DateTime
The date and time the pipeline was created.
last_updated_time
DateTime
The date and time the pipeline was updated.
deployed
Bool
Whether the pipeline is currently deployed or not.
Pipeline versions are saved automatically when the method wallaroo.pipeline.deploy(deployment_configuration) is called. Pipeline versions are stored manually with the wallaroo.pipeline.create_versions() method, which stores the current pipeline steps and other details stored in the local SDK session into the Wallaroo pipeline database.
The following example demonstrates setting a model as a pipeline step, then saving the pipeline configuration in the local SDK session to Wallaroo as a new pipeline version.
display("Current pipeline.")
display(pipeline) # display the current pipelinepipeline.clear() #clear the current stepspipeline.add_model_step(houseprice_rf_model_version) #set a different model as a pipeline stepnew_pipeline_version=pipeline.create_version()
display("New pipeline version.")
display(new_pipeline_version)
Current pipeline.
name
houseprice-estimator
version
342f4605-9467-460e-866f-1b74e6e863d1
creation_time
2023-11-Sep 21:27:00
last_updated_time
2023-11-Sep 21:27:00
deployed
False
tags
steps
house-price-prime
New pipeline version.
name
houseprice-estimator
version
937fd68d-2eaa-4b30-80b2-e66ea7be3086
creation_time
2023-26-Sep 16:36:13
last_updated_time
2023-26-Sep 16:36:13
deployed
False
tags
steps
house-price-rf-model
List Pipeline Versions
Pipeline versions are retrieved with the method wallaroo.pipeline.versions() and returns a List of the versions of the pipelines listed in descending creation order, with the most recent version stored in position 0.
The following example demonstrates retrieving the list of pipeline version, then storing a specific version to a variable and displaying its version id and other details.
When a pipeline step is added or removed, the pipeline must be deployed through the pipeline deploy(deployment_config). This allocates resources to the pipeline from the Kubernetes environment and make it available to submit information to perform inferences. For full details on pipeline deployment configurations, see Wallaroo SDK Essentials Guide: Pipeline Deployment Configuration.
Pipelines do not need to be undeployed to deploy new pipeline versions or pipeline deployment configurations. For example, the following pipeline is deployed, new pipeline steps are set, and the pipeline deploy command is issues again. This creates a new version of the pipeline and updates the deployed pipeline with the new configuration.
# clear all stepspipeline.clear()
# set modelA as the steppipeline.add_model_step(modelA)
# deploy the pipeline - the version is saved and the resources allocated to the pipelinepipeline.deploy()
# clear the steps - this configuration is only stored in the local SDK session until the deploy or create_version command is givenpipeline.clear()
# set modelB as the steppipeline.add_model_step(modelB)
# deploy the pipeline - the pipeline configuration is saved and the pipeline deployment updated without significant downtimepipeline.deploy()
Deploy Current Pipeline Version
By default, deploying a Wallaroo pipeline will deploy the most current version. For example:
Pipeline versions are deployed with the method wallaroo.pipeline_variant.deploy(deployment_name, model_configs, config: Optional[wallaroo.deployment_config.DeploymentConfig]). Note that the deployment_name and model_configs are required. The model_configs are retrieved with the wallaroo.pipeline_variant.model_configs() method.
The following demonstrates retrieving a previous version of a pipeline, deploying it, and retrieving the deployment status.
Once complete, the pipeline status() command will show 'status':'Running'.
Pipeline deployments can be modified to enable auto-scaling to allow pipelines to allocate more or fewer resources based on need by setting the pipeline’s This will then be applied to the deployment of the pipelineccfraudPipelineby specifying it'sdeployment_config` optional parameter. If this optional parameter is not passed, then the deployment will defer to default values. For more information, see Manage Pipeline Deployment Configuration.
In the following example, the pipeline imdb-pipeline that contains two steps will be deployed with default deployment configuration:
If you deploy more pipelines than your environment can handle, or if you deploy more pipelines than your license allows, you may see an error like the following:
When a pipeline is not currently needed, it can be undeployed and its resources turned back to the Kubernetes environment. To undeploy a pipeline, use the pipeline undeploy() command.
In this example, the aloha_pipeline will be undeployed:
Anomaly detection allows organizations to set validation parameters. A validation is added to a pipeline to test data based on a specific expression. If the expression is returned as False, this is detected as an anomaly and added to the InferenceResult object’s check_failures array and the pipeline logs.
Anomaly detection consists of the following steps:
Set a validation: Add a validation to a pipeline that, when returned False, adds an entry to the InferenceResult object’s check_failures attribute with the expression that caused the failure.
Display anomalies: Anomalies detected through a Pipeline’s validation attribute are displayed either through the InferenceResult object’s check_failures attribute, or through the pipeline’s logs.
Set A Validation
Validations are added to a pipeline through the wallaroo.pipelineadd_validation method. The following parameters are required:
The validation expression that adds the result InferenceResult object’s check_failures attribute when expression result is False. The validation checks the expression against both the data value and the data type.
Validation expressions take the format value Expression, with the expression being in the form of a :py:Expression:. For example, if the model housing_model is part of the pipeline steps, then a validation expression may be housing_model.outputs[0][0] < 100.0: If the output of the housing_model inference is less than 100, then the validation is True and no action is taken. Any values over 100, the validation is False which triggers adding the anomaly to the InferenceResult object’s check_failures attribute.
IMPORTANT NOTE
Validations test for the expression value and the data type. For example: 100 is considered an integer data type, while 100.0 is considered a float data type.
If the data type is an integer, and the value the expression is testing against is a float, then the validation check will always be triggered. Verify that the data type is properly set in the validation expression to ensure correct validation check results.
Note that multiple validations can be created to allow for multiple anomalies detection.
In the following example, a validation is added to the pipeline to detect housing prices that are below 100 (represented as $100 million), and trigger an anomaly for values above that level. When an inference is performed that triggers a validation failure, the results are displayed in the InferenceResult object’s check_failures attribute.
Anomalies detected through a Pipeline’s validation attribute are displayed either through the InferenceResult object’s check_failures attribute, or through the pipeline’s logs.
To display an anomaly through the InferenceResult object, display the check_failures attribute.
In the following example, the an InferenceResult where the validation failed will display the failure in the check_failures attribute:
A/B testing is a method that provides the ability to test competing ML models for performance, accuracy or other useful benchmarks. Different models are added to the same pipeline steps as follows:
Control or Champion model: The model currently used for inferences.
Challenger model(s): The model or set of models compared to the challenger model.
A/B testing splits a portion of the inference requests between the champion model and the one or more challengers through the add_random_split method. This method splits the inferences submitted to the model through a randomly weighted step.
Each model receives inputs that are approximately proportional to the weight it is assigned. For example, with two models having weights 1 and 1, each will receive roughly equal amounts of inference inputs. If the weights were changed to 1 and 2, the models would receive roughly 33% and 66% respectively instead.
When choosing the model to use, a random number between 0.0 and 1.0 is generated. The weighted inputs are mapped to that range, and the random input is then used to select the model to use. For example, for the two-models equal-weight case, a random key of 0.4 would route to the first model, 0.6 would route to the second.
Add Random Split
A random split step can be added to a pipeline through the add_random_split method.
The following parameters are used when adding a random split step to a pipeline:
Parameter
Type
Description
champion_weight
Float (Required)
The weight for the champion model.
champion_model
Wallaroo.Model (Required)
The uploaded champion model.
challenger_weight
Float (Required)
The weight of the challenger model.
challenger_model
Wallaroo.Model (Required)
The uploaded challenger model.
hash_key
String(Optional)
A key used instead of a random number for model selection. This must be between 0.0 and 1.0.
Note that multiple challenger models with different weights can be added as the random split step.
If a pipeline already had steps as detailed in Add a Step to a Pipeline, this step can be replaced with a random split with the replace_with_random_split method.
The following parameters are used when adding a random split step to a pipeline:
Parameter
Type
Description
index
Integer (Required)
The pipeline step being replaced.
champion_weight
Float (Required)
The weight for the champion model.
champion_model
Wallaroo.Model (Required)
The uploaded champion model.
**challenger_weight
Float (Required)
The weight of the challenger model.
challenger_model
Wallaroo.Model (Required)
The uploaded challenger model.
hash_key
String(Optional)
A key used instead of a random number for model selection. This must be between 0.0 and 1.0.
Note that one or more challenger models can be added for the random split step:
Wallaroo provides a method of testing the same data against two different models or sets of models at the same time through shadow deployments otherwise known as parallel deployments or A/B test. This allows data to be submitted to a pipeline with inferences running on several different sets of models. Typically this is performed on a model that is known to provide accurate results - the champion - and a model or set of models that is being tested to see if it provides more accurate or faster responses depending on the criteria known as the challenger(s). Multiple challengers can be tested against a single champion to determine which is “better” based on the organization’s criteria.
In data science, A/B tests can also be used to choose between two models in production, by measuring which model performs better in the real world. In this formulation, the control is often an existing model that is currently in production, sometimes called the champion. The treatment is a new model being considered to replace the old one. This new model is sometimes called the challenger…. Keep in mind that in machine learning, the terms experiments and trials also often refer to the process of finding a training configuration that works best for the problem at hand (this is sometimes called hyperparameter optimization).
When a shadow deployment is created, only the inference from the champion is returned in the InferenceResult Object data, while the result data for the shadow deployments is stored in the InferenceResult Object shadow_data.
Create Shadow Deployment
Create a parallel or shadow deployment for a pipeline with the pipeline.add_shadow_deploy(champion, challengers[]) method, where the champion is a Wallaroo Model object, and challengers[] is one or more Wallaroo Model objects.
Each inference request sent to the pipeline is sent to all the models. The prediction from the champion is returned by the pipeline, while the predictions from the challengers are not part of the standard output, but are kept stored in the shadow_data attribute and in the logs for later comparison.
In this example, a shadow deployment is created with the champion versus two challenger models.
An alternate method is with the pipeline.replace_with_shadow_deploy(index, champion, challengers[]) method, where the index is the pipeline step to replace.
Shadow Deploy Outputs
Model outputs are listed by column based on the model’s outputs. The output data is set by the term out, followed by the name of the model. For the default model, this is out.{variable_name}, while the shadow deployed models are in the format out_{model name}.variable, where {model name} is the name of the shadow deployed model.
Shadow deploy results are part of the Pipeline.logs() method. The output data is set by the term out, followed by the name of the model. For the default model, this is out.dense_1, while the shadow deployed models are in the format out_{model name}.variable, where {model name} is the name of the shadow deployed model.
The Pipeline URL Endpoint or the Pipeline Deploy URL is used to submit data to a pipeline to use for an inference. This is done through the pipeline _deployment._url() method.
In this example, the pipeline URL endpoint for the pipeline ccfraud_pipeline will be displayed:
Pipeline deployments configurations allow tailoring of a pipeline’s resources to match an organization’s and model’s requirements. Pipelines may require more memory, CPU cores, or GPUs to run to run all its steps efficiently. Pipeline deployment configurations also allow for multiple replicas of a model in a pipeline to provide scalability.
Create Pipeline Configuration
Setting a pipeline deployment configuration follows this process:
Pipeline deployment configurations are created through the wallaroo ‘deployment_config.DeploymentConfigBuilder()](https://docs.wallaroo.ai/wallaroo-developer-guides/wallaroo-sdk-guides/wallaroo-sdk-reference-guide/deployment_config/#DeploymentConfigBuilder) class.
Once the configuration options are set the pipeline deployment configuration is set with the deployment_config.build() method.
The pipeline deployment configuration is then applied when the pipeline is deployed.
The following example shows a pipeline deployment configuration with 1 replica, 1 cpu, and 2Gi of memory set to be allocated to the pipeline.
Pipeline resources can be configured with autoscaling. Autoscaling allows the user to define how many engines a pipeline starts with, the minimum amount of engines a pipeline uses, and the maximum amount of engines a pipeline can scale to. The pipeline scales up and down based on the average CPU utilization across the engines in a given pipeline as the user’s workload increases and decreases.
Pipeline Resource Configurations
Pipeline deployment configurations deal with two major components:
Native Runtimes: Models that are deployed “as is” with the Wallaroo engine (Onnx, etc).
Containerized Runtimes: Models that are packaged into a container then deployed as a container with the Wallaroo engine (MLFlow, etc).
These configurations can be mixed - both native runtimes and containerized runtimes deployed to the same pipeline, with resources allocated to each runtimes in different configurations.
CPUs are allocated in fractions of total CPU power similar to the Kubernetes CPU definitions. cpus(0.25), cpus(1.0), etc are valid values.
GPUs can only be allocated by entire integer units from the GPU enabled nodepools. gpus(1), gpus(2), etc are valid values, while gpus(0.25) are not.
Organizations should be aware of how many GPUs are allocated to the cluster. If all GPUs are already allocated to other pipelines, or if there are not enough GPUs to fulfill the request, the pipeline deployment will fail and return an error message.
GPU Support
Wallaroo 2023.2.1 and above supports Kubernetes nodepools with Nvidia Cuda GPUs.
If allocating GPUs to a Wallaroo pipeline, the deployment_label configuration option must be used.
Architecture Support
Wallaroo supports x86 and ARM architecture CPUs. For example, Azure supports Ampere® Altra® Arm-based processor included with the following virtual machines:
Pipeline deployment architectures are specified through the arch(wallaroo.engine_config.Architecture) parameter with x86 processors as the default architecture. To set the deployment architecture to ARM, specify the arch parameter as follows:
The number of replicas of the pipeline to deploy. This allows for multiple deployments of the same models to be deployed to increase inferences through parallelization.
√
replica_autoscale_min_max
(maximum: int, minimum: int = 0)
Provides replicas to be scaled from 0 to some maximum number of replicas. This allows pipelines to spin up additional replicas as more resources are required, then spin them back down to save on resources and costs.
√
autoscale_cpu_utilization
(cpu_utilization_percentage: int)
Sets the average CPU percentage metric for when to load or unload another replica.
√
disable_autoscale
Disables autoscaling in the deployment configuration.
cpus
(core_count: float)
Sets the number or fraction of CPUs to use for the pipeline, for example: 0.25, 1, 1.5, etc. The units are similar to the Kubernetes CPU definitions.
gpus
(core_count: int)
Sets the number of GPUs to allocate for native runtimes. GPUs are only allocated in whole units, not as fractions. Organizations should be aware of the total number of GPUs available to the cluster, and monitor which pipeline deployment configurations have gpus allocated to ensure they do not run out. If there are not enough gpus to allocate to a pipeline deployment configuration, and error message will be deployed when the pipeline is deployed. If gpus is called, then the deployment_label must be called and match the GPU Nodepool for the Wallaroo Cluster hosting the Wallaroo instance.
√
memory
(memory_spec: str)
Sets the amount of RAM to allocate the pipeline. The memory_spec string is in the format “{size as number}{unit value}”. The accepted unit values are:
Sets the number or fraction of CPUs to use for the pipeline’s load balancer, for example: 0.25, 1, 1.5, etc. The units, similar to the Kubernetes CPU definitions.
lb_memory
(memory_spec: str)
Sets the amount of RAM to allocate the pipeline’s load balancer. The memory_spec string is in the format “{size as number}{unit value}”. The accepted unit values are:
Label used to match the nodepool label used for the pipeline. Required if gpus are set and must match the GPU nodepool label. See Create GPU Nodepools for Kubernetes Clusters for details on setting up GPU nodepools for Wallaroo.
√
arch
architecture: wallaroo.engine_config.Architecture
Sets the CPU architecture for the pipeline. This defaults to X86. Available options are:
wallaroo.engine_config.Architecture.X86
wallaroo.engine_config.Architecture.ARM
Containerized Runtime Configuration Methods
Method
Parameters
Description
Enterprise Only Feature
sidekick_cpus
(model: wallaroo.model.Model, core_count: float)
Sets the number of CPUs to be used for the model’s sidekick container. Only affects image-based models (e.g. MLFlow models) in a deployment. The parameters are as follows:
Model model: The sidekick model to configure.
float core_count: Number of CPU cores to use in this sidekick.
sidekick_memory
(model: wallaroo.model.Model, memory_spec: str)
Sets the memory available to for the model’s sidekick container. Only affects image-based models (e.g. MLFlow models) in a deployment. The parameters are as follows:
Model model: The sidekick model to configure.
memory_spec: The amount of memory to allocated as memory unit values. The accepted unit values are:
Environment variables submitted to the model’s sidekick container. Only affects image-based models (e.g. MLFlow models) in a deployment. These are used specifically for containerized models that have environment variables that effect their performance.
sidekick_gpus
(model: wallaroo.model.Model, core_count: int)
Sets the number of GPUs to allocate for containerized runtimes. GPUs are only allocated in whole units, not as fractions. Organizations should be aware of the total number of GPUs available to the cluster, and monitor which pipeline deployment configurations have gpus allocated to ensure they do not run out. If there are not enough gpus to allocate to a pipeline deployment configuration, and error message will be deployed when the pipeline is deployed. If called, then the deployment_label must be called and match the GPU Nodepool for the Wallaroo Cluster hosting the Wallaroo instance
√
sidekick_arch
architecture: wallaroo.engine_config.Architecture
Sets the CPU architecture for the pipeline. This defaults to X86. Available options are:
wallaroo.engine_config.Architecture.X86
wallaroo.engine_config.Architecture.ARM
√
Examples
Native Runtime Deployment
The following will set native runtime deployment to one quarter of a CPU with 1 Gi of Ram:
This example sets the replica count to 1, then sets the auto-scale to vary between 2 to 5 replicas depending on need, with 1 CPU and 1 GI RAM allocated per replica.
The following configuration allocates 0.25 CPU and 1Gi RAM to the containerized runtime sm_model, and passes that runtime environmental variables used for timeout settings.
The following configuration allocates 1 gpu to the pipeline for native runtimes, then another gpu to the containerized runtime sm_model for a total of 2 gpus allocated to the pipeline: one gpu for native runtimes, another gpu for the containerized runtime model sm_model.
How to create and manage Wallaroo Pipelines through the Wallaroo SDK
Pipeline have their own set of log files that are retrieved and analyzed as needed with the either through:
The Pipeline logs method (returns either a DataFrame or Apache Arrow).
The Pipeline export_logs method (saves either a DataFrame file in JSON format, or an Apache Arrow file).
Get Pipeline Logs
Pipeline logs are retrieved through the Pipeline logs method. By default, logs are returned as a DataFrame in reverse chronological order of insertion, with the most recent files displayed first.
Pipeline logs are segmented by pipeline versions. For example, if a new model step is added to a pipeline, a model swapped out of a pipeline step, etc - this generated a new pipeline version. log method requests will return logs based on the parameter that match the pipeline version. To request logs of a specific pipeline version, specify the start_datetime and end_datetime parameters based on the pipeline version logs requested.
IMPORTANT NOTE
Pipeline logs are returned either in reverse or forward chronological order of record insertion; depending on when a specific inference request completes, one inference record may be inserted out of chronological order by the Timestamp value, but still be in chronological order of insertion.
This command takes the following parameters.
Parameter
Type
Description
limit
Int (Optional) (Default: 100)
Limits how many log records to display. If there are more pipeline logs than are being displayed, the Warning message Pipeline log record limit exceeded will be displayed. For example, if 100 log files were requested and there are a total of 1,000, the warning message will be displayed.
start_datetime and end_datetime
DateTime (Optional)
Limits logs to all logs between the start_datetime and end_datetime DateTime parameters. These comply with the Python datetime library for formats such as:
datetime.datetime.now()
datetime.datetime(2023, 3, 28, 14, 25, 51, 660058, tzinfo=tzutc()) (March 28, 2023 14:25:51:660058 UTC time zone)
Both parameters must be provided. Submitting a logs() request with only start_datetime or end_datetime will generate an exception. If start_datetime and end_datetime are provided as parameters even with any other parameter, then the records are returned in chronological order, with the oldest record displayed first.
dataset
List[String] (OPTIONAL)
The datasets to be returned. The datasets available are:
*: Default. This translates to ["time", "in", "out", "anomaly"].
count The number of anomalies detected as an integer. Each pipeline validation the returns True adds to the number of anomalies detected.
{validation}: Each pipeline validation added to the pipeline is returned as the field anomaly.{validation}. Validations that return True indicate an anomaly detected based on the validation expression, while False indicates no anomaly found for the validation.
meta: Returns metadata. IMPORTANT NOTE: See Metadata Requests Restrictions for specifications on how this dataset can be used with other datasets.
Returns in the metadata.elapsed field:
A list of time in nanoseconds for:
The time to serialize the input.
How long each step took.
Returns in the metadata.last_model field:
A dict with each Python step as:
model_name: The name of the model in the pipeline step.
model_sha : The sha hash of the model in the pipeline step.
Returns in the metadata.partition field:
The partition used to store the inference results from this pipeline. This is mainly used when adding Wallaroo Server edge deployments to a published pipeline and separating the inference results from those edge deployments. See Wallaroo SDK Essentials Guide: Pipeline Edge Publication: Edge Observability for full details.
Returns in the metadata.pipeline_version field:
The pipeline version as a UUID value.
metadata.elapsed: IMPORTANT NOTE: See Metadata Requests Restrictionsfor specifications on how this dataset can be used with other datasets.
Returns in the metadata.elapsed field:
A list of time in nanoseconds for:
The time to serialize the input.
How long each step took.
dataset_exclude
List[String] (OPTIONAL)
Exclude specified datasets.
dataset_separator
Sequence[[String], string] (OPTIONAL)
If set to “.”, return dataset will be flattened.
arrow
Boolean (Optional) (Default: False)
If arrow is set to True, then the logs are returned as an Apache Arrow table. If arrow=False, then the logs are returned as a pandas DataFrame.
All of the parameters can be used together, but start_datetime and end_datetimemust be combined; if one is used, then so must the other. If start_datetime and end_datetime are used with any other parameter, then the log results are in chronological order of record insertion.
Log requests are limited to around 100k in size. For requests greater than 100k in size, use the Pipeline export_logs() method.
Logs include the following standard datasets:
Parameter
Type
Description
time
DateTime
The DateTime the inference request was made.
in.{variable}
The input(s) for the inference request. Each input is listed as in.{variable_name}. For example, in.text_input, in.square_foot, in.number_of_rooms, etc.
out
The outputs(s) for the inference request, based on the ML model’s outputs. Each output is listed as out.{variable_name}. For example, out.maximum_offer_price, out.minimum_asking_price, out.trade_in_value, etc.
Only returned when using Pipeline Shadow Deployments. For each model in the shadow deploy step, their output is listed in the format out_{model_name}.{variable}. For example, out_shadow_model_xgb.maximum_offer_price, out_shadow_model_xgb.minimum_asking_price, out_shadow_model_xgb.trade_in_value, etc.
out._model_split
Only returned when using A/B Testing, used to display the model_name, model_version, and model_sha of the model used for the inference.
In this example, the last 50 logs to the pipeline mainpipeline between two sample dates. In this case, all of the time column fields are the same since the inference request was sent as a batch.
The following restrictions are in place when requesting the following datasets:
metadata
metadata.elasped
metadata.last_model
metadata.pipeline_version
Standard Pipeline Steps Log Requests
Effected pipeline steps:
add_model_step
replace_with_model_step
For log file requests, the following metadata dataset requests for standard pipeline steps are available:
metadata
These must be paired with specific columns. * is not available when paired with metadata.
in: All input fields.
out: All output fields.
time: The DateTime the inference request was made.
in.{input_fields}: Any input fields (tensor, etc.)
out.{output_fields}: Any output fields (out.house_price, out.variable, etc.)
anomaly.count: Any anomalies detected from validations.
anomaly.{validation}: The validation that triggered the anomaly detection and whether it is True (indicating an anomaly was detected) or False. For more details, see Wallaroo SDK Essentials Guide: Anomaly Detection
For example, the following requests the metadata plus any output fields.
For log file requests, the following metadata dataset requests for shadow deploy testing pipeline steps are available:
metadata
These must be paired with specific columns. * is not available when paired with metadata. timemust be included if dataset is used.
in: All input fields.
out: All output fields.
time: The DateTime the inference request was made.
in.{input_fields}: Any input fields (tensor, etc.).
out.{output_fields}: Any output fields matching the specific output_field (out.house_price, out.variable, etc.).
out_: All shadow deployed challenger steps Any output fields matching the specific output_field (out.house_price, out.variable, etc.).
anomaly.count: Any anomalies detected from validations.
anomaly.{validation}: The validation that triggered the anomaly detection and whether it is True (indicating an anomaly was detected) or False. For more details, see Wallaroo SDK Essentials Guide: Anomaly Detection
The following example retrieves the logs from a pipeline with shadow deployed models, and displays the specific shadow deployed model outputs and the metadata.elasped field.
For log file requests, the following metadata dataset requests for A/B testing pipeline steps are available:
metadata
These must be paired with specific columns. * is not available when paired with metadata. timemust be included if dataset is used.
in: All input fields.
out: All output fields.
time: The DateTime the inference request was made. Must be requested in all dataset requests.
in.{input_fields}: Any input fields (tensor, etc.).
out.{output_fields}: Any output fields matching the specific output_field (out.house_price, out.variable, etc.).
anomaly.count: Any anomalies detected from validations.
anomaly.{validation}: The validation that triggered the anomaly detection and whether it is True (indicating an anomaly was detected) or False. For more details, see Wallaroo SDK Essentials Guide: Anomaly Detection
The following example retrieves the logs from a pipeline with A/B deployed models, and displays the output and the specific metadata.last_model field.
The Pipeline method export_logs returns the Pipeline records as either by default pandas records in Newline Delimited JSON (NDJSON) format, or an Apache Arrow table files.
The output files are by default stores in the current working directory ./logs with the default prefix as the {pipeline name}-1, {pipeline name}-2, etc.
IMPORTANT NOTE
Files with the same names will be overwritten.
The suffix by default will be json for pandas records in Newline Delimited JSON (NDJSON) format files. Logs are segmented by pipeline version across the limit, data_size_limit, or start_datetime and end_datetime parameters.
By default, logs are returned as a pandas record in NDJSON in reverse chronological order of insertion, with the most recent log insertions displayed first.
Pipeline logs are segmented by pipeline versions. For example, if a new model step is added to a pipeline, a model swapped out of a pipeline step, etc - this generated a new pipeline version.
IMPORTANT NOTE
Pipeline logs are returned either in reverse or forward chronological order of record insertion; depending on when a specific inference request completes, one inference record may be inserted out of chronological order by the Timestamp value, but still be in chronological order of insertion.
This command takes the following parameters.
Parameter
Type
Description
directory
String (Optional) (Default: logs)
Logs are exported to a file from current working directory to directory.
file_prefix
String (Optional) (Default: The name of the pipeline)
The name of the exported files. By default, this will the name of the pipeline and is segmented by pipeline version between the limits or the start and end period. For example: ’logpipeline-1.json`, etc.
data_size_limit
String (Optional) (Default: 100MB)
The maximum size for the exported data in bytes. Note that file size is approximate to the request; a request of 10MiB may return 10.3MB of data. The fields are in the format “{size as number} {unit value}”, and can include a space so “10 MiB” and “10MiB” are the same. The accepted unit values are:
KiB (for KiloBytes)
MiB (for MegaBytes)
GiB (for GigaBytes)
TiB (for TeraBytes)
limit
Int (Optional) (Default: 100)
Limits how many log records to display. Defaults to 100. If there are more pipeline logs than are being displayed, the Warning message Pipeline log record limit exceeded will be displayed. For example, if 100 log files were requested and there are a total of 1,000, the warning message will be displayed.
start_datetime and end_datetime
DateTime (Optional)
Limits logs to all logs between the start_datetime and end_datetime DateTime parameters. These comply with the Python datetime library for formats such as:
datetime.datetime.now()
datetime.datetime(2023, 3, 28, 14, 25, 51, 660058, tzinfo=tzutc()) (March 28, 2023 14:25:51:660058 UTC time zone)
Both parameters must be provided. Submitting a logs() request with only start_datetime or end_datetime will generate an exception. If start_datetime and end_datetime are provided as parameters even with any other parameter, then the records are returned in chronological order, with the oldest record displayed first.
filename
String (Required)
The file name to save the log file to. The requesting user must have write access to the file location. The requesting user must have write permission to the file location, and the target directory for the file must already exist. For example: If the file is set to /var/wallaroo/logs/pipeline.json, then the directory /var/wallaroo/logs must already exist. Otherwise file names are only limited by standard file naming rules for the target environment.
dataset
List (OPTIONAL)
The datasets to be returned. The datasets available are:
*: Default. This translates to ["time", "in", "out", "anomaly"].
count The number of anomalies detected as an integer. Each pipeline validation the returns True adds to the number of anomalies detected.
{validation}: Each pipeline validation added to the pipeline is returned as the field anomaly.{validation}. Validations that return True indicate an anomaly detected based on the validation expression, while False indicates no anomaly found for the validation.
meta: Returns metadata. IMPORTANT NOTE: See Metadata Requests Restrictions for specifications on how this dataset can be used with other datasets.
Returns in the metadata.elapsed field:
A list of time in nanoseconds for:
The time to serialize the input.
How long each step took.
Returns in the metadata.last_model field:
A dict with each Python step as:
model_name: The name of the model in the pipeline step.
model_sha : The sha hash of the model in the pipeline step.
Returns in the metadata.partition field:
The partition used to store the inference results from this pipeline. This is mainly used when adding Wallaroo Server edge deployments to a published pipeline and separating the inference results from those edge deployments. See Wallaroo SDK Essentials Guide: Pipeline Edge Publication: Edge Observability for full details.
Returns in the metadata.pipeline_version field:
The pipeline version as a UUID value.
metadata.elapsed: IMPORTANT NOTE: See Metadata Requests Restrictionsfor specifications on how this dataset can be used with other datasets.
Returns in the metadata.elapsed field:
A list of time in nanoseconds for:
The time to serialize the input.
How long each step took.
dataset_exclude
List[String] (OPTIONAL)
Exclude specified datasets.
dataset_separator
Sequence[[String], string] (OPTIONAL)
If set to “.”, return dataset will be flattened.
arrow
Boolean (Optional)
Defaults to False. If arrow=True, then the logs are returned as an Apache Arrow table. If arrow=False, then the logs are returned as pandas record in NDJSON that can be imported into a pandas DataFrame.
All of the parameters can be used together, but start_datetime and end_datetimemust be combined; if one is used, then so must the other. If start_datetime and end_datetime are used with any other parameter, then the log results are in chronological order of record insertion.
File sizes are limited to around 10 MB in size. If the requested log file is greater than 10 MB, a Warning will be displayed indicating the end date of the log file downloaded so the request can be adjusted to capture the requested log files.
IMPORTANT NOTE
DataFrame file exports exported as pandas record in NDJSON are read back to a DataFrame through the the pandas read_json method with the parameter lines=True. For example:
In this example, the log files are saved as both Pandas DataFrame and Apache Arrow.
# Save the DataFrame version of the log filemainpipeline.export_logs()
display(os.listdir('./logs'))
mainpipeline.export_logs(arrow=True)
display(os.listdir('./logs'))
Warning: Therearemorelogsavailable.Pleasesetalargerlimittoexportmoredata. ['pipeline-logs-1.json']
Warning: Therearemorelogsavailable.Pleasesetalargerlimittoexportmoredata. ['pipeline-logs-1.arrow', 'pipeline-logs-1.json']
Pipeline Log Storage
Pipeline logs have a set allocation of storage space and data requirements.
Pipeline Log Storage Warnings
To prevent storage and performance issues, inference result data may be dropped from pipeline logs by the following standards:
Columns are progressively removed from the row starting with the largest input data size and working to the smallest, then the same for outputs.
For example, Computer Vision ML Models typically have large inputs and output values - a single pandas DataFrame inference request may be over 13 MB in size, and the inference results nearly as large. To prevent pipeline log storage issues, the input may be dropped from the pipeline logs, and if additional space is needed, the inference outputs would follow. The time column is preserved.
IMPORTANT NOTE
Inference Requests will always return all inputs, outputs, and other metadata unless specifically requested for exclusion. It is the pipeline logs that may drop columns for space purposes.
If a pipeline has dropped columns for space purposes, this will be displayed when a log request is made with the following warning, with {columns} replaced with the dropped columns.
To review what columns are dropped from pipeline logs for storage reasons, include the dataset metadata in the request to view the column metadata.dropped. This metadata field displays a List of any columns dropped from the pipeline logs.
Data elements that do not fit the supported data types below, such as None or Null values, are not supported in pipeline logs. When present, undefined data will be written in the place of the null value, typically zeroes. Any null list values will present an empty list.
How to publish a pipeline engine to a edge registry for deployment to other platforms.
Wallaroo pipelines can be published to a Edge Open Container Initiative (OCI) Registry Service, known here as the Edge Registry Service, as a container images. This allows the Wallaroo pipelines to be deployed in other environments, such as Docker or Kubernetes with all of the pipeline model. When deployed, these pipelines can perform inferences from the ML models exactly as if they were deployed as part of a Wallaroo instance.
When a pipeline is updated with new model steps or deployment configurations, the updated pipeline is republished to the Edge Registry as a new repo and version. This allows DevOps engineers to update an Wallaroo pipeline in any container supporting environment with the new versions of the pipeline.
Pipeline Publishing Flow
A typical ML Model and Pipeline deployment to Wallaroo Ops and to remote locations as a Wallaroo Inference server is as follows:
Components:
Wallaroo Ops: The Wallaroo Ops provides the backbone services for ML Model deployment. This is where ML models are uploaded, pipelines created and deployed for inferencing, pipelines published to OCI compliant registries, and other functions.
Wallaroo Inference Server: A remote deployment of a published Wallaroo pipeline with the Wallaroo Inference Engine outside the Wallaroo Ops instance. When the edge name is added to a Wallaroo publish, the Wallaroo Inference Server’s inference logs are submitted to the Wallaroo Ops instance. These inference logs are stored as part of the Wallaroo pipeline the remote deployment is published from.
DevOps:
Add Edge Publishing and Edge Observability to the Wallaroo Ops center. See Edge Deployment Registry Guide for details on updating the Wallaroo instance with Edge Publishing and Edge Observability.
Data Scientists:
Develop and train models.
Test their deployments in Wallaroo Ops Center as Pipelines with:
Pipeline Steps: The models part of the inference flow.
Pipeline Deployment Configurations: CPUs, RAM, GPU, and Architecture settings to run the pipeline.
Publish the Pipeline from the Wallaroo Ops to an OCI Registry: Store a image version of the Pipeline with models and pipeline configuration into the OCI Registry set by the DevOps engineers as the Wallaroo Edge Registry Service.
DevOps:
Retrieve the new or updated Wallaroo published pipeline from the Wallaroo Edge Registry Service.
(Optional): Add an edge to the Wallaroo publish. This provides the EDGE_BUNDLE with the credentials for the Wallaroo Inference Server to transmit its inference result logs back to the Wallaroo Ops instance. These inference logs are added to the originating Wallaroo pipeline, labeled with the metadata.partition being the name of the edge deployed Wallaroo Inference server. For more details, see Wallaroo SDK Essentials Guide: Pipeline Edge Publication: Edge Observability
Deploy the Pipeline as a Wallaroo Inference Server as a Docker or Kubernetes container, updating the resource allocations as part of the Helm chart, Docker Compose file, etc.
Enable Wallaroo Edge Registry
Set Edge Registry Service
Wallaroo Pipeline Publishes aka Wallaroo Servers are automatically routed to the Edge Open Container Initiative (OCI) Registry Service registered in the Wallaroo instance. This is enabled through either the Wallaroo Administrative Dashboard through kots, or by enabling it through a helm chart setting. From here on out, we will refer to it as the Edge Registry Service.
Set Edge Registry Service through Kots
To set the Edge Registry Settings through the Wallaroo Administrative Dashboard:
Launch the Wallaroo Administrative Dashboard using the following command, replacing the --namespace parameter with the Kubernetes namespace for the Wallaroo instance:
kubectl kots admin-console --namespace wallaroo
Open a browser at the URL detailed in the step above and authenticate using the console password set as described in the as detailed in the Wallaroo Install Guides.
From the top menu, select Config then scroll to Edge Deployment.
Enable Provide OCI registry credentials for pipelines.
Enter the following:
Registry URL: The address of the registry service. For example: us-west1-docker.pkg.dev.
email: The email address of the user account used to authenticate to the service.
username: The account used to authenticate to the registry service.
password: The password or token used to authenticate to the registry service.
Save the updated configuration, then deploy it. Once complete, the edge registry settings will be available.
Set Edge Registry Service through Helm
The helm settings for adding the Edge Server configuration details are set through the ociRegistry element, with the following settings.
ociRegistry: Sets the Edge Server registry information.
enabled: true enables the Edge Server registry information, false disables it.
registry: The registry url. For example: reg.big.corp:3579.
repository: The repository within the registry. This may include the cloud account, or the full path where the Wallaroo published pipelines should be kept. For example: account123/wallaroo/pipelines.
email: Optional field to track the email address of the registry credential.
username: The username to the registry. This may vary based on the provider. For example, GCP Artifact Registry with service accounts uses the username _json_key_base64 with the password as a base64 processed token of the credential information.
password: The password or token for the registry service.
Set Edge Observability Service
Edge Observability allows published Wallaroo Servers to community with the Wallaroo Ops center to update their associated Wallaroo Pipeline with inference results, visible in the Pipeline logs.
This process will create a new Kubernetes service edge-lb. Based on the configuration options below, the service will require an additional IP address separate from the Wallaroo service api-lb. The edge-lb will require a DNS hostname.
Set Edge Observability Service through Kots
To enable Edge Observability using the Wallaroo Administrative Dashboard for kots installed instances of Wallaroo Ops:
Launch the Wallaroo Administrative Dashboard using the following command, replacing the --namespace parameter with the Kubernetes namespace for the Wallaroo instance:
kubectl kots admin-console --namespace wallaroo
Open a browser at the URL detailed in the step above and authenticate using the console password set as described in the as detailed in the Wallaroo Install Guides.
Access Config and scroll to Edge Deployment and enable Enable pipelines deployed on the edge to send data back to the OpsCenter.
Set the following:
Specify the OpsCenter hostname or IP address, as reachable from edge sites.: Set the DNS address in the format https://service.{suffix domain}. For example, if the domain suffix is wallaroo.example.com and the Wallaroo Edge Observabilty Service is set to the hostname edge, then the URL to access the edge service is:
edge.wallaroo.example.com
Edge ingress mode: Set one of the following.
None - Services are cluster local and kubernetes port forwarding must be used for access.
Internal - Private network users can connect directly and do not need to port forward anything.
External - Internet facing users can connect directly to interactive Wallaroo services. Exercise caution.
Save the updated configuration, then deploy it. Once complete, the edge observability service is available.
To enable the Edge Observability Service for Wallaroo Ops Helm based installation, include the following variables for the helm settings. For these instructions they are stored in local-values.yaml:
Update the Wallaroo Helm installation with the same version as the Wallaroo ops and the channel. For example, if updating Wallaroo Enterprise server, use the following:
This process will take 5-15 minutes depending on other configuration options. Once complete, set the DNS address as described in Set Edge Observability Service DNS Hostname.
Set Edge Observability Service DNS Hostname
Once enabled, the Wallaroo Edge Observability Service requires a DNS address. The following instructions are specified for Edge ingress mode:External.
Obtain the external IP address of the the Wallaroo Edge Observability Service with the following command, replacing the -n wallaroo namespace option with the one the Wallaroo Ops instance is installed into.
EDGE_LOADBALANCER=$(kubectl get svc edge-lb -n wallaroo -o jsonpath='{.status.loadBalancer.ingress[0].ip}')&&echo$EDGE_LOADBALANCER
The following are short guides for setting up the credentials for different registry services. Refer to the registry documentation for full details.
The following process is used with a GitHub Container Registry to create the authentication tokens for use with a Wallaroo instance’s Private Model Registry configuration.
The following process is used register a GitHub Container Registry with Wallaroo.
Create a new token as per the instructions from the Creating a personal access token (classic) guide. Note that a classic token is recommended for this process. Store this token in a secure location as it will not be able to be retrieved later from GitHub. Verify the following permissions are set:
Select the write:packages scope to download and upload container images and read and write their metadata.
Select the read:packages scope to download container images and read their metadata (selected when write:packages is selected by default).
Select the delete:packages scope to delete container images.
Store the token in a secure location.
This can be tested with docker by logging into the specified registry. For example:
The following process is an example of setting up an Artifact Registry Service with Google Cloud Platform (GCP) that is used to store containerized model images and retrieve them for use with Wallaroo.
Uploading and downloading containerized models to a Google Cloud Platform Registry follows these general steps.
Create the GCP registry.
Create a Service Account that will manage the registry service requests.
Assign appropriate Artifact Registry role to the Service Account
Retrieve the Service Account credentials.
Using either a specific user, or the Service Account credentials, upload the containerized model to the registry service.
Add the service account credentials to the Wallaroo instance’s containerized model private registry configuration.
Prerequisites
The commands below use the Google gcloud command line tool, and expect that a Google Cloud Platform account is created and the gcloud application is associated with the GCP Project for the organization.
For full details on the process and other methods, see the Google GCP documentation.
The GCP Registry Service Account is used to manage the GCP registry service. The steps are details from the Google Create a service account guide.
The gcloud process for these steps are:
Connect the gcloud application to the organization’s project.
$PROJECT_ID="YOUR PROJECT ID"gcloud config set project $PROJECT_ID
Create the service account with the following:
The name of the service account.
A description of its purpose.
The name to show when displayed.
SA_NAME="YOUR SERVICE ACCOUNT NAME"DESCRIPTION="Wallaroo container registry SA"DISPLAY_NAME="Wallaroo the Roo"gcloud iam service-accounts create $SA_NAME\
--description=$DESCRIPTION\
--display-name=$DISPLAY_NAME
Read, write, and delete artifacts. Create gcr.io repositories.
For this example, we will add the Artifact Registry Create-on-push Writer to the created Service Account from the previous step.
Add the role to the service account, specifying the member as the new service account, and the role as the selected role. For this example, a pkg.dev is assumed for the Artifact Registry type.
# for pkg.devROLE="roles/artifactregistry.writer"# for gcr.io #ROLE="roles/artifactregistry.createOnPushWritergcloud projects add-iam-policy-binding \
$PROJECT_ID\
--member="serviceAccount:$SA_NAME@$PROJECT_ID.iam.gserviceaccount.com"\
--role=$ROLE
Authenticate to Repository
To push and pull image from the new registry, we’ll use our new service account and authenticate through the local Docker application. See the GCP Push and pull images for details on using Docker and other methods to add artifacts to the GCP artifact registry.
Set up Service Account Key
To set up the Service Account key, we’ll use the Google Console IAM & ADMIN dashboard based on the Set up authentication for Docker, using the JSON key approach.
From GCP console, search for IAM & Admin.
Select Service Accounts.
Select the service account to generate keys for.
Select the Email address listed and store this for later steps with the key generated through this process.
Select Keys, then Add Key, then Create new key.
Select JSON, then Create.
Store the key in a safe location.
Convert SA Key to Base64
The key file downloaded in Set up Service Account Key needs to be converted to base64 with the following command, replacing the locations of KEY_FILE and KEYFILEBASE64:
Pipelines are published as images to the edge registry set in the Enable Wallaroo Edge Registry with the wallaroo.pipeline.publish method.
Publish a Pipeline Parameters
The publish method takes the following parameters. The containerized pipeline will be pushed to the Edge registry service with the model, pipeline configurations, and other artifacts needed to deploy the pipeline.
Numerical Wallaroo id of the pipeline version published.
status
string
The status of the pipeline publication. Values include:
PendingPublish: The pipeline publication is about to be uploaded or is in the process of being uploaded.
Published: The pipeline is published and ready for use.
Engine URL
string
The URL of the published pipeline engine in the edge registry.
Pipeline URL
string
The URL of the published pipeline in the edge registry.
Helm Chart URL
string
The URL of the helm chart for the published pipeline in the edge registry.
Helm Chart Reference
string
The help chart reference.
Helm Chart Version
string
The version of the Helm Chart of the published pipeline. This is also used as the Docker tag.
Engine Config
wallaroo.deployment_config.DeploymentConfig
The pipeline configuration included with the published pipeline.
Created At
DateTime
When the published pipeline was created.
Updated At
DateTime
When the published pipeline was updated.
Publish a Pipeline Example
The following example shows how to publish a pipeline to the edge registry service associated with the Wallaroo instance.
# set the configurationdeployment_config=wallaroo.DeploymentConfigBuilder().replica_count(1).cpus(0.5).memory("900Mi").build()
# build the pipelinepipeline=wl.build_pipeline("publish-example")
# add a model as a model steppipeline.add_model_step(m2)
publish=pipeline.publish(deployment_config)
display(publish)
Edge Observability allows edge deployments of Wallaroo Server to transmit inference results back to the Wallaroo Ops center and become part of the pipeline’s logs. This is valuable for data scientists and MLOps engineers to retrieve edge deployment logs for use in model observability, drift, and other use cases.
Before starting, the Edge Observability Service must be enabled in the Wallaroo Ops center. See the Edge Deployment Registry Guide for details on enabling the Wallaroo Edge Deployment service.
Wallaroo Server edge observability is enabled when a new edge location is added to the pipeline publish. Each location has its own EDGE_BUNDLE settings, a Base64 encoded set of instructions informing the edge deployed Wallaroo Server on how to communicate with Wallaroo Ops center.
Add Edge
Wallaroo Servers edge deployments are added to a Wallaroo pipeline’s publish with the wallaroo.pipeline_publish.add_edge(name: string, tags: List[string]) method. The name is the unique primary key for each edge added to the pipeline publish and must be unique.
Add Edge Parameters
wallaroo.pipeline_publish.add_edge(name: string, tags: List[string]) has the following parameters.
Field
Type
Description
name
String (Required)
The name of the edge location. This must be a unique value across all edges in the Wallaroo instance.
tags
List[String] (Optional)
A list of optional tags.
Add Edge Returns
This returns a Publish Edge with the following fields:
Field
Type
Description
id
Integer
The integer ID of the pipeline publish.
created_at
DateTime
The DateTime of the pipeline publish.
docker_run_variables
String
The Docker variables in JSON entry with the key EDGE_BUNDLE as a base64 encoded value that include the following: The BUNDLE_VERSION, EDGE_NAME, JOIN_TOKEN_, OPSCENTER_HOST, PIPELINE_URL, and WORKSPACE_ID. For example: {'EDGE_BUNDLE': 'abcde'}
engine_config
String
The Wallaroo wallaroo.deployment_config.DeploymentConfig for the pipeline.
pipeline_version_id
Integer
The integer identifier of the pipeline version published.
status
String
The status of the publish. Published is a successful publish.
updated_at
DateTime
The DateTime when the pipeline publish was updated.
user_images
List[String]
User images used in the pipeline publish.
created_by
String
The UUID of the Wallaroo user that created the pipeline publish.
engine_url
String
The URL for the published pipeline’s Wallaroo engine in the OCI registry.
error
String
Any errors logged.
helm
String
The helm chart, helm reference and helm version.
pipeline_url
String
The URL for the published pipeline’s container in the OCI registry.
pipeline_version_name
String
The UUID identifier of the pipeline version published.
additional_properties
String
Any other identities.
Add Edge Example
The following example demonstrates creating a publish from a pipeline, then adding a new edge to the publish.
When an edge is added to a pipeline publish, the field docker_run_variables contains a JSON value for edge devices to connect to the Wallaroo Ops instance. The settings are stored in the key EDGE_BUNDLE as a base64 encoded value that include the following:
BUNDLE_VERSION: The current version of the bundled Wallaroo pipeline.
EDGE_NAME: The edge name as defined when created and added to the pipeline publish.
JOIN_TOKEN_: The one time authentication token for authenticating to the Wallaroo Ops instance.
OPSCENTER_HOST: The hostname of the Wallaroo Ops edge service. See Edge Deployment Registry Guide for full details on enabling pipeline publishing and edge observability to Wallaroo.
The JOIN_TOKEN is a one time access token. Once used, a JOIN_TOKEN expires. The authentication session data is stored in persistent volumes. Persistent volumes must be specified for docker and docker compose based deployments of Wallaroo pipelines; helm based deployments automatically provide persistent volumes to store authentication credentials.
The JOIN_TOKEN has the following time to live (TTL) parameters.
Once created, the JOIN_TOKEN is valid for 24 hours. After it expires the edge will not be allowed to contact the OpsCenter the first time and a new edge bundle will have to be created.
After an Edge joins to Wallaroo Ops for the first time with persistent storage, the edge must contact the Wallaroo Ops instance at least onceevery 7 days.
If this period is exceeded, the authentication credentials will expire and a new edge bundle must be created with a new and valid JOIN_TOKEN.
Wallaroo edges require unique names. To create a new edge bundle with the same name:
Use Add Edge to add the edge with the same name. A new EDGE_BUNDLE is generated with a new JOIN_TOKEN.
DevOps - Pipeline Edge Deployment
Once a pipeline is deployed to the Edge Registry service, it can be deployed in environments such as Docker, Kubernetes, or similar container running services by a DevOps engineer.
Docker Deployment
First, the DevOps engineer must authenticate to the same OCI Registry service used for the Wallaroo Edge Deployment registry.
For more details, check with the documentation on your artifact service. The following are provided for the three major cloud services:
For the deployment, the engine URL is specified with the following environmental variables:
DEBUG (true|false): Whether to include debug output.
OCI_REGISTRY: The URL of the registry service.
CONFIG_CPUS: The number of CPUs to use.
OCI_USERNAME: The edge registry username.
OCI_PASSWORD: The edge registry password or token.
PIPELINE_URL: The published pipeline URL.
EDGE_BUNDLE (Optional): The base64 encoded edge token and other values to connect to the Wallaroo Ops instance. This is used for edge management and transmitting inference results for observability. IMPORTANT NOTE: The token for EDGE_BUNDLE is valid for one deployment. For subsequent deployments, generate a new edge location with its own EDGE_BUNDLE.
Login through docker to confirm access to the registry service. First, docker login. For example, logging into the artifact registry with the token stored in the variable tok:
Then deploy the Wallaroo published pipeline with an edge added to the pipeline publish through docker run.
IMPORTANT NOTE: Edge deployments with Edge Observability enabled with the EDGE_BUNDLE option include an authentication token that only authenticates once. To store the token long term, include the persistent volume flag -v {path to storage} setting.
For users who prefer to use docker compose, the following sample compose.yaml file is used to launch the Wallaroo Edge pipeline. This is the same used in the Wallaroo Use Case Tutorials Computer Vision: Retail tutorials. The volumes tag is used to preserve the login session from the one-time token generated as part of the EDGE_BUNDLE.
EDGE_BUNDLE is only required when adding an edge to a Wallaroo publish for observability. The following is deployed without observability.
Login through docker to confirm access to the registry service. First, docker login. For example, logging into the artifact registry with the token stored in the variable tok to the registry us-west1-docker.pkg.dev:
IMPORTANT NOTE: Edge deployments with Edge Observability enabled with the EDGE_BUNDLE option include an authentication token that only authenticates once. To store the token long term, include the persistent volume with the volumes: tag.
The deployment and undeployment is then just a simple docker compose up and docker compose down. The following shows an example of deploying the Wallaroo edge pipeline using docker compose.
docker compose up
[+] Running 1/1
✔ Container cv_data-engine-1 Recreated 0.5s
Attaching to cv_data-engine-1
cv_data-engine-1 | Wallaroo Engine - Standalone mode
cv_data-engine-1 | Login Succeeded
cv_data-engine-1 | Fetching manifest and config for pipeline: sample-registry.com/pipelines/edge-cv-retail:bf70eaf7-8c11-4b46-b751-916a43b1a555
cv_data-engine-1 | Fetching model layers
cv_data-engine-1 | digest: sha256:c6c8869645962e7711132a7e17aced2ac0f60dcdc2c7faa79b2de73847a87984
cv_data-engine-1 | filename: c6c8869645962e7711132a7e17aced2ac0f60dcdc2c7faa79b2de73847a87984
cv_data-engine-1 | name: resnet-50
cv_data-engine-1 | type: model
cv_data-engine-1 | runtime: onnx
cv_data-engine-1 | version: 693e19b5-0dc7-4afb-9922-e3f7feefe66d
cv_data-engine-1 |
cv_data-engine-1 | Fetched
cv_data-engine-1 | Starting engine
cv_data-engine-1 | Looking for preexisting `yaml` files in //modelconfigs
cv_data-engine-1 | Looking for preexisting `yaml` files in //pipelines
Helm Deployment
Published pipelines can be deployed through the use of helm charts.
Helm deployments take up to two steps - the first step is in retrieving the required values.yaml and making updates to override.
IMPORTANT NOTE: Edge deployments with Edge Observability enabled with the EDGE_BUNDLE option include an authentication token that only authenticates once. Helm chart installations automatically add a persistent volume during deployment to store the authentication session data for future deployments.
Login to the registry service with helm registry login. For example, if the token is stored in the variable tok:
Pull the helm charts from the published pipeline. The two fields are the Helm Chart URL and the Helm Chart version to specify the OCI . This typically takes the format of:
Extract the tgz file and copy the values.yaml and copy the values used to edit engine allocations, etc. The following are required for the deployment to run:
Once deployed, the DevOps engineer will have to forward the appropriate ports to the svc/engine-svc service in the specific pipeline. For example, using kubectl port-forward to the namespace ccfraud that would be:
elapsed (List[Integer]): A list of time in nanoseconds for:
[0] The time to serialize the input.
[1…n] How long each step took.
model_name (String): The name of the model used.
model_version (String): The version of the model in UUID format.
original_data: The original input data. Returns null if the input may be too long for a proper return.
outputs (List): The outputs of the inference result separated by data type, where each data type includes:
data: The returned values.
dim (List[Integer]): The dimension shape returned.
v (Integer): The vector shape of the data.
pipeline_name (String): The name of the pipeline.
shadow_data: Any shadow deployed data inferences in the same format as outputs.
time (Integer): The time since UNIX epoch.
Edge Inference Endpoint Example
The following example demonstrates sending an Apache Arrow table to the Edge deployed pipeline, requesting the inference results back in a pandas DataFrame records format.
When an edge is added to a pipeline publish, the field docker_run_variables contains a JSON value for edge devices to connect to the Wallaroo Ops instance.
The settings are stored in the key EDGE_BUNDLE as a base64 encoded value that include the following:
BUNDLE_VERSION: The current version of the bundled Wallaroo pipeline.
EDGE_NAME: The edge name as defined when created and added to the pipeline publish.
JOIN_TOKEN_: The one time authentication token for authenticating to the Wallaroo Ops instance.
OPSCENTER_HOST: The hostname of the Wallaroo Ops edge service. See Edge Deployment Registry Guide for full details on enabling pipeline publishing and edge observability to Wallaroo.
PIPELINE_URL: The OCI registry URL to the containerized pipeline.
The JOIN_TOKEN is a one time access token. Once used, a JOIN_TOKEN expires. The authentication session data is stored in persistent volumes. Persistent volumes must be specified for docker and docker compose based deployments of Wallaroo pipelines; helm based deployments automatically provide persistent volumes to store authentication credentials.
The JOIN_TOKEN has the following time to live (TTL) parameters.
Once created, the JOIN_TOKEN is valid for 24 hours. After it expires the edge will not be allowed to contact the OpsCenter the first time and a new edge bundle will have to be created.
After an Edge joins to Wallaroo Ops for the first time with persistent storage, the edge must contact the Wallaroo Ops instance at least onceevery 7 days.
If this period is exceeded, the authentication credentials will expire and a new edge bundle must be created with a new and valid JOIN_TOKEN.
Wallaroo edges require unique names. To create a new edge bundle with the same name:
Use Add Edge to add the edge with the same name. A new EDGE_BUNDLE is generated with a new JOIN_TOKEN.
7 - Wallaroo SDK Essentials Guide: ML Workload Orchestration
How to create and manage ML Workload Orchestration through the Wallaroo SDK
Wallaroo provides ML Workload Orchestrations and Tasks to automate processes in a Wallaroo instance. For example:
Deploy a pipeline, retrieve data through a data connector, submit the data for inferences, undeploy the pipeline
Replace a model with a new version
Retrieve shadow deployed inference results and submit them to a database
Orchestration Flow
ML Workload Orchestration flow works within 3 tiers:
Tier
Description
ML Workload Orchestration
User created custom instructions that provide automated processes that follow the same steps every time without error. Orchestrations contain the instructions to be performed, uploaded as a .ZIP file with the instructions, requirements, and artifacts.
Task
Instructions on when to run an Orchestration as a scheduled Task. Tasks can be Run Once, where is creates a single Task Run, or Run Scheduled, where a Task Run is created on a regular schedule based on the Kubernetes cronjob specifications. If a Task is Run Scheduled, it will create a new Task Run every time the schedule parameters are met until the Task is killed.
Task Run
The execution of an task. These validate business operations are successful identify any unsuccessful task runs. If the Task is Run Once, then only one Task Run is generated. If the Task is a Run Scheduled task, then a new Task Run will be created each time the schedule parameters are met, with each Task Run having its own results and logs.
One example may be of making donuts.
The ML Workload Orchestration is the recipe.
The Task is the order to make the donuts. It might be Run Once, so only one set of donuts are made, or Run Scheduled, so donuts are made every 2nd Sunday at 6 AM. If Run Scheduled, the donuts are made every time the schedule hits until the order is cancelled (aka killed).
The Task Run are the donuts with their own receipt of creation (logs, etc).
Orchestration Requirements
Orchestrations are uploaded to the Wallaroo instance as a ZIP file with the following requirements:
Parameter
Type
Description
User Code
(Required) Python script as .py files
If main.py exists, then that will be used as the task entrypoint. Otherwise, the firstmain.py found in any subdirectory will be used as the entrypoint. If no main.py is found, the orchestration will not be accepted.
A standard Python requirements.txt for any dependencies to be provided in the task environment. The Wallaroo SDK will already be present and should not be included in the requirements.txt. Multiple requirements.txt files are not allowed.
Other artifacts
Other artifacts such as files, data, or code to support the orchestration.
Zip Instructions
In a terminal with the zip command, assemble artifacts as above and then create the archive. The zip command is included by default with the Wallaroo JupyterHub service.
zip commands take the following format, with {zipfilename}.zip as the zip file to save the artifacts to, and each file thereafter as the files to add to the archive.
zip {zipfilename}.zip file1, file2, file3....
For example, the following command will add the files main.py and requirements.txt into the file hello.zip.
The following recommendations will make using Wallaroo orchestrations.
The version of Python used should match the same version as in the Wallaroo JupyterHub service.
The same version of the Wallaroo SDK should match the server. For a 2023.2.1 Wallaroo instance, use the Wallaroo SDK version 2023.2.1.
Specify the version of pip dependencies.
The wallaroo.Client constructor auth_type argument is ignored. Using wallaroo.Client() is sufficient.
The following methods will assist with orchestrations:
wallaroo.in_task() : Returns True if the code is running within an orchestration task.
wallaroo.task_args(): Returns a Dict of invocation-specific arguments passed to the run_ calls.
Orchestrations will be run in the same way as running within the Wallaroo JupyterHub service, from the version of Python libraries (unless specifically overridden by the requirements.txt setting, which is not recommended), and running in the virtualized directory /home/jovyan/.
Orchestration Code Samples
The following demonstres using the wallaroo.in_task() and wallaroo.task_args() methods within an Orchestration. This sample code uses wallaroo.in_task() to verify whether or not the script is running as a Wallaroo Task. If true, it will gather the wallaroo.task_args() and use them to set the workspace and pipeline. If False, then it sets the pipeline and workspace manually.
# get the argumentswl=wallaroo.Client()
# if true, get the arguments passed to the taskifwl.in_task():
arguments=wl.task_args()
# arguments is a key/value pair, set the workspace and pipeline nameworkspace_name=arguments['workspace_name']
pipeline_name=arguments['pipeline_name']
# False: We're not in a Task, so set the pipeline manuallyelse:
workspace_name="bigqueryworkspace"pipeline_name="bigquerypipeline"
Orchestration Methods
The following methods are provided for creating and listing orchestrations.
Create Orchestration
An orchestration is created through the Wallaroo Client upload_orchestration(path) with the following parameters.
For the uploads, either the path to the .zip file is required, or bytes_buffer with name are required. path can not be used with bytes_buffer and name, and vice versa.
Parameter
Type
Description
path
String (Optional)
The path to the .zip file that contains the orchestration package. Can not be use with bytes_buffer and name are used.
file_name
String (Optional)
The file name to give to the zip file when uploaded.
bytes_buffer
[bytes] (Optional)
The .zip file object to be uploaded. Can not be used with path. Note that if the zip file is uploaded as from the bytes_buffer parameter and file_name is not included, then the file name in the Wallaroo orchestrations list will be -.
name
String (Optional)
Sets the name of the byte uploaded zip file.
List Orchestrations
All orchestrations for a Wallaroo instances are listed via the Wallaroo Client list_orchestrations() method. It returns an array with the following.
Parameter
Type
Description
id
String
The UUID identifier for the orchestration.
last run status
String
The last reported status the task. Valid values are:
packaging: The orchestration has been upload and is being prepared.
ready: The orchestration is available to be used as a task.
sha
String
The sha value of the uploaded orchestration.
name
String
The name of the orchestration
filename
String
The name of the uploaded orchestration file.
created at
DateTime
The date and time the orchestration was uploaded to the Wallaroo instance.
updated at
DateTime
The date and time a new version of the orchestration was uploaded.
wl.list_orchestrations()
id
name
status
filename
sha
created at
updated at
0f90e606-09f8-409b-a306-cb04ec4c011a
comprehensive sample
ready
remote_inference.zip
b88e93...2396fb
2023-22-May 19:55:15
2023-22-May 19:56:09
Task Methods
Tasks are the implementation of an orchestration. Think of the orchestration as the instructions to follow, and the Task is the unit actually doing it.
Tasks are set at the workspace level.
Create Tasks
Tasks are created from an orchestration through the following methods.
Task Type
Description
run_once
Run the task once.
run_scheduled
Run on a schedule, repeat every time the schedule fits the task until it is killed.
Tasks have the following parameters.
Parameter
Type
Description
id
String
The UUID identifier for the task.
last run status
String
The last reported status the task. Values are:
unknown: The task has not been started or is being prepared.
ready: The task is scheduled to execute.
running: The task has started.
failure: The task failed.
success: The task completed.
type
String
The type of the task. Values are:
Temporary Run: The task runs once then stop.
Scheduled Run: The task repeats on a cron like schedule.
Service Run: The task runs as a service and executes when its service port is activated.
active
Boolean
True: The task is scheduled or running. False: The task has completed or has been issued the kill command.
schedule
String
The cron style schedule for the task. If the task is not a scheduled one, then the schedule will be -.
created at
DateTime
The date and time the task was started.
updated at
DateTime
The date and time the task was updated.
Run Task Once
Temporary Run tasks are created from the Orchestration run_once(name, json_args, timeout) with the following parameters.
Parameter
Type
Description
name
String (Required)
The designated name of the task.
json_args
Dict (Required)
Arguments for the orchestration, such as { "dogs": 3.9, "cats": 8.1}
timeout
int (Optional)
Timeout period in seconds.
task=orchestration.run_once(name="house price run once 2", json_args={"workspace_name": workspace_name,
"pipeline_name":pipeline_name,
"connection_name": connection_name }
)
task
Field
Value
ID
f0e27d6a-6a98-4d26-b240-266f08560c48
Name
house price run once 2
Last Run Status
unknown
Type
Temporary Run
Active
True
Schedule
-
Created At
2023-22-May 19:58:32
Updated At
2023-22-May 19:58:32
Run Task Scheduled
A task can be scheduled via the Orchestration run_scheduled method.
Scheduled tasks are run every time the schedule period is met. This uses the same settings as the cron utility.
Scheduled tasks include the following parameters.
Parameter
Type
Description
name
String (Required)
The name of the task.
schedule
String (Required)
Schedule in the cron format of: hour, minute, day_of_week, day_of_month, month.
timeout
int (Optional)
Timeout period in seconds.
json_args
Dict (Required)
Arguments for the task, such as { "dogs": 3.9, "cats": 8.1}
The schedule uses the same method as the cron service. For example, the following schedule:
schedule={'42 * * * *'}
Runs on the 42nd minute of every hour. The following schedule:
The list of tasks in the Wallaroo instance is retrieves through the Wallaroo Client list_tasks() method that accepts the following parameters.
Parameter
Type
Description
killed
Boolean (OptionalDefault: False)
Returns tasks depending on whether they have been issued the kill command. False returns all tasks whether killed or not. True only returns killed tasks.
This returns an array list of the following in reverse chronological order from updated at.
Parameter
Type
Description
id
String
The UUID identifier for the task.
last run status
String
The last reported status the task. Values are:
unknown: The task has not been started or is being prepared.
ready: The task is scheduled to execute.
running: The task has started.
failure: The task failed.
success: The task completed.
type
String
The type of the task. Values are:
Temporary Run: The task runs once then stop.
Scheduled Run: The task repeats on a cron like schedule.
Service Run: The task runs as a service and executes when its service port is activated.
active
Boolean
True: The task is scheduled or running. False: The task has completed or has been issued the kill command.
schedule
String
The cron style schedule for the task. If the task is not a scheduled one, then the schedule will be -.
created at
DateTime
The date and time the task was started.
updated at
DateTime
The date and time the task was updated.
For example:
wl.list_tasks()
id
name
last run status
type
active
schedule
created at
updated at
f0e27d6a-6a98-4d26-b240-266f08560c48
house price run once 2
running
Temporary Run
True
-
2023-22-May 19:58:32
2023-22-May 19:58:38
36509ef8-98da-42a0-913f-e6e929dedb15
house price run once
success
Temporary Run
True
-
2023-22-May 19:56:37
2023-22-May 19:56:48
An individual task can be retrieved through the list_tasks() by specifying the task from the array returned. In this example, the first task listed from the list_tasks() method will be assigned to the task variable.
task=wl.list_tasks()[0]
Get Task Status
The status of a task is retrieved through the Task status() method and returns the following.
Parameter
Type
Description
status
String
The current status of the task. Values are:
pending: The task has not been started or is being prepared.
started: The task has started to execute.
display(task2.status())
'started'
Kill a Task
Killing a task removes the schedule or removes it from a service. Tasks are killed with the Task kill() method, and returns a message with the status of the kill procedure.
Note that a Task set to Run Scheduled will generate a new Task Run each time the schedule parameters are met until the Task is killed. A Task set to Run Once will generate only one Task Run, so does not need to be killed.
Task Runs are generated from a Task. If the Task is Run Once, then only one Task Run is generated. If the Task is a Run Scheduled task, then a new Task Run will be created each time the schedule parameters are met, with each Task Run having its own results and logs.
Task Last Runs History
The history of a task, which each deployment of the task is known as a task run is retrieved with the Task last_runs method that takes the following arguments.
Parameter
Type
Description
status
String (Optional *Default: all)
Filters the task history by the status. If all, returns all statuses. Status values are:
running: The task has started.
failure: The task failed.
success: The task completed.
limit
Integer (Optional)
Limits the number of task runs returned.
This returns the following in reverse chronological order by updated at.
Parameter
Type
Description
task id
String
Task id in UUID format.
pod id
String
Pod id in UUID format.
status
String
Status of the task. Status values are:
running: The task has started.
failure: The task failed.
success: The task completed.
created at
DateTime
Date and time the task was created at.
updated at
DateTime
Date and time the task was updated.
task.last_runs()
task id
pod id
status
created at
updated at
f0e27d6a-6a98-4d26-b240-266f08560c48
7d9d73d5-df11-44ed-90c1-db0e64c7f9b8
success
2023-22-May 19:58:35
2023-22-May 19:58:35
Task Run Logs
The output of a task is displayed with the Task Run logs() method that takes the following parameters.
Parameter
Type
Description
limit
Integer (Optional)
Limits the lines returned from the task run log. The limit parameter is based on the log tail - starting from the last line of the log file, then working up until the limit of lines is reached. This is useful for viewing final outputs, exceptions, etc.
The Task Run logs() returns the log entries as a string list, with each entry as an item in the list.
IMPORTANT NOTE: It may take around a minute for task run logs to be integrated into the Wallaroo log database.
# give time for the task to complete and the log files enteredtime.sleep(60)
recent_run=task.last_runs()[0]
display(recent_run.logs())
How to create and manage Wallaroo Tags through the Wallaroo SDK
Wallaroo SDK Tag Management
Tags are applied to either model versions or pipelines. This allows organizations to track different versions of models, and search for what pipelines have been used for specific purposes such as testing versus production use.
Create Tag
Tags are created with the Wallaroo client command create_tag(String tagname). This creates the tag and makes it available for use.
The tag will be saved to the variable currentTag to be used in the rest of these examples.
# Now we create our tagcurrentTag=wl.create_tag("My Great Tag")
List Tags
Tags are listed with the Wallaroo client command list_tags(), which shows all tags and what models and pipelines they have been assigned to.
Tags are used with pipelines to track different pipelines that are built or deployed with different features or functions.
Add Tag to Pipeline
Tags are added to a pipeline through the Wallaroo Tag add_to_pipeline(pipeline_id) method, where pipeline_id is the pipeline’s integer id.
For this example, we will add currentTag to testtest_pipeline, then verify it has been added through the list_tags command and list_pipelines command.
# add this tag to the pipelinecurrentTag.add_to_pipeline(tagtest_pipeline.id())
{'pipeline_pk_id': 1, 'tag_pk_id': 1}
Search Pipelines by Tag
Pipelines can be searched through the Wallaroo Client search_pipelines(search_term) method, where search_term is a string value for tags assigned to the pipelines.
In this example, the text “My Great Tag” that corresponds to currentTag will be searched for and displayed.
wl.search_pipelines('My Great Tag')
name
version
creation_time
last_updated_time
deployed
tags
steps
tagtestpipeline
5a4ff3c7-1a2d-4b0a-ad9f-78941e6f5677
2022-29-Nov 17:15:21
2022-29-Nov 17:15:21
(unknown)
My Great Tag
Remove Tag from Pipeline
Tags are removed from a pipeline with the Wallaroo Tag remove_from_pipeline(pipeline_id) command, where pipeline_id is the integer value of the pipeline’s id.
For this example, currentTag will be removed from tagtest_pipeline. This will be verified through the list_tags and search_pipelines command.
## remove from pipelinecurrentTag.remove_from_pipeline(tagtest_pipeline.id())
{'pipeline_pk_id': 1, 'tag_pk_id': 1}
Wallaroo Model Tag Management
Tags are used with models to track differences in model versions.
Assign Tag to a Model
Tags are assigned to a model through the Wallaroo Tag add_to_model(model_id) command, where model_id is the model’s numerical ID number. The tag is applied to the most current version of the model.
For this example, the currentTag will be applied to the tagtest_model. All tags will then be listed to show it has been assigned to this model.
# add tag to modelcurrentTag.add_to_model(tagtest_model.id())
{'model_id': 1, 'tag_id': 1}
Search Models by Tag
Model versions can be searched via tags using the Wallaroo Client method search_models(search_term), where search_term is a string value. All models versions containing the tag will be displayed. In this example, we will be using the text from our tag to list all models that have the text from currentTag in them.
# Search models by tagwl.search_models('My Great Tag')
name
version
file_name
image_path
last_update_time
tagtestmodel
70169e97-fb7e-4922-82ba-4f5d37e75253
ccfraud.onnx
None
2022-11-29 17:15:21.703465+00:00
Remove Tag from Model
Tags are removed from models using the Wallaroo Tag remove_from_model(model_id) command.
In this example, the currentTag will be removed from tagtest_model. A list of all tags will be shown with the list_tags command, followed by searching the models for the tag to verify it has been removed.
### remove tag from modelcurrentTag.remove_from_model(tagtest_model.id())
{'model_id': 1, 'tag_id': 1}
How to create and manage Wallaroo Assays through the Wallaroo SDK
Model Insights and Interactive Analysis Introduction
Wallaroo provides the ability to perform interactive analysis so organizations can explore the data from a pipeline and learn how the data is behaving. With this information and the knowledge of your particular business use case you can then choose appropriate thresholds for persistent automatic assays as desired.
IMPORTANT NOTE
Model insights operates over time and is difficult to demo in a notebook without pre-canned data. We assume you have an active pipeline that has been running and making predictions over time and show you the code you may use to analyze your pipeline.
Monitoring tasks called assays monitors a model’s predictions or the data coming into the model against an established baseline. Changes in the distribution of this data can be an indication of model drift, or of a change in the environment that the model trained for. This can provide tips on whether a model needs to be retrained or the environment data analyzed for accuracy or other needs.
Assay Details
Assays contain the following attributes:
Attribute
Default
Description
Name
The name of the assay. Assay names must be unique.
Baseline Data
Data that is known to be “typical” (typically distributed) and can be used to determine whether the distribution of new data has changed.
Schedule
Every 24 hours at 1 AM
Configure the start time and frequency of when the new analysis will run. New assays are configured to run a new analysis for every 24 hours starting at the end of the baseline period. This period can be configured through the SDK.
Group Results
Daily
How the results are grouped: Daily (Default), Every Minute, Weekly, or Monthly.
Metric
PSI
Population Stability Index (PSI) is an entropy-based measure of the difference between distributions. Maximum Difference of Bins measures the maximum difference between the baseline and current distributions (as estimated using the bins). Sum of the difference of bins sums up the difference of occurrences in each bin between the baseline and current distributions.
Threshold
0.1
Threshold for deciding the difference between distributions is similar(small) or different(large), as evaluated by the metric. The default of 0.1 is generally a good threshold when using PSI as the metric.
Number of Bins
5
Number of bins used to partition the baseline data. By default, the binning scheme is percentile (quantile) based. The binning scheme can be configured (see Bin Mode, below). Note that the total number of bins will include the set number plus the left_outlier and the right_outlier, so the total number of bins will be the total set + 2.
Bin Mode
Quantile
Specify the Binning Scheme. Available options are: Quantile binning defines the bins using percentile ranges (each bin holds the same percentage of the baseline data). Equal binning defines the bins using equally spaced data value ranges, like a histogram. Custom allows users to set the range of values for each bin, with the Left Outlier always starting at Min (below the minimum values detected from the baseline) and the Right Outlier always ending at Max (above the maximum values detected from the baseline).
Bin Weight
Equally Weighted
The weight applied to each bin. The bin weights can be either set to Equally Weighted (the default) where each bin is weighted equally, or Custom where the bin weights can be adjusted depending on which are considered more important for detecting model drift.
Model Insights via the Wallaroo Dashboard SDK
Assays generated through the Wallaroo SDK can be previewed, configured, and uploaded to the Wallaroo Ops instance. The following is a condensed version of this process. For full details see the Wallaroo SDK Essentials Guide: Assays Management guide.
Model drift detection with assays using the Wallaroo SDK follows this general process.
Define the Baseline: From either historical inference data for a specific model in a pipeline, or from a pre-determine array of data, a baseline is formed.
Assay Preview: Once the baseline is formed, we preview the assay and configure the different options until we have the the best method of detecting environment or model drift.
Create Assay: With the previews and configuration complete, we upload the assay. The assay will perform an analysis on a regular scheduled based on the configuration.
Get Assay Results: Retrieve the analyses and use them to detect model drift and possible sources.
Pause/Resume Assay: Pause or restart an assay as needed.
Define the Baseline
Assay baselines are defined with the wallaroo.client.build_assay method. Through this process we define the baseline from either a range of dates or pre-generated values.
wallaroo.client.build_assay take the following parameters:
Parameter
Type
Description
assay_name
String (Required) - required
The name of the assay. Assay names must be unique across the Wallaroo instance.
pipeline
wallaroo.pipeline.Pipeline (Required)
The pipeline the assay is monitoring.
model_name
String (Required)
The name of the model to monitor.
iopath
String (Required)
The input/output data for the model being tracked in the format input/output field index. Only one value is tracked for any assay. For example, to track the output of the model’s field house_value at index 0, the iopath is 'output house_value 0.
baseline_start
datetime.datetime (Optional)
The start time for the inferences to use as the baseline. Must be included with baseline_end. Cannot be included with baseline_data.
baseline_end
datetime.datetime (Optional)
The end time of the baseline window. the baseline. Windows start immediately after the baseline window and are run at regular intervals continuously until the assay is deactivated or deleted. Must be included with baseline_start. Cannot be included with baseline_data..
baseline_data
numpy.array (Optional)
The baseline data in numpy array format. Cannot be included with either baseline_start or baseline_data.
Baselines are created in one of two ways:
Date Range: The baseline_start and baseline_end retrieves the inference requests and results for the pipeline from the start and end period. This data is summarized and used to create the baseline.
Numpy Values: The baseline_data sets the baseline from a provided numpy array.
Define the Baseline Example
This example shows two methods of defining the baseline for an assay:
"assays from date baseline": This assay uses historical inference requests to define the baseline. This assay is saved to the variable assay_builder_from_dates.
"assays from numpy": This assay uses a pre-generated numpy array to define the baseline. This assay is saved to the variable assay_builder_from_numpy.
In both cases, the following parameters are used:
Parameter
Value
assay_name
"assays from date baseline" and "assays from numpy"
pipeline
mainpipeline: A pipeline with a ML model that predicts house prices. The output field for this model is variable.
model_name
"houseprice-predictor" - the model name set during model upload.
iopath
These assays monitor the model’s output field variable at index 0. From this, the iopath setting is "output variable 0".
The difference between the two assays’ parameters determines how the baseline is generated.
"assays from date baseline": Uses the baseline_start and baseline_end to set the time period of inference requests and results to gather data from.
"assays from numpy": Uses a pre-generated numpy array as for the baseline data.
For each of our assays, we will set the time period of inference data to compare against the baseline data.
# Build the assay, based on the start and end of our baseline time, # and tracking the output variable index 0assay_builder_from_dates=wl.build_assay(assay_name="assays from date baseline",
pipeline=mainpipeline,
model_name="house-price-estimator",
iopath="output variable 0",
baseline_start=assay_baseline_start,
baseline_end=assay_baseline_end)
# set the width, interval, and time period assay_builder_from_dates.add_run_until(datetime.datetime.now())
assay_builder_from_dates.window_builder().add_width(minutes=1).add_interval(minutes=1).add_start(assay_window_start)
assay_config_from_dates=assay_builder_from_dates.build()
assay_results_from_dates=assay_config_from_dates.interactive_run()
# assay builder by baselineassay_builder_from_numpy=wl.build_assay(assay_name="assays from numpy",
pipeline=mainpipeline,
model_name="house-price-estimator",
iopath="output variable 0",
baseline_data=small_results_baseline)
# set the width, interval, and time period assay_builder_from_numpy.add_run_until(datetime.datetime.now())
assay_builder_from_numpy.window_builder().add_width(minutes=1).add_interval(minutes=1).add_start(assay_window_start)
assay_config_from_numpy=assay_builder_from_numpy.build()
assay_results_from_numpy=assay_config_from_numpy.interactive_run()
Now that the baseline is defined, we look at different configuration options and view how the assay baseline and results changes. Once we determine what gives us the best method of determining model drift, we can create the assay.
Analysis List Chart Scores
Analysis List scores show the assay scores for each assay result interval in one chart. Values that are outside of the alert threshold are colored red, while scores within the alert threshold are green.
The following example shows retrieving the assay results and displaying the chart scores. From our example, we have two windows - the first should be green, and the second is red showing that values were outside the alert threshold.
# Build the assay, based on the start and end of our baseline time, # and tracking the output variable index 0assay_builder_from_dates=wl.build_assay(assay_name="assays from date baseline",
pipeline=mainpipeline,
model_name="house-price-estimator",
iopath="output variable 0",
baseline_start=assay_baseline_start,
baseline_end=assay_baseline_end)
# set the width, interval, and time period assay_builder_from_dates.add_run_until(datetime.datetime.now())
assay_builder_from_dates.window_builder().add_width(minutes=1).add_interval(minutes=1).add_start(assay_window_start)
assay_config_from_dates=assay_builder_from_dates.build()
assay_results_from_dates=assay_config_from_dates.interactive_run()
assay_results_from_dates.chart_scores()
Analysis Chart
The method wallaroo.assay.AssayAnalysis.chart() displays a comparison between the baseline and an interval of inference data.
This is compared to the Chart Scores, which is a list of all of the inference data split into intervals, while the Analysis Chart shows the breakdown of one set of inference data against the baseline.
The window index. Interactive assay runs are None.
# Build the assay, based on the start and end of our baseline time, # and tracking the output variable index 0assay_builder_from_dates=wl.build_assay(assay_name="assays from date baseline",
pipeline=mainpipeline,
model_name="house-price-estimator",
iopath="output variable 0",
baseline_start=assay_baseline_start,
baseline_end=assay_baseline_end)
# set the width, interval, and time period assay_builder_from_dates.add_run_until(datetime.datetime.now())
assay_builder_from_dates.window_builder().add_width(minutes=1).add_interval(minutes=1).add_start(assay_window_start)
assay_config_from_dates=assay_builder_from_dates.build()
assay_results_from_dates=assay_config_from_dates.interactive_run()
assay_results_from_dates[0].chart()
baseline mean = 495193.23178642715
window mean = 517763.394625
baseline median = 442168.125
window median = 448627.8125
bin_mode = Quantile
aggregation = Density
metric = PSI
weighted = False
score = 0.0363497101644573
scores = [0.0, 0.027271477163285655, 0.003847844548034077, 0.000217023993714693, 0.002199485350158766, 0.0028138791092641195, 0.0]
index = None
Analysis List DataFrame
wallaroo.assay.AssayAnalysisList.to_dataframe() returns a DataFrame showing the assay results for each window aka individual analysis. This DataFrame contains the following fields:
Field
Type
Description
assay_id
Integer/None
The assay id. Only provided from uploaded and executed assays.
name
String/None
The name of the assay. Only provided from uploaded and executed assays.
iopath
String/None
The iopath of the assay. Only provided from uploaded and executed assays.
score
Float
The assay score.
start
DateTime
The DateTime start of the assay window.
min
Float
The minimum value in the assay window.
max
Float
The maximum value in the assay window.
mean
Float
The mean value in the assay window.
median
Float
The median value in the assay window.
std
Float
The standard deviation value in the assay window.
warning_threshold
Float/None
The warning threshold of the assay window.
alert_threshold
Float/None
The alert threshold of the assay window.
status
String
The assay window status. Values are:
OK: The score is within accepted thresholds.
Warning: The score has triggered the warning_threshold if exists, but not the alert_threshold.
Alert: The score has triggered the the alert_threshold.
For this example, the assay analysis list DataFrame is listed.
From this tutorial, we should have 2 windows of dta to look at, each one minute apart. The first window should show status: OK, with the second window with the very large house prices will show status: alert
# Build the assay, based on the start and end of our baseline time, # and tracking the output variable index 0assay_builder_from_dates=wl.build_assay(assay_name="assays from date baseline",
pipeline=mainpipeline,
model_name="house-price-estimator",
iopath="output variable 0",
baseline_start=assay_baseline_start,
baseline_end=assay_baseline_end)
# set the width, interval, and time period assay_builder_from_dates.add_run_until(datetime.datetime.now())
assay_builder_from_dates.window_builder().add_width(minutes=1).add_interval(minutes=1).add_start(assay_window_start)
assay_config_from_dates=assay_builder_from_dates.build()
assay_results_from_dates=assay_config_from_dates.interactive_run()
assay_results_from_dates.to_dataframe()
assay_id
name
iopath
score
start
min
max
mean
median
std
warning_threshold
alert_threshold
status
0
None
0.036350
2024-02-15T16:20:43.976756+00:00
2.362387e+05
1489624.250
5.177634e+05
4.486278e+05
227729.030050
None
0.25
Ok
1
None
8.868614
2024-02-15T16:22:43.976756+00:00
1.514079e+06
2016006.125
1.885772e+06
1.946438e+06
160046.727324
None
0.25
Alert
Analysis List Full DataFrame
wallaroo.assay.AssayAnalysisList.to_full_dataframe() returns a DataFrame showing all values, including the inputs and outputs from the assay results for each window aka individual analysis. This DataFrame contains the following fields:
If baseline bin weights were provided, the list of those weights. Otherwise, None.
summarizer_provided_edges
List / None
If baseline bin edges were provided, the list of those edges. Otherwise, None.
status
String
The assay window status. Values are:
OK: The score is within accepted thresholds.
Warning: The score has triggered the warning_threshold if exists, but not the alert_threshold.
Alert: The score has triggered the the alert_threshold.
id
Integer/None
The id for the window aka analysis. Only provided from uploaded and executed assays.
assay_id
Integer/None
The assay id. Only provided from uploaded and executed assays.
pipeline_id
Integer/None
The pipeline id. Only provided from uploaded and executed assays.
warning_threshold
Float
The warning threshold set for the assay.
warning_threshold
Float
The warning threshold set for the assay.
bin_index
Integer/None
The bin index for the window aka analysis.
created_at
Datetime/None
The date and time the window aka analysis was generated. Only provided from uploaded and executed assays.
For this example, full DataFrame from an assay preview is generated.
From this tutorial, we should have 2 windows of dta to look at, each one minute apart. The first window should show status: OK, with the second window with the very large house prices will show status: alert
# Build the assay, based on the start and end of our baseline time, # and tracking the output variable index 0assay_builder_from_dates=wl.build_assay(assay_name="assays from date baseline",
pipeline=mainpipeline,
model_name="house-price-estimator",
iopath="output variable 0",
baseline_start=assay_baseline_start,
baseline_end=assay_baseline_end)
# set the width, interval, and time period assay_builder_from_dates.add_run_until(datetime.datetime.now())
assay_builder_from_dates.window_builder().add_width(minutes=1).add_interval(minutes=1).add_start(assay_window_start)
assay_config_from_dates=assay_builder_from_dates.build()
assay_results_from_dates=assay_config_from_dates.interactive_run()
assay_results_from_dates.to_full_dataframe()
window_start
analyzed_at
elapsed_millis
baseline_summary_count
baseline_summary_min
baseline_summary_max
baseline_summary_mean
baseline_summary_median
baseline_summary_std
baseline_summary_edges_0
...
summarizer_type
summarizer_bin_weights
summarizer_provided_edges
status
id
assay_id
pipeline_id
warning_threshold
bin_index
created_at
0
2024-02-15T16:20:43.976756+00:00
2024-02-15T16:26:42.266029+00:00
82
501
236238.671875
1514079.375
495193.231786
442168.125
226075.814267
236238.671875
...
UnivariateContinuous
None
None
Ok
None
None
None
None
None
None
1
2024-02-15T16:22:43.976756+00:00
2024-02-15T16:26:42.266134+00:00
83
501
236238.671875
1514079.375
495193.231786
442168.125
226075.814267
236238.671875
...
UnivariateContinuous
None
None
Alert
None
None
None
None
None
None
2 rows × 86 columns
Analysis Compare Basic Stats
The method wallaroo.assay.AssayAnalysis.compare_basic_stats returns a DataFrame comparing one set of inference data against the baseline.
This is compared to the Analysis List DataFrame, which is a list of all of the inference data split into intervals, while the Analysis Compare Basic Stats shows the breakdown of one set of inference data against the baseline.
# Build the assay, based on the start and end of our baseline time, # and tracking the output variable index 0assay_builder_from_dates=wl.build_assay(assay_name="assays from date baseline",
pipeline=mainpipeline,
model_name="house-price-estimator",
iopath="output variable 0",
baseline_start=assay_baseline_start,
baseline_end=assay_baseline_end)
# set the width, interval, and time period assay_builder_from_dates.add_run_until(datetime.datetime.now())
assay_builder_from_dates.window_builder().add_width(minutes=1).add_interval(minutes=1).add_start(assay_window_start)
assay_config_from_dates=assay_builder_from_dates.build()
assay_results_from_dates=assay_config_from_dates.interactive_run()
assay_results_from_dates[0].compare_basic_stats()
Baseline
Window
diff
pct_diff
count
501.0
1000.0
499.000000
99.600798
min
236238.671875
236238.671875
0.000000
0.000000
max
1514079.375
1489624.25
-24455.125000
-1.615181
mean
495193.231786
517763.394625
22570.162839
4.557850
median
442168.125
448627.8125
6459.687500
1.460912
std
226075.814267
227729.03005
1653.215783
0.731266
start
None
2024-02-15T16:20:43.976756+00:00
NaN
NaN
end
None
2024-02-15T16:21:43.976756+00:00
NaN
NaN
Configure Assays
Before creating the assay, configure the assay and continue to preview it until the best method for detecting drift is set. The following options are available.
Score Metric
The score is a distance between the baseline and the analysis window. The larger the score, the greater the difference between the baseline and the analysis window. The following methods are provided determining the score:
PSI (Default) - Population Stability Index (PSI).
MAXDIFF: Maximum difference between corresponding bins.
SUMDIFF: Mum of differences between corresponding bins.
The following three charts use each of the metrics. Note how the scores change based on the score type used.
# Build the assay, based on the start and end of our baseline time, # and tracking the output variable index 0assay_builder_from_dates=wl.build_assay(assay_name="assays from date baseline",
pipeline=mainpipeline,
model_name="house-price-estimator",
iopath="output variable 0",
baseline_start=assay_baseline_start,
baseline_end=assay_baseline_end)
# set metric PSI modeassay_builder_from_dates.summarizer_builder.add_metric(wallaroo.assay_config.Metric.PSI)
# set the width, interval, and time period assay_builder_from_dates.add_run_until(datetime.datetime.now())
assay_builder_from_dates.window_builder().add_width(minutes=1).add_interval(minutes=1).add_start(assay_window_start)
assay_config_from_dates=assay_builder_from_dates.build()
assay_results_from_dates=assay_config_from_dates.interactive_run()
assay_results_from_dates[0].chart()
baseline mean = 495193.23178642715
window mean = 517763.394625
baseline median = 442168.125
window median = 448627.8125
bin_mode = Quantile
aggregation = Density
metric = PSI
weighted = False
score = 0.0363497101644573
scores = [0.0, 0.027271477163285655, 0.003847844548034077, 0.000217023993714693, 0.002199485350158766, 0.0028138791092641195, 0.0]
index = None
# Build the assay, based on the start and end of our baseline time, # and tracking the output variable index 0assay_builder_from_dates=wl.build_assay(assay_name="assays from date baseline",
pipeline=mainpipeline,
model_name="house-price-estimator",
iopath="output variable 0",
baseline_start=assay_baseline_start,
baseline_end=assay_baseline_end)
# set metric MAXDIFF modeassay_builder_from_dates.summarizer_builder.add_metric(wallaroo.assay_config.Metric.MAXDIFF)
# set the width, interval, and time period assay_builder_from_dates.add_run_until(datetime.datetime.now())
assay_builder_from_dates.window_builder().add_width(minutes=1).add_interval(minutes=1).add_start(assay_window_start)
assay_config_from_dates=assay_builder_from_dates.build()
assay_results_from_dates=assay_config_from_dates.interactive_run()
assay_results_from_dates[0].chart()
baseline mean = 495193.23178642715
window mean = 517763.394625
baseline median = 442168.125
window median = 448627.8125
bin_mode = Quantile
aggregation = Density
metric = MaxDiff
weighted = False
score = 0.06759281437125747
scores = [0.0, 0.06759281437125747, 0.028391217564870255, 0.006592814371257472, 0.02139520958083832, 0.02439920159680639, 0.0]
index = 1
# Build the assay, based on the start and end of our baseline time, # and tracking the output variable index 0assay_builder_from_dates=wl.build_assay(assay_name="assays from date baseline",
pipeline=mainpipeline,
model_name="house-price-estimator",
iopath="output variable 0",
baseline_start=assay_baseline_start,
baseline_end=assay_baseline_end)
# set metric SUMDIFF modeassay_builder_from_dates.summarizer_builder.add_metric(wallaroo.assay_config.Metric.SUMDIFF)
# set the width, interval, and time period assay_builder_from_dates.add_run_until(datetime.datetime.now())
assay_builder_from_dates.window_builder().add_width(minutes=1).add_interval(minutes=1).add_start(assay_window_start)
assay_config_from_dates=assay_builder_from_dates.build()
assay_results_from_dates=assay_config_from_dates.interactive_run()
assay_results_from_dates[0].chart()
baseline mean = 495193.23178642715
window mean = 517763.394625
baseline median = 442168.125
window median = 448627.8125
bin_mode = Quantile
aggregation = Density
metric = SumDiff
weighted = False
score = 0.07418562874251496
scores = [0.0, 0.06759281437125747, 0.028391217564870255, 0.006592814371257472, 0.02139520958083832, 0.02439920159680639, 0.0]
index = None
The following example updates the alert threshold to 0.5.
# Build the assay, based on the start and end of our baseline time, # and tracking the output variable index 0assay_builder_from_dates=wl.build_assay(assay_name="assays from date baseline",
pipeline=mainpipeline,
model_name="house-price-estimator",
iopath="output variable 0",
baseline_start=assay_baseline_start,
baseline_end=assay_baseline_end)
assay_builder_from_dates.add_alert_threshold(0.5)
# set the width, interval, and time period assay_builder_from_dates.add_run_until(datetime.datetime.now())
assay_builder_from_dates.window_builder().add_width(minutes=1).add_interval(minutes=1).add_start(assay_window_start)
assay_config_from_dates=assay_builder_from_dates.build()
assay_results_from_dates=assay_config_from_dates.interactive_run()
assay_results_from_dates.to_dataframe()
assay_id
name
iopath
score
start
min
max
mean
median
std
warning_threshold
alert_threshold
status
0
None
0.036350
2024-02-15T16:20:43.976756+00:00
2.362387e+05
1489624.250
5.177634e+05
4.486278e+05
227729.030050
None
0.5
Ok
1
None
8.868614
2024-02-15T16:22:43.976756+00:00
1.514079e+06
2016006.125
1.885772e+06
1.946438e+06
160046.727324
None
0.5
Alert
Number of Bins
Number of bins sets how the baseline data is partitioned. The total number of bins includes the set number plus the left_outlier and the right_outlier, so the total number of bins will be the total set + 2.
# Build the assay, based on the start and end of our baseline time, # and tracking the output variable index 0assay_builder_from_dates=wl.build_assay(assay_name="assays from date baseline",
pipeline=mainpipeline,
model_name="house-price-estimator",
iopath="output variable 0",
baseline_start=assay_baseline_start,
baseline_end=assay_baseline_end)
# Set the number of bins# update number of bins hereassay_builder_from_dates.summarizer_builder.add_num_bins(10)
# set the width, interval, and time period assay_builder_from_dates.add_run_until(datetime.datetime.now())
assay_builder_from_dates.window_builder().add_width(minutes=1).add_interval(minutes=1).add_start(assay_window_start)
assay_config_from_dates=assay_builder_from_dates.build()
assay_results_from_dates=assay_config_from_dates.interactive_run()
assay_results_from_dates[0].chart()
baseline mean = 495193.23178642715
window mean = 517763.394625
baseline median = 442168.125
window median = 448627.8125
bin_mode = Quantile
aggregation = Density
metric = PSI
weighted = False
score = 0.05250979748389363
scores = [0.0, 0.009076998929542533, 0.01924002322223739, 0.0021945246367443406, 0.0016700458183385653, 0.005779503770625584, 0.002393429678215835, 0.002942858220315506, 0.00010651192741915124, 0.00046961759334670583, 0.008636283687108028, 0.0]
index = None
Binning Mode
Binning Mode defines how the bins are separated. Binning modes are modified through the wallaroo.assay_config.UnivariateContinousSummarizerBuilder.add_bin_mode(bin_mode: bin_mode: wallaroo.assay_config.BinMode, edges: Optional[List[float]] = None).
Available bin_mode values from wallaroo.assay_config.Binmode are the following:
QUANTILE (Default): Based on percentages. If num_bins is 5 then quintiles so bins are created at the 20%, 40%, 60%, 80% and 100% points.
EQUAL: Evenly spaced bins where each bin is set with the formula min - max / num_bins
PROVIDED: The user provides the edge points for the bins.
If PROVIDED is supplied, then a List of float values must be provided for the edges parameter that matches the number of bins.
The following examples are used to show how each of the binning modes effects the bins.
# Build the assay, based on the start and end of our baseline time, # and tracking the output variable index 0assay_builder_from_dates=wl.build_assay(assay_name="assays from date baseline",
pipeline=mainpipeline,
model_name="house-price-estimator",
iopath="output variable 0",
baseline_start=assay_baseline_start,
baseline_end=assay_baseline_end)
# update binning mode hereassay_builder_from_dates.summarizer_builder.add_bin_mode(wallaroo.assay_config.BinMode.QUANTILE)
# set the width, interval, and time period assay_builder_from_dates.add_run_until(datetime.datetime.now())
assay_builder_from_dates.window_builder().add_width(minutes=1).add_interval(minutes=1).add_start(assay_window_start)
assay_config_from_dates=assay_builder_from_dates.build()
assay_results_from_dates=assay_config_from_dates.interactive_run()
assay_results_from_dates[0].chart()
baseline mean = 495193.23178642715
window mean = 517763.394625
baseline median = 442168.125
window median = 448627.8125
bin_mode = Quantile
aggregation = Density
metric = PSI
weighted = False
score = 0.0363497101644573
scores = [0.0, 0.027271477163285655, 0.003847844548034077, 0.000217023993714693, 0.002199485350158766, 0.0028138791092641195, 0.0]
index = None
# Build the assay, based on the start and end of our baseline time, # and tracking the output variable index 0assay_builder_from_dates=wl.build_assay(assay_name="assays from date baseline",
pipeline=mainpipeline,
model_name="house-price-estimator",
iopath="output variable 0",
baseline_start=assay_baseline_start,
baseline_end=assay_baseline_end)
# update binning mode hereassay_builder_from_dates.summarizer_builder.add_bin_mode(wallaroo.assay_config.BinMode.EQUAL)
# set the width, interval, and time period assay_builder_from_dates.add_run_until(datetime.datetime.now())
assay_builder_from_dates.window_builder().add_width(minutes=1).add_interval(minutes=1).add_start(assay_window_start)
assay_config_from_dates=assay_builder_from_dates.build()
assay_results_from_dates=assay_config_from_dates.interactive_run()
assay_results_from_dates[0].chart()
baseline mean = 495193.23178642715
window mean = 517763.394625
baseline median = 442168.125
window median = 448627.8125
bin_mode = Equal
aggregation = Density
metric = PSI
weighted = False
score = 0.013362603453760629
scores = [0.0, 0.0016737762070682225, 1.1166481947075492e-06, 0.011233704798893194, 1.276169365380064e-07, 0.00045387818266796784, 0.0]
index = None
The following example manually sets the bin values.
The values in this dataset run from 200000 to 1500000. We can specify the bins with the BinMode.PROVIDED and specifying a list of floats with the right hand / upper edge of each bin and optionally the lower edge of the smallest bin. If the lowest edge is not specified the threshold for left outliers is taken from the smallest value in the baseline dataset.
# Build the assay, based on the start and end of our baseline time, # and tracking the output variable index 0assay_builder_from_dates=wl.build_assay(assay_name="assays from date baseline",
pipeline=mainpipeline,
model_name="house-price-estimator",
iopath="output variable 0",
baseline_start=assay_baseline_start,
baseline_end=assay_baseline_end)
edges= [200000.0, 400000.0, 600000.0, 800000.0, 1500000.0, 2000000.0]
# update binning mode hereassay_builder_from_dates.summarizer_builder.add_bin_mode(wallaroo.assay_config.BinMode.PROVIDED, edges)
# set the width, interval, and time period assay_builder_from_dates.add_run_until(datetime.datetime.now())
assay_builder_from_dates.window_builder().add_width(minutes=1).add_interval(minutes=1).add_start(assay_window_start)
assay_config_from_dates=assay_builder_from_dates.build()
assay_results_from_dates=assay_config_from_dates.interactive_run()
assay_results_from_dates[0].chart()
baseline mean = 495193.23178642715
window mean = 517763.394625
baseline median = 442168.125
window median = 448627.8125
bin_mode = Provided
aggregation = Density
metric = PSI
weighted = False
score = 0.01005936099521711
scores = [0.0, 0.0030207963288415803, 0.00011480201840874194, 0.00045327555974347976, 0.0037119550613212583, 0.0027585320269020493, 0.0]
index = None
Aggregation.DENSITY (Default): Count the number/percentage of values that fall in each bin.
Aggregation.CUMULATIVE: Empirical Cumulative Density Function style, which keeps a cumulative count of the values/percentages that fall in each bin.
The following example demonstrate the different results between the two.
#Aggregation.DENSITY - the default# Build the assay, based on the start and end of our baseline time, # and tracking the output variable index 0assay_builder_from_dates=wl.build_assay(assay_name="assays from date baseline",
pipeline=mainpipeline,
model_name="house-price-estimator",
iopath="output variable 0",
baseline_start=assay_baseline_start,
baseline_end=assay_baseline_end)
assay_builder_from_dates.summarizer_builder.add_aggregation(wallaroo.assay_config.Aggregation.DENSITY)
# set the width, interval, and time period assay_builder_from_dates.add_run_until(datetime.datetime.now())
assay_builder_from_dates.window_builder().add_width(minutes=1).add_interval(minutes=1).add_start(assay_window_start)
assay_config_from_dates=assay_builder_from_dates.build()
assay_results_from_dates=assay_config_from_dates.interactive_run()
assay_results_from_dates[0].chart()
baseline mean = 495193.23178642715
window mean = 517763.394625
baseline median = 442168.125
window median = 448627.8125
bin_mode = Quantile
aggregation = Density
metric = PSI
weighted = False
score = 0.0363497101644573
scores = [0.0, 0.027271477163285655, 0.003847844548034077, 0.000217023993714693, 0.002199485350158766, 0.0028138791092641195, 0.0]
index = None
#Aggregation.CUMULATIVE# Build the assay, based on the start and end of our baseline time, # and tracking the output variable index 0assay_builder_from_dates=wl.build_assay(assay_name="assays from date baseline",
pipeline=mainpipeline,
model_name="house-price-estimator",
iopath="output variable 0",
baseline_start=assay_baseline_start,
baseline_end=assay_baseline_end)
assay_builder_from_dates.summarizer_builder.add_aggregation(wallaroo.assay_config.Aggregation.CUMULATIVE)
# set the width, interval, and time period assay_builder_from_dates.add_run_until(datetime.datetime.now())
assay_builder_from_dates.window_builder().add_width(minutes=1).add_interval(minutes=1).add_start(assay_window_start)
assay_config_from_dates=assay_builder_from_dates.build()
assay_results_from_dates=assay_config_from_dates.interactive_run()
assay_results_from_dates[0].chart()
baseline mean = 495193.23178642715
window mean = 517763.394625
baseline median = 442168.125
window median = 448627.8125
bin_mode = Quantile
aggregation = Cumulative
metric = PSI
weighted = False
score = 0.17698802395209584
scores = [0.0, 0.06759281437125747, 0.03920159680638724, 0.04579441117764471, 0.02439920159680642, 0.0, 0.0]
index = None
For example, an interval of 1 minute and a width of 1 minute collects 1 minutes worth of data every minute. An interval of 1 minute with a width of 5 minutes collects 5 minute of inference data every minute.
By default, the interval and width is 24 hours.
For this example, we’ll adjust the width and interval from 1 minute to 5 minutes and see how the number of analyses and their score changes.
# Build the assay, based on the start and end of our baseline time, # and tracking the output variable index 0assay_builder_from_dates=wl.build_assay(assay_name="assays from date baseline",
pipeline=mainpipeline,
model_name="house-price-estimator",
iopath="output variable 0",
baseline_start=assay_baseline_start,
baseline_end=assay_baseline_end)
# set the width, interval, and time period assay_builder_from_dates.add_run_until(datetime.datetime.now())
assay_builder_from_dates.window_builder().add_width(minutes=1).add_interval(minutes=1).add_start(assay_window_start)
assay_config_from_dates=assay_builder_from_dates.build()
assay_results_from_dates=assay_config_from_dates.interactive_run()
assay_results_from_dates.chart_scores()
# Build the assay, based on the start and end of our baseline time, # and tracking the output variable index 0assay_builder_from_dates=wl.build_assay(assay_name="assays from date baseline",
pipeline=mainpipeline,
model_name="house-price-estimator",
iopath="output variable 0",
baseline_start=assay_baseline_start,
baseline_end=assay_baseline_end)
# set the width, interval, and time period assay_builder_from_dates.add_run_until(datetime.datetime.now())
assay_builder_from_dates.window_builder().add_width(minutes=5).add_interval(minutes=5).add_start(assay_window_start)
assay_config_from_dates=assay_builder_from_dates.build()
assay_results_from_dates=assay_config_from_dates.interactive_run()
assay_results_from_dates.chart_scores()
Setting the wallaroo.assay_config.WindowBuilder.add_start sets the start date and time to collect inference data. When an assay is uploaded, this setting is included, and assay results will be displayed starting from that start date at the Inference Interval until the assay is paused. By default, add_start begins 24 hours after the assay is uploaded unless set in the assay configuration manually.
For the following example, the add_run_until setting is set to datetime.datetime.now() to collect all inference data from assay_window_start up until now, and the second example limits that example to only two minutes of data.
# inference data that includes all of the data until now assay_builder_from_dates=wl.build_assay(assay_name="assays from date baseline",
pipeline=mainpipeline,
model_name="house-price-estimator",
iopath="output variable 0",
baseline_start=assay_baseline_start,
baseline_end=assay_baseline_end)
# set the width, interval, and time period assay_builder_from_dates.add_run_until(datetime.datetime.now())
assay_builder_from_dates.window_builder().add_width(minutes=1).add_interval(minutes=1).add_start(assay_window_start)
assay_config_from_dates=assay_builder_from_dates.build()
assay_results_from_dates=assay_config_from_dates.interactive_run()
assay_results_from_dates.chart_scores()
# inference data that includes all of the data until now assay_builder_from_dates=wl.build_assay(assay_name="assays from date baseline",
pipeline=mainpipeline,
model_name="house-price-estimator",
iopath="output variable 0",
baseline_start=assay_baseline_start,
baseline_end=assay_baseline_end)
# set the width, interval, and time period assay_builder_from_dates.add_run_until(assay_window_start+datetime.timedelta(seconds=120))
assay_builder_from_dates.window_builder().add_width(minutes=1).add_interval(minutes=1).add_start(assay_window_start)
assay_config_from_dates=assay_builder_from_dates.build()
assay_results_from_dates=assay_config_from_dates.interactive_run()
assay_results_from_dates.chart_scores()
Create Assay
With the assay previewed and configuration options determined, we officially create it by uploading it to the Wallaroo instance.
Once it is uploaded, the assay runs an analysis based on the window width, interval, and the other settings configured.
Assays are uploaded with the wallaroo.assay_config.upload() method. This uploads the assay into the Wallaroo database with the configurations applied and returns the assay id. Note that assay names must be unique across the Wallaroo instance; attempting to upload an assay with the same name as an existing one will return an error.
wallaroo.assay_config.upload() returns the assay id for the assay.
Typically we would just call wallaroo.assay_config.upload() after configuring the assay. For the example below, we will perform the complete configuration in one window to show all of the configuration steps at once before creating the assay.
# Build the assay, based on the start and end of our baseline time, # and tracking the output variable index 0assay_builder_from_dates=wl.build_assay(assay_name="assays creation example",
pipeline=mainpipeline,
model_name="house-price-estimator",
iopath="output variable 0",
baseline_start=assay_baseline_start,
baseline_end=assay_baseline_end)
# set the width, interval, and assay start date and timeassay_builder_from_dates.window_builder().add_width(minutes=1).add_interval(minutes=1).add_start(assay_window_start)
# add other optionsassay_builder_from_dates.summarizer_builder.add_aggregation(wallaroo.assay_config.Aggregation.CUMULATIVE)
assay_builder_from_dates.summarizer_builder.add_metric(wallaroo.assay_config.Metric.MAXDIFF)
assay_builder_from_dates.add_alert_threshold(0.5)
assay_id=assay_builder_from_dates.upload()
The assay is now visible through the Wallaroo UI by selecting the workspace, then the pipeline, then Insights.
Get Assay Results
Once an assay is created the assay runs an analysis based on the window width, interval, and the other settings configured.
Assay results are retrieved with the wallaroo.client.get_assay_results method, which takes the following parameters:
Parameter
Type
Description
assay_id
Integer (Required)
The numerical id of the assay.
start
Datetime.Datetime (Required)
The start date and time of historical data from the pipeline to start analyses from.
end
Datetime.Datetime (Required)
The end date and time of historical data from the pipeline to limit analyses to.
IMPORTANT NOTE: This process requires that additional historical data is generated from the time the assay is created to when the results are available. To add additional inference data, use the Assay Test Data section above.
baseline mean = 495193.23178642715
window mean = 517763.394625
baseline median = 442168.125
window median = 448627.8125
bin_mode = Quantile
aggregation = Cumulative
metric = MaxDiff
weighted = False
score = 0.067592815
scores = [0.0, 0.06759281437125747, 0.03920159680638724, 0.04579441117764471, 0.02439920159680642, 0.0, 0.0]
index = 1
List and Retrieve Assay
If the assay id is not already know, it is retrieved from the wallaroo.client.list_assays() method. Select the assay to retrieve data for and retrieve its id with wallaroo.assay.Assay._id method.
Inferences are performed on deployed pipelines. This submits data to the pipeline, where it is processed through each of the pipeline’s steps with the output of the previous step providing the input for the next step. The final step will then output the result of all of the pipeline’s steps.
Apache Arrow (Preferred). The return value will be an Apache Arrow table.
Apache Arrow is the recommended method of data inputs for inferences. Wallaroo inference data is based on Apache Arrow, which will return the fastest inference results and smaller data transfer amounts on average than JSON or DataFrame tables. Arrow tables also specify the data types used in their schema, insuring that the data sent and receives are exactly what is required. Using pandas DataFrame requires inferring the data type which may lead to data type mismatch issues.
The pipeline infer(data, timeout, dataset, dataset_exclude, dataset_separator) method performs an inference as defined by the pipeline steps and takes the following arguments:
data (REQUIRED): The data submitted to the pipeline for inference. The following data inputs are supported:
pandas.DataFrame: Data submitted as a pandas DataFrame are returned as a pandas DataFrame. For models that output one column based on the models outputs.
Apache Arrow (Preferred): Data submitted as an Apache Arrow are returned as an Apache Arrow.
timeout (OPTIONAL): A timeout in seconds before the inference throws an exception. The default is 15 second per call to accommodate large, complex models. Note that for a batch inference, this is per call - with 10 inference requests, each would have a default timeout of 15 seconds.
dataset (OPTIONAL): The datasets to be returned. The datasets available are:
*: Default. This translates to ["time", "in", "out", "anomaly"].
count The number of anomalies detected as an integer. Each pipeline validation the returns True adds to the number of anomalies detected.
{validation name}: Each pipeline validation added to the pipeline is returned as the field anomaly.{validation name}. Validations that return True indicate an anomaly detected based on the validation expression, while False indicates no anomaly found for the validation.
metadata: IMPORTANT NOTE: See Metadata Requests Restrictions for specifications on how to the metadata dataset requests in combination with other fields.
Returns in the metadata.elapsed field:
A list of time in nanoseconds for:
The time to serialize the input.
How long each step took.
Returns in the metadata.last_model field:
A dict with each Python step as:
model_name: The name of the model in the pipeline step.
model_sha : The sha hash of the model in the pipeline step.
Returns in the metadata.pipeline_version field:
The pipeline version as a UUID value.
Returns in the metadata.partition:
The partition used to store the inference results from this pipeline. This is mainly used when adding Wallaroo Server edge deployments to a published pipeline and separating the inference results from those edge deployments. See Wallaroo SDK Essentials Guide: Pipeline Edge Publication: Edge Observability for full details.
metadata.elapsed: See Metadata Requests Restrictions for specifications on how to use meta or metadata dataset requests in combination with other fields.
Returns in the metadata.elapsed field:
A list of time in nanoseconds for:
The time to serialize the input.
How long each step took.
dataset_exclude (OPTIONAL): Allows users to exclude parts of the dataset.
dataset_separator (OPTIONAL): Allows other types of dataset separators to be used. If set to “.”, the returned dataset will be flattened.
Outputs of the inference are based on the model’s outputs as out.{model_output}. This model only has one output - dense_1, which is listed in the out.dense_1 column. If the model has multiple outputs, they would be listed as out.output1, out.output2, etc.
pipeline.infer metadata.elapsed Format
The inference result field metadata.elapsed format changes depending on the input type.
pandas DataFrame: If the inference request is in pandas Record format, metadata.elapsed is returned as an int.
Apache Arrow: If the inference request is an Apache Arrow table, metadata.elapsed is returned as pyarrow.Int64.
The following code is provided to convert metadata.elapsed into the same format for consistency.
The following demonstrates the differences between the metadata.elasped field from a DataFrame based inference request vs an Apache Arrow table inference request.
Apache Arrow based inference request.
result_arrow=ccfraud_pipeline.infer_from_file('./data/cc_data_10k.arrow', dataset="metadata")
# unconverted raw data from Arrow table inference# time to parse input datadisplay(result_arrow["metadata.elapsed"][0][0])
# time to inference from parsed input datadisplay(result_arrow["metadata.elapsed"][0][1])
<pyarrow.UInt64Scalar: 1253219><pyarrow.UInt64Scalar: 1275320>parse_elapsed=result_arrow["metadata.elapsed"][0][0].as_py()
display(f'Time to parse input data: {parse_elapsed}')
'Time to parse input data: 1253219'display(f'Time to inference from parsed data: {result_arrow["metadata.elapsed"][0][0]}')
'Time to inference from parsed data: 1253219'
pandas DataFrame based inference request
# no conversion needed for pandas DataFrameresult_dataframe=ccfraud_pipeline.infer_from_file('./data/cc_data_10k.df.json', dataset=["*", "metadata"])
result_dataframe=ccfraud_pipeline.infer_from_file('./data/cc_data_10k.df.json', dataset=["*", "metadata"])
display(f"Time to parse input data: {result_dataframe['metadata.elapsed'][0][0]}")
display(f"Time to inference from parsed data: {result_dataframe['metadata.elapsed'][0][1]}")
'Time to parse input data: 51879691''Time to inference from parsed data: 2310435'
Run Inference Through Local Variable Example
The following example is an inference request using an Apache Arrow table. The inference result is returned as an Apache Arrow table, which is then converted into a Pandas DataFrame and a Polars DataFrame, with the results filtered based on results greater than 0.75.
The following restrictions are in place when requesting the datasets metadata or metadata.elapsed.
Standard Pipeline Steps
For the following Pipeline steps, metadata or metadata.elapsedmust be requested with the * parameter. For example:
result = mainpipeline.infer(normal_input, dataset=["*", "metadata.elapsed"])
Effected pipeline steps:
add_model_step
replace_with_model_step
Testing Pipeline Steps
For the following Pipeline steps, meta or metadata.elapsedcan not be included with the * parameter. For example:
result = mainpipeline.infer(normal_input, dataset=["metadata.elapsed"])
Effected pipeline steps:
add_random_split
replace_with_random_split
add_shadow_deploy
replace_with_shadow_deploy
Numpy Arrays as Inputs
Numpy arrays can be submitted as an input by containing it within a DataFrame. In this example, the input column is tensor, but can whatever the model expects.
dataframedata=pd.DataFrame({"tensor":[npArray]})
This bypasses the need to convert the npArray to a List - the object itself can be embedded into the DataFrame table and submitted. For this example, a DataFrame with the column tensor that contains a numpy array will be submitted as an inference, and from the return only the column out.2519 will be displayed.
To submit a data file directly to a pipeline, use the pipeline infer_from_file(data, timeout, dataset, dataset_exclude, dataset_separator) method. This performs an inference as defined by the pipeline steps and takes the following arguments:
data (REQUIRED): The name of the file submitted to the pipeline for inference.
pandas.DataFrame: Data submitted as a pandas DataFrame are returned as a pandas DataFrame. For models that output one column based on the models outputs.
Apache Arrow (Preferred): Data submitted as an Apache Arrow are returned as an Apache Arrow.
timeout (OPTIONAL): A timeout in seconds before the inference throws an exception. The default is 15 second per call to accommodate large, complex models. Note that for a batch inference, this is per call - with 10 inference requests, each would have a default timeout of 15 seconds. Inferences sent in a batch rather than individual inference requests are processed faster.
dataset (OPTIONAL): The datasets to be returned. By default this is set to ["*"] which returns, [“time”, “in”, “out”, “anomaly”].
dataset (OPTIONAL): The datasets to be returned. The datasets available are:
*: Default. This translates to ["time", "in", "out", "anomaly"].
count The number of anomalies detected as an integer. Each pipeline validation the returns True adds to the number of anomalies detected.
{validation name}: Each pipeline validation added to the pipeline is returned as the field anomaly.{validation name}. Validations that return True indicate an anomaly detected based on the validation expression, while False indicates no anomaly found for the validation.
meta:
Returns in the metadata.elapsed field:
A list of time in nanoseconds for:
The time to serialize the input.
How long each step took.
metadata.elapsed:
Returns in the metadata.elapsed field:
A list of time in nanoseconds for:
The time to serialize the input.
How long each step took.
Returns in the metadata.last_model field:
A dict with each Python step as:
model_name: The name of the model in the pipeline step.
model_sha : The sha hash of the model in the pipeline step.
dataset_exclude (OPTIONAL): Allows users to exclude parts of the dataset.
dataset_separator (OPTIONAL): Allows other types of dataset separators to be used. If set to “.”, the returned dataset will be flattened.
pipeline.infer_from_file metadata.elapsed Format
The inference result field metadata.elapsed format changes depending on the input type.
pandas DataFrame: If the inference request is in pandas Record format, metadata.elapsed is returned as an int.
Apache Arrow: If the inference request is an Apache Arrow table, metadata.elapsed is returned as pyarrow.Int64.
The following code is provided to convert metadata.elapsed into the same format for consistency.
pipeline.infer_from_file metadata.elapsed Format Examples
The following demonstrates the differences between the metadata.elasped field from a DataFrame based inference request vs an Apache Arrow table inference request.
Apache Arrow based inference request.
result_arrow=ccfraud_pipeline.infer_from_file('./data/cc_data_10k.arrow', dataset="metadata")
# unconverted raw data from Arrow table inference# time to parse input datadisplay(result_arrow["metadata.elapsed"][0][0])
# time to inference from parsed input datadisplay(result_arrow["metadata.elapsed"][0][1])
<pyarrow.UInt64Scalar: 1253219><pyarrow.UInt64Scalar: 1275320>parse_elapsed=result_arrow["metadata.elapsed"][0][0].as_py()
display(f'Time to parse input data: {parse_elapsed}')
'Time to parse input data: 1253219'display(f'Time to inference from parsed data: {result_arrow["metadata.elapsed"][0][0]}')
'Time to inference from parsed data: 1253219'
pandas DataFrame based inference request
# no conversion needed for pandas DataFrameresult_dataframe=ccfraud_pipeline.infer_from_file('./data/cc_data_10k.df.json', dataset=["*", "metadata"])
result_dataframe=ccfraud_pipeline.infer_from_file('./data/cc_data_10k.df.json', dataset=["*", "metadata"])
display(f"Time to parse input data: {result_dataframe['metadata.elapsed'][0][0]}")
display(f"Time to inference from parsed data: {result_dataframe['metadata.elapsed'][0][1]}")
'Time to parse input data: 51879691''Time to inference from parsed data: 2310435'
Run Inference From A Example
In this example, an inference of 50K inferences as an Apache Arrow file will be submitted to a model trained for reviewing IMDB reviews, and the first 5 results displayed.
Inference request inputs are extremely large - for example, greater than 4 GB. Parallen inference requests allow that request to be split into more manageable sizes and submitted in one request, with each segment split as a separate inference request automatically.
Inference inputs come from different data sources. This allows organizations to query data from different sources, add each query result to the list, then submit the entire list as one request and receive the results fast.
Image processing, where the entire image is of a extreme size and resolution where submitting the entire image requires large memory and bandwidth. The image can be resolved into separate pieces, then all the pieces submitted in one requests to allow parallelization to examine each individual piece and return the results faster than analyzing the entire large image.
It is highly recommended that the data elements included in the parallel inference List are all of the same data type. For example: all of the elements of the list should be a pandas DataFrame OR all an Apache Arrow table. This makes processing the returned information easier rather than trying to parse what type of data is received.
For example, if the parallel inference input list should be in the format:
Data Type
0
DataFrame
1
DataFrame
2
DataFrame
3
DataFrame
And not:
Data Type
0
DataFrame
1
Apache Arrow
2
DataFrame
3
Apache Arrow
Parallel Inferences Method
The pipeline parallel_infer(tensor_list, timeout, num_parallel, retries)asynchronous method performs an inference as defined by the pipeline steps and takes the following arguments:
tensor_list (REQUIRED List): The data submitted to the pipeline for inference as a List of the supported data types:
pandas.DataFrame: Data submitted as a pandas DataFrame are returned as a pandas DataFrame. For models that output one column based on the models outputs.
Apache Arrow (Preferred): Data submitted as an Apache Arrow are returned as an Apache Arrow.
timeout (OPTIONAL int): A timeout in seconds before the inference throws an exception. The default is 15 second per call to accommodate large, complex models. Note that for a batch inference, this is per list item - with 10 inference requests, each would have a default timeout of 15 seconds.
num_parallel (OPTIONAL int): The number of parallel threads used for the submission. This should be no more than four times the number of pipeline replicas.
retries (OPTIONAL int): The number of retries per inference request submitted.
parallel_infer is an asynchronous method that returns the Python callback list of tasks. Calling parallel_infer should be called with the await keyword to retrieve the callback results.
For example, the following will split a single pandas DataFrame table into rows, and submit each row as a separate DataFrame table. Once complete, each separate table is submitted via parallel_infer, and the results collected together as a new List. For this example, there are 4 replicas set in the pipeline deployment configuration.
dataset= []
forindex, rowintest_data.head(200).iterrows():
dataset.append(row.to_frame('text_input').reset_index())
# we have a list of 200 dataframes - run as in inferenceparallel_results=awaitpipeline.parallel_infer(dataset, timeout=10, num_parallel=8, retries=1)
Parallel Inference Returns
The await pipeline.parallel_infer method asynchronously returns a List of inference results. This includes how inference requests match the input types: pandas DataFrame inputs return pandas DataFrame, and Apache Arrow inputs return Apache Arrow objects. For example: a parallel inference request with 3 DataFrame tables in the list will return a list with 3 DataFrame tables.
Inference failures are tied to the object in the List that caused the failure. For example, a List with [dataframe1, dataframe2, dataframe3] where dataframe2 is malformed, then the List returned from await pipeline.parallel_infer would be [some inference result, error inference result, some inference result]. Results are returned in the same order of the data submitted.
Output Formats
DataFrame and Arrow
Output formats are based on the input types: pandas DataFrame inputs return pandas DataFrame, and Apache Arrow inputs return Apache Arrow objects.
The default columns returned are:
time: The DateTime of the inference request.
in: The input data.
out: The output data. Outputs of the inference are based on the model’s outputs as out.{model_output}. This model only has one output - dense_1, which is listed in the out.dense_1 column. If the model has multiple outputs, they would be listed as out.{outputname1}, out.{outputname2}, etc.
anomaly.count: Any anomalies detected from validations.
anomaly.{validation}: The validation that triggered the anomaly detection and whether it is True (indicating an anomaly was detected) or False. For more details, see Wallaroo SDK Essentials Guide: Anomaly Detection
Columns returned are controlled by the dataset_exclude array parameter, which specifies which output columns to ignore. For example, if a model outputs the columns out.rambo, out.main, out.glibnar, using the parameter dataset_exclude=["out.rambo", "out.glibnar"] will exclude those columns from the output.