Manage JupyterHub Storage
Table of Contents
| Targeted Role |
|---|
| Dev Ops |
Organizations can manage their JupyterHub service storage space through the Wallaroo Administrative Console, and administrative access to the Kubernetes cluster hosting the Wallaroo instance through the command line tool kubectl.
This process increases the available memory and storage space available for each Wallaroo user that accesses the JupyterHub service included with Wallaroo. This helps when working with very large models that exceed 4 GB or more.
Issue
This process will delete the individual pods for each user that has previously access the JupyterHub service included with Wallaroo, and this JupyterHub service will not be available while these steps are being performed. Inform the users to back up their notebooks and artifacts before starting this process.Prerequisites
- A Wallaroo instance installed via
kots. See Wallaroo Installation Guides for more details. - Administrative access to the Kubernetes cluster through the
kubectlcommand with thekotsplugin.
Increase Memory For All Users
To increase the amount of memory available for each user in the Wallaroo JupyterHub Service:
Disable JupyterHub Service
Through
kubectl, launch the Kots Administrative Dashboard with the following:kubectl kots admin-console --namespace {Wallaroo Installed Namespace}Replace
{Wallaroo Installed Namespace}with the Kubernetes namespace the Wallaroo instance is installed in. By default, this iswallaroo. For example:kubectl kots admin-console --namespace wallarooBy default this launches the Kots Administrative Dashboard at
http://localhost:8080• Press Ctrl+C to exit • Go to http://localhost:8800 to access the Admin ConsoleLaunch a browser and access the Kots Administrative Dashboard at the URL shown.
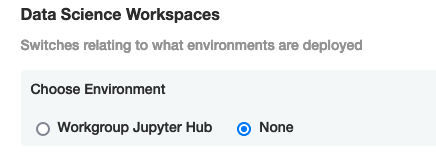
From the top navigation panel, select Config and scroll to Data Science Workspaces. Set Choose Environment to None.
Scroll to the bottom of the Config page and select Save Config.
Once the configuration is saved, select Go to updated version. The new configuration is at the top; select Deploy.
Delete Existing Labs
With the JupyterHub service disabled, the next step is to remove any existing labs so they can be recreated with the new memory specifications later. This is done through the kubectl tool.
List all current labs with
kubectl -n {Wallaroo Installed Namespace} get pods | grep jup. For example, if Wallaroo is installed in the default namespacewallaroo:kubectl -n wallaroo get pods | grep jup jupyter-ankush-2egarg-40wallaroo-2eai 1/1 Running 0 3d20h jupyter-john-2ehummel-40wallaroo-2eai 1/1 Running 0 4d20hFor each lab, delete it with
kubectl -n {Wallaroo Installed Namespace} delete pod/{Pod Name}For example, if Wallaroo is installed in the default namespacewallaroo:kubectl -n wallaroo delete pod/jupyter-ankush-2egarg-40wallaroo-2eaiWhen all pods are deleted, proceed to the next step.
Update Lab Memory Storage
With the Labs deleted, update the lab memory storage. Reopen the Kots Administrative Dashboard and complete the following steps.
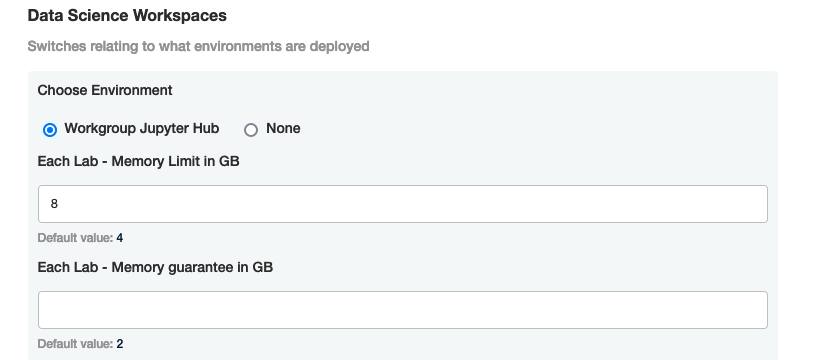
From the top navigation panel, select Config and scroll to Data Science Workspaces. Set Choose Environment to Workgroup Jupyter Hub.
Set any of the following:
- Each Lab - Memory Limit in GB: Sets the amount of memory available to each lab. Typically this is the only one that needs updating.
- Each Lab - Memory guarantee in GB: Sets the minimum amount of memory allocated to each lab to guarantee the memory is allocated whether it is needed or not.
Scroll to the bottom of the Config page and select Save Config.
Once the configuration is saved, select Go to updated version. The new configuration is at the top; select Deploy.
Once the deployment is complete, the memory limit for each lab is increased.
Increase Storage Space Per Lab
To increase the storage capacity of a specific lab, update the PersistentVolumeClaim (PVC) for the lab through the following steps. This requires administrative access to the Kubernetes cluster hosting the Wallaroo instance.
Verify
AllowVolumeExpansionis enabled with:kubectl describe sc wallaroo-standardThis returns a result like the following.
Name:                  wallaroo-standard
IsDefaultClass:        No
Annotations:           kots.io/app-slug=wallaroo,meta.helm.sh/release-name=wallaroo,meta.helm.sh/release-namespace=wallaroo
Provisioner:           pd.csi.storage.gke.io
Parameters:            type=pd-balanced
AllowVolumeExpansion:  True
MountOptions:          <none>
ReclaimPolicy:         Delete
VolumeBindingMode:     WaitForFirstConsumer
Events:                <none>
If it is not enabled, enable it with the following. NOTE: Not all cloud providers allow for volume expansion. Check with your cloud provider to verify. The following command uses a
vieditor.kubectl edit sc wallaroo-standardEnter
ito enter inset mode.Add at the top under any commend lines:
allowVolumeExpansion: trueIt will resemble the following:
# Please edit the object below. Lines beginning with a '#' will be ignored,
# and an empty file will abort the edit. If an error occurs while saving this file will be
# reopened with the relevant failures.
#
allowVolumeExpansion: true
apiVersion: storage.k8s.io/v1
kind: StorageClass
Press
Escto exit insert mode.Enter
:to access the menu and enterwqfor Write and Quit.
Find the PVC for the specific lab with the command
kubectl get pvc --namespace {Wallaroo Installed Namespace} | grep claim. For example, if Wallaroo is installed in the default namespacewallaroo:kubectl get pvc --namespace wallaroo | grep claimclaim-ankush-2egarg-40wallaroo-2eai Bound pvc-bf62479c-3b19-46e3-aaed-33d6f644e394 47Gi RWO standard-rwo 3d23h claim-john-2ehummel-40wallaroo-2eai Bound pvc-41238b6c-6941-4941-91be-0f7eaba71ea2 47Gi RWO standard-rwo 4d23h prometheus-alert-config-volume-pv-claim Bound pvc-9e80ac4c-20e1-4ba6-aa66-df5d2b13fe73 1Gi RWO standard-rwo 4d23hThe PVCs that contain the users names are the labs. Not that
-2ecorrespond to the.character, while-2ecorresponds to the2character. Soclaim-john-2ehummel-40wallaroo-2eaiisclaim-john.hummel@wallaroo.ai.Edit the PVC with the command
kubectl edit pvc --namespace {Wallaroo Installed Namespace} {PVC Name}, replacing{Wallaroo Installed Namespace}with the Kubernetes the Wallaroo instance was installed to, and replacing{PVC Name}with the PVC to edit. For example, if Wallaroo is installed in the default namespacewallaroo:kubectl edit pvc --namespace wallaroo claim-john-2ehummel-40wallaroo-2eaiPress
ito enter Insert mode. Updatespec:/resources:/requests:/storage:with the updated size. For example, the default setting is:spec: accessModes: - ReadWriteOnce resources: requests: storage: 50G storageClassName: standard-rwo volumeMode: FilesystemTo expand to 100 Gi of storage, update storage accordingly:
spec:
  accessModes:
  - ReadWriteOnce
  resources:
    requests:
      storage: 100G
  storageClassName: standard-rwo
  volumeMode: Filesystem
Exit the Insert mode with the
Esckey. Enter:to enter the menu, thenwqto Write and Quit. The PVC will update.Verify the update with
kubectl describe pvc --namespace {Wallaroo Install Namespace}. For example, the default install namespace iswallaroo, so the command would bekubectl describe pvc --namespace wallaroo. IfStatusisBound, then the process is complete.
Troubleshooting
If the PersistentVolumeClaim (PVC) status still shows Waiting, check with the PersistentVolume (PV) settings and verify that the storage settings match the PVC.