Oracle Cloud Marketplace Setup
Table of Contents
This guide is targeted towards system administrators and data scientists who want to work with the easiest, fastest, and free method of running your own machine learning models.
A typical installation of Wallaroo Community Edition follows this process:
| Step | Description | Average Setup Time |
|---|---|---|
| Get A License | Download or redownload the Wallaroo Community Edition license. | 5 minutes |
| Provision Wallaroo Installation from OCI Marketplace | Set up the cloud environment hosting the Wallaroo instance. | 15 minutes |
| Activate the Wallaroo Instance | Start the Wallaroo instance and make it available for use. | 15-20 minutes |
Get A License
Completion Time
General completion time: 5 minutes
The first step to installing Wallaroo CE is to set up your Wallaroo Community Edition Account at the web site https://portal.wallaroo.community. This process typically takes about 5 minutes.

Once you’ve submitted your credentials, you’ll be sent an email with a link to your license file.

Follow the link and download your license file. Store it in a secure location.

Redownload License
If your license is misplaced or otherwise lost, it can be downloaded again later from the same link, or by following the registration steps again to be provided with a link to your license file.
Prerequisites
Verify the prerequisites are met before creating the new Wallaroo instance through the OCI Marketplace:
- A Wallaroo Community license.
- A SSH key (Optional): Oracle instances support pre-generated SSH keys or a new SSH key is generated when the new instance is created in the step Provision Wallaroo Installation from OCI Marketplace.
- A Virtual Cloud Network (VCN) with the following ports open. For more details, see Networking Scenarios: Scenario A: Public Subnet, with Step 5 detailing how to open external ports.
44330000
The following steps detail:
- How to provision a new Wallaroo instance from the OCI Marketplace.
- Activate the new Wallaroo instance.
Provision Wallaroo Installation from OCI Marketplace
The following steps provisions a new Wallaroo installation from the OCI Marketplace. See the video below for a demonstration.
During this process the following information must be stored:
- The generated or used SSH key.
- The public IP address set for the new instance.
Login to the OCI Marketplace. From the OCI Marketplace listing Wallaroo AI inference platform - Community Edition (Ampere), select Get App.
Set the following required options. For other options, refer to the Oracle Cloud Infrastructure documentation Creating an Instance.
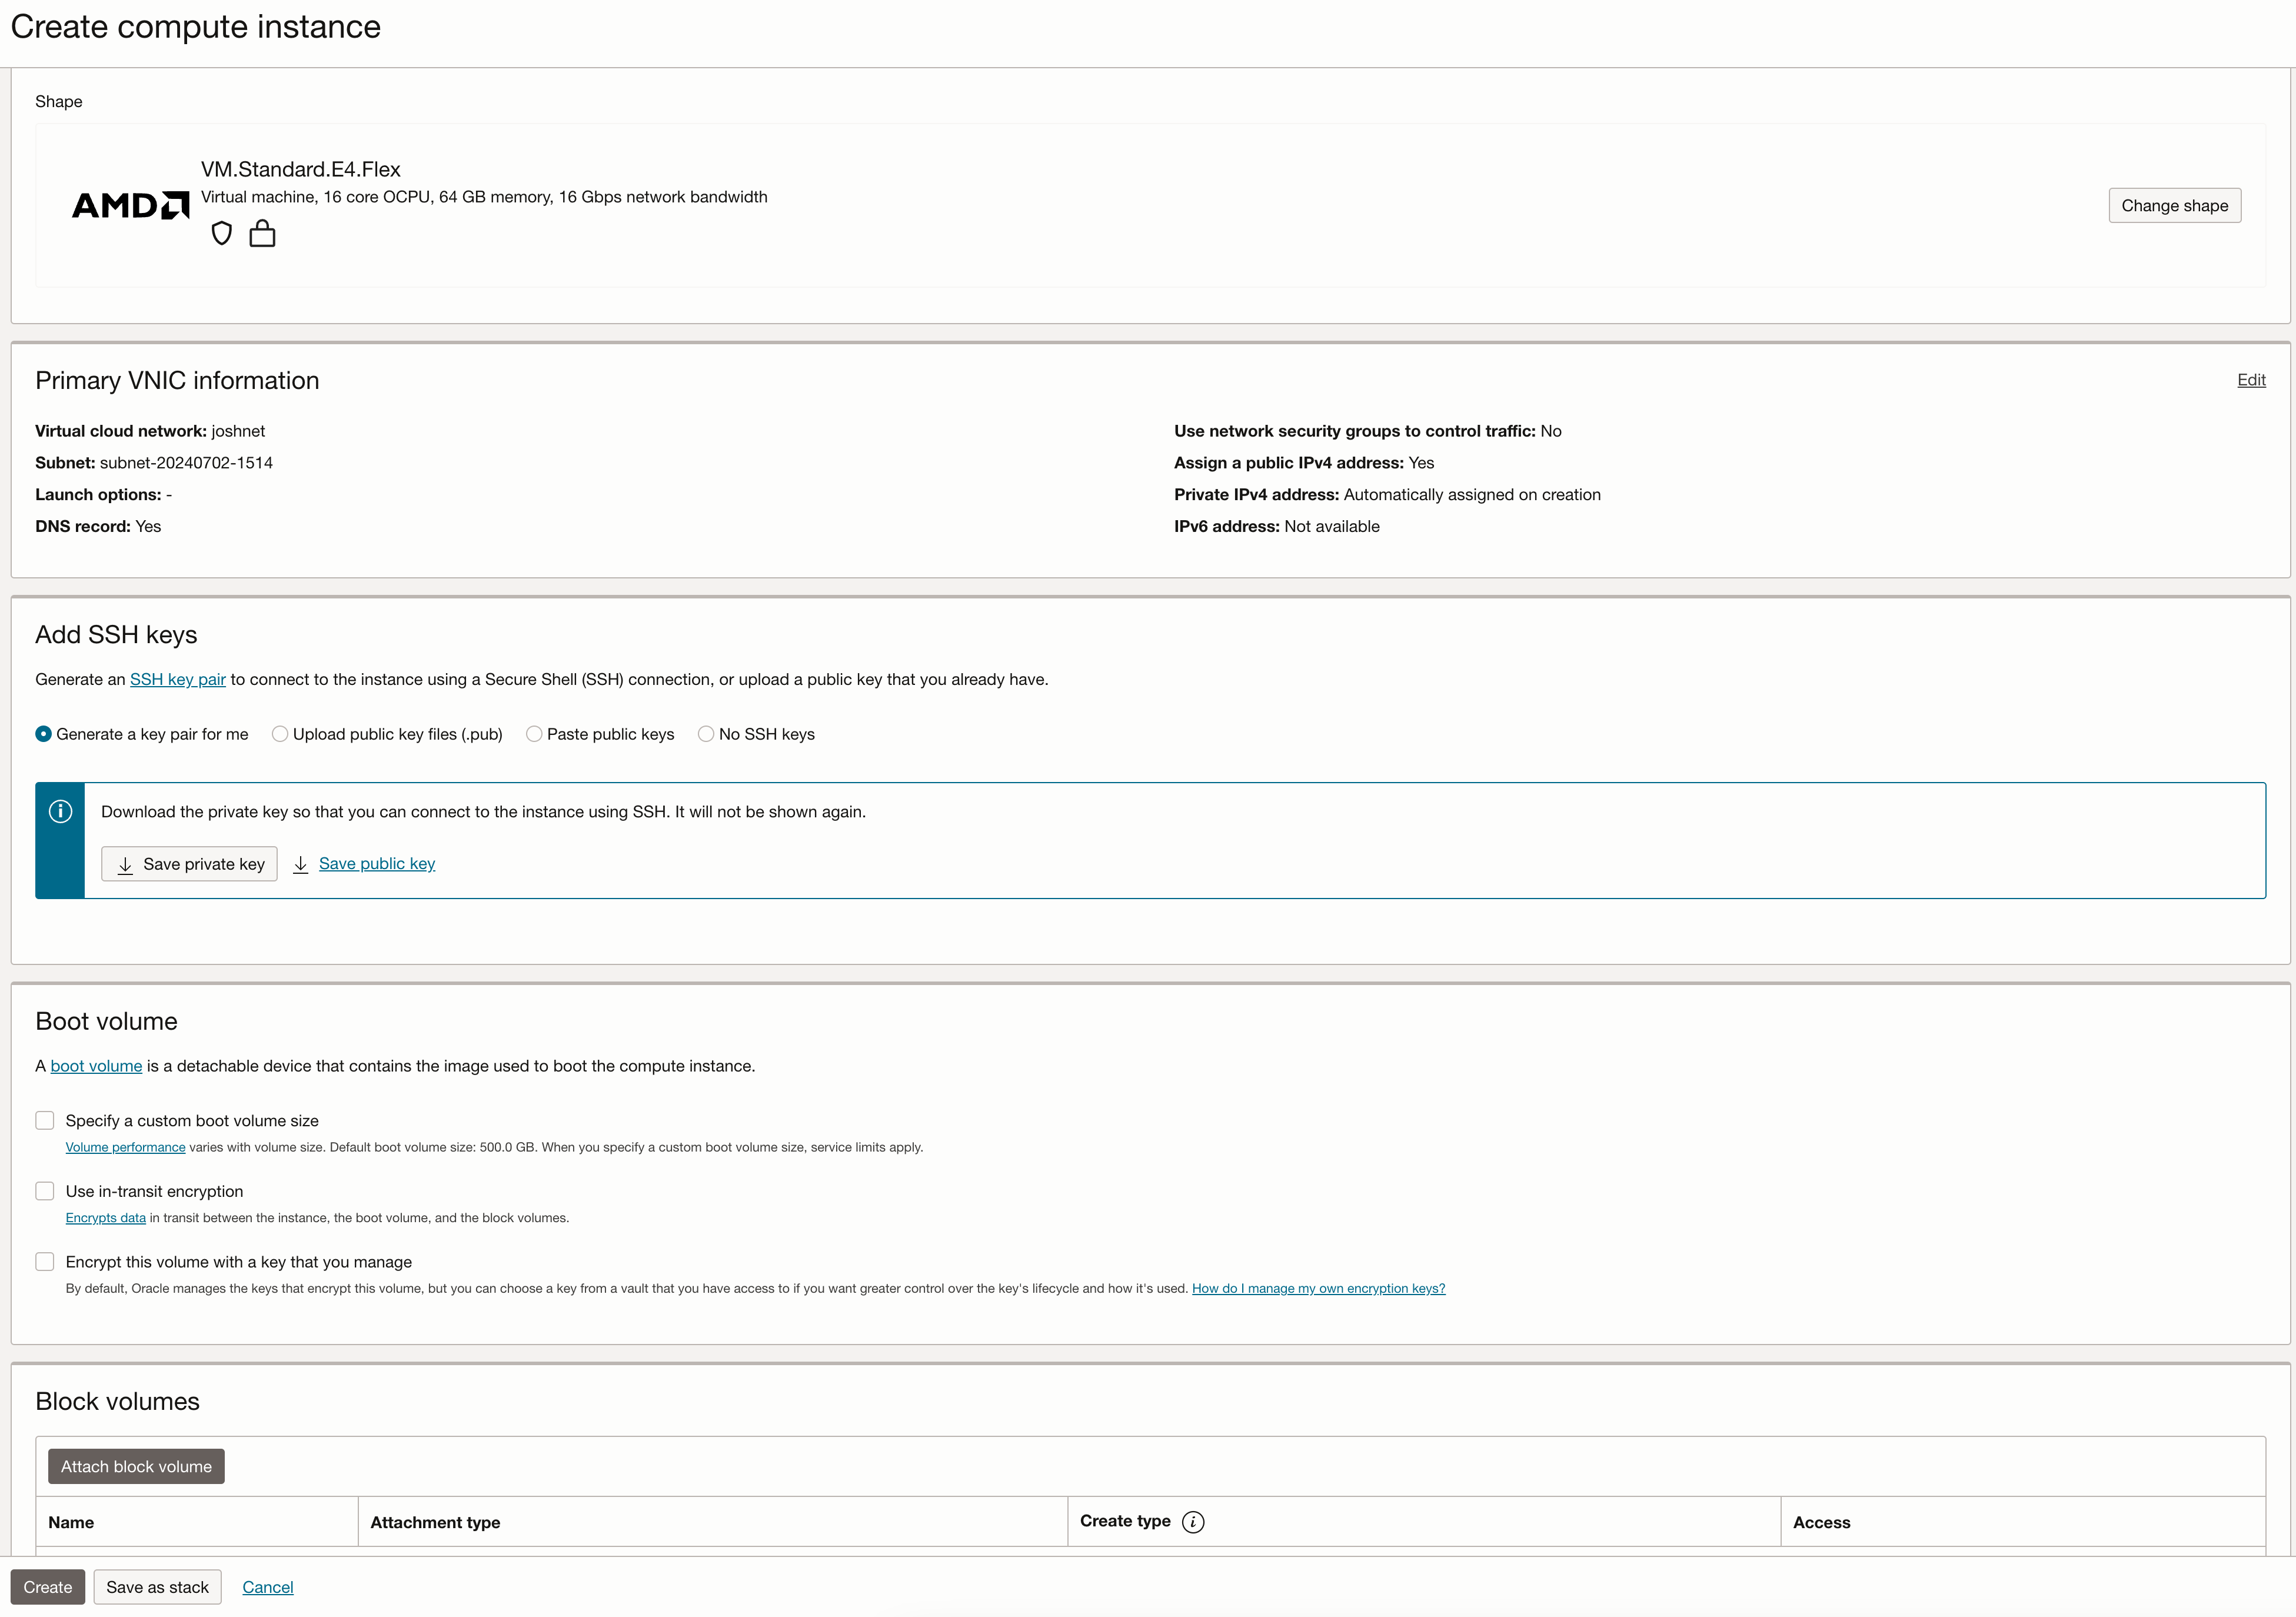
- Name: The name of the new Wallaroo instance.
- Create in compartment: Select the OCI compartment the instance is created in. For more details, see What is a Compartment?.
- Image and Shape:
- Image: The OCI marketplace automatically selects the Wallaroo image.
- Shape: Select Change shape and set the following.
- Shape Name: VM.Standard.A1.Flex
- Number of ocpu: 32 ocpu
- Shape: 64gb E4.Flex
- Primary VNIC information
- Primary Network: Select Select existing virtual cloud network as defined in the Prerequisites.
- Add SSH Keys: Select one of the following.
- Select Generate a key pair for me, then select Save private key and Save public key. Save these in a secure location.
- Use a pre-created SSH key from the Prerequisites and either Upload public key files (.pub) or Paste public keys. Store these in a secure location.
When finished, select Create.
Wait until the new instance state is Running then continue to activate the new Wallaroo instance.
Activate the Wallaroo Instance
Once the new Wallaroo instance State is Running, the new instance is activated through the following steps.
From the OCI Instances page, select the Public IP for the new Wallaroo instance.

From a browser, access the Kots Administrative Console from the instances public IP address through the following address:
http://instance-public-ip:30000
Login with the default password:
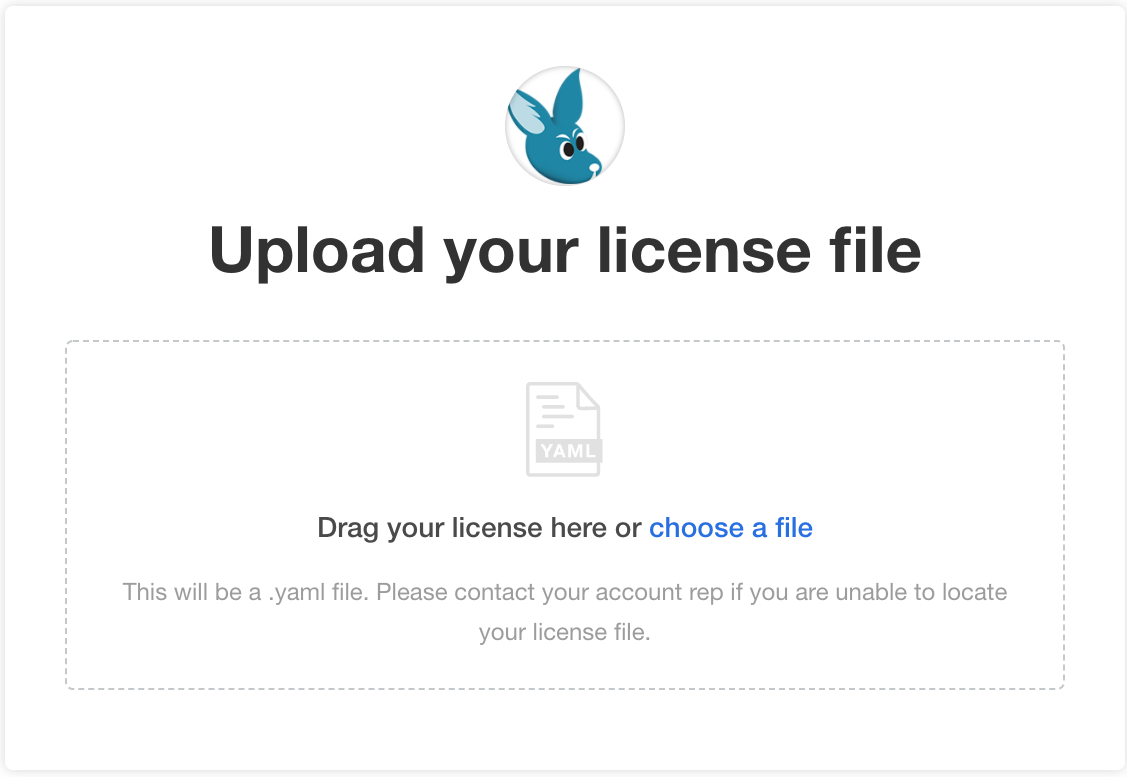
W@11y$.Upload your Wallaroo license file.
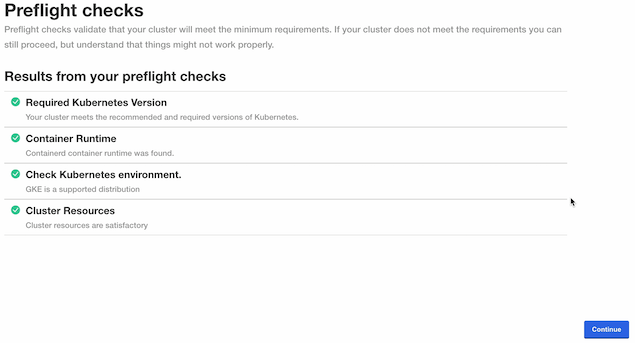
A preflight check verifies that all of the minimum requirements are met. This may take a few minutes. If there are any issues, Wallaroo can still be launched but may not function properly. When ready, select Continue.
Review the installation config page. Most of the settings are left as default. Once complete, scroll to the bottom of the Config page and select Deploy.
While the initial startup is complete, change the Kots Administrative Console Password:
- From the upper right corner, select the menu labeled
..., and select Change password. - Enter the current password, then enter the new password and confirm it. When finished, select Change Password.
- From the upper right corner, select the menu labeled
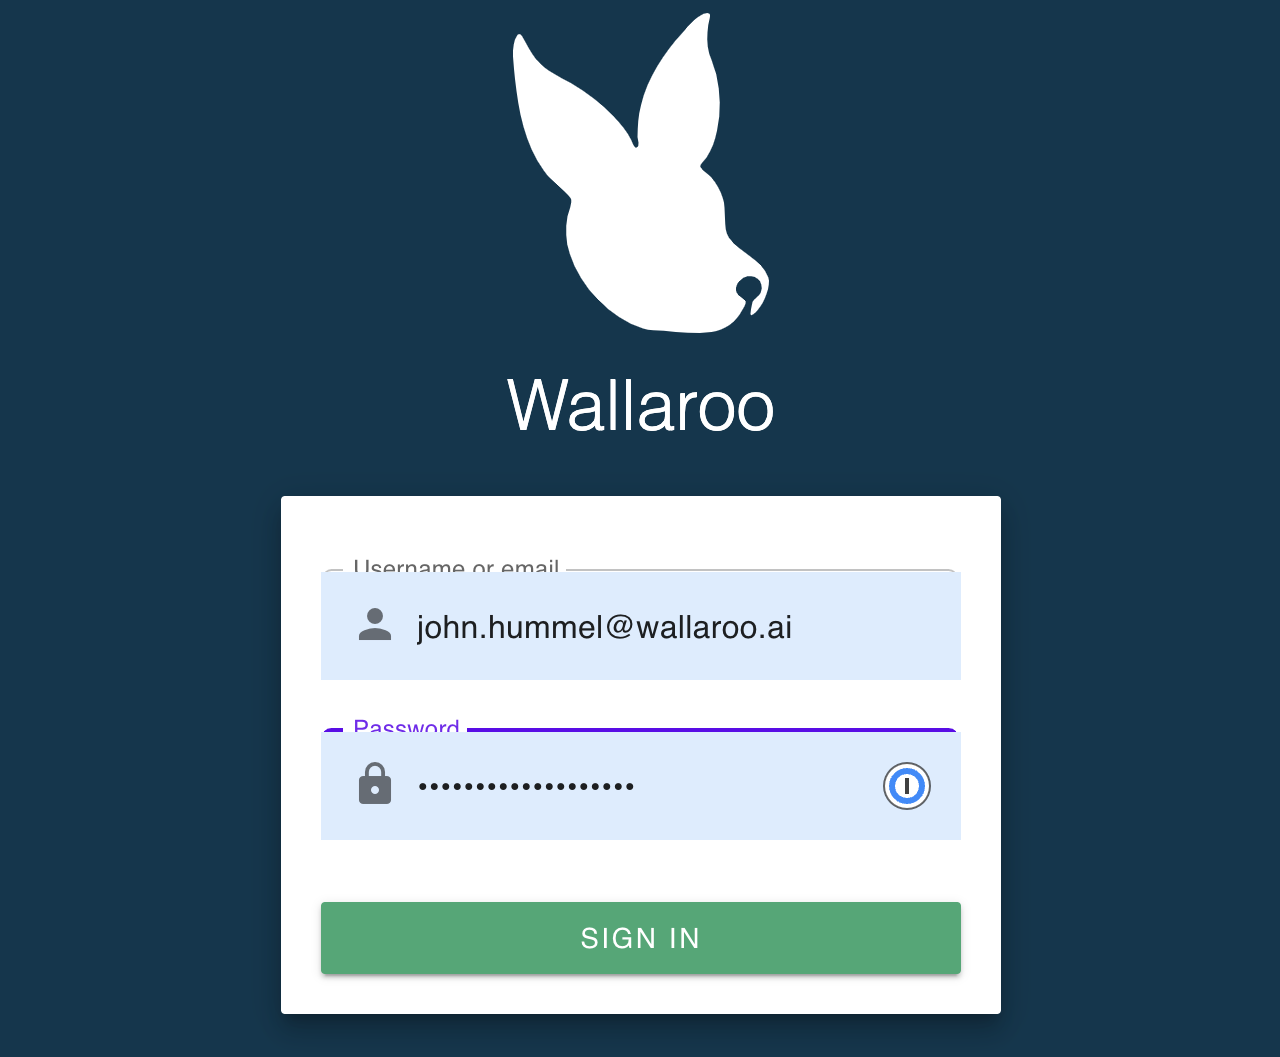
You will receive an email invitation associated with the license with a temporary password and a link to this Wallaroo instance’s URL. Either enter the URL for your Wallaroo instance or use the link in the email.
To login to your new Wallaroo instance, enter the email address and temporary password associated with the license.
With that, Wallaroo Community edition is launched and ready for use! From this point on you can just use the Wallaroo instance URL.
Now that your Wallaroo Community Edition has been installed, let’s work with some sample models to show off what you can do. Check out either the Wallaroo 101 if this is your first time using Wallaroo, or for more examples of how to use Wallaroo see the Wallaroo Tutorials.