Wallaroo Prerequisites Guide
Software and other local system requirements before installing Wallaroo
This guides are targeted towards system administrators and data scientists who want to work with the easiest, fastest, and comprehensive method of running your own machine learning models.
Some knowledge of the following will be useful in working with this guide:
kubectl and kots or helm.The following guide is prepared for organizations that have an environment that meets the prerequisites for installing Wallaroo, and want to jump directly to the installation process.
For a complete guide that includes environment setup for different cloud providers, select the Wallaroo Enterprise Comprehensive Install Guide.
Some knowledge of the following will be useful in working with this guide:
kubectl and kots.For more information, Contact Us for additional details.
The following software or runtimes are required for Wallaroo 2023.4.1. Most are automatically available through the supported cloud providers.
| Software or Runtime | Description | Minimum Supported Version | Preferred Version(s) |
|---|---|---|---|
| Kubernetes | Cluster deployment management | 1.23 | 1.26 |
| containerd | Container Management | 1.7.0 | 1.7.0 |
| kubectl | Kubernetes administrative console application | 1.26 | 1.26 |
Organizations that use cloud services such as Google Cloud Platform (GCP), Amazon Web Services (AWS), or Microsoft Azure can install Wallaroo Enterprise through the following process. These instructions also work with Single Node Linux based installations.
Before installation, the following prerequisites must be met:
Wallaroo Enterprise can be installed either interactively or automatically through the kubectl and kots applications.
To automatically install Wallaroo into the namespace wallaroo, specify the administrative password and the license file during the installation as in the following format with the following variables:
NAMESPACE: The namespace for the Wallaroo Enterprise install, typically wallaroo.LICENSEFILE: The location of the Wallaroo Enterprise license file.SHAREDPASSWORD: The password of for the Wallaroo Administrative Dashboard.kubectl kots install wallaroo/ee -n $NAMESPACE --license-file $LICENSEFILE --shared-password $SHAREDPASSWORD
For example, the following settings translate to the following install command:
NAMESPACE: wallaroo.LICENSEFILE: myWallaroolicense.yamlSHAREDPASSWORD: snugglebunnieskubectl kots install wallaroo/ee -n wallaroo --license-file myWallaroolicense.yaml --shared-password wallaroo
The Interactive Install process allows users to adjust the configuration settings before Wallaroo is deployed. It requires users be able to access the Wallaroo Administrative Dashboard through a browser, typically on port 8080.
IMPORTANT NOTE: Users who install Wallaroo through another node such as in the single node installation can port use SSH tunneling to access the Wallaroo Administrative Dashboard. For example:
ssh IP -L8800:localhost:8800
Install the Wallaroo Enterprise Edition using kots install wallaroo/ee, specifying the namespace to install Wallaroo into. For example, if wallaroo is the namespace, then the command is:
kubectl kots install wallaroo/ee --namespace wallaroo
Wallaroo Enterprise Edition will be downloaded and installed into your Kubernetes environment in the namespace specified. When prompted, set the default password for the Wallaroo environment. When complete, Wallaroo Enterprise Edition will display the URL for the Admin Console, and how to end the Admin Console from running.
• Deploying Admin Console
• Creating namespace ✓
• Waiting for datastore to be ready ✓
    Enter a new password to be used for the Admin Console: •••••••••••••
  • Waiting for Admin Console to be ready ✓

• Press Ctrl+C to exit
• Go to http://localhost:8800 to access the Admin Console
To relaunch the Wallaroo Administrative Dashboard and make changes or updates, use the following command:
kubectl-kots admin-console --namespace wallaroo
Once installed, Wallaroo will continue to run until terminated.
To change the password to the Wallaroo Administrative Dashboard:
From the command line, use the command:
kubectl kots reset-password -n {namespace}
For example, for default installations where the Kubernetes namespace is wallaroo, the command would be:
kubectl kots reset-password -n wallaroo
From here, enter the new password.
From the Wallaroo Administrative Dashboard:
Login and authenticate with the current password.
From the upper right hand corner, select … to access the menu and select Change password.
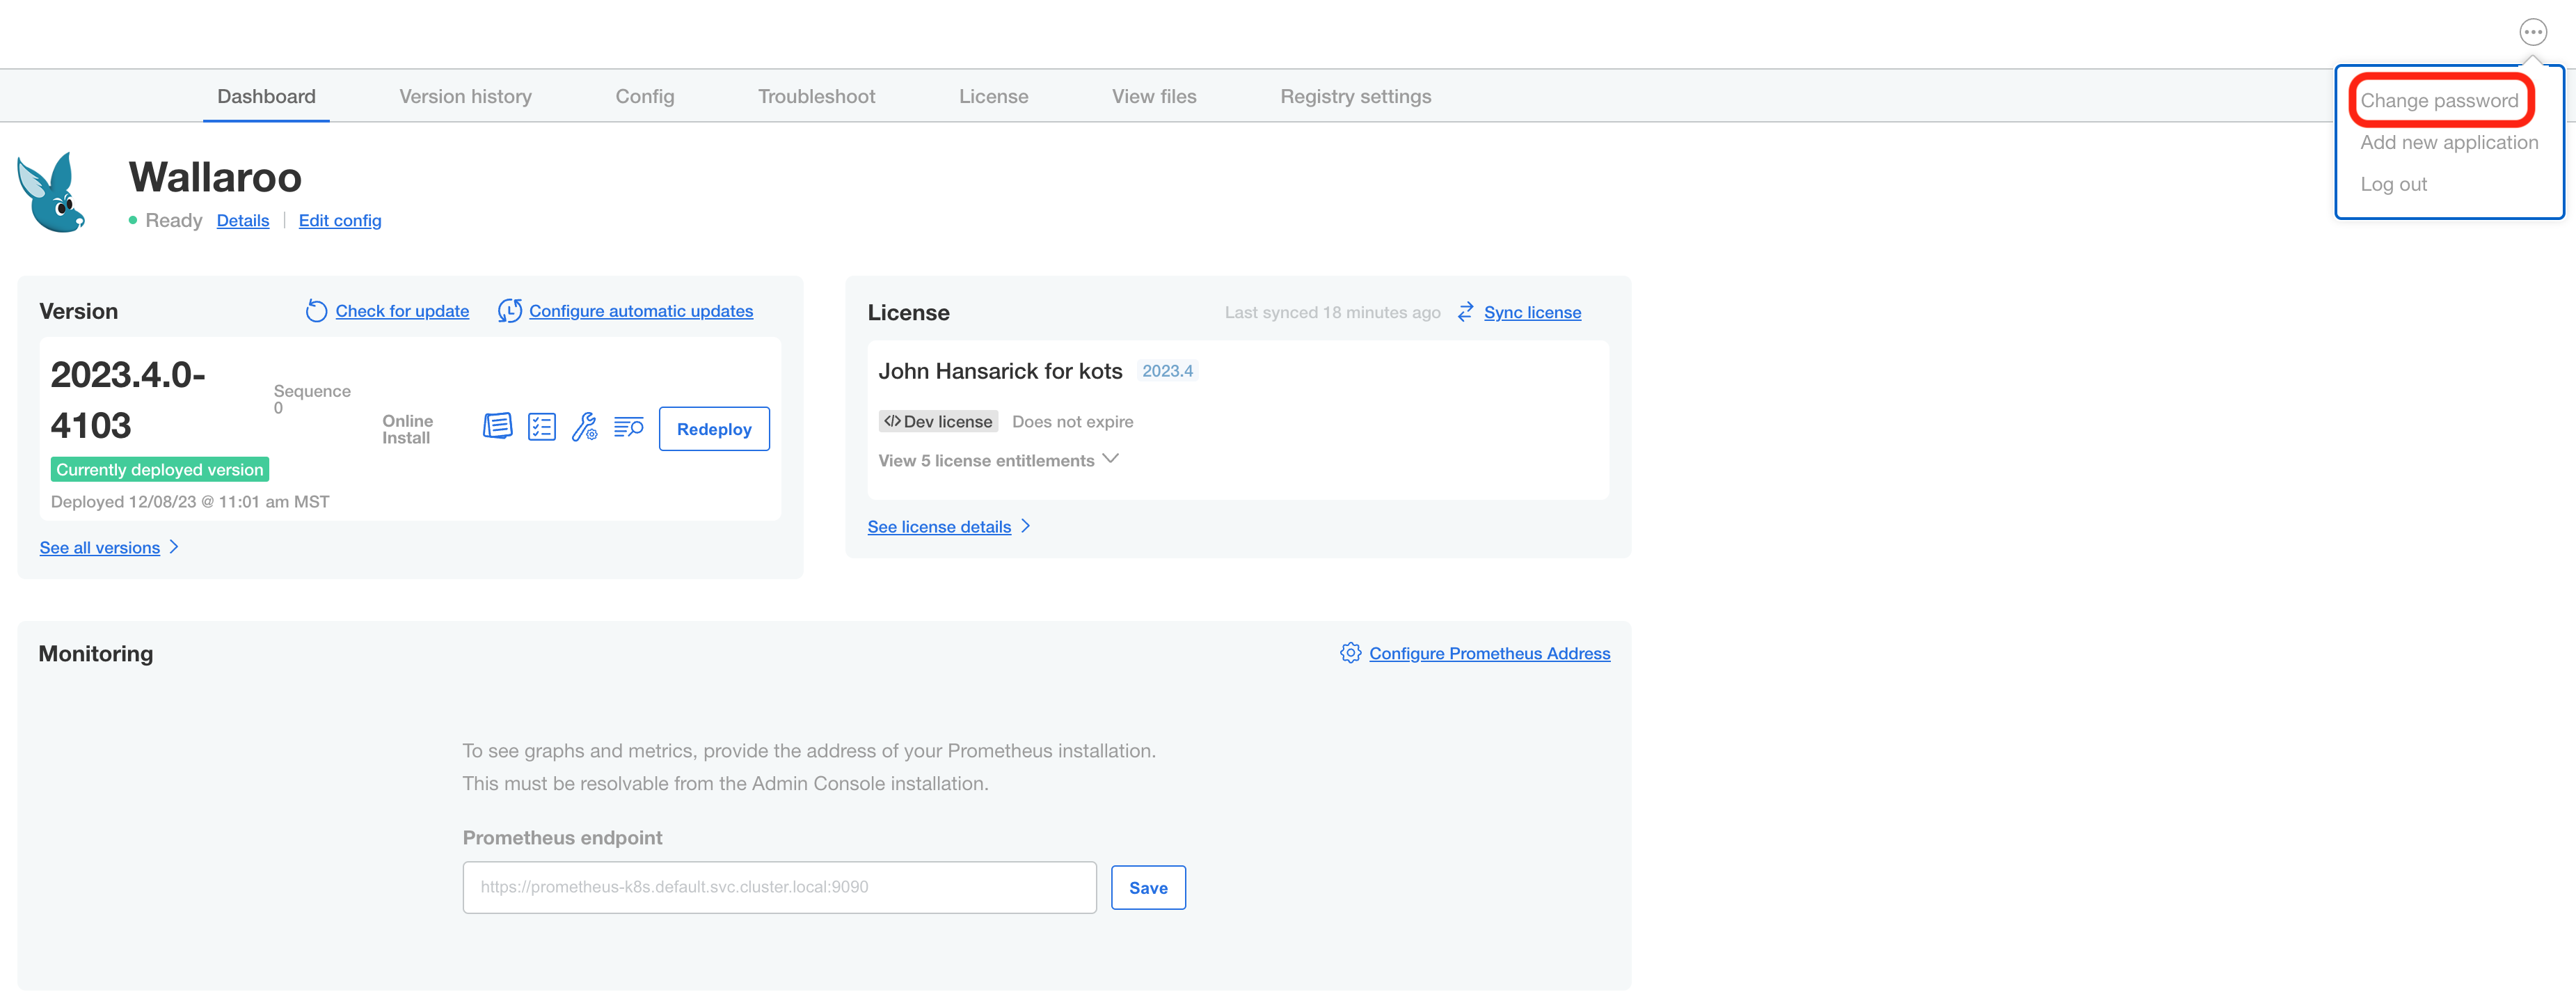
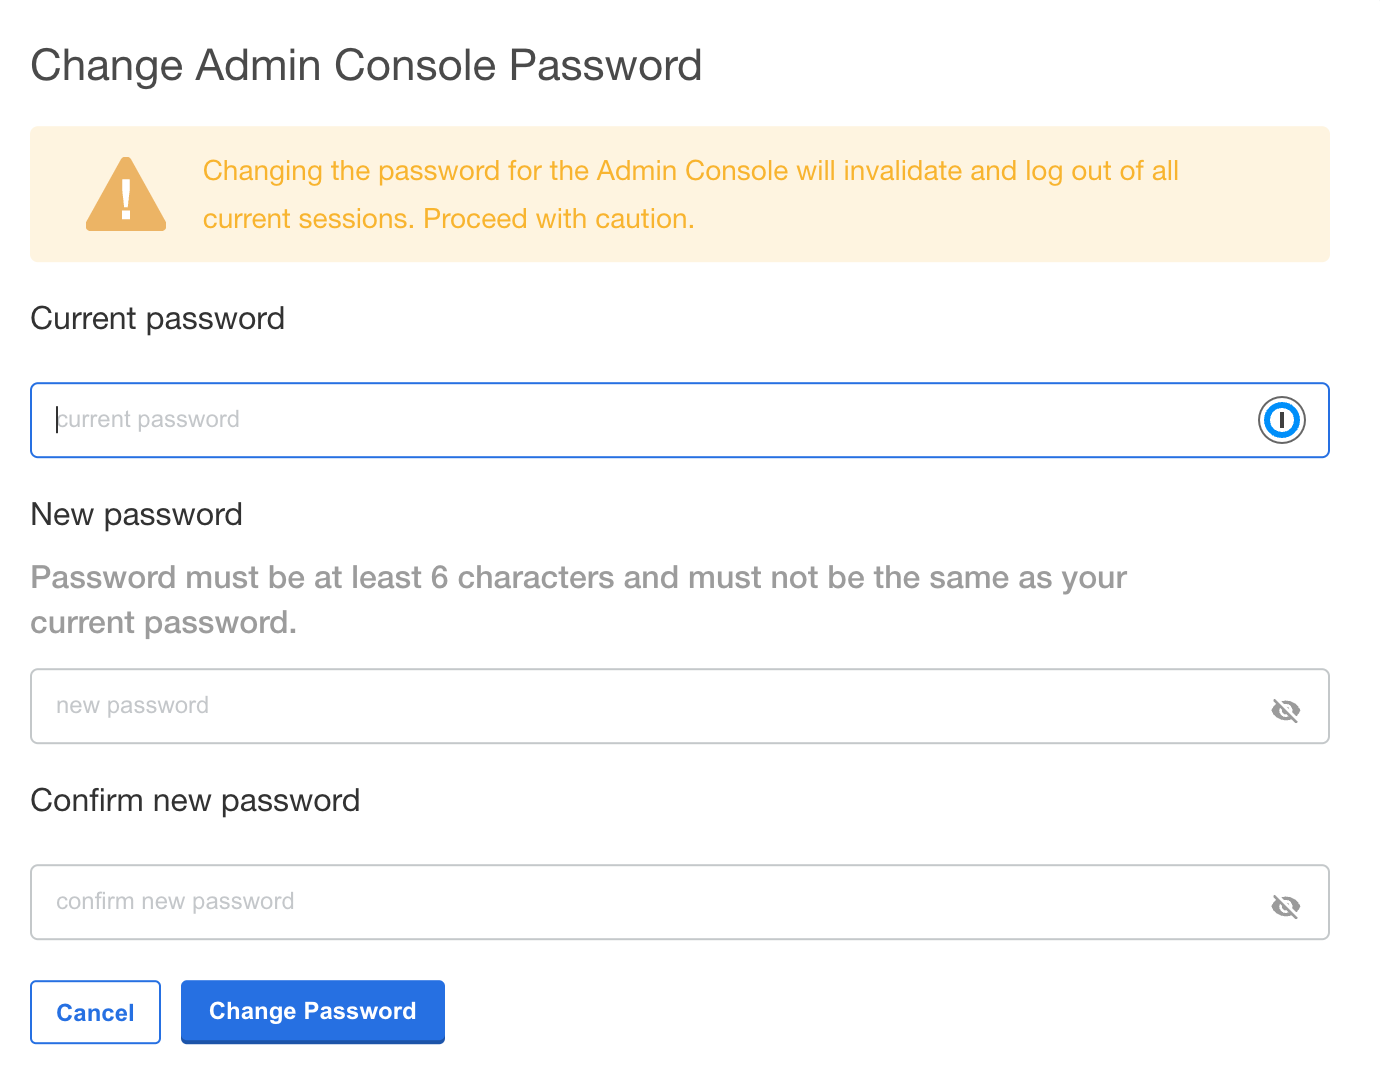
Enter the current password, then update and verify with the new password.
Wallaroo Enterprise requires integration into your organizations DNS services.
The DNS Integration Guide details adding the Wallaroo instance to an organizations DNS services. The following is an abbreviated guide that assumes that certificates were already generated.
From the Wallaroo Dashboard, select Config and set the following:
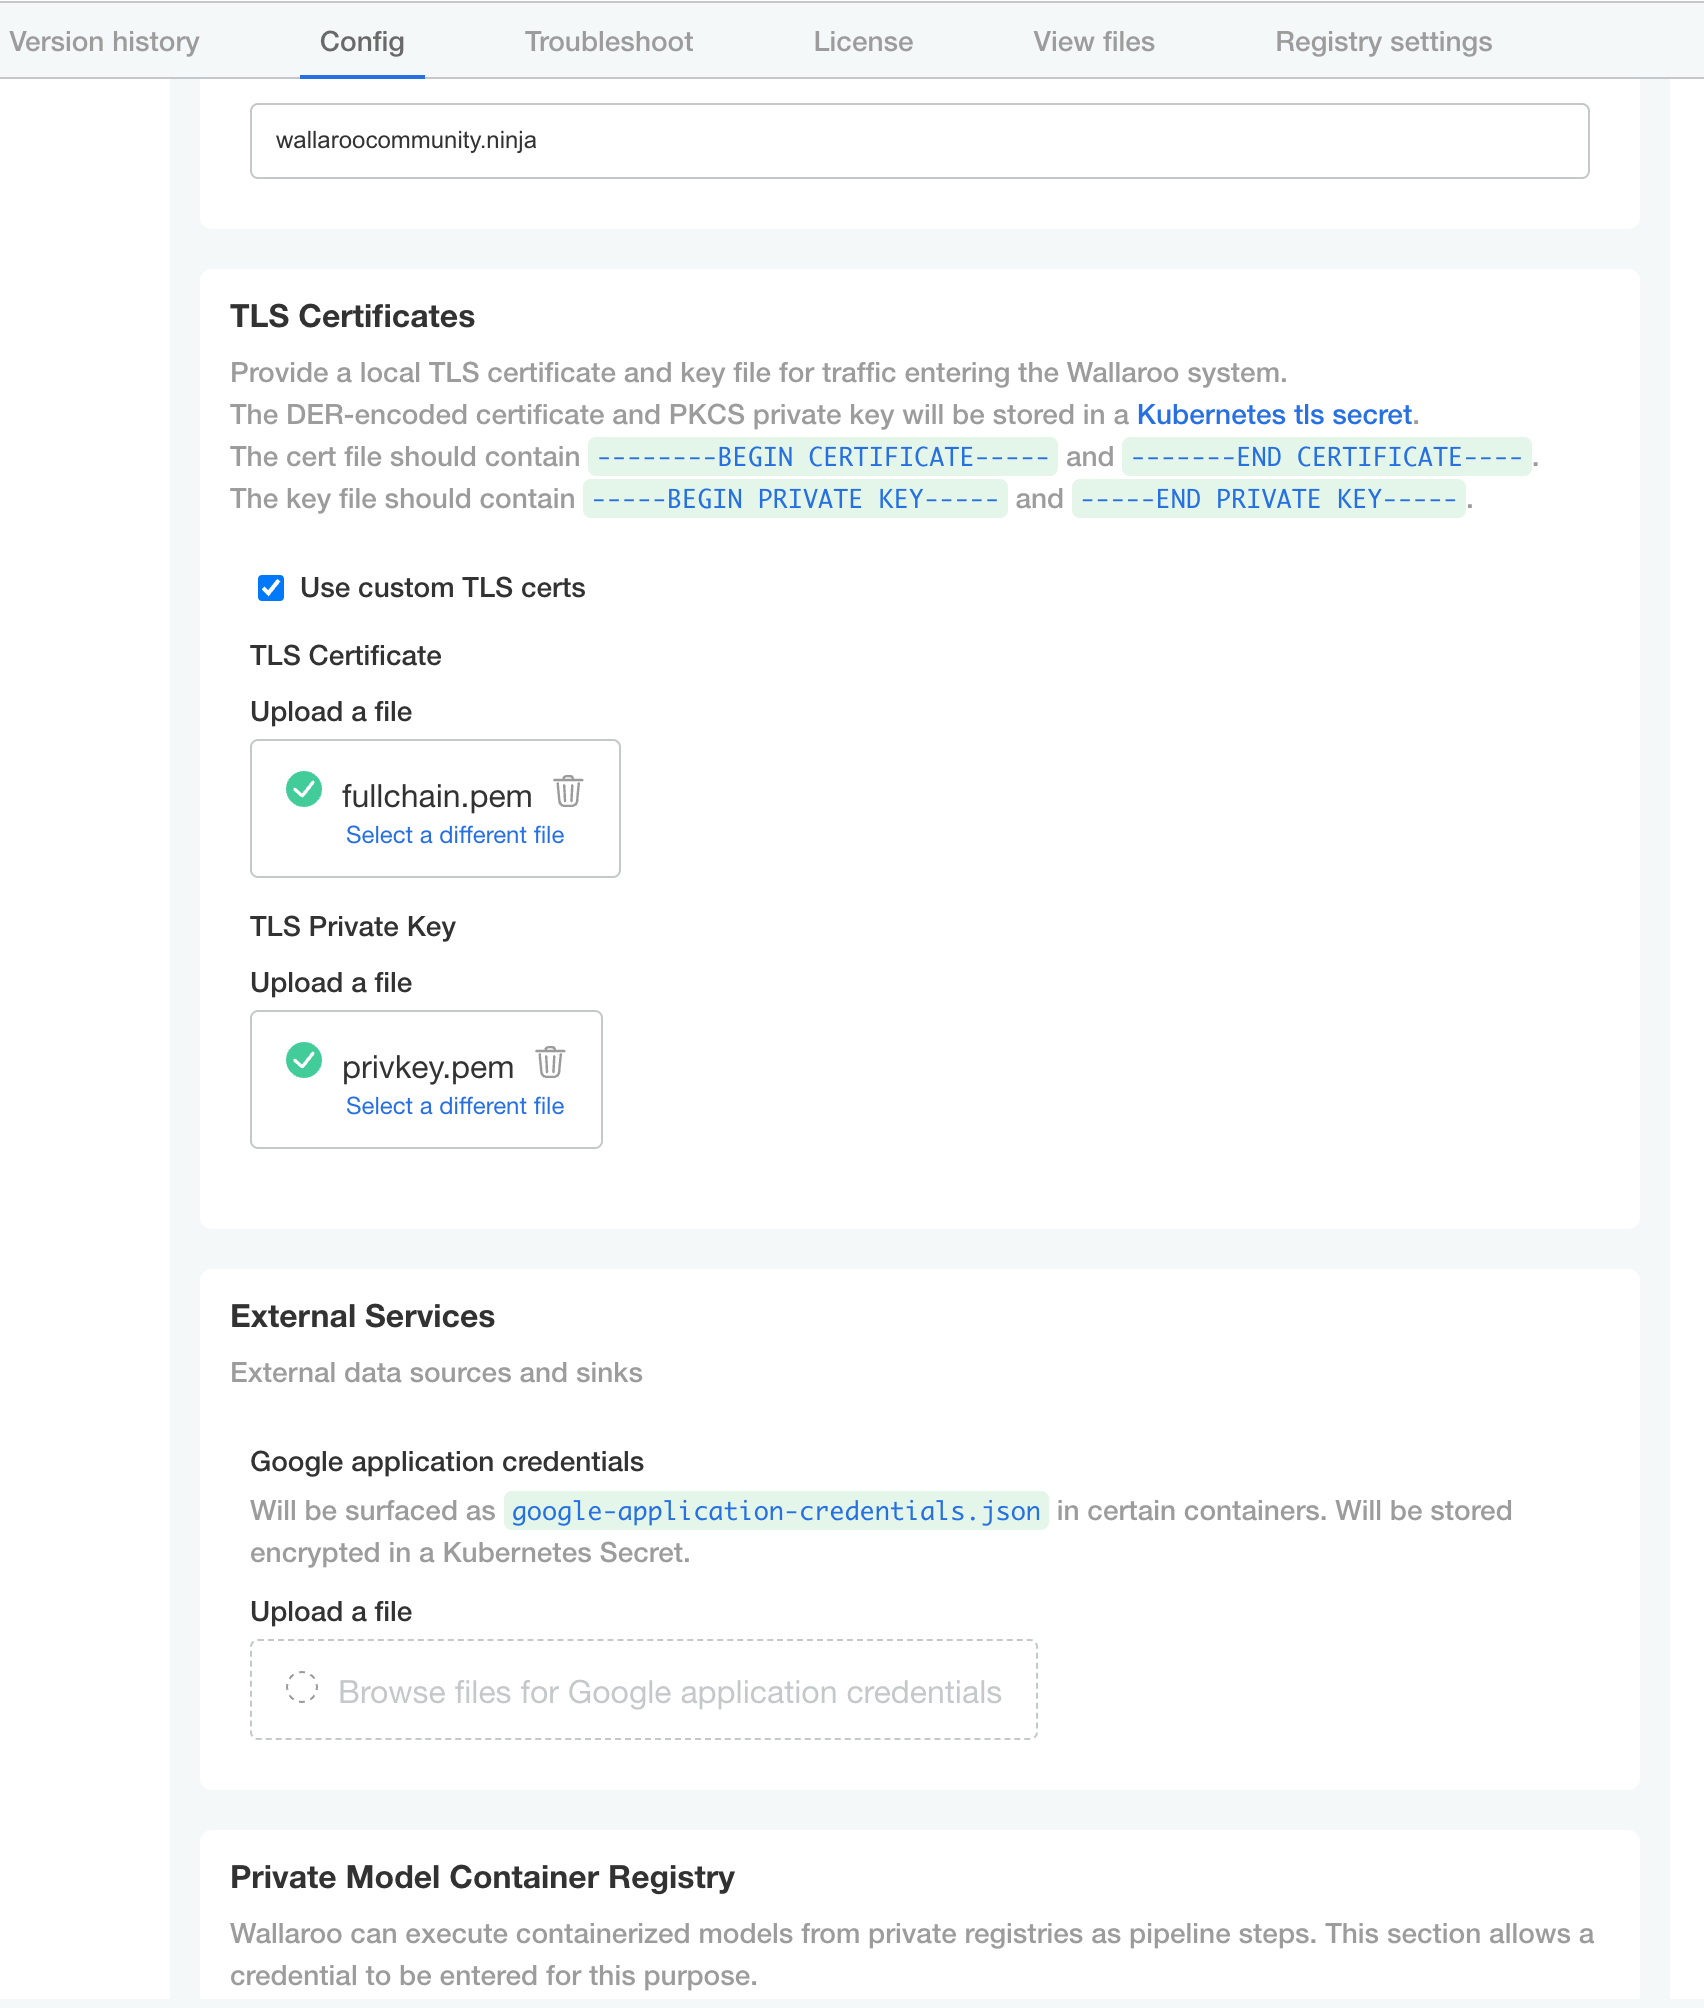
Once complete, scroll to the bottom of the Config page and select Save config.
A pop-up window will display The config for Wallaroo Enterprise has been updated.. Select Go to updated version to continue.
From the Version History page, select Deploy. Once the new deployment is finished, you will be able to access your Wallaroo services via their DNS addresses.
To verify the configuration is complete, access the Wallaroo Dashboard through the suffix domain. For example if the suffix domain is wallaroo.example.com then access https://wallaroo.example.com in a browser and verify the connection and certificates.
User management is handled through the Wallaroo instance Keycloak service. See the Wallaroo User Management for full guides on setting up users, identity providers, and other user configuration options. This step must be completed before using Wallaroo.
The following is an abbreviated guide on setting up new Wallaroo users.
At least one user must be created before using Wallaroo.
Enterprise customers may access their Wallaroo Keycloak dashboard by navigating to https://keycloak.<suffix>, depending on their choice domain suffix supplied during installation.
The standard Wallaroo installation creates the user admin by default and assigns them a randomly generated password. The admin user credentials are obtained which may be obtained directly from Kubernetes with the following commands, assuming the Wallaroo instance namespace is wallaroo.
Retrieve Keycloak Admin Username
kubectl -n wallaroo \
get secret keycloak-admin-secret \
-o go-template='{{.data.KEYCLOAK_ADMIN_USER | base64decode }}'
Retrieve Keycloak Admin Password
kubectl -n wallaroo \
get secret keycloak-admin-secret \
-o go-template='{{.data.KEYCLOAK_ADMIN_PASSWORD | base64decode }}'
In the Keycloak Administration Console, click Manage -> Users in the left-hand side menu. Click the View all users button to see existing users. This will be under the host name keycloak.$WALLAROO_SUFFIX. For example, if the $WALLAROO_SUFFIX is wallaroo.example.com, the Keycloak Administration Console would be keycloak.wallaroo.example.com.
To add a user through the Keycloak interface:
Click the Add user button in the top-right corner.
Enter the following:

Click Save.
Once saved, select Credentials tab, then the Set Password section, enter the new user’s desired initial password in the Password and Password Confirmation fields.
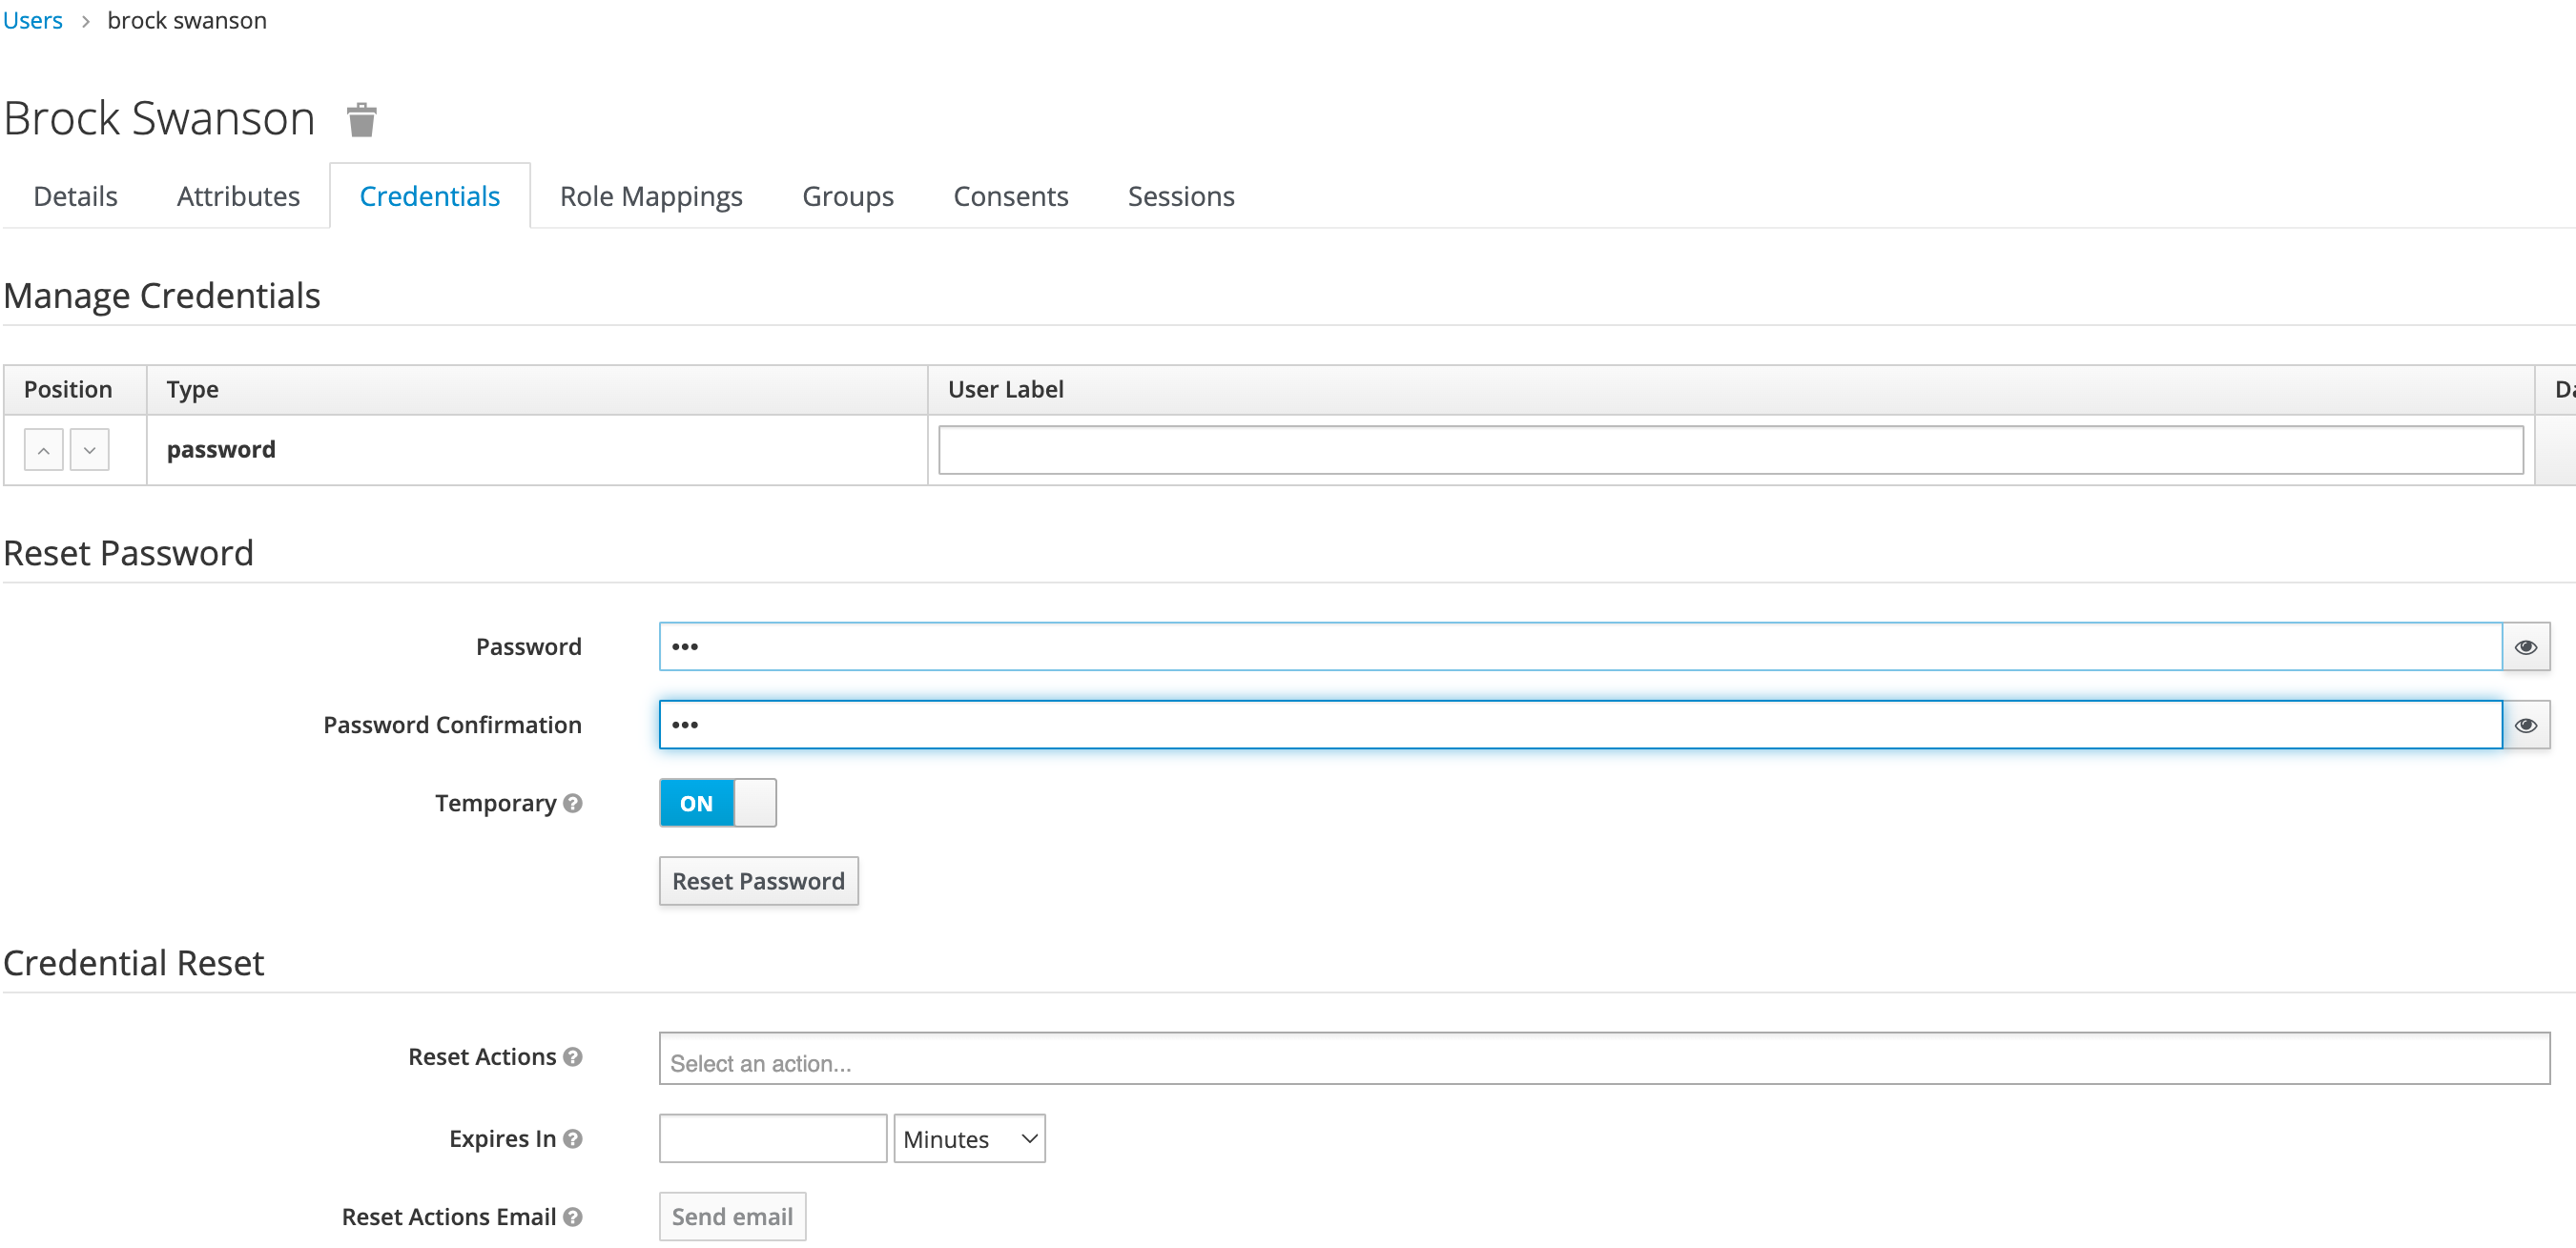
Click Set Password. Confirm the action when prompted. This will force the user to set their own password when they log in to Wallaroo.
To log into the Wallaroo dashboard, log out as the Admin user and login to the Wallaroo Dashboard as a preconfigured user or via SSO.
Software and other local system requirements before installing Wallaroo
How to Uninstall Wallaroo