Wallaroo SSO for Microsoft Azure
Table of Contents
Organizations can use Microsoft Azure as an identity provider for single sign-on (SSO) logins for users with Wallaroo Enterprise.
IMPORTANT NOTE
These instructions are for Wallaroo Enterprise edition only.To enable Microsoft Azure as an authentication provider to a Wallaroo Enterprise instance:
Create the Azure Credentials
The first step is to create the Azure credentials in Microsoft Azure.
By the end, the following information must be saved for use in the step Add Azure Credentials to Wallaroo:
Create the New App
login to the Microsoft Azure account with an account with permissions to create application registrations.
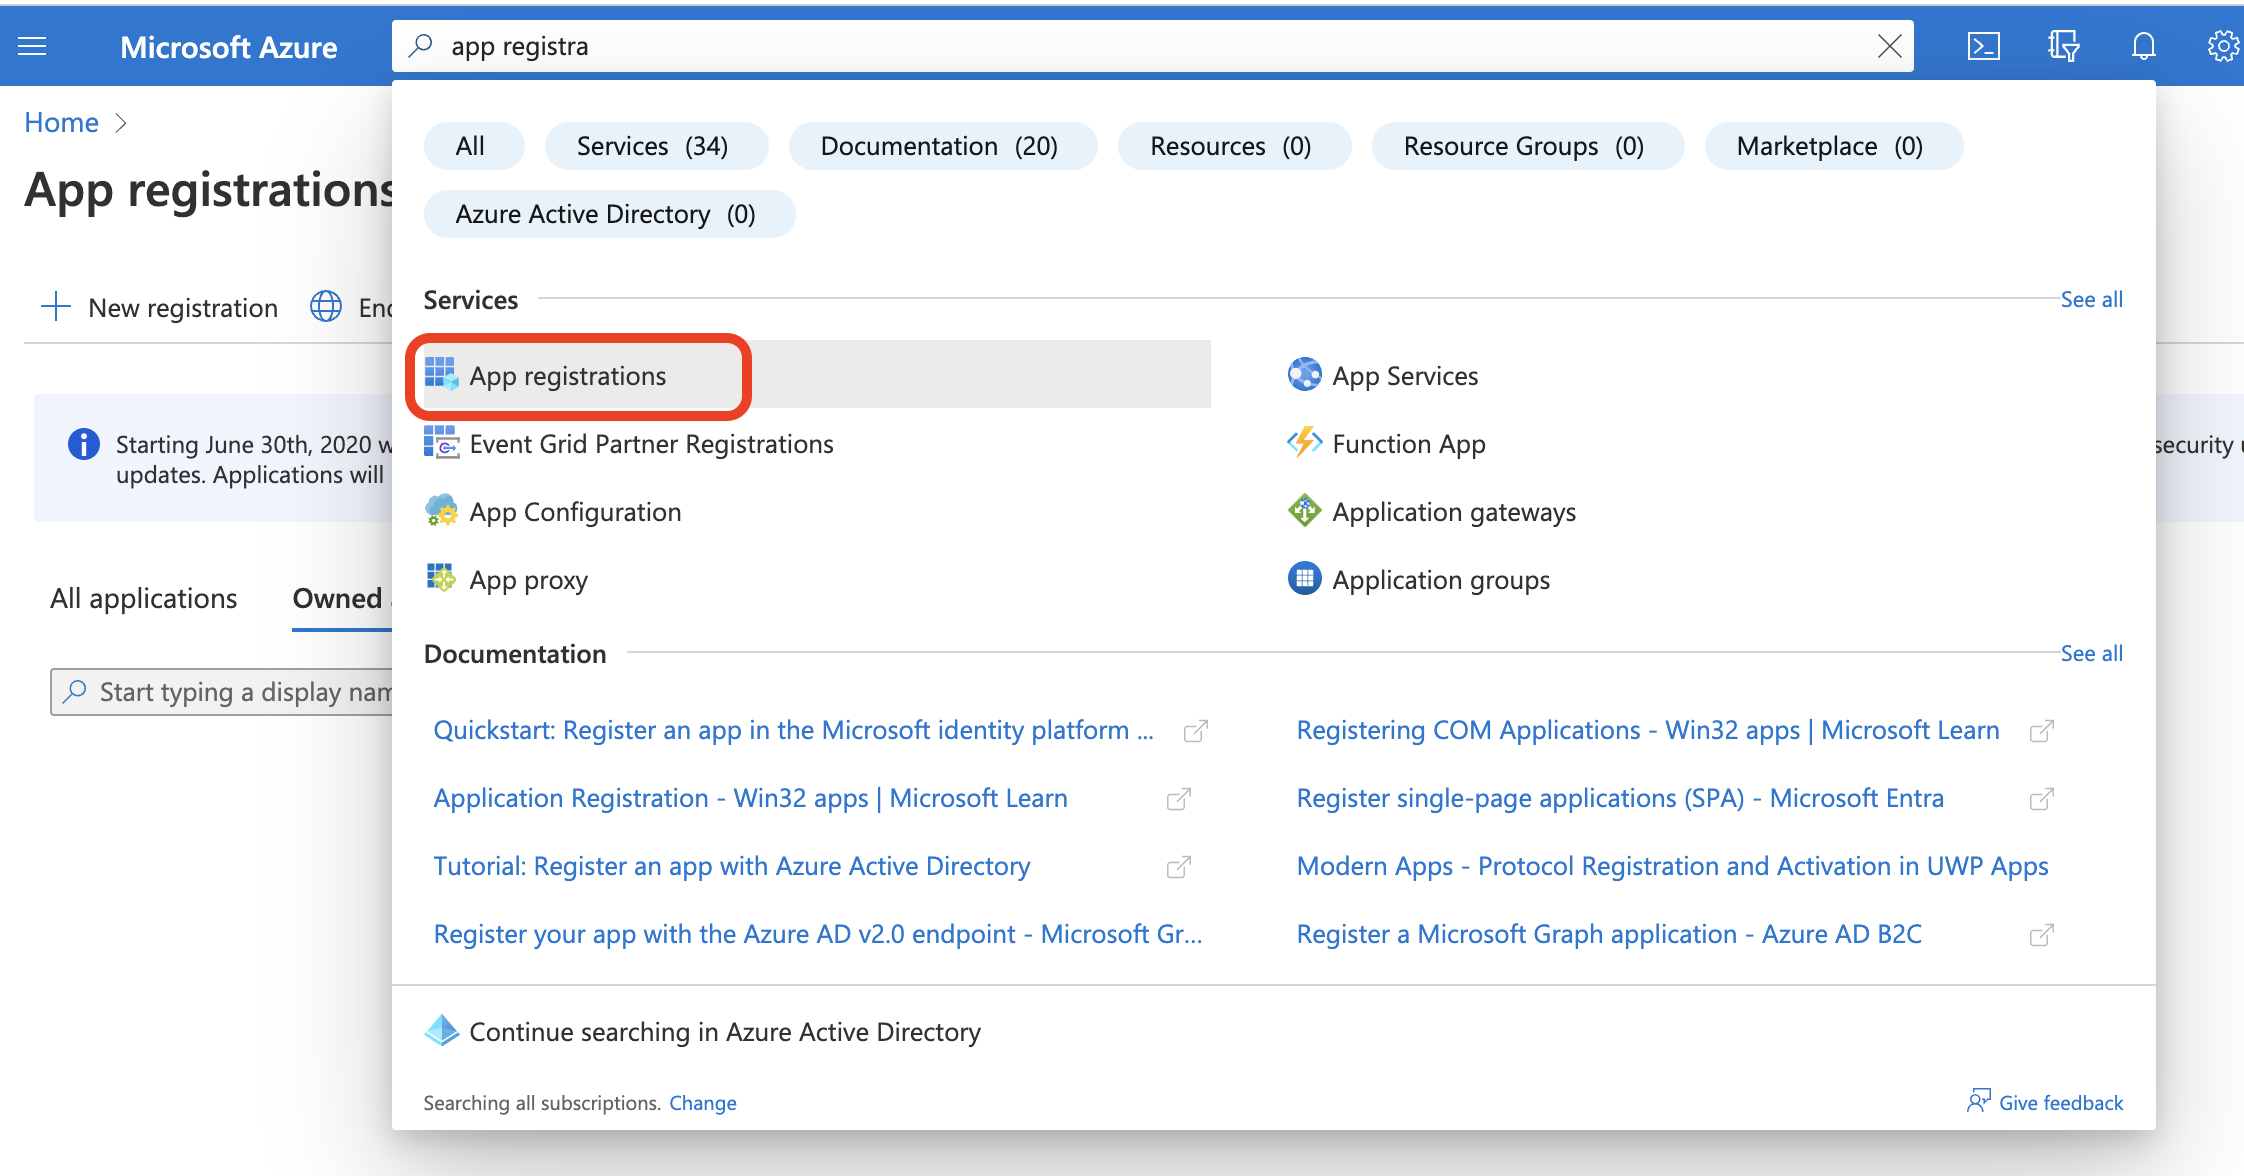
Select App registrations from the Azure Services menu, or search for App Registrations from the search bar.
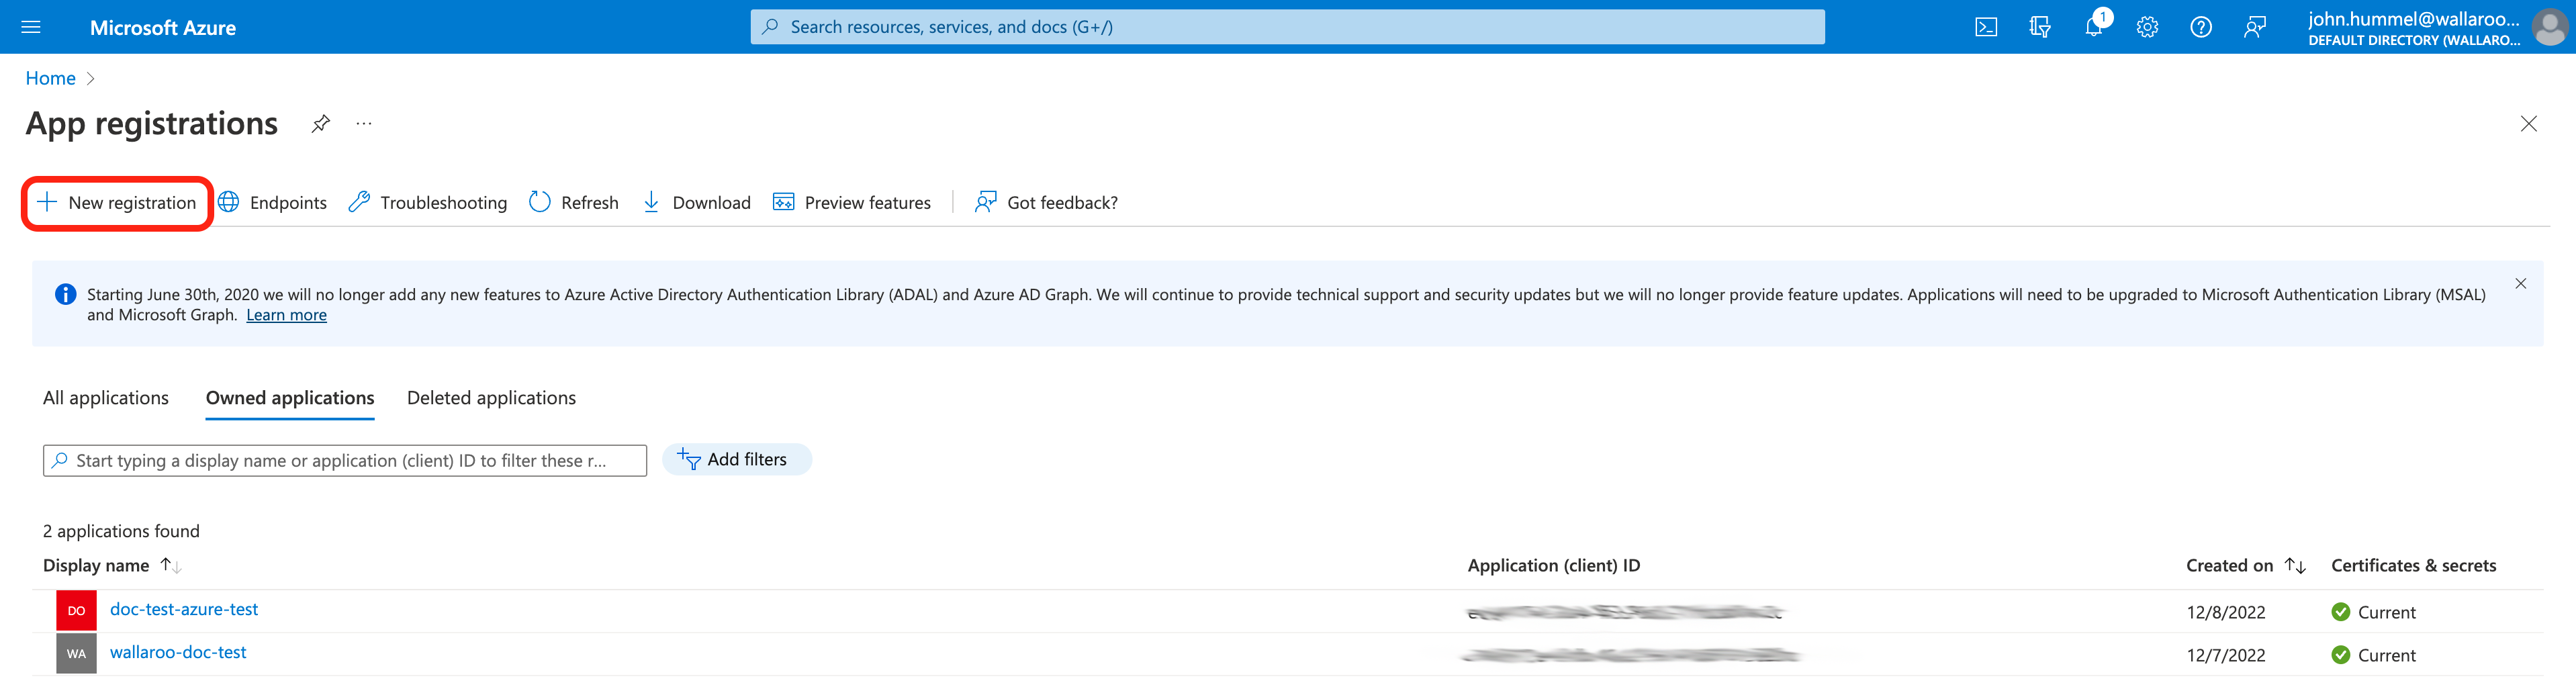
From the App registrations screen, select either an existing application, or select + New registration. This example will show creating a new registration.
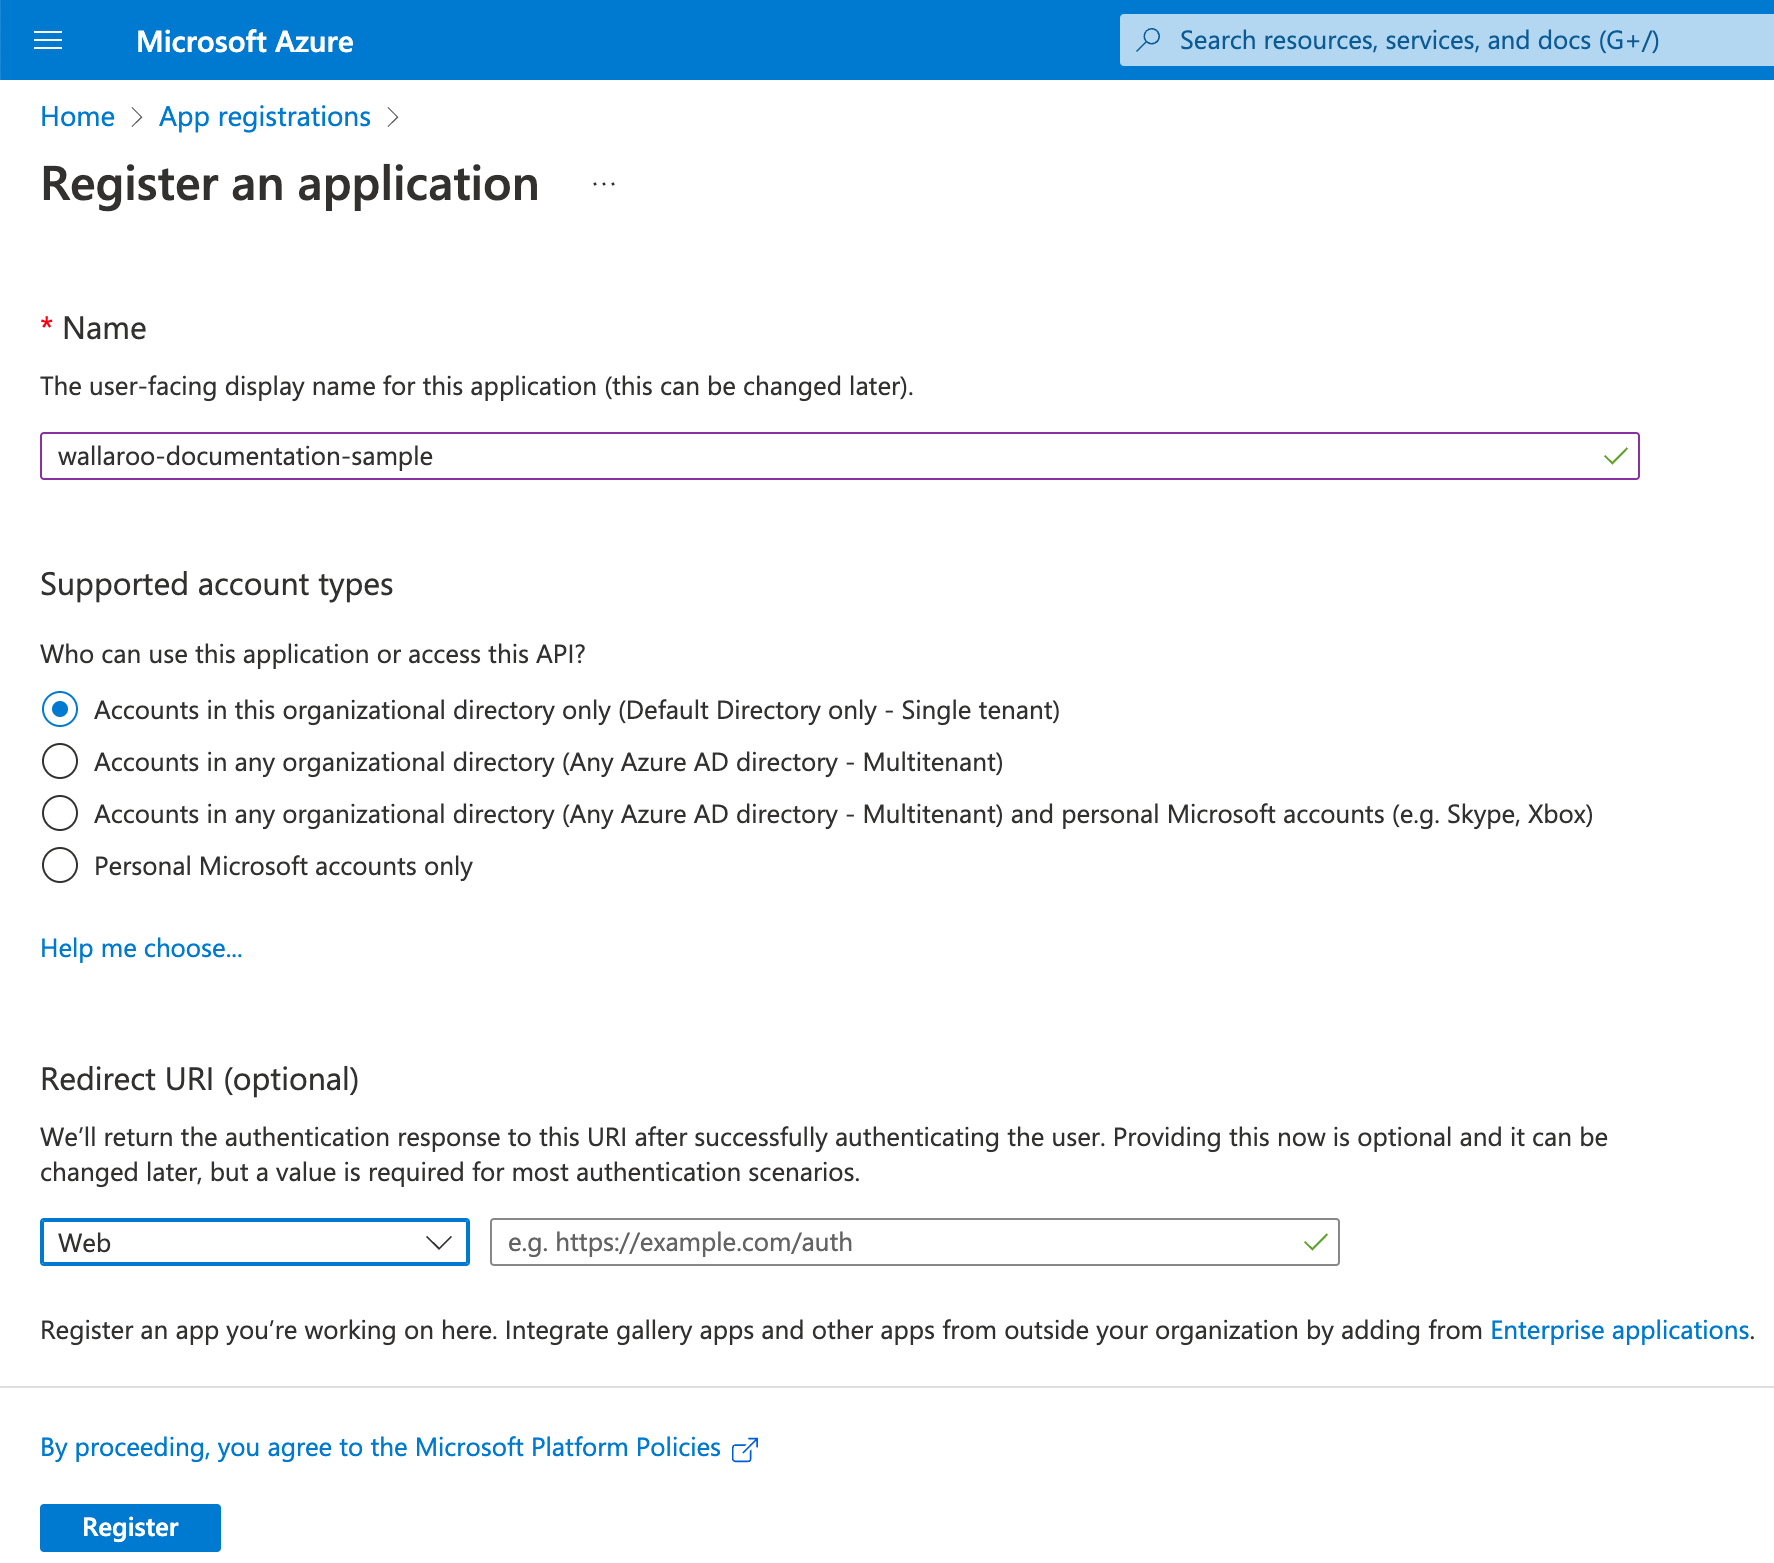
From the Register an application screen, set the following:
Name: The name of the application.
Supported account types: To restrict only to accounts in the organization directory, select Accounts in this organizational directory only.
Redirect URI: Set the type to Web and the URI. The URI will be based on the Wallaroo instance and the name of the Keycloak Identity Provider set in the step Add Azure Credentials to Wallaroo. This will be a link back to the Keycloak endpoint URL in your Wallaroo instance in the format
https://$PREFIX.keycloak.$SUFFIX/auth/realms/master/broker/$IDENTITYNAME/endpoint.For example, if the Wallaroo prefix is
silky-lions-3657, the name of the Wallaroo Keycloak Identity Provider isazure, and the suffix iswallaroo.ai, then the Keycloak endpoint URL would besilky-lions-3657.keycloak.wallaroo.ai/auth/realms/master/broker/azure/endpoint. For more information see the DNS Integration Guide.Once complete, select Register.
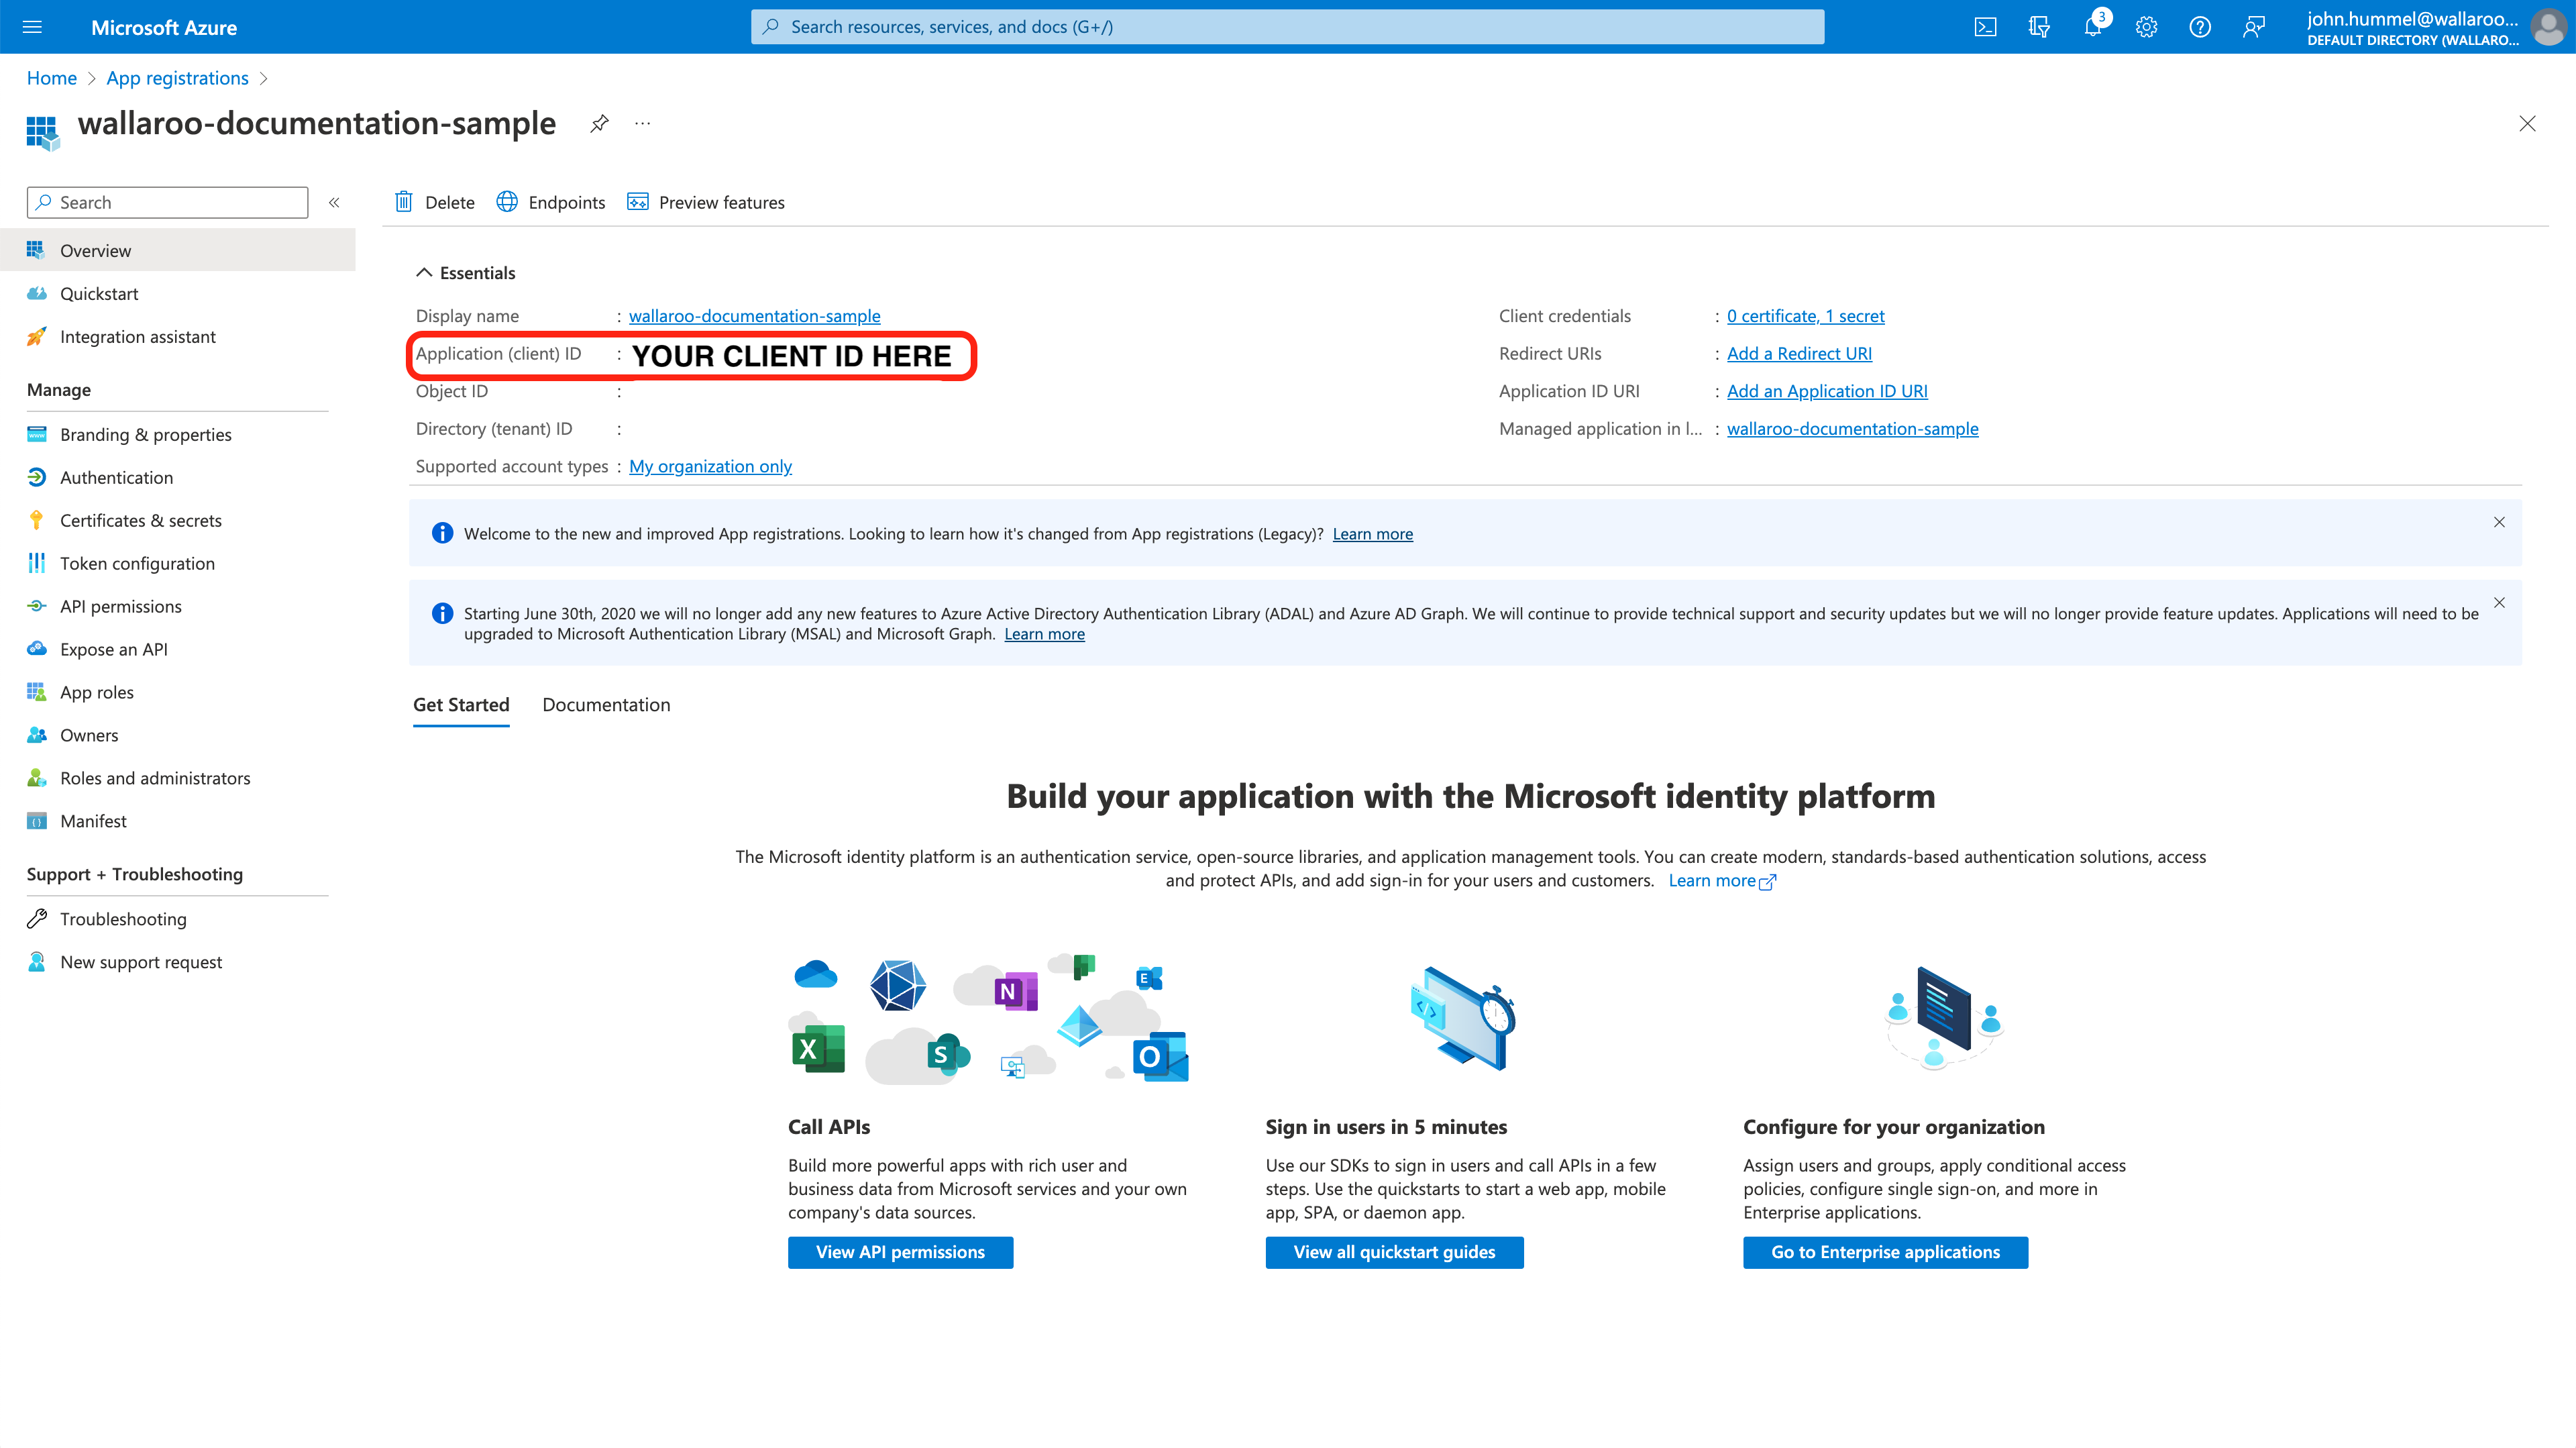
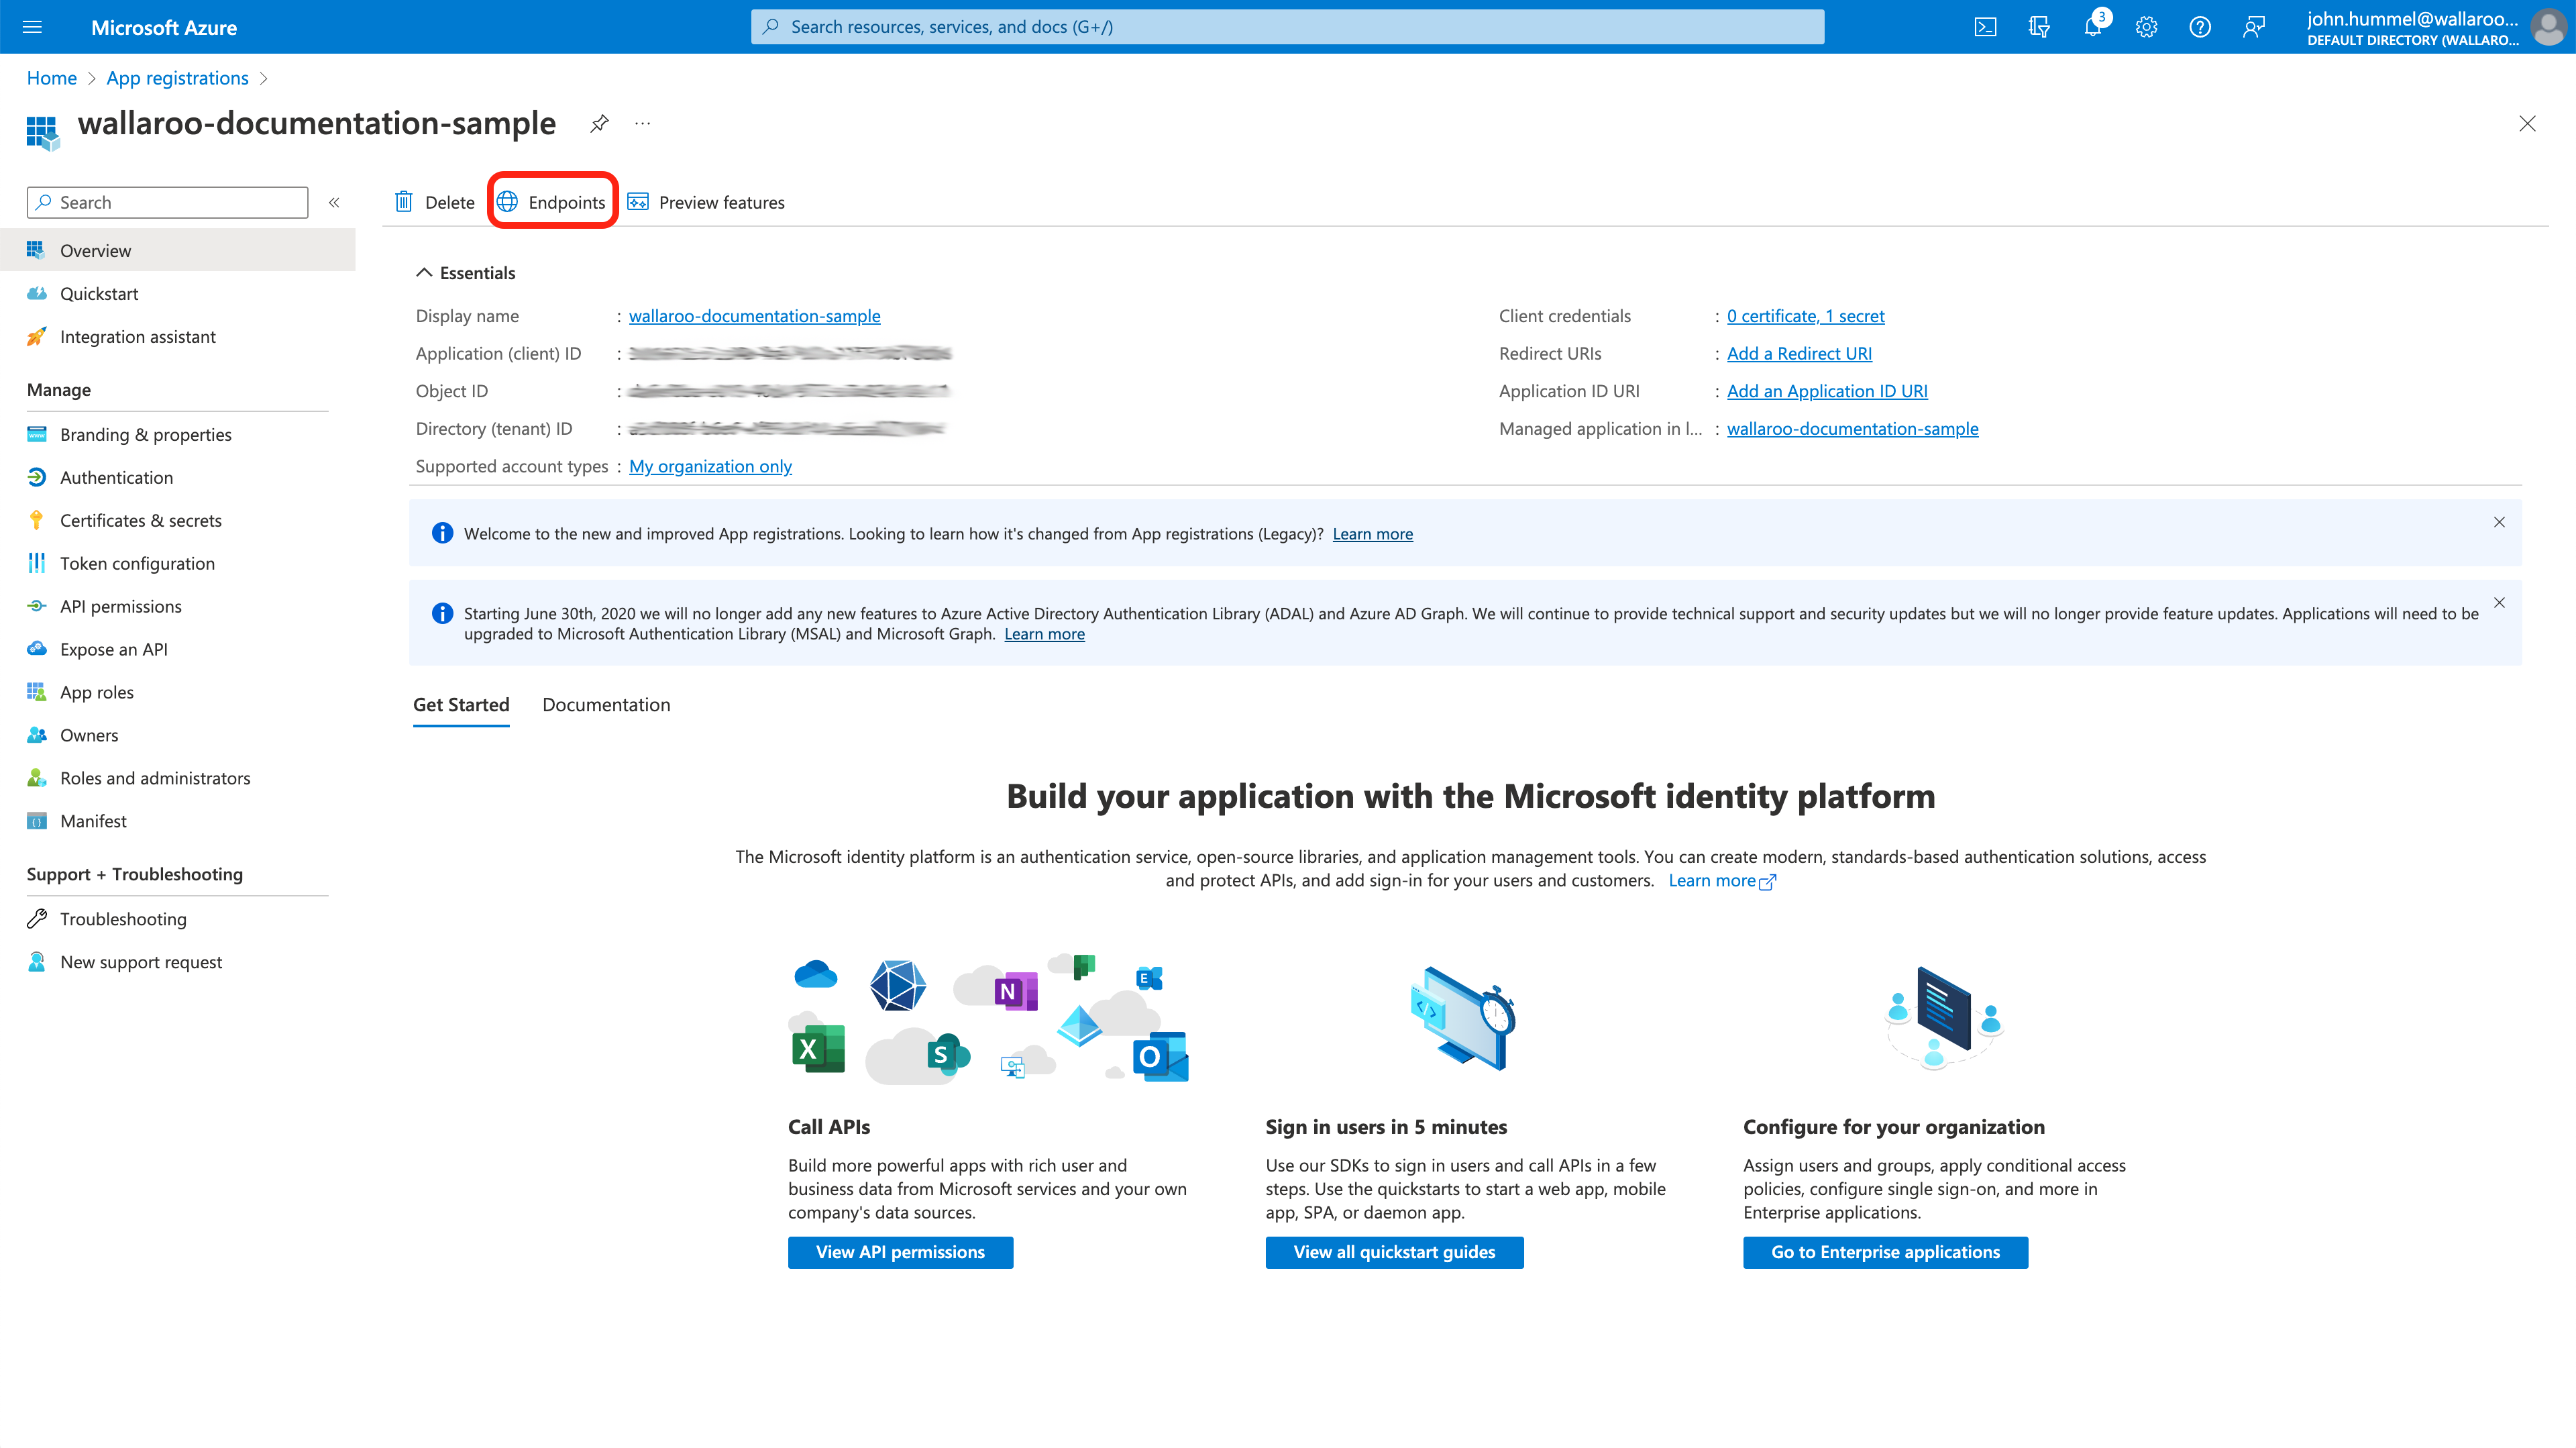
Store the Application ID
From the Overview screen, store the following in a secure location:
Application (client) ID: This will be used in the Add Azure Credentials to Wallaroo step.
From the Overview screen, select Redirect URIs. Set the following:
- Verify the Redirect URI matches the Wallaroo instance endpoint.
- Under Implicit grant and hybrid flows, set the following:
- Access tokens: Enabled
- ID tokens: Enabled
From the Overview screen, from the left sidebar select API permissions. Select +Add a permission.
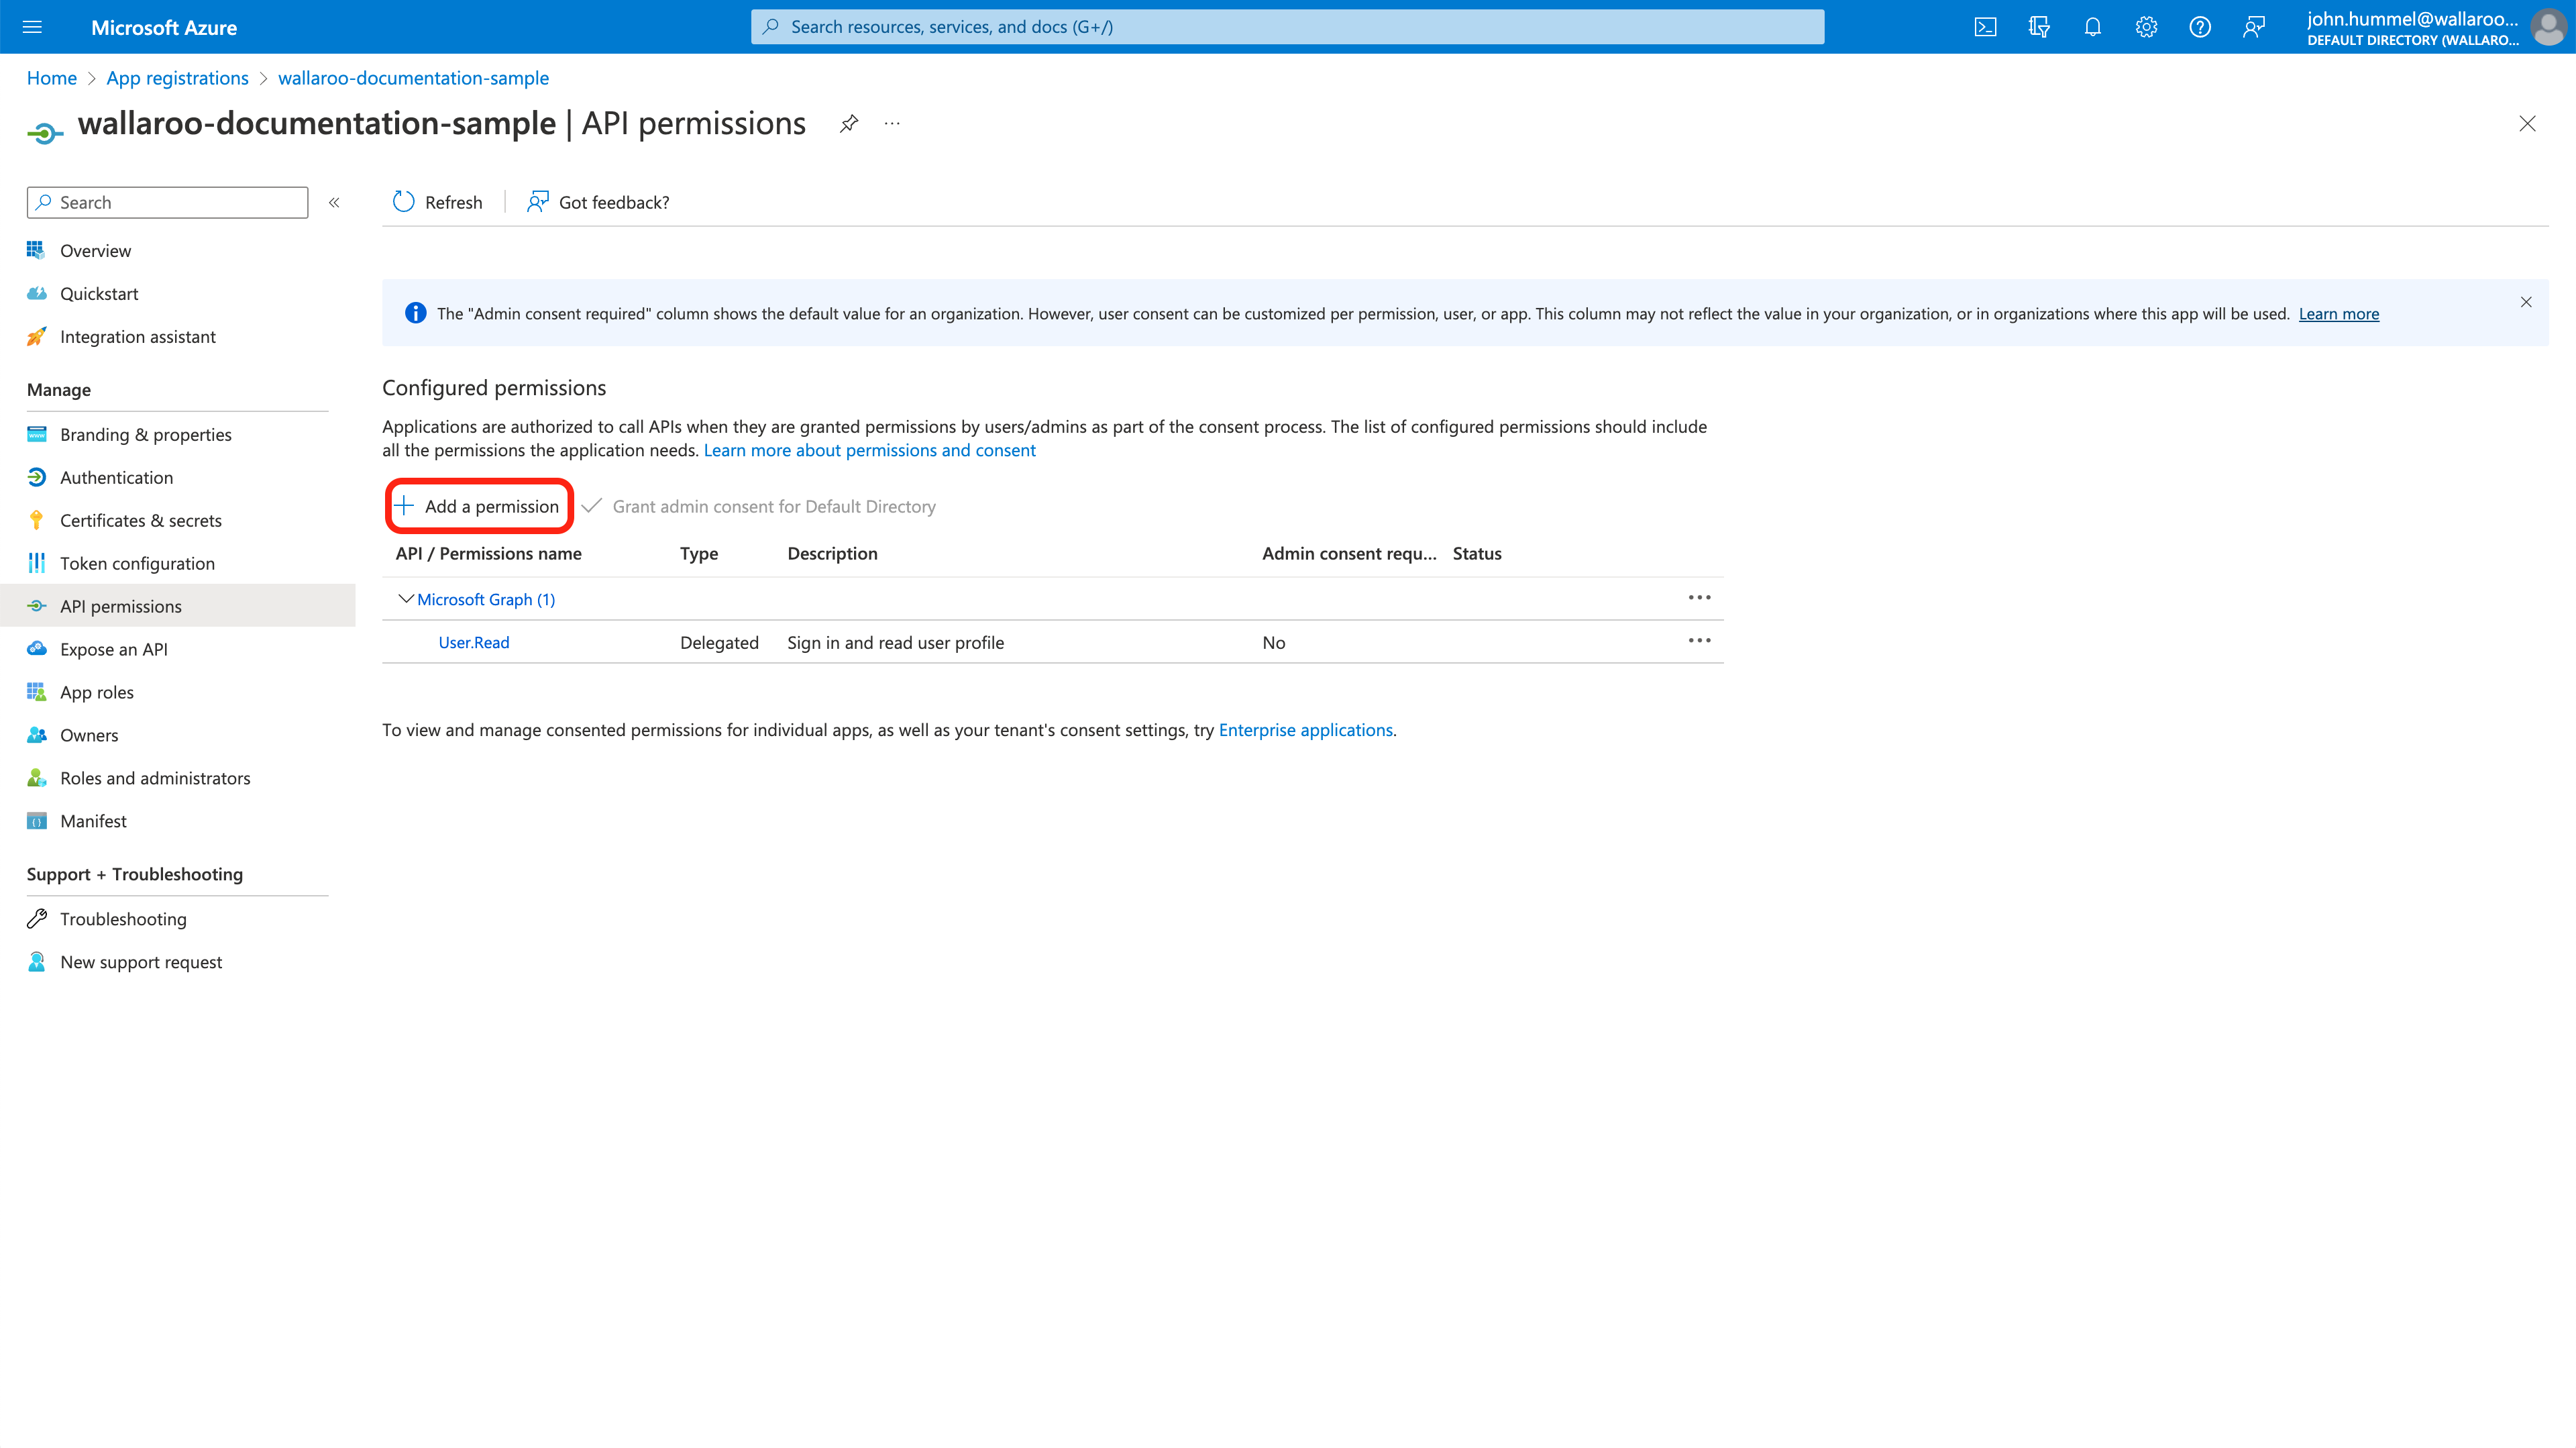
Select Microsoft Graph, then Delegated Permissions.
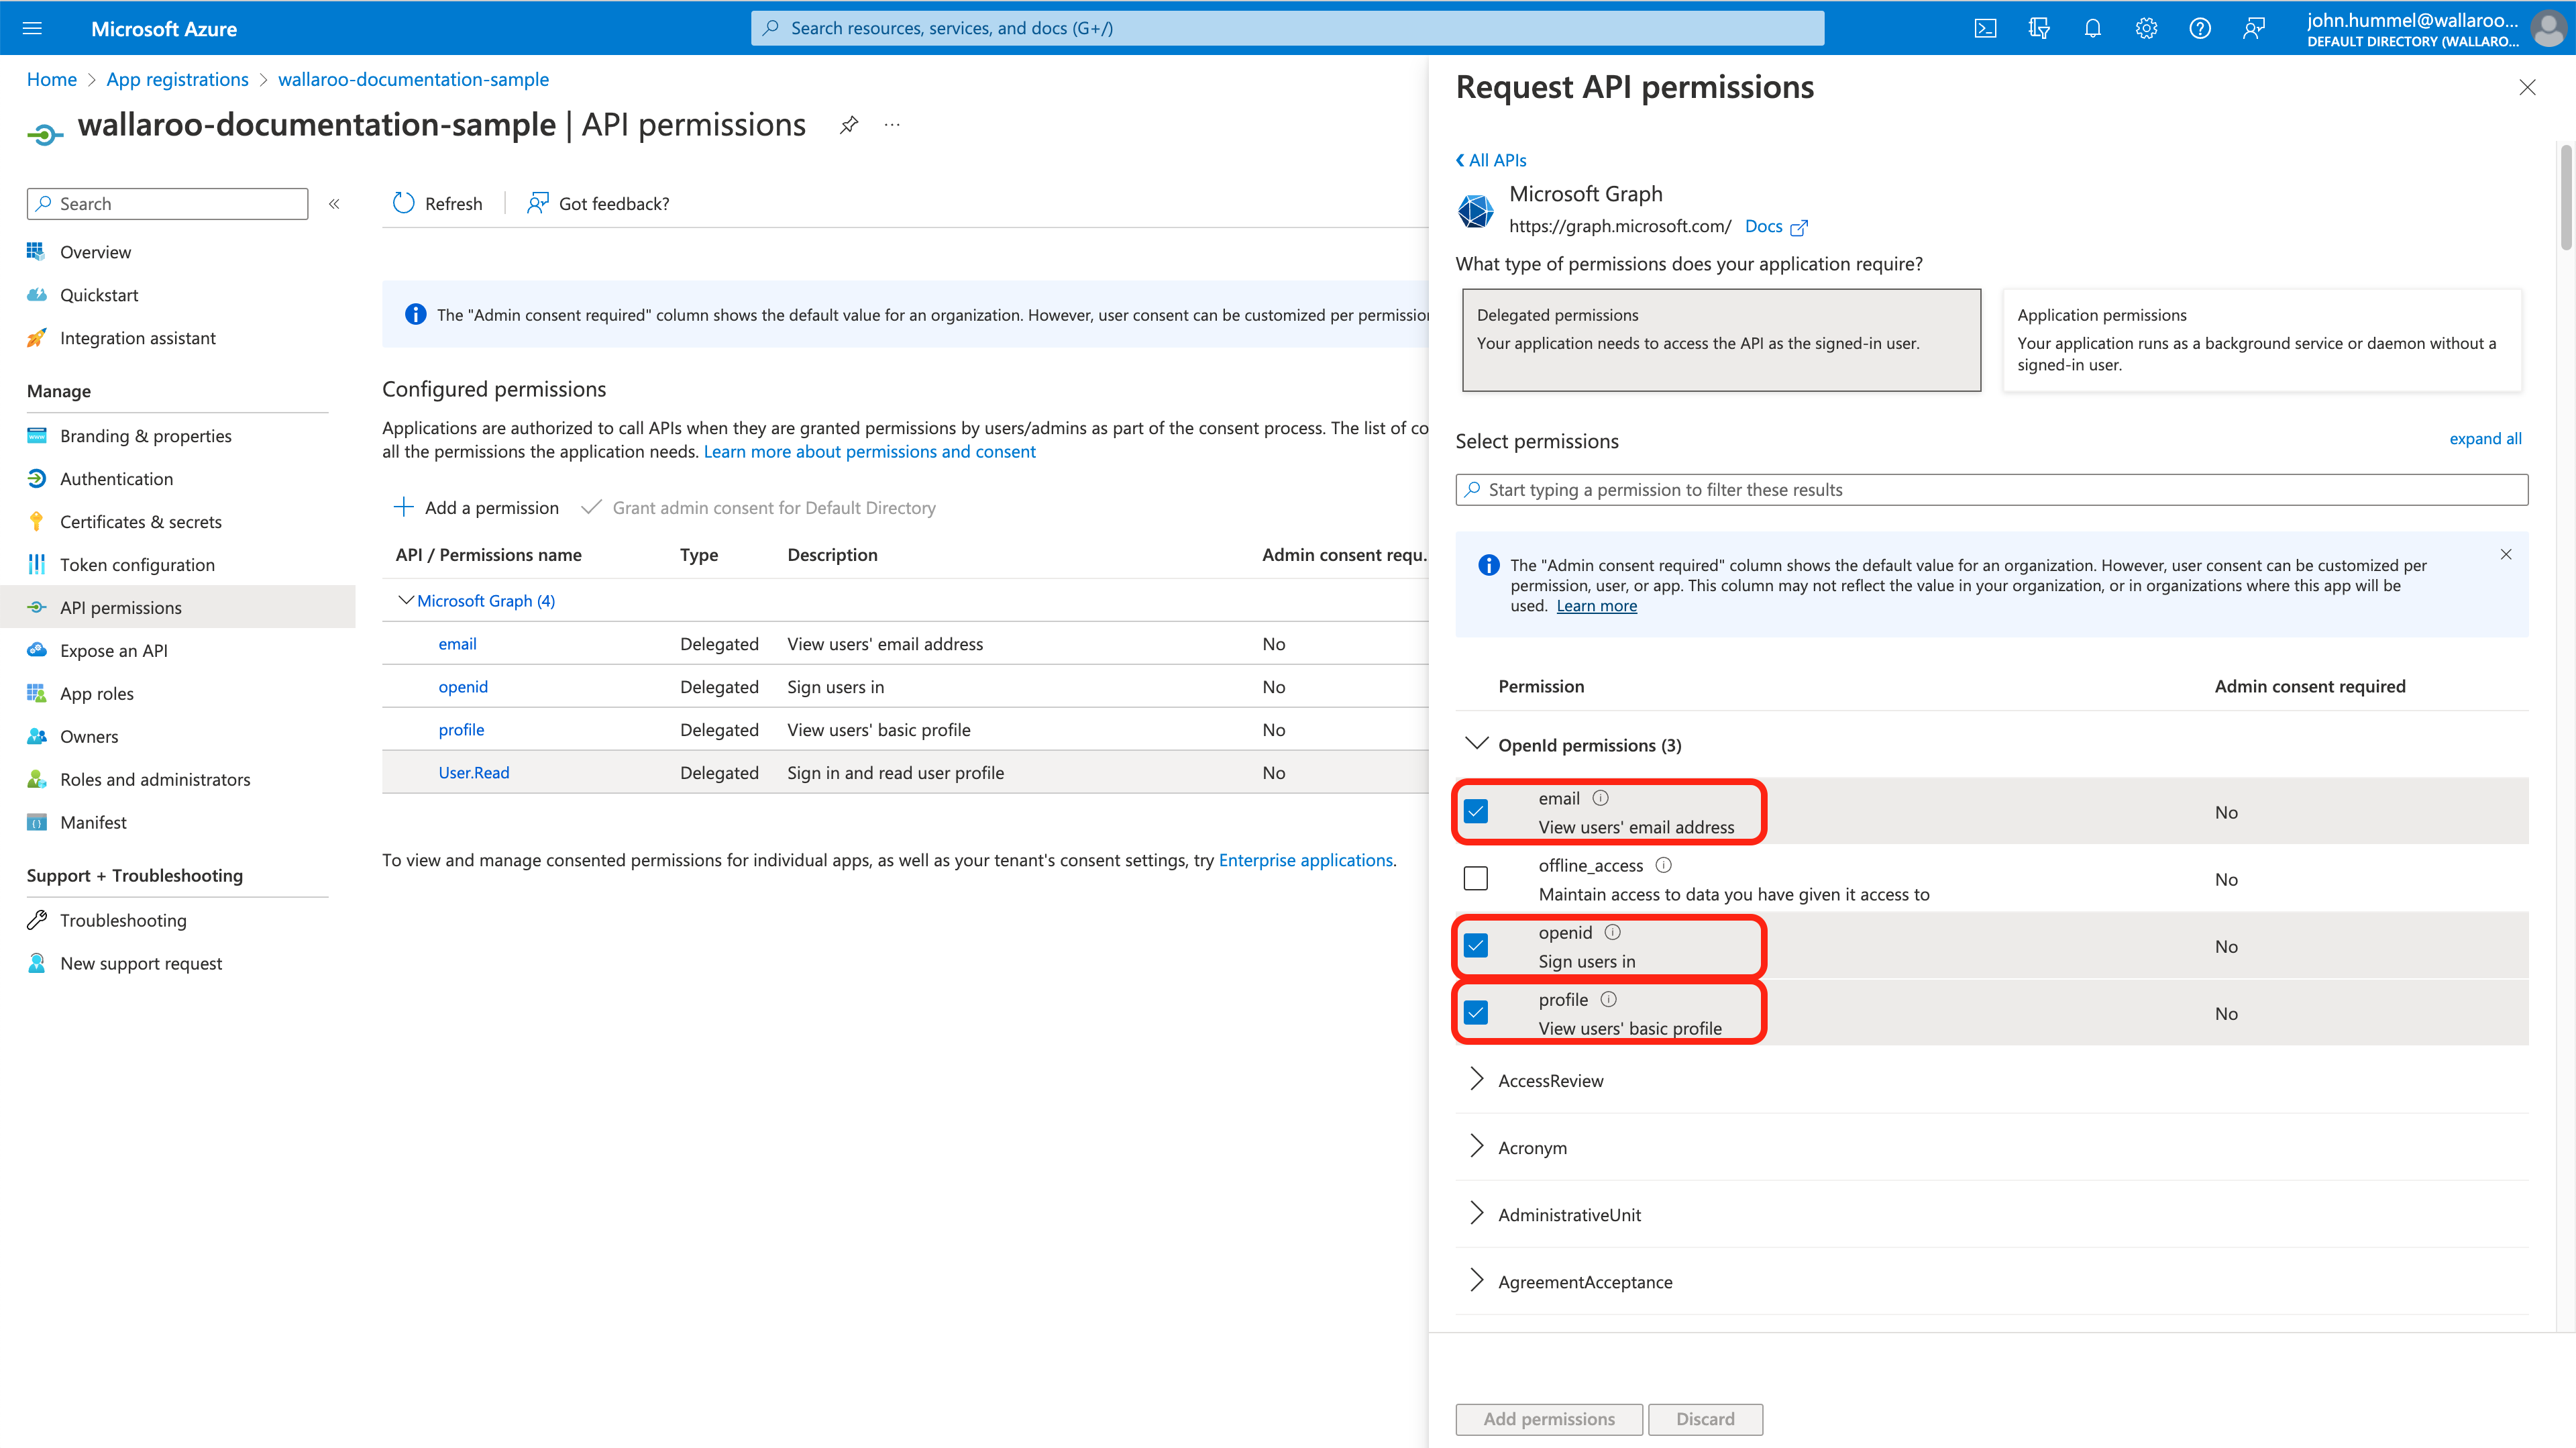
Set email, openid, profile to Enabled then select Add permissions.
Create Client Secret
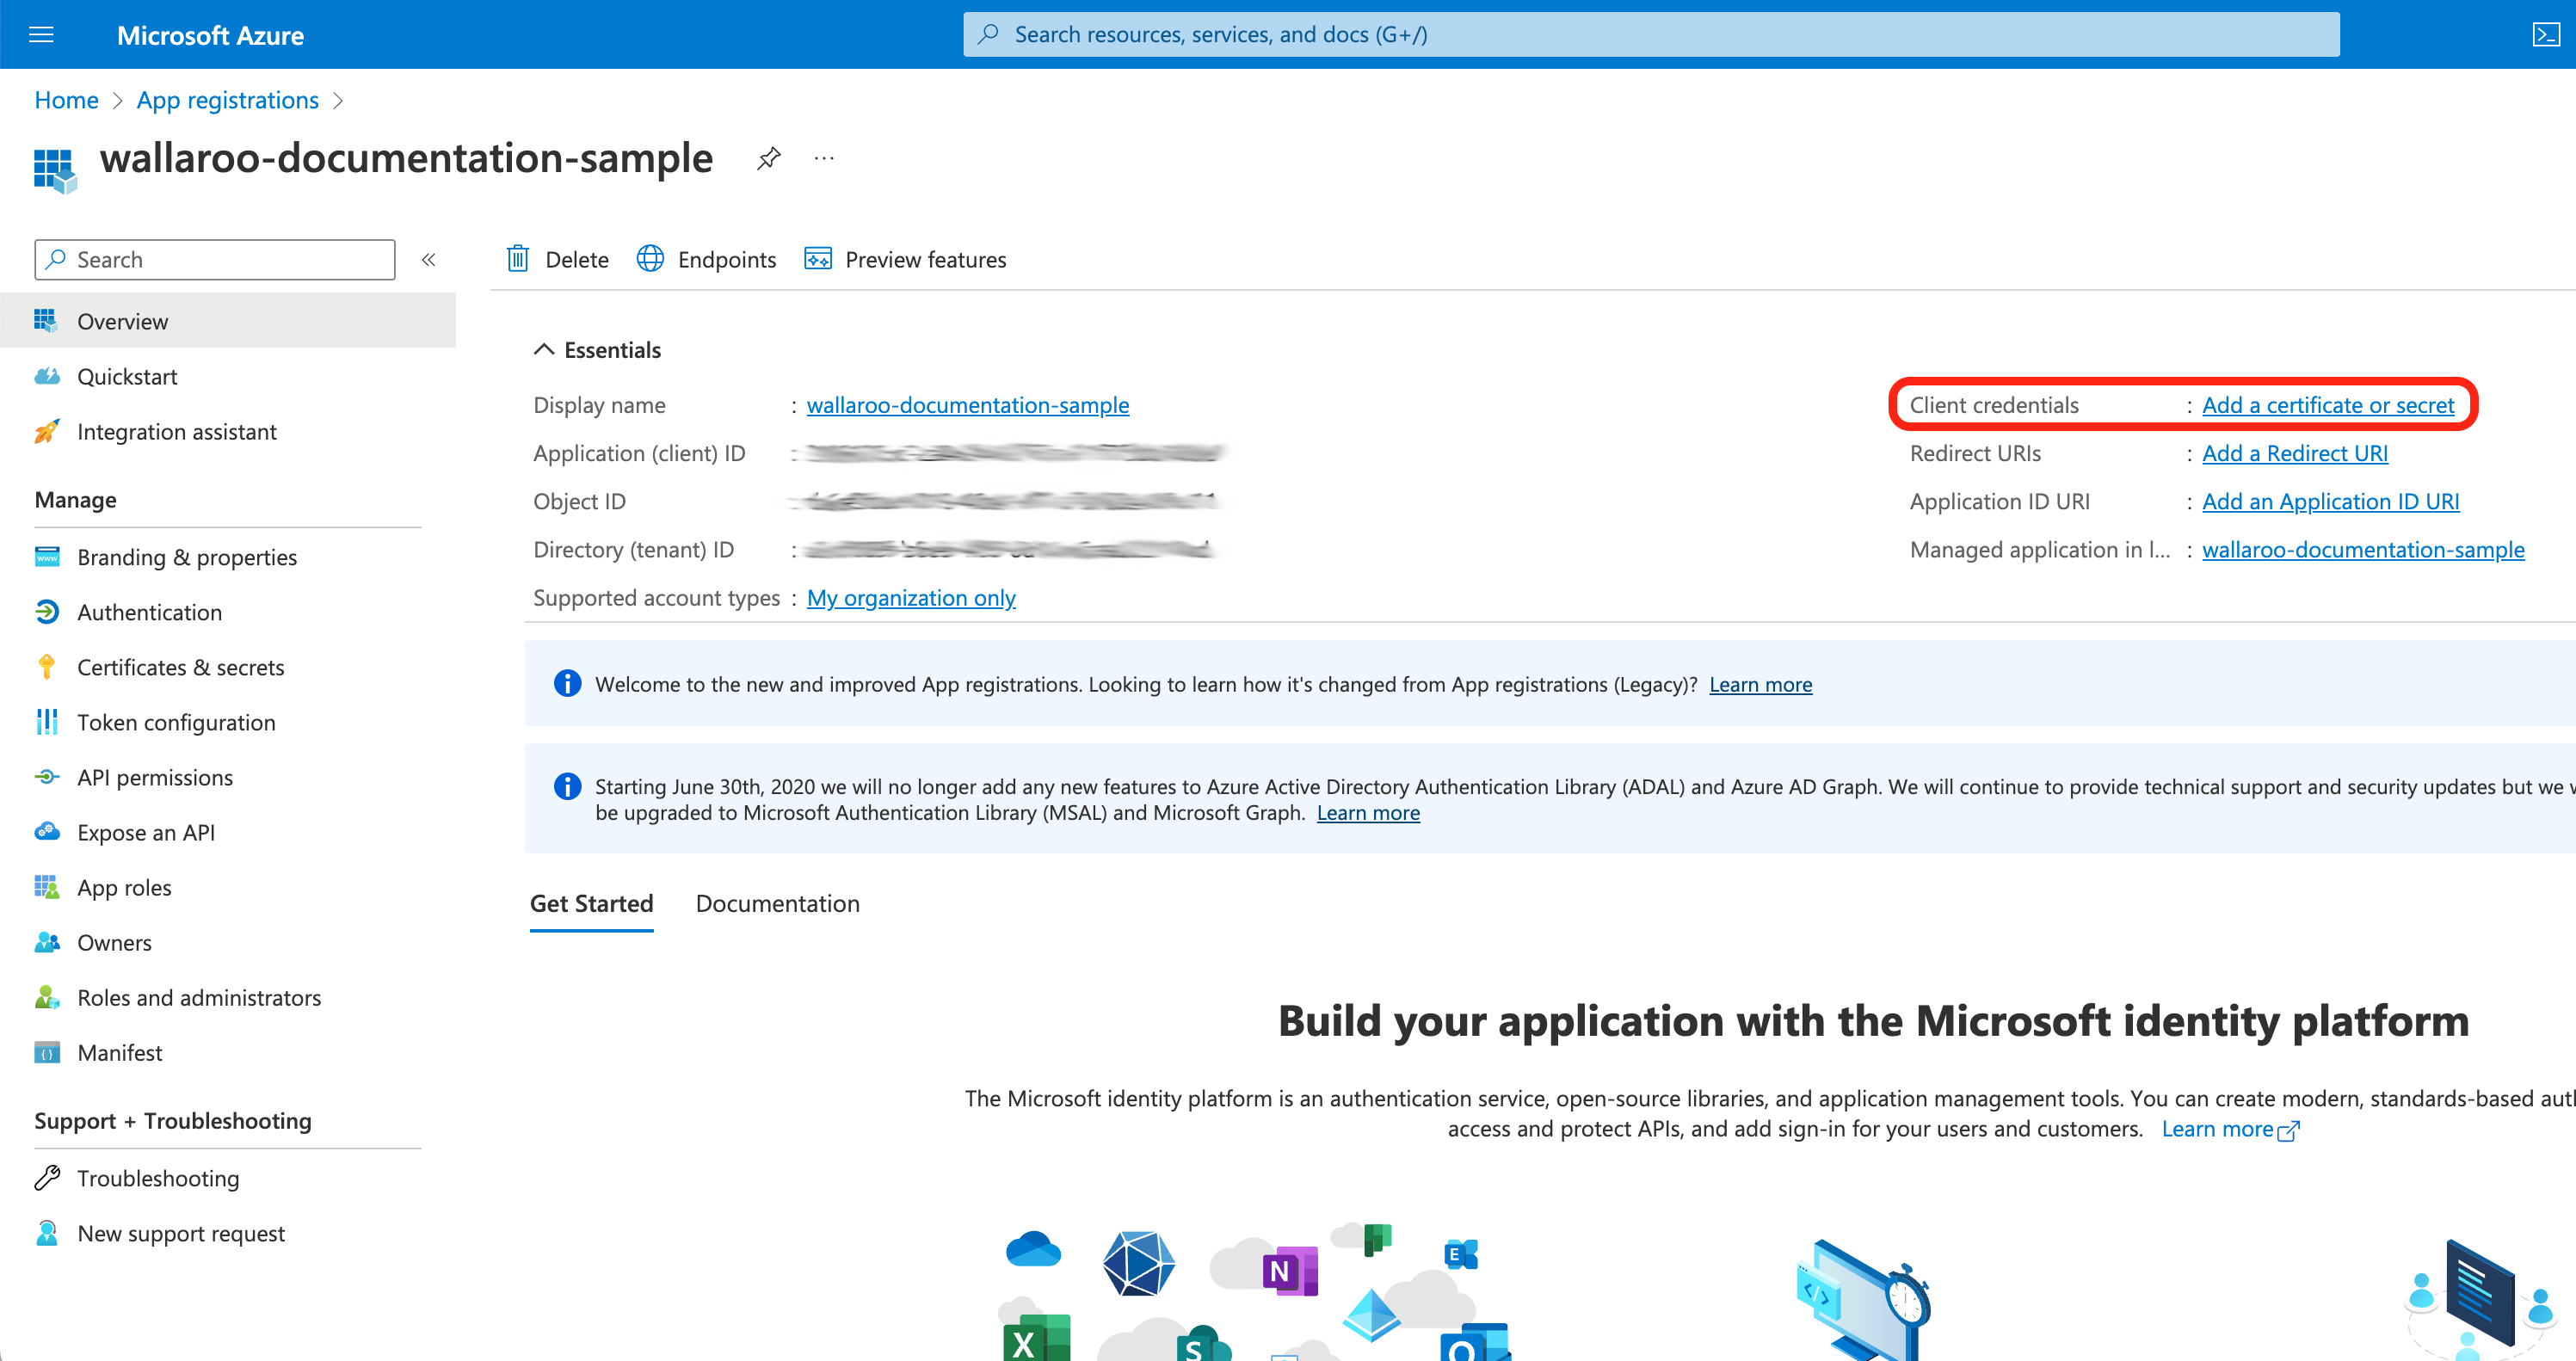
From the Overview screen, select Add a certificate or secret.
Select Client secrets, then +New client secret.
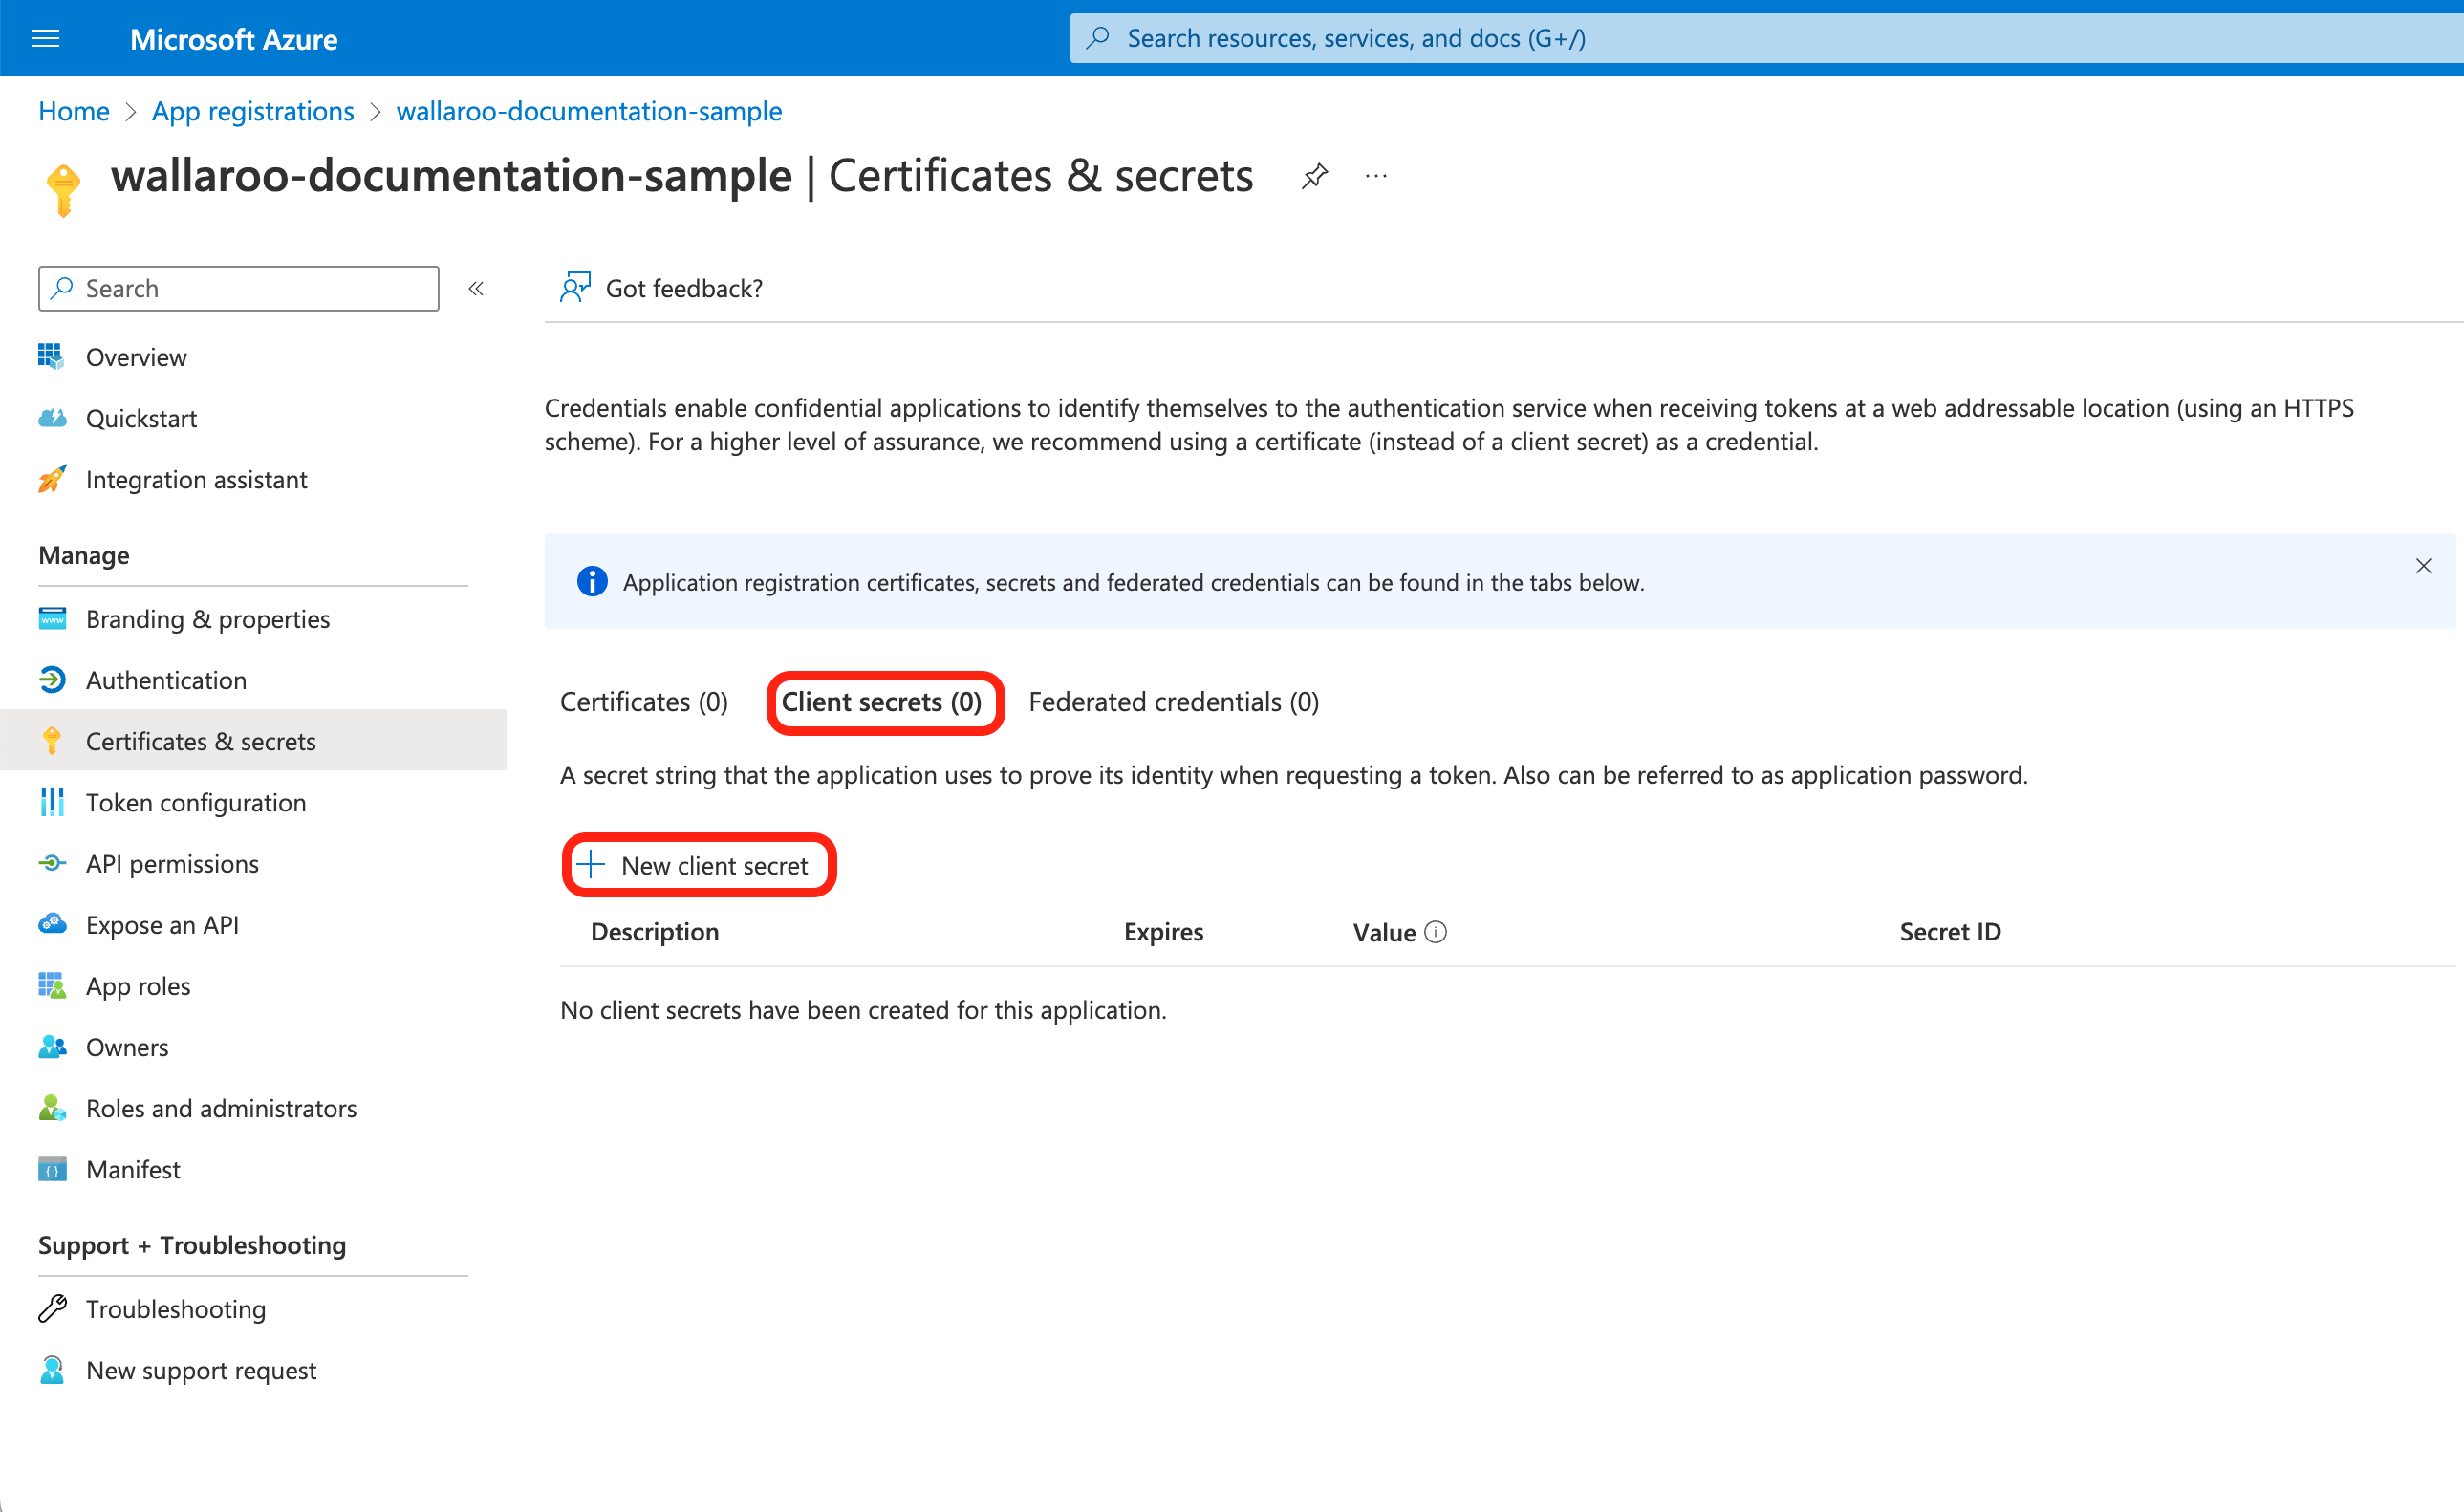
Set the following, then select Add.
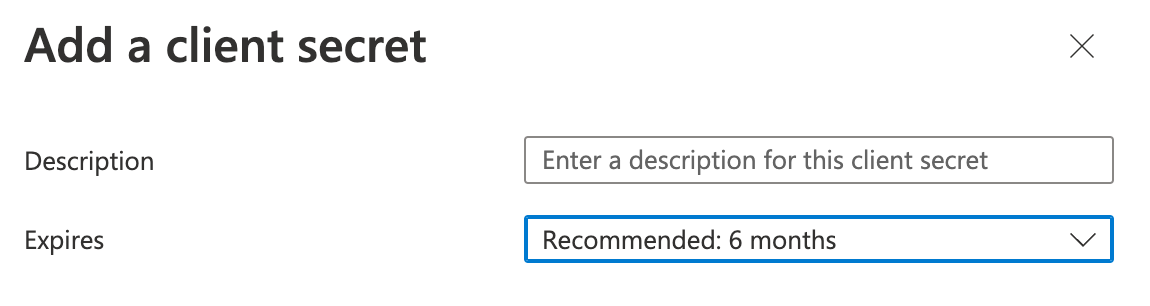
- Description: Set the description of the client secret.
- Expires: Set the expiration for the client secret. Defaults to 6 months from creation.
Store the following in a secure location:
- Client secret Value: This will be used in the Add Azure Credentials to Wallaroo step.
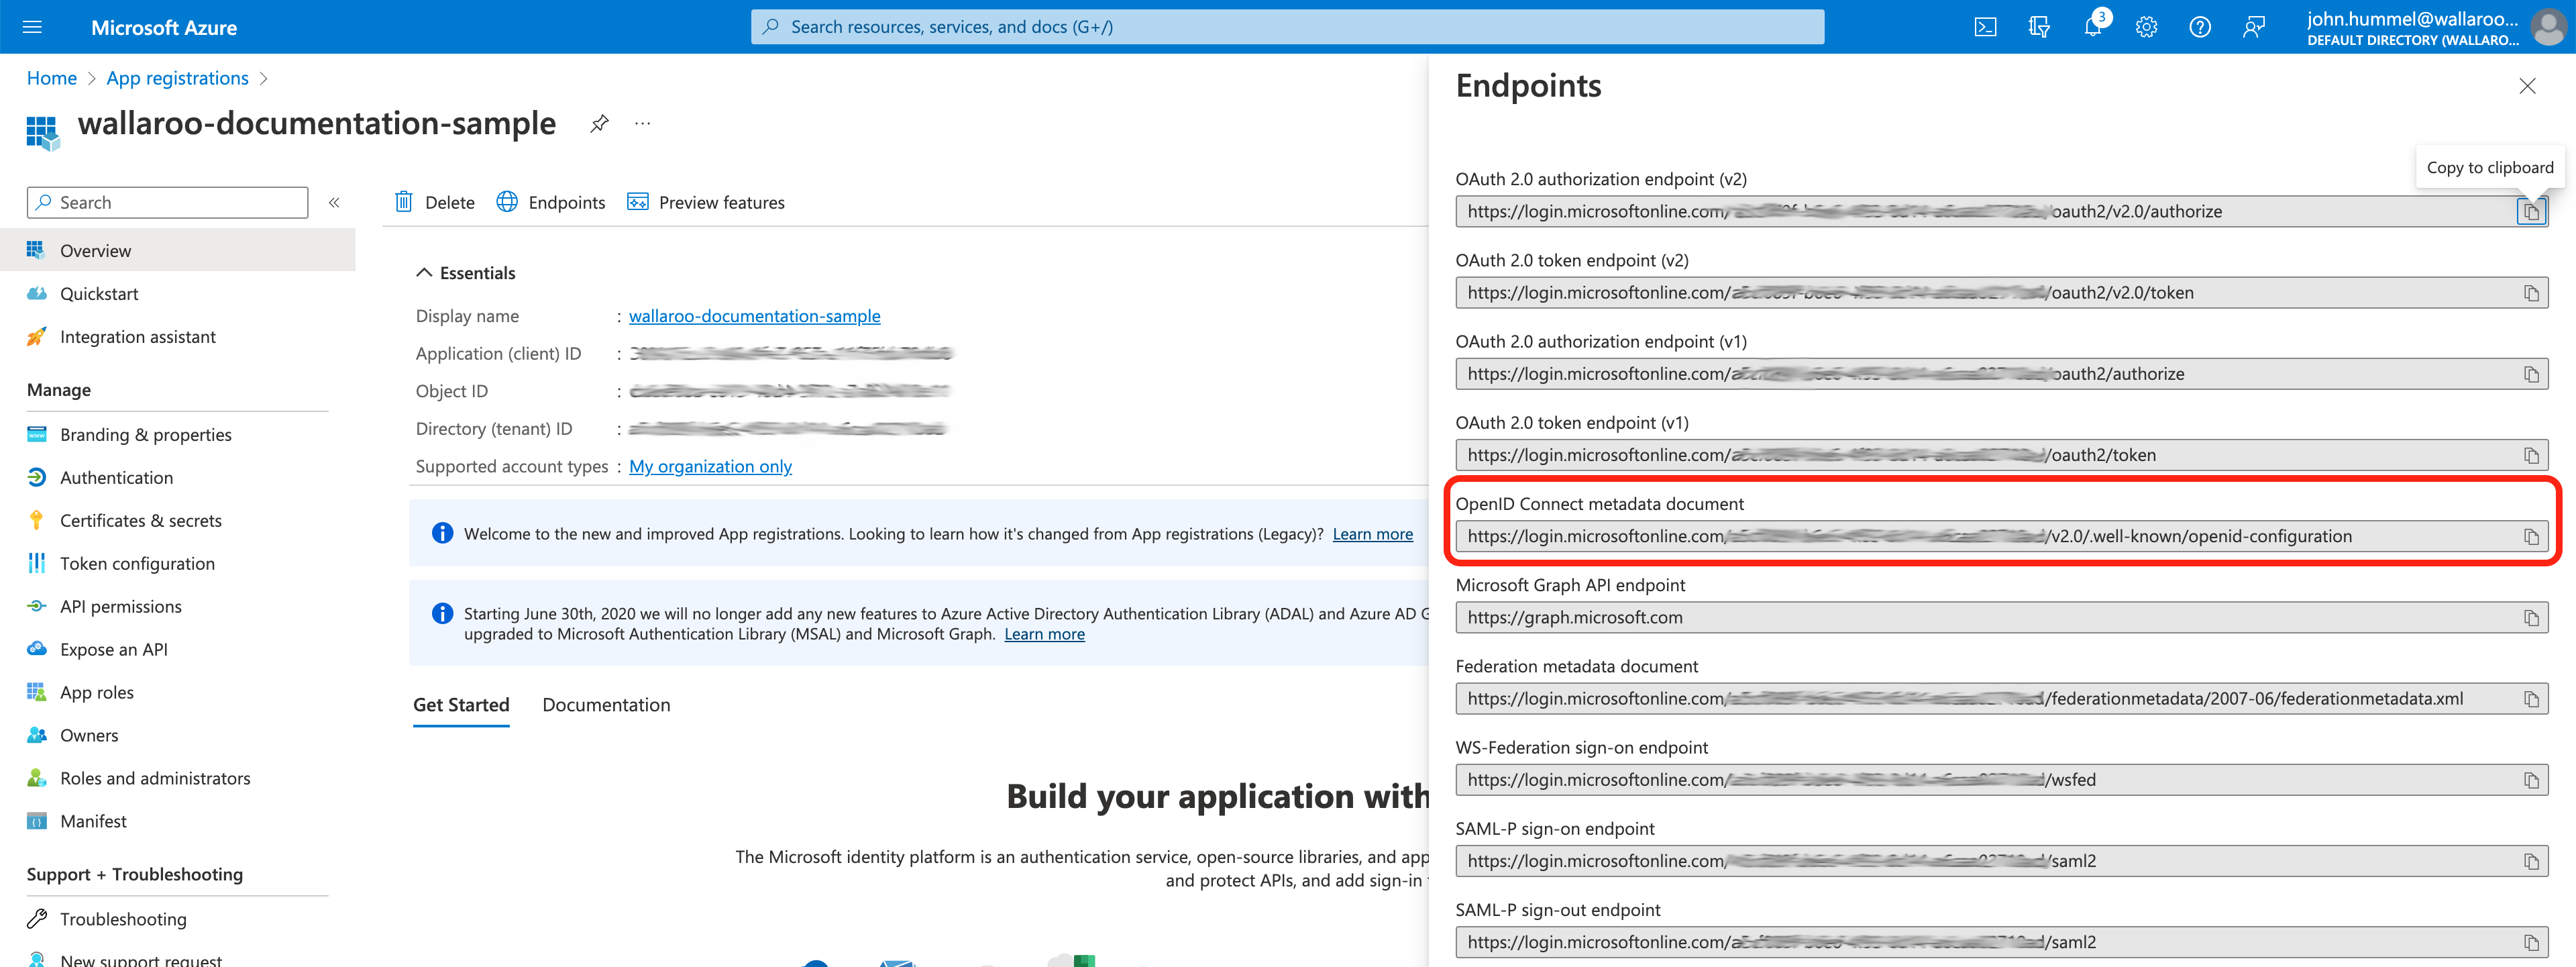
Store Metadata Document
From the left navigation panel, select Overview, then Endpoints.
- Store the following in a secure location:
OpenID Connect metadata document: This will be used in the Add Azure Credentials to Wallaroo step.
- Store the following in a secure location:
Add Azure Credentials to Wallaroo
With the Azure credentials saved from the Create the Azure Credentials step, they can now be added into the Wallaroo Keycloak service.
Login to the Wallaroo Keycloak service with a Wallaroo admin account from the URL in the format
https://$PREFIX.keycloak.$SUFFIX.For example, if the Wallaroo prefix is
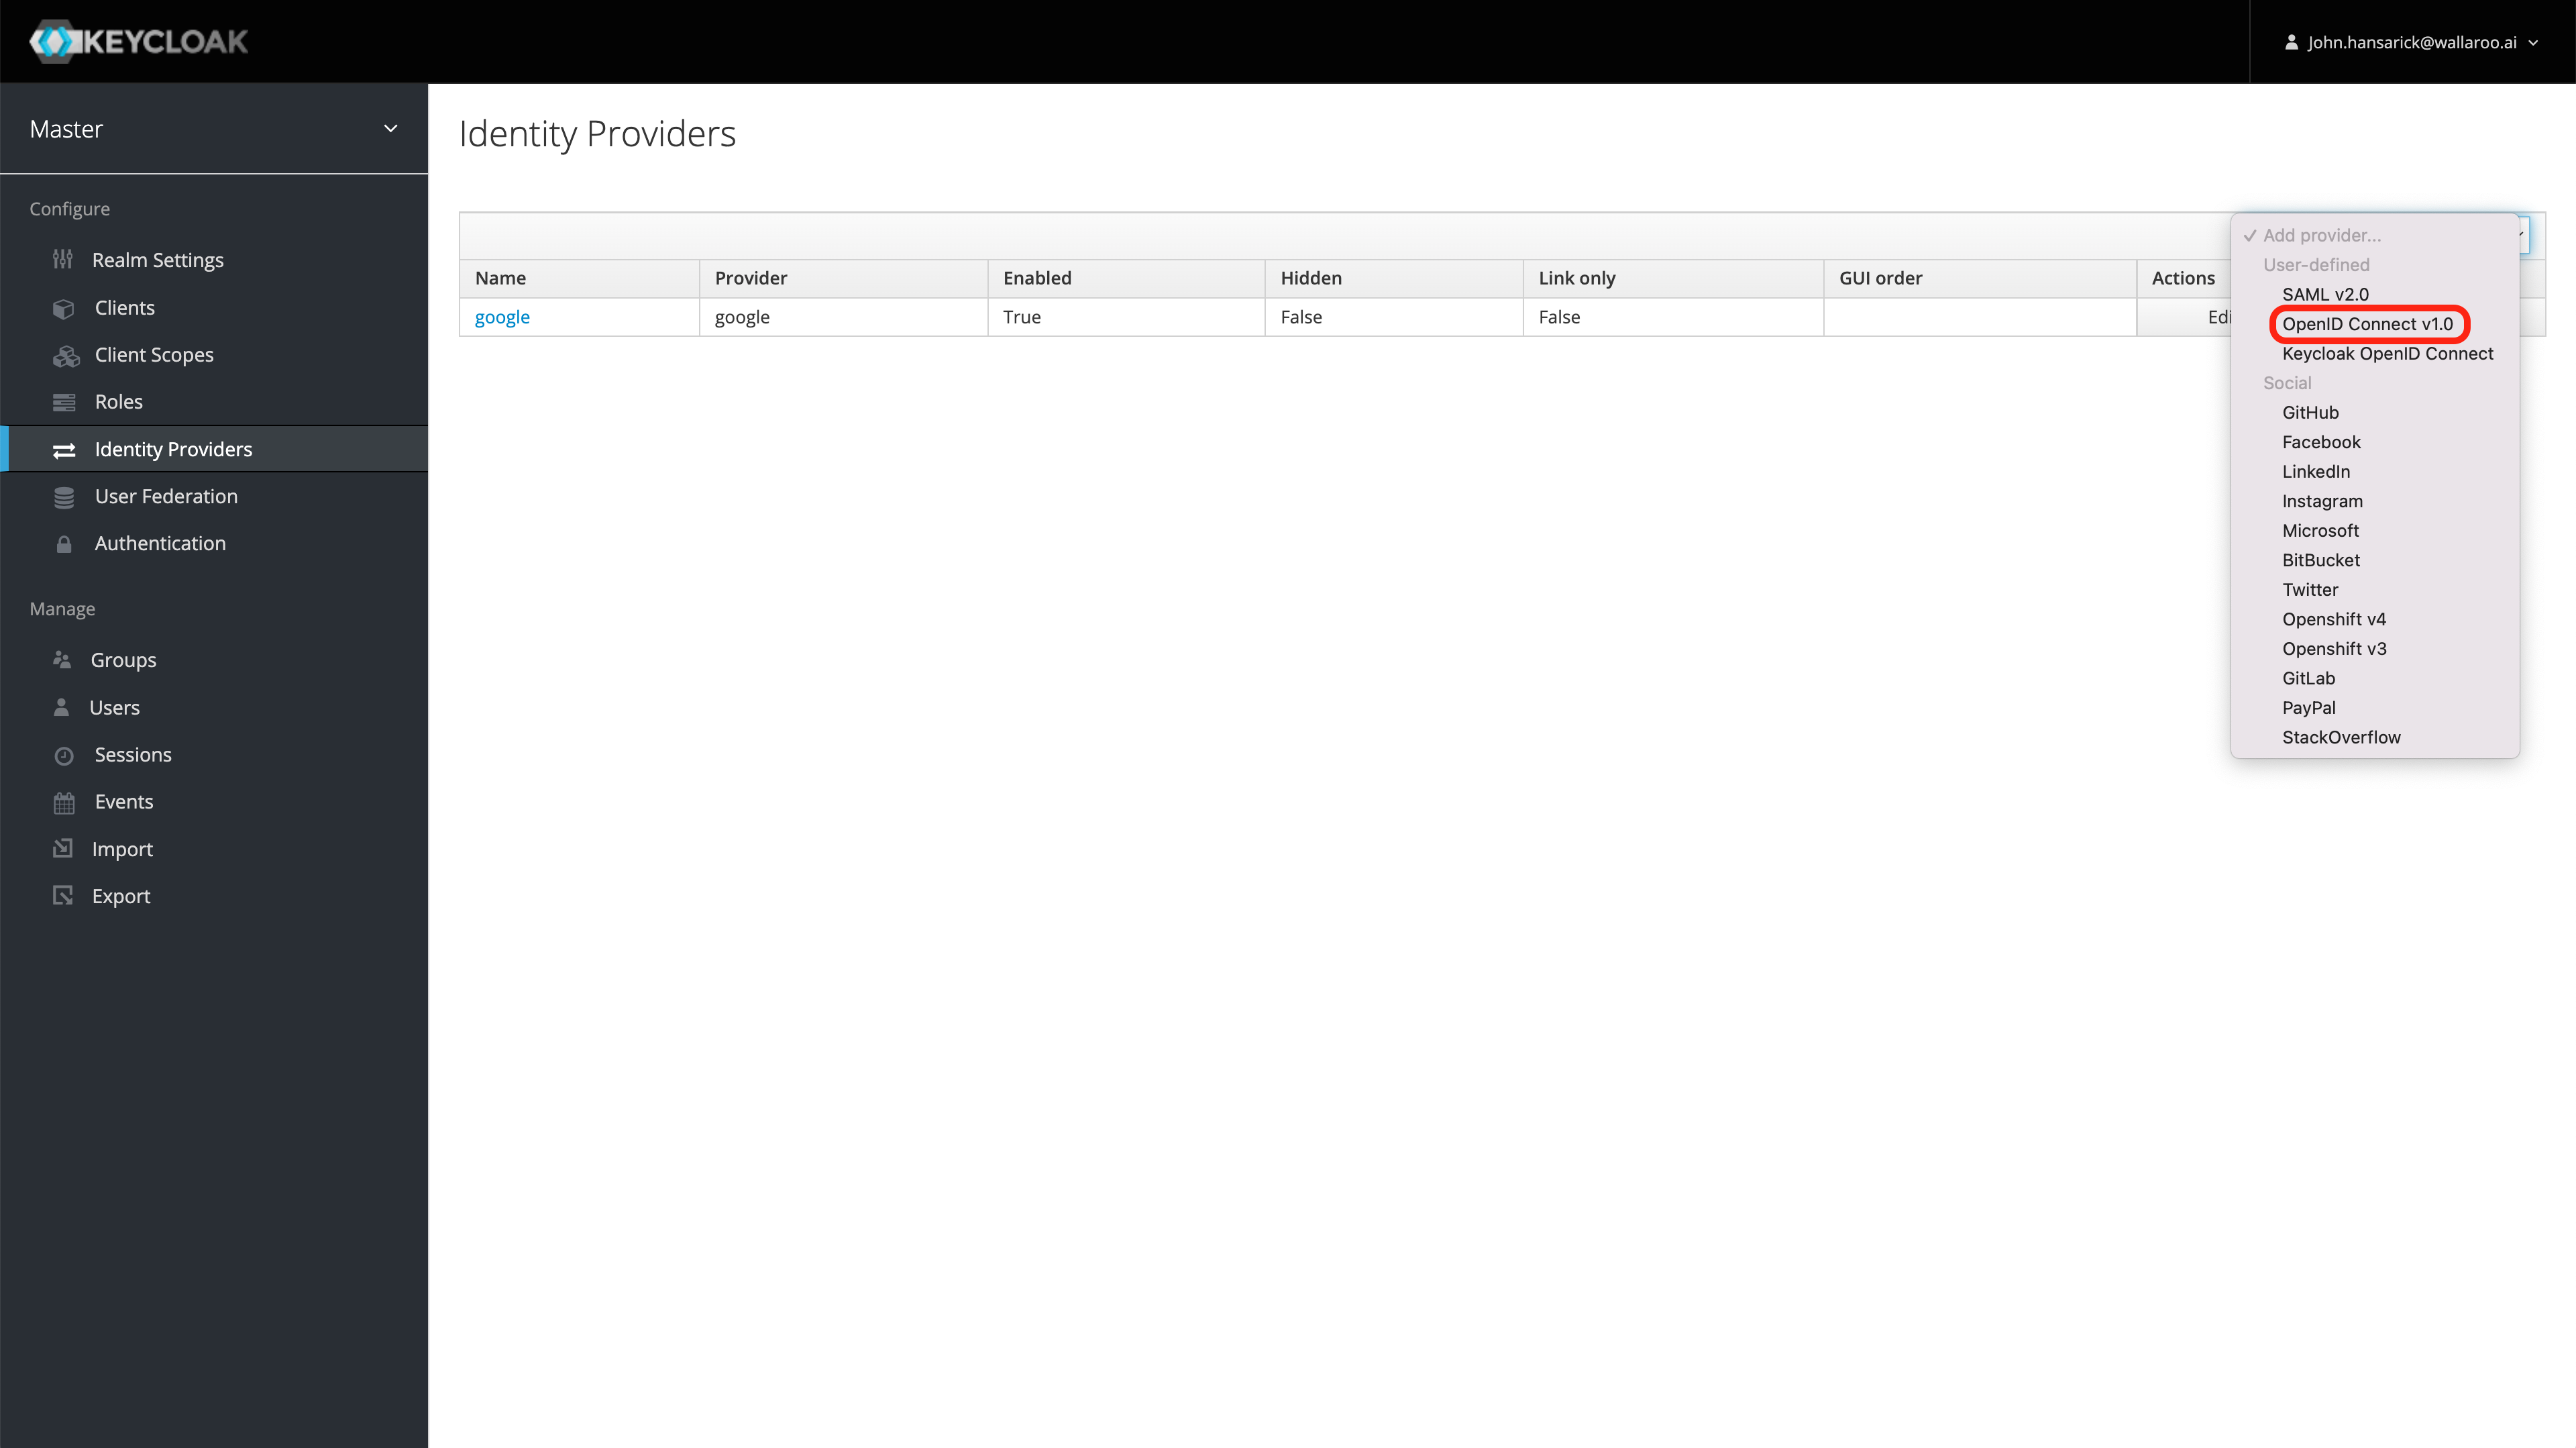
silky-lions-3657, the name of the Wallaroo Keycloak Identity Provider isazure, and the suffix iswallaroo.ai, then the Keycloak endpoint URL would besilky-lions-3657.keycloak.wallaroo.ai. For more information see the DNS Integration Guide.Select Administration Console, then from the left navigation panel select Identity Providers.
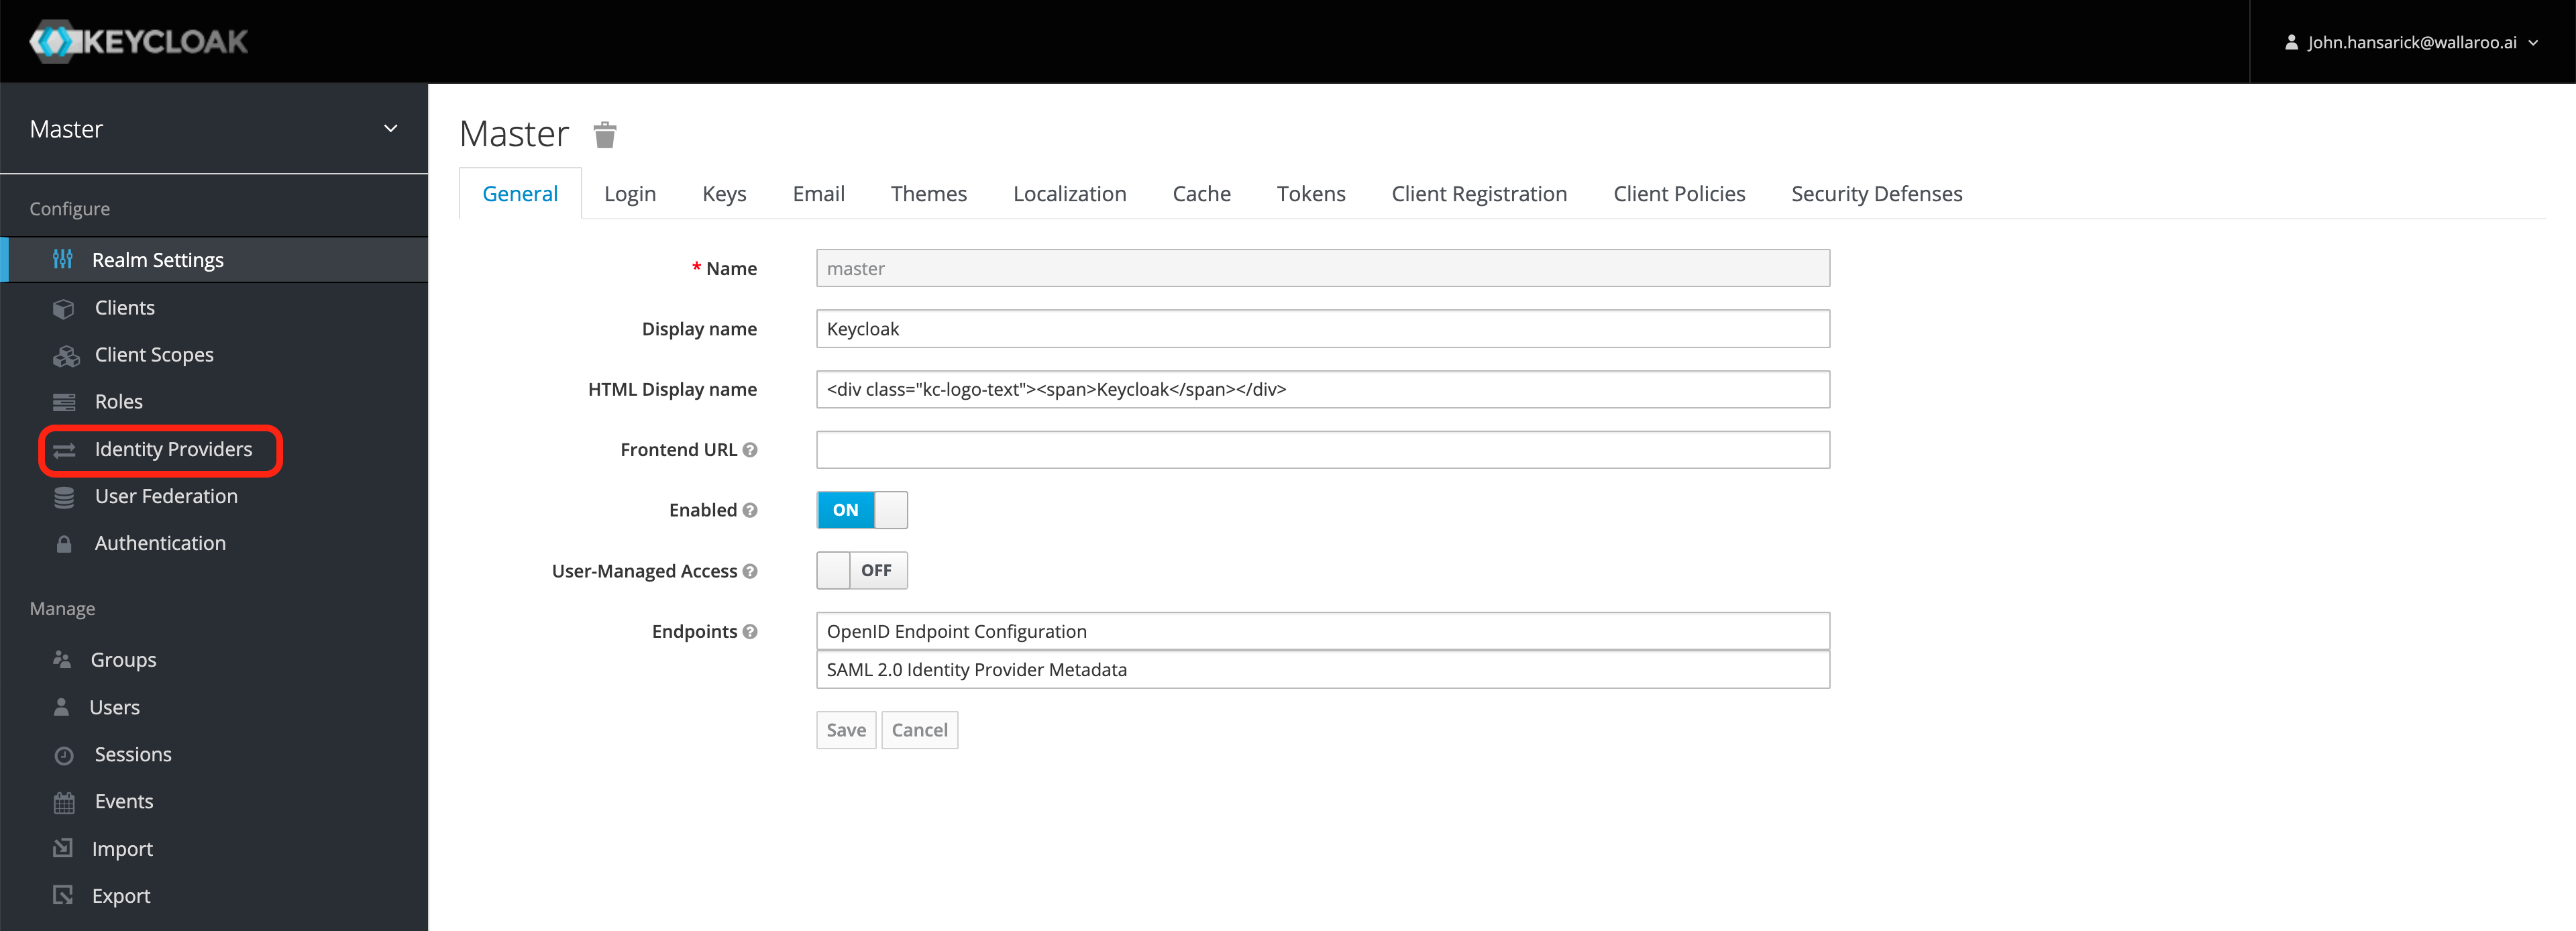
From the right Add provider… drop down menu select OpenID Connect v1.0.
From the Add identity provider screen, add the following:
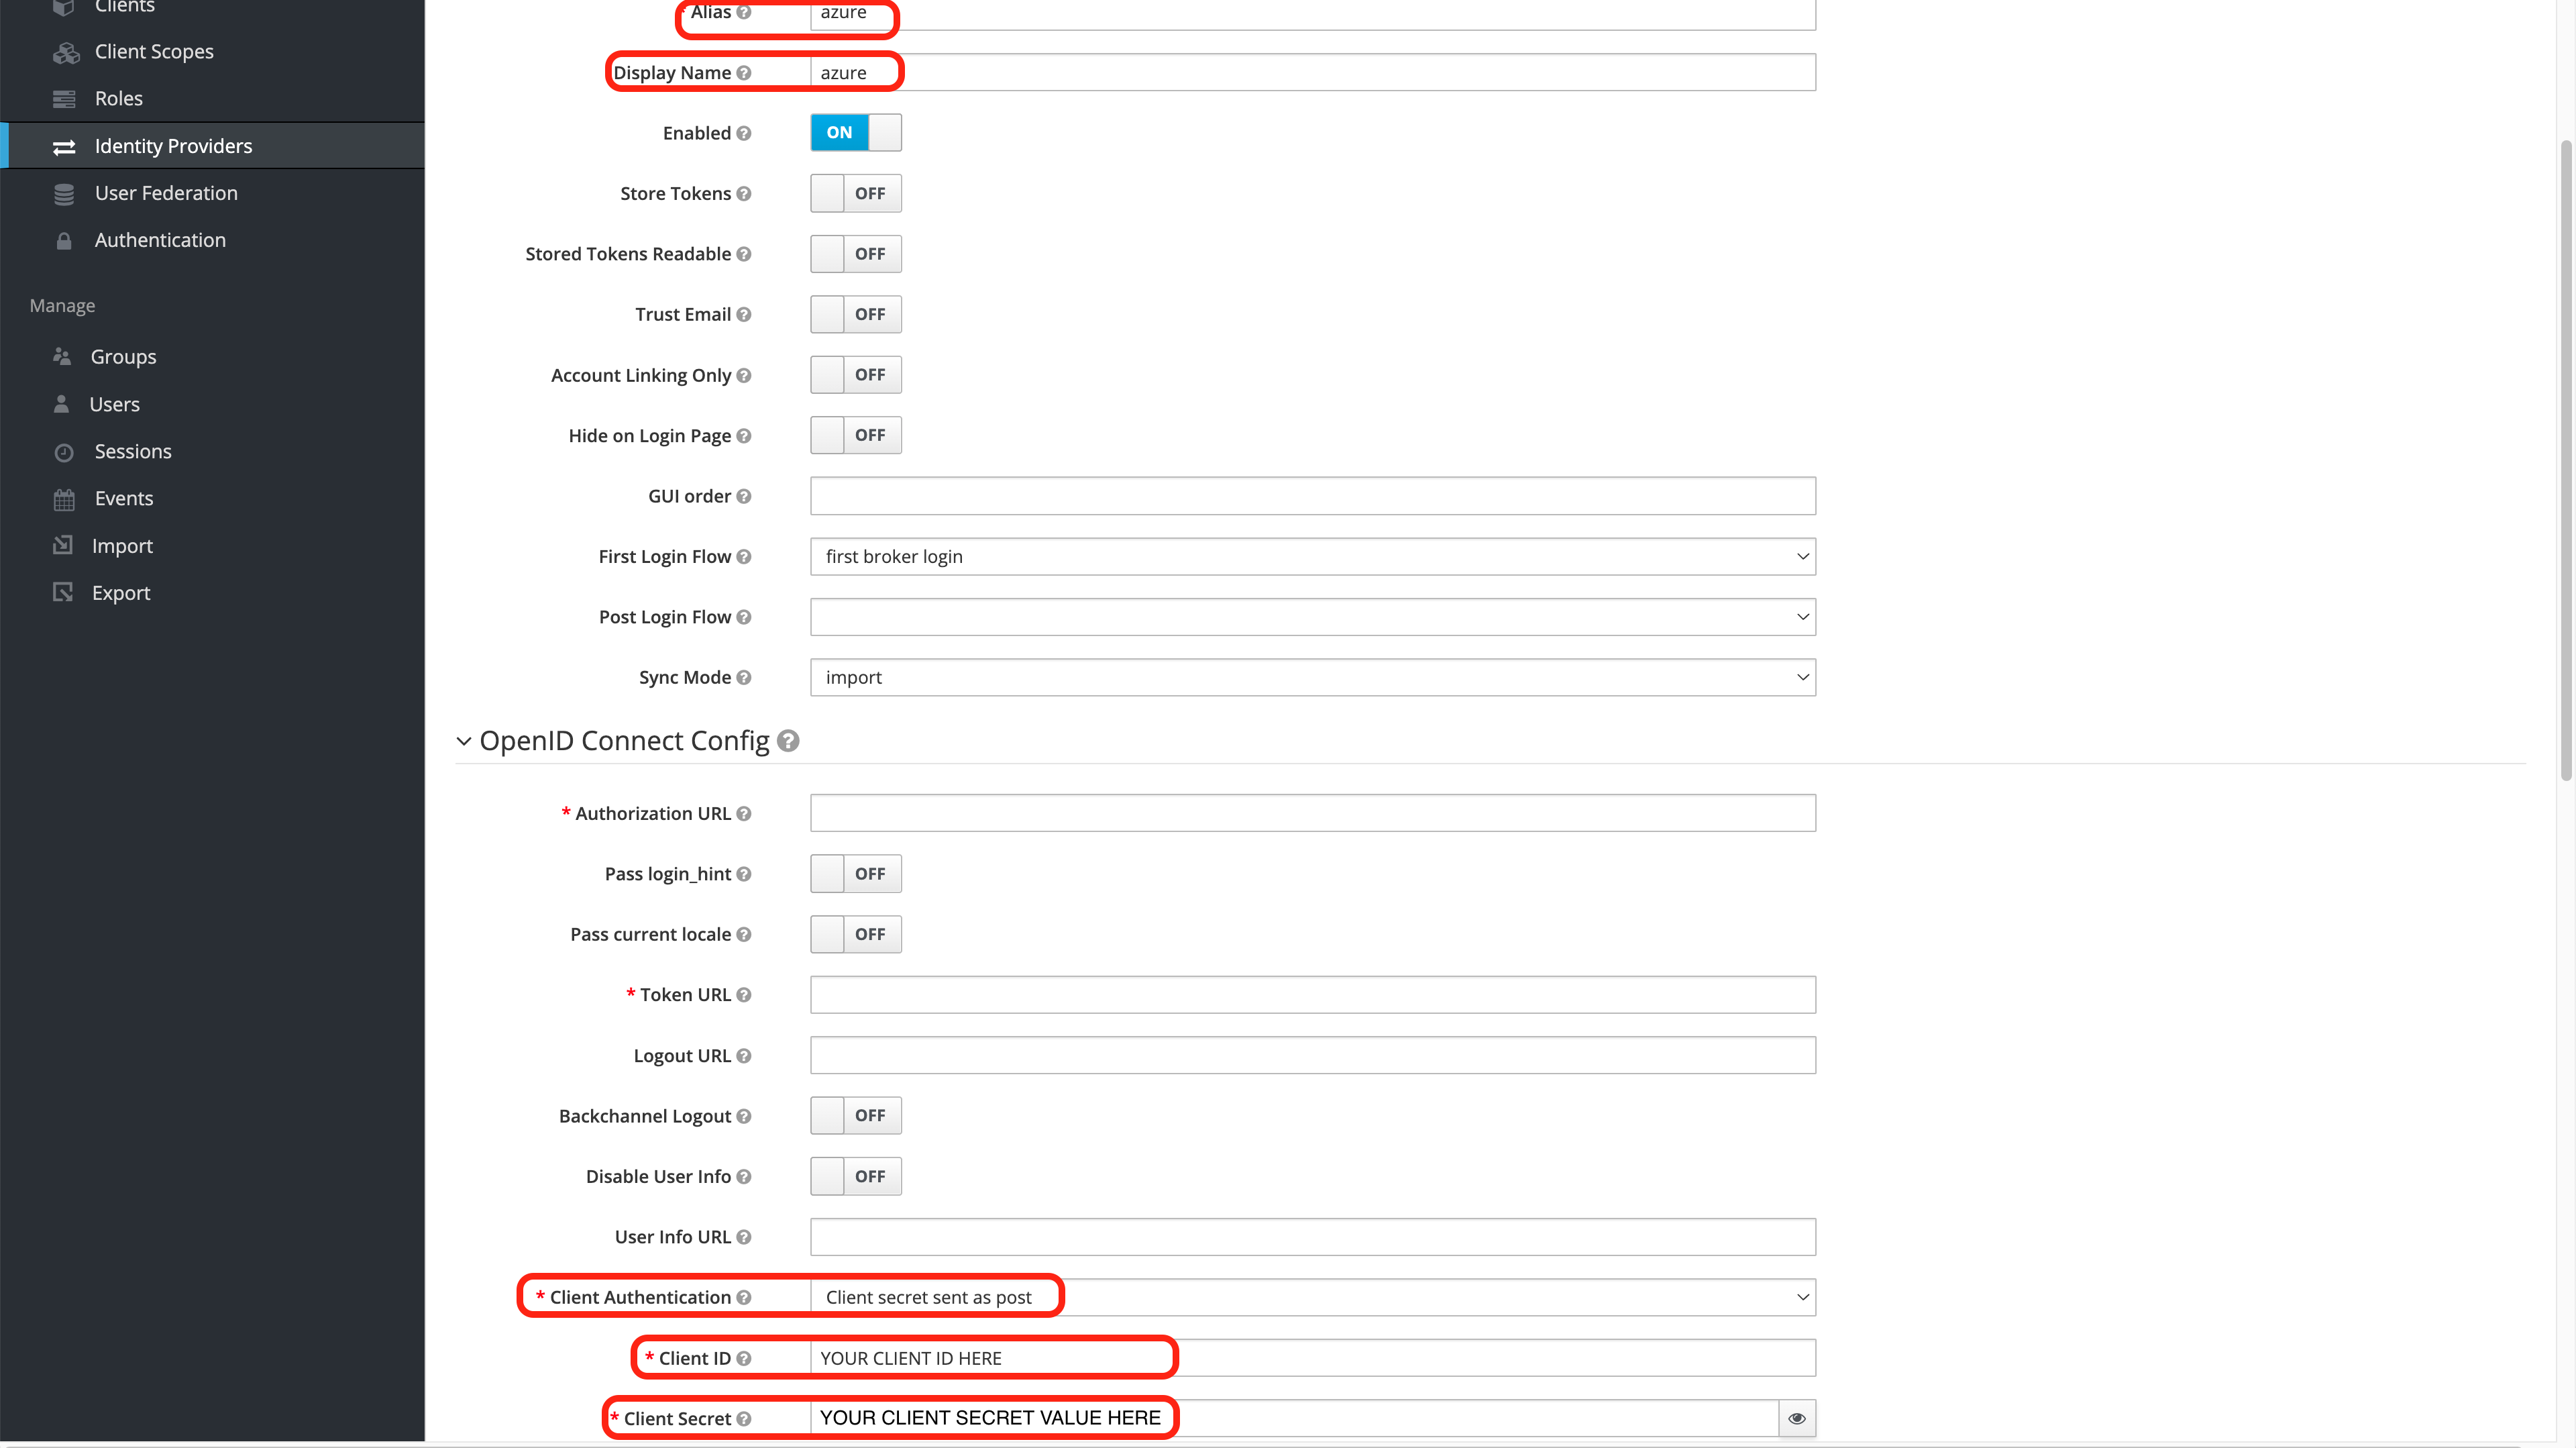
- alias: The name of the the Identity Provider. IMPORTANT NOTE: This will determine the Redirect URI value that is used in the Create the Azure Credentials step. Verify that the Redirect URI in both steps are the same.
- Display Name: The name that will be shown on the Wallaroo instance login screen.
- Client Authentication: Set to Client secret sent as post.
- Client Authentication: Set with the Application (client) ID created in the Create the Azure Credentials step.
- Client Secret: Set with the Client secret Value created in the Create the Azure Credentials step.
- Default Scopes: Set to
openid email profile- one space between each word. - Scroll to the bottom of the page and in Import from URL, add the OpenID Connect metadata document created in the Create the Azure Credentials step. Select Import to set the Identity Provider settings.
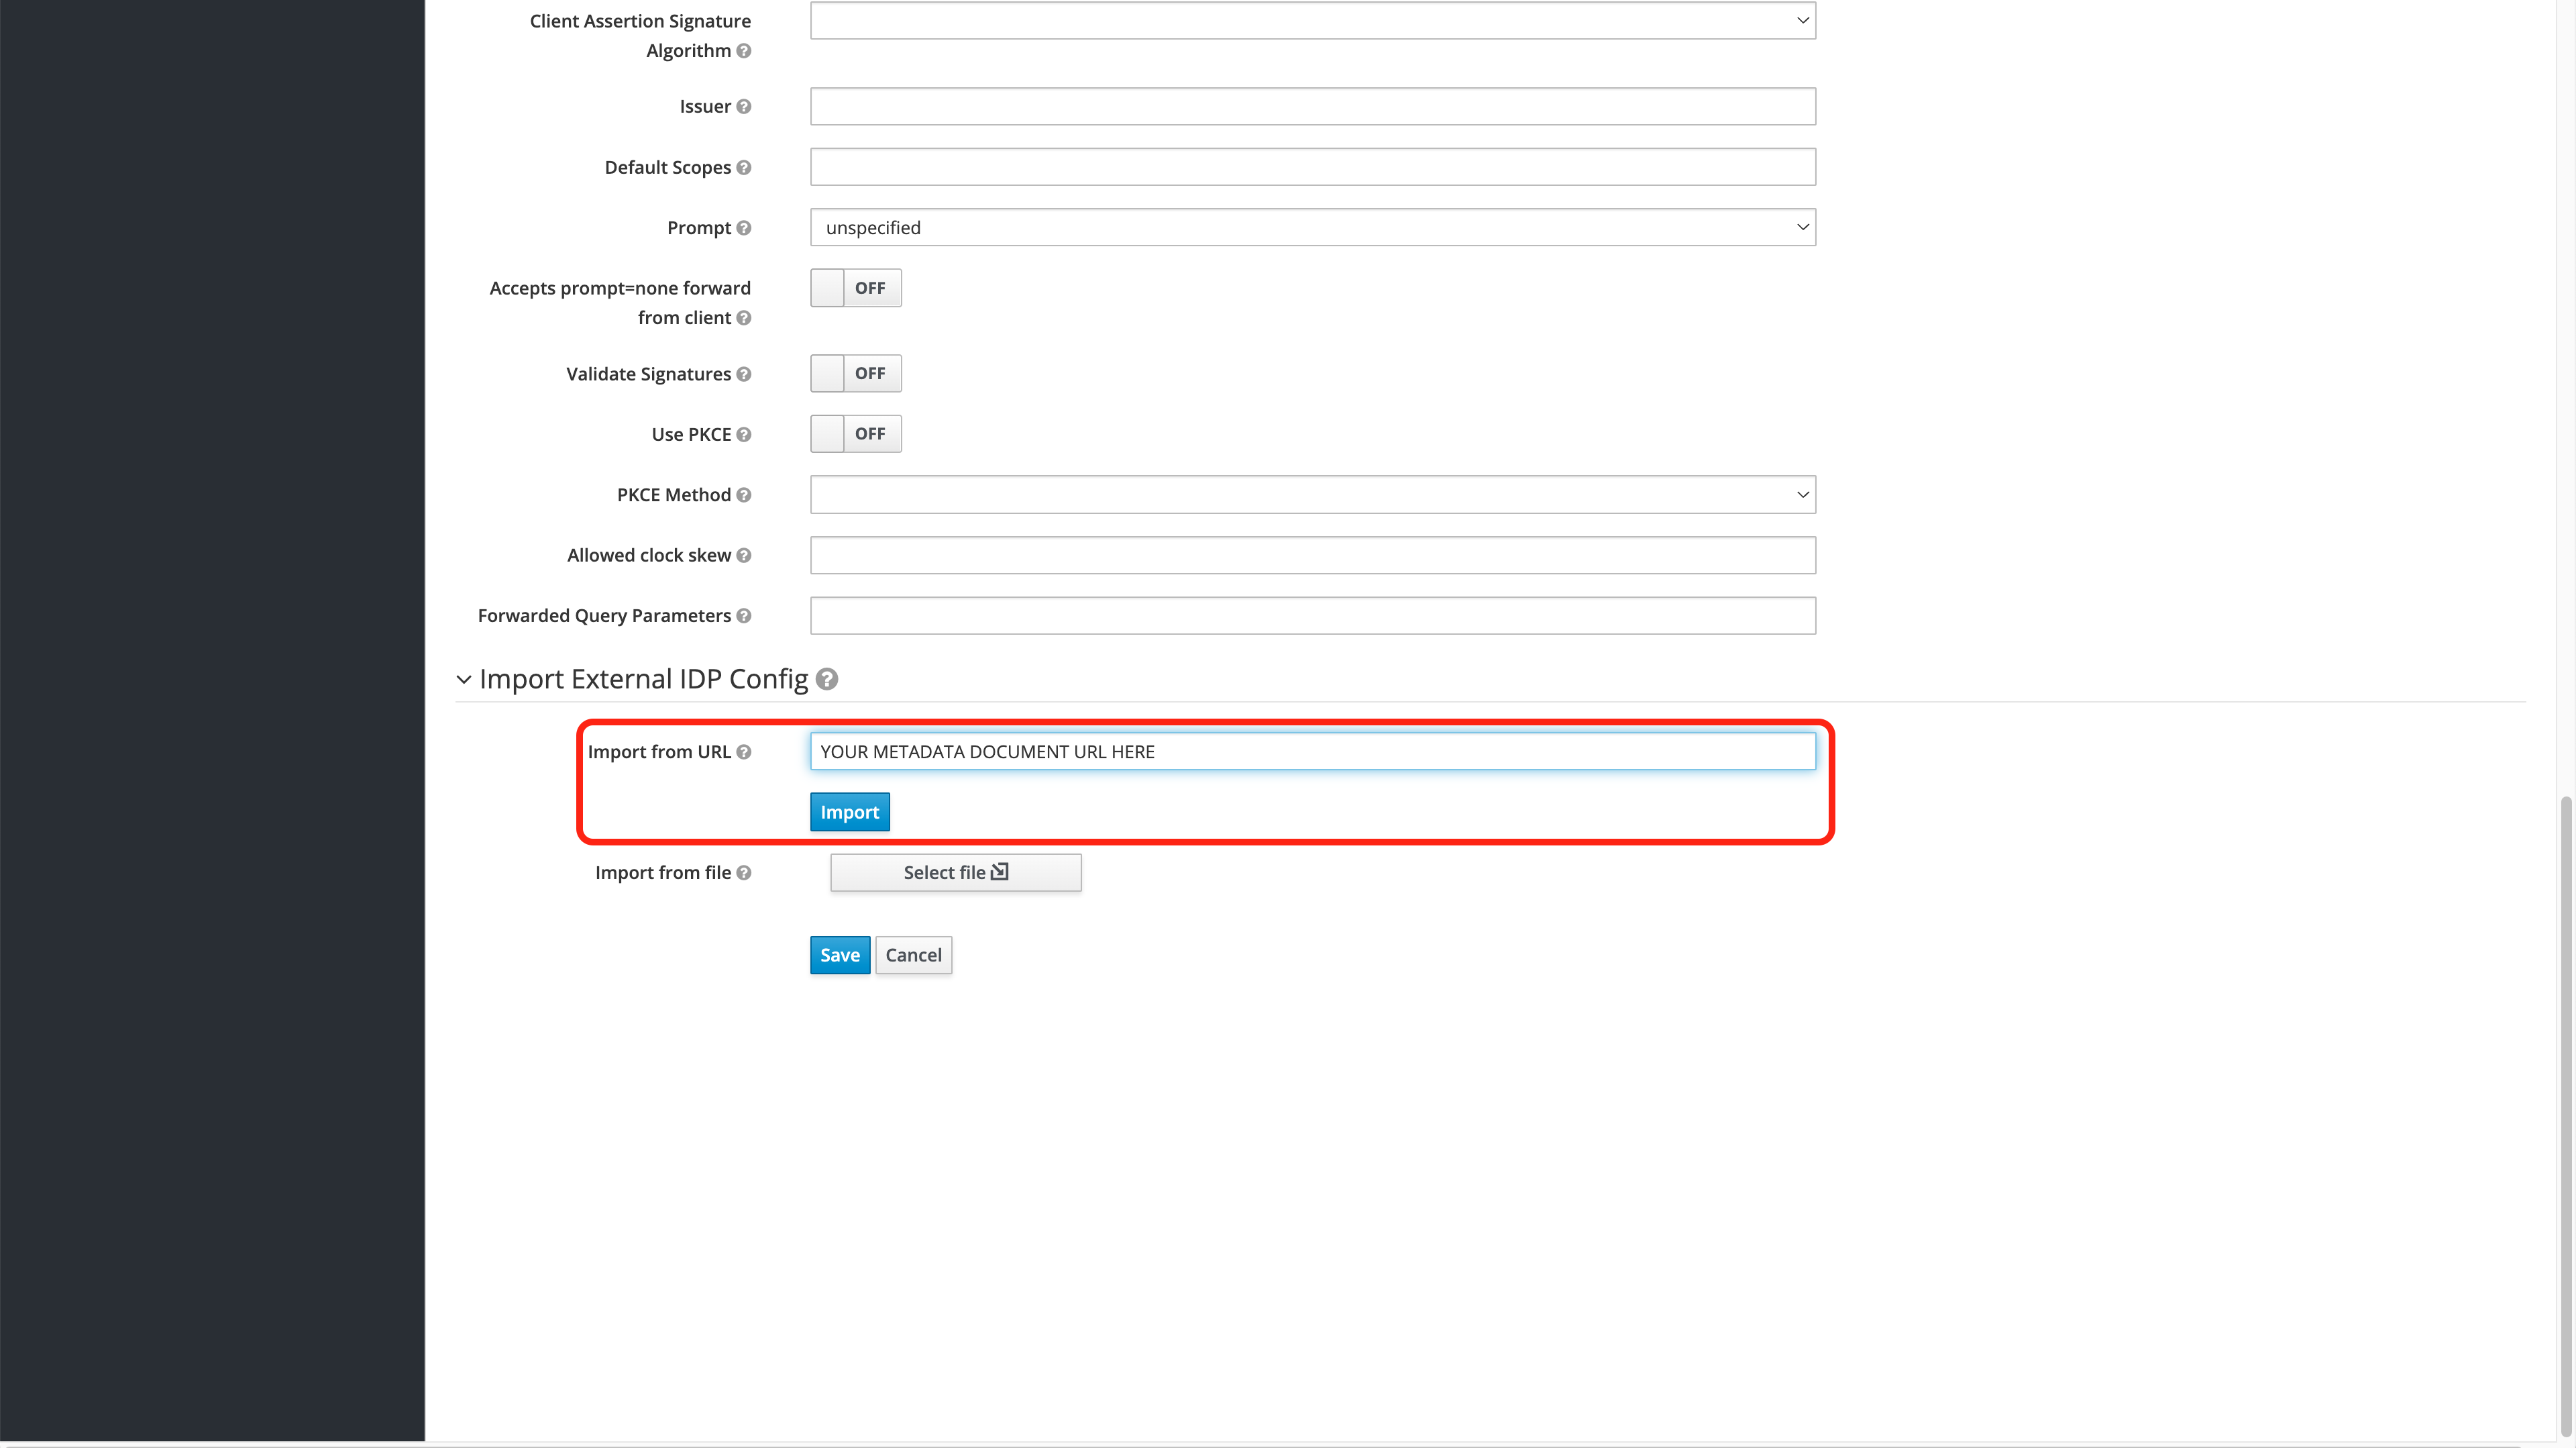
Once complete, select Save to store the identity provider settings.
Once the Azure Identity Provider settings are complete, log out of the Keycloak service.
Verify the Login
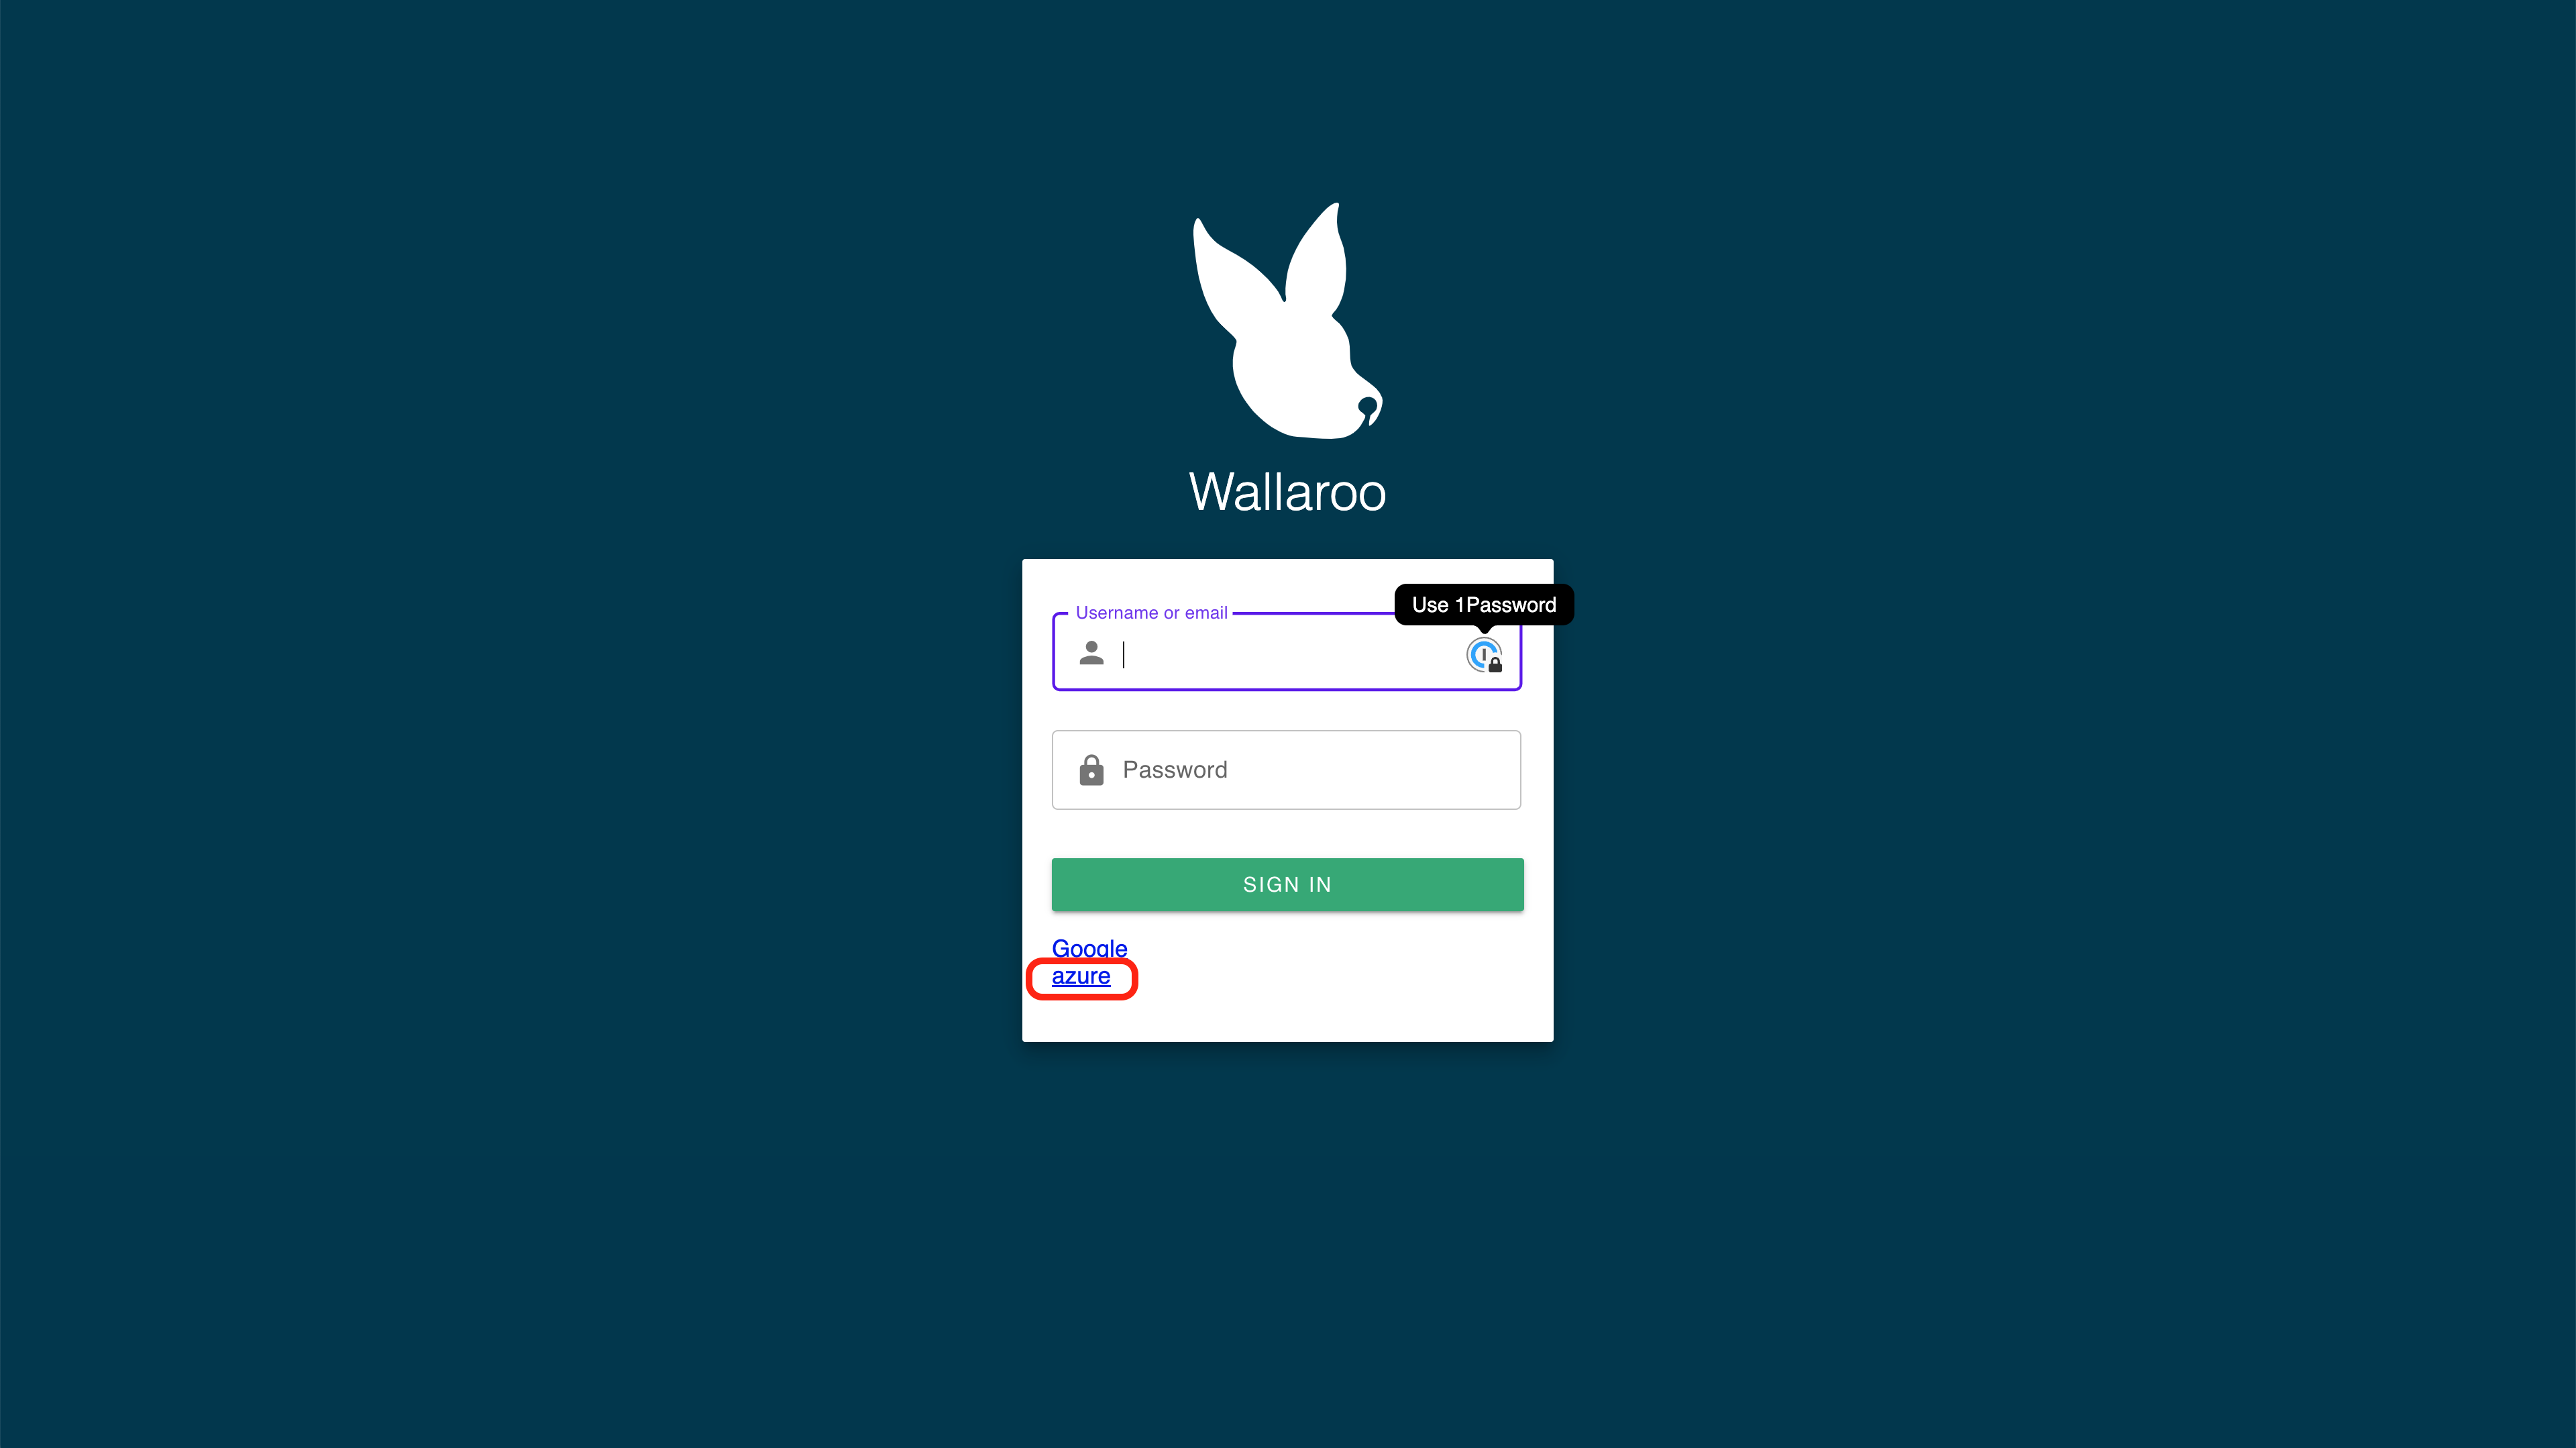
After completing Add Azure Credentials to Wallaroo, the login can be verified through the following steps. This process will need to be completed the first time a user logs into the Wallaroo instance after the Azure Identity Provider settings are added.
Go to the Wallaroo instance login page. The Azure Identity Provider will be displayed under the username and password request based on the Displey Name set in the Add Azure Credentials to Wallaroo step.
Select the Azure Identity Provider to login.
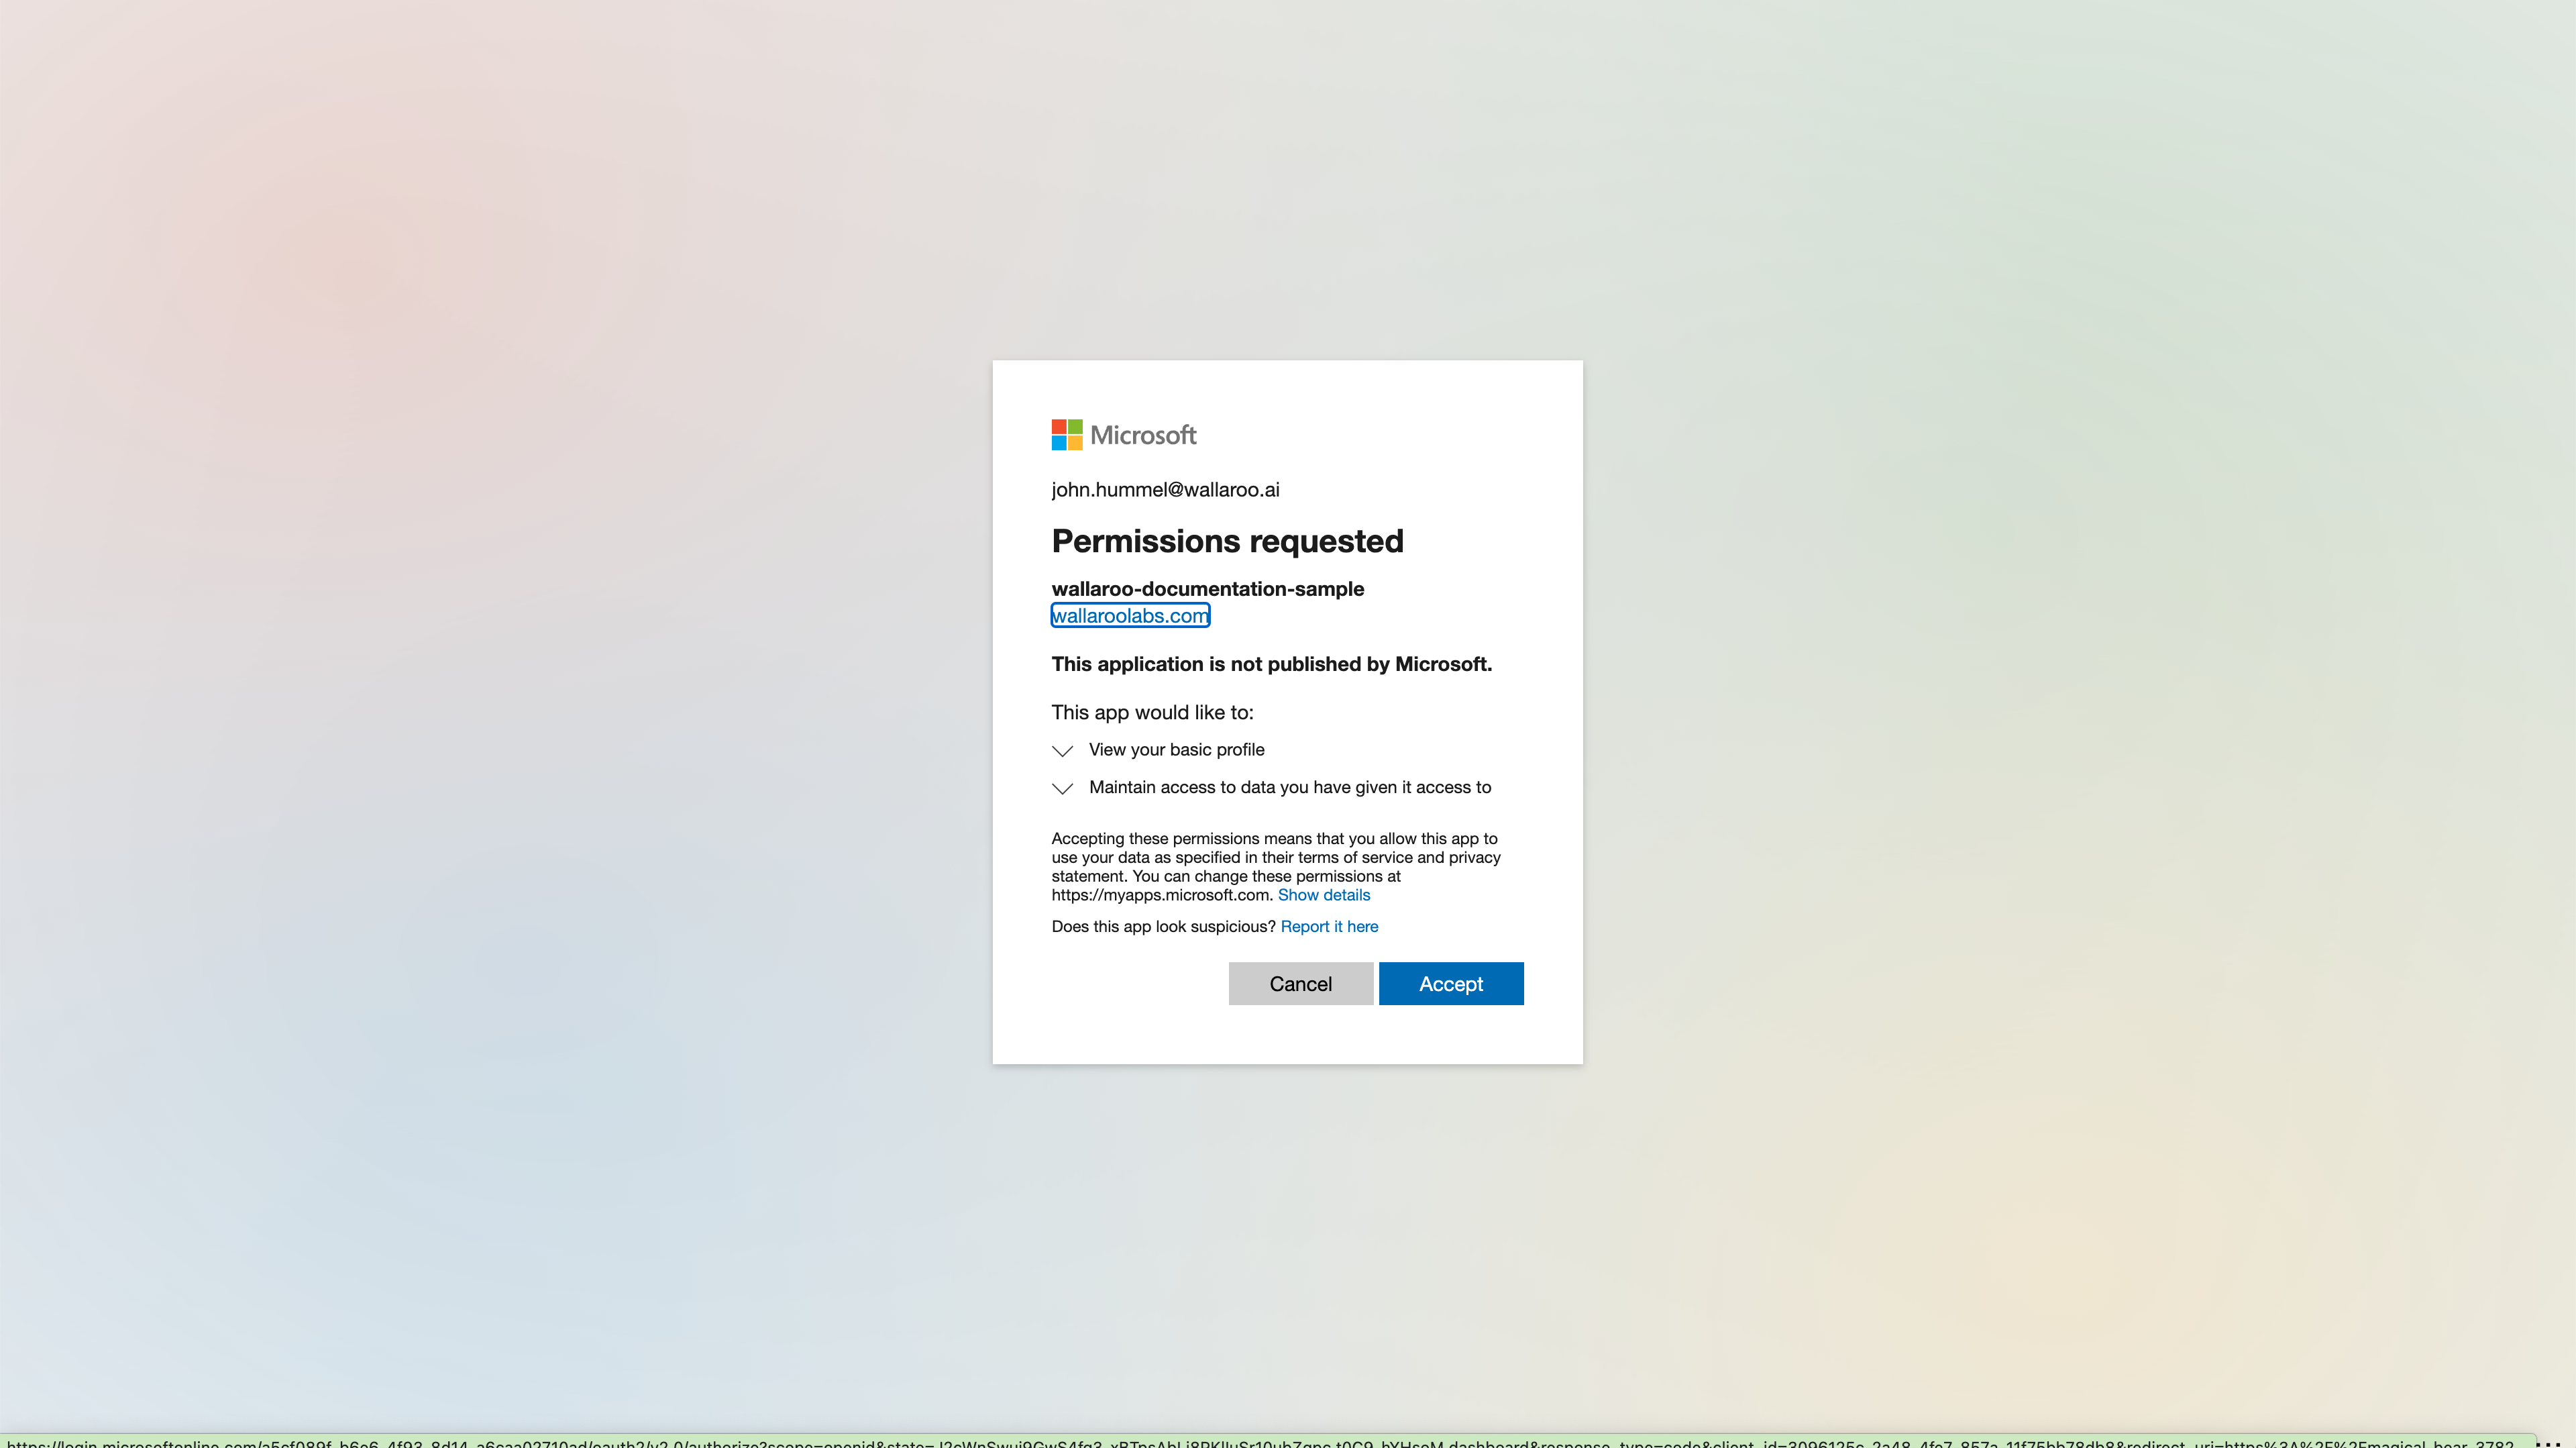
For the first login, grant permission to the application. You may be required to select which Microsoft Azure account is being used to authenticate.
Once complete, the new user will be added to the Wallaroo instance.