Wallaroo General Guide
Table of Contents
The Wallaroo General Guide details how to perform the most common tasks in Wallaroo.
Install Wallaroo
For devops or system administrators who will be installing Wallaroo, see the following guides:
- Wallaroo Install Guides: How to prepare your environment for Wallaroo and install Wallaroo into your Kubernetes cloud environment, along with tips on other local software requirements.
How to Login The First Time to Wallaroo Community
Before logging into to Wallaroo for the first time, you’ll have received an email inviting you to your new Wallaroo instance and a temporary email to use.
To login to Wallaroo Community for the first time:
- The Wallaroo Invitation email will contain:
- Your temporary password.
- A link to your Wallaroo instance.
- Select the link to your Wallaroo instance.
- Select Sign In.
- Login using your email address and the temporary password from the Invitation email.
- Once you have successfully authenticated, you will be prompted to create your own password.
- When finished, you will be able to login to your Wallaroo instance in the future using your registered email address and new password.
How to Login the First Time to Wallaroo Enterprise
Wallaroo Enterprise users are created either as local users, or through other authentication services such as GitHub or Google Cloud Platform. For more information, see the Wallaroo Enterprise User Management Guide. Local users will be provided a temporary password by their devops team.
To log into Wallaroo Enterprise for the first time as a local user:
- Access the Wallaroo Dashboard provided by your devops team.
- Select Sign In.
- Login using your email address and the temporary password provided by your devops team.
- Once you have successfully authenticated, you will be prompted to create your own password.
- When finished, you will be able to login to your Wallaroo instance in the future using your registered email address and new password.
How to Login to Your Wallaroo Instance
To login to your Wallaroo instance with an existing username and password:
- From your browser, enter the URL for your Wallaroo instance. This is provided either during the installation process or when you are invited to a Wallaroo environment.
- Select Sign In.
- Enter your username and password.
Exploring the Wallaroo Dashboard
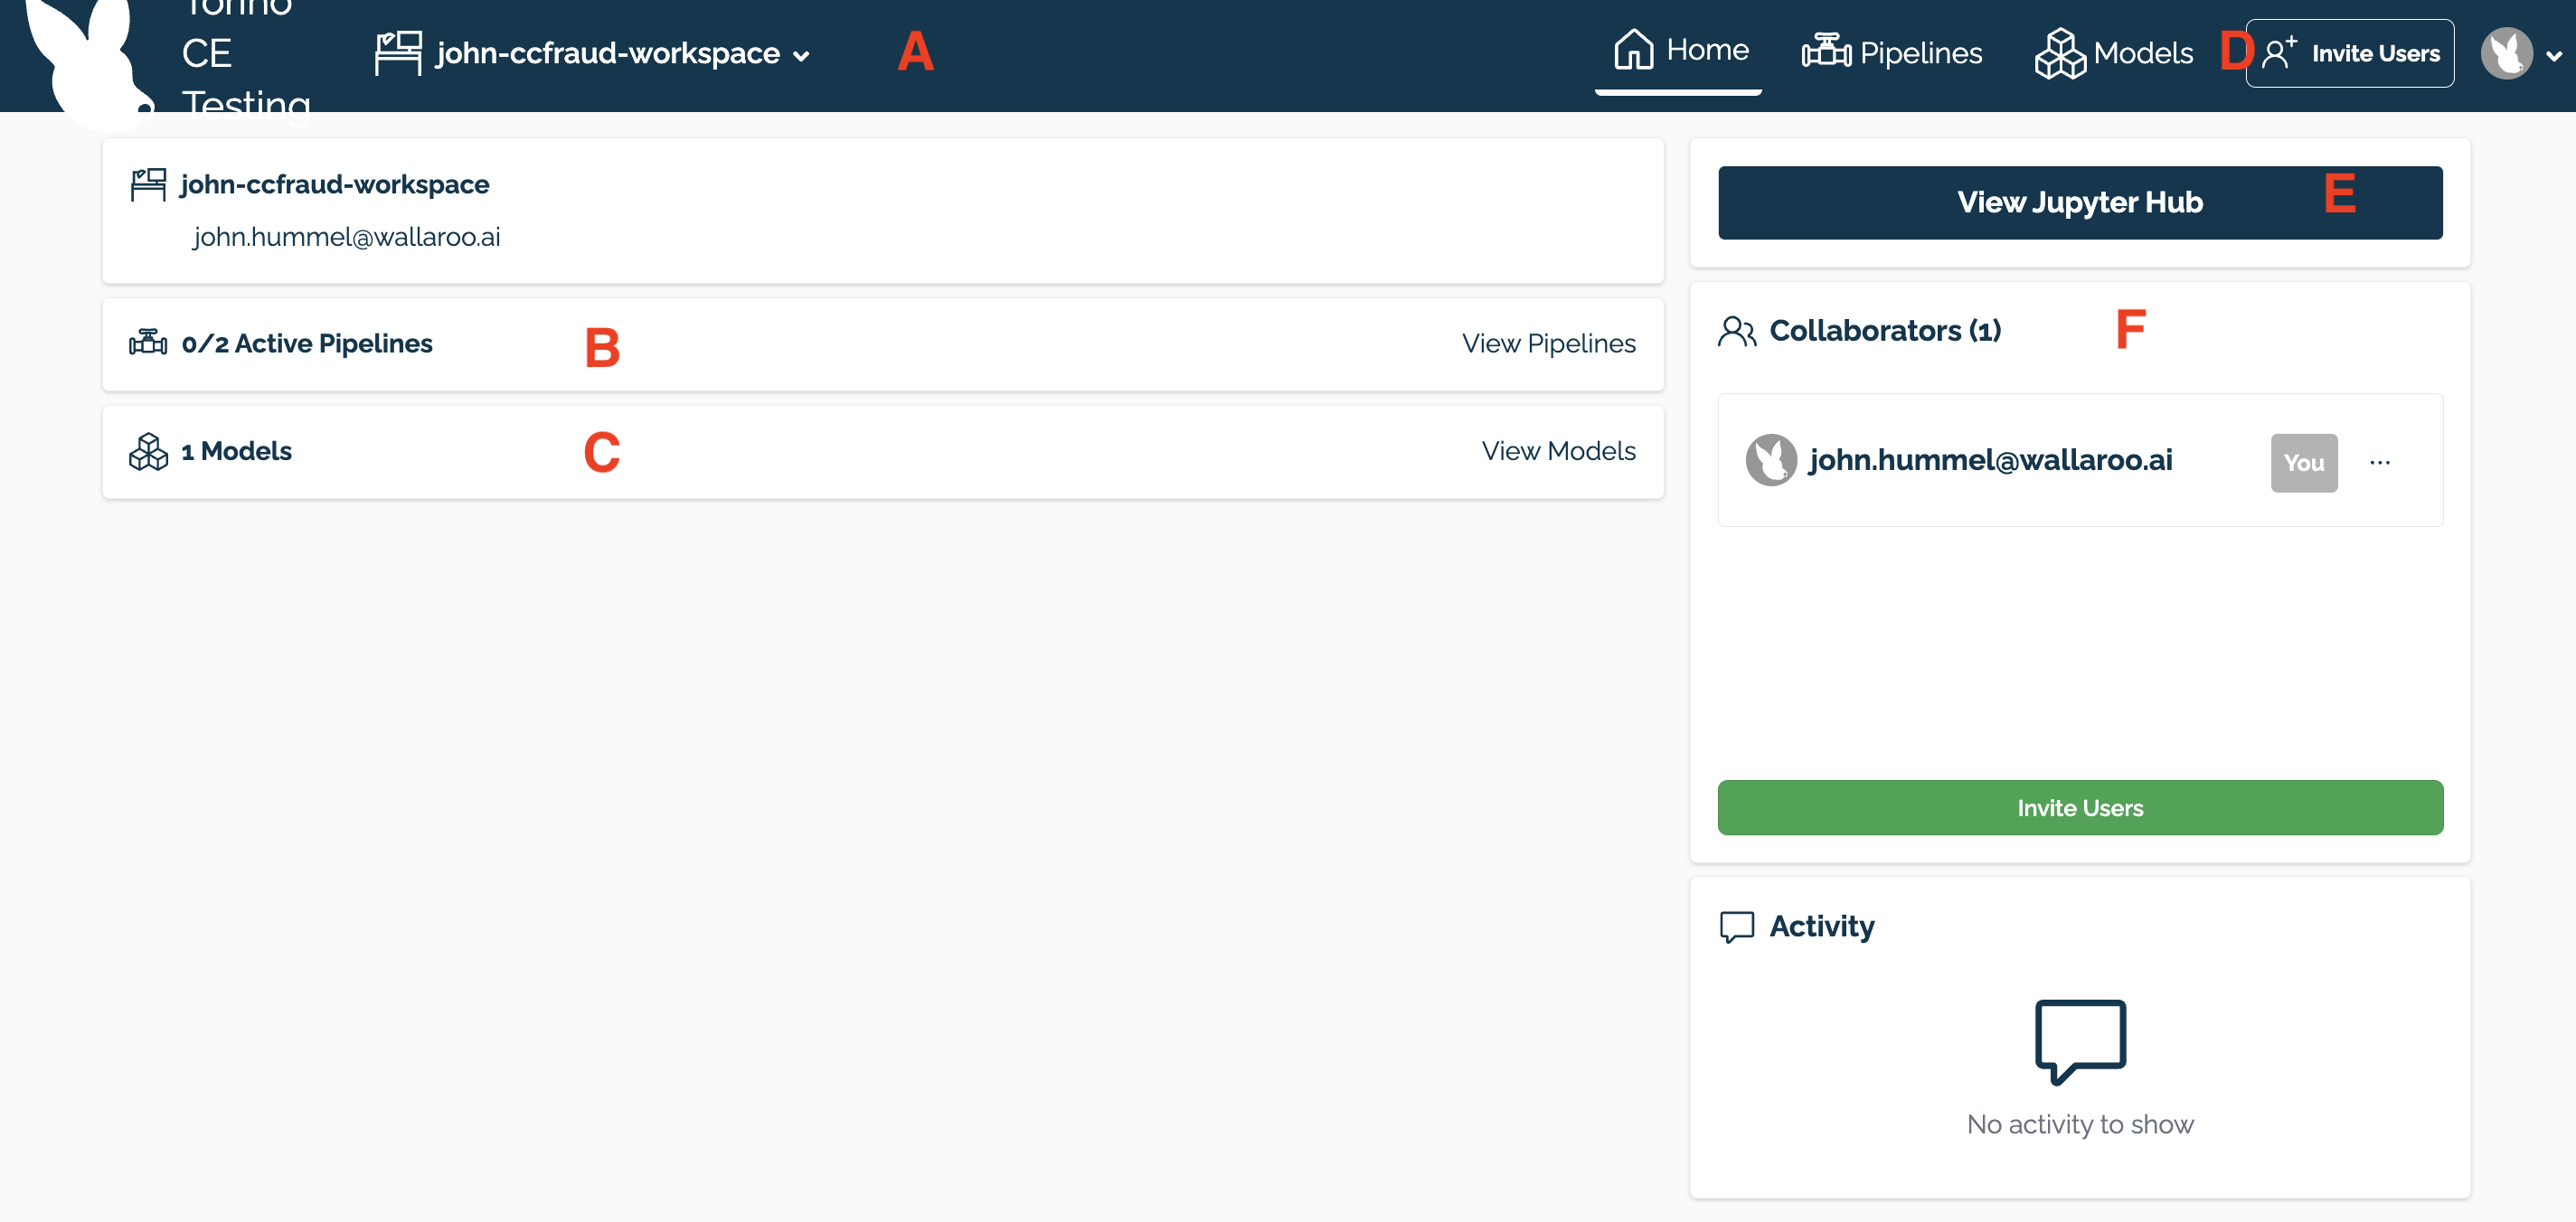
Once you have logged into your Wallaroo instance, you will be presented with the Wallaroo dashboard. From here, you can perform the following actions:

- A Change Current Workspace and Workspace Management: Select the workspace to work in. Each workspace has it’s own Models and Pipelines. For more information, see Workspace Management.
- B Pipeline Management: View information on this workspace’s pipelines. For more information, see Pipeline Management.
- C Model Management: View information on this workspace’s models. For more information, see Model Management.
- D User Management: Add users to your instance, or to your current workspace. For more information, see either User Management or Workspace Management.
- E Access Jupyter Hub: Access the Jupyter Hub to run Jupyter Notebooks and shell access to your Wallaroo Instance. For more information, see either the Quick Start Guides for sample Jupyter Notebooks, data and models to learn how to use Wallaroo, or the Wallaroo Developer Guides for developers.
- F View Collaborators: Displays a list of users who have been granted to this workspace.
How to Connect to Jupyter Hub
Jupyter Hub has been integrated as a service for Wallaroo. To access your Wallaroo instance’s Jupyter Hub service:
- Login to your Wallaroo instance.
- From the right navigation panel, select View Jupyter Hub.
A new tab will connect you to your Jupyter Hub service.
How to Log Out of Wallaroo
To log out of your Wallaroo instance:
- Select the Wallaroo icon in the upper right hand corner.
- Select Logout.